- ArangoDB 教程
- ArangoDB - 主頁
- 多模型優先資料庫
- ArangoDB - 優勢
- 基本概念和術語
- ArangoDB - 系統要求
- ArangoDB - 命令列
- ArangoDB - Web 介面
- ArangoDB - 示例案例場景
- 資料模型和建模
- ArangoDB - 資料庫方法
- ArangoDB - Crud 操作
- 使用 Web 介面進行 Crud 操作
- 使用 AQL 查詢資料
- ArangoDB - AQL 示例查詢
- ArangoDB – 部署方法
- ArangoDB 有用資源
- ArangoDB - 快速指南
- ArangoDB - 有用資源
- ArangoDB - 討論
ArangoDB - Web 介面
在本節中,我們將學習如何啟用/停用身份驗證,以及如何將 ArangoDB 繫結到公共網路介面。
# arangosh --server.endpoint tcp://127.0.0.1:8529 --server.database "_system"
它會提示你輸入之前儲存的密碼 −
Please specify a password:
在配置中使用你為 root 建立的密碼。
還可以使用 curl 檢查你是否真的針對需要身份驗證的請求獲得了 HTTP 401(未授權)伺服器響應 −
# curl --dump - http://127.0.0.1:8529/_api/version
輸出
HTTP/1.1 401 Unauthorized
X-Content-Type-Options: nosniff
Www-Authenticate: Bearer token_type = "JWT", realm = "ArangoDB"
Server: ArangoDB
Connection: Keep-Alive
Content-Type: text/plain; charset = utf-8
Content-Length: 0
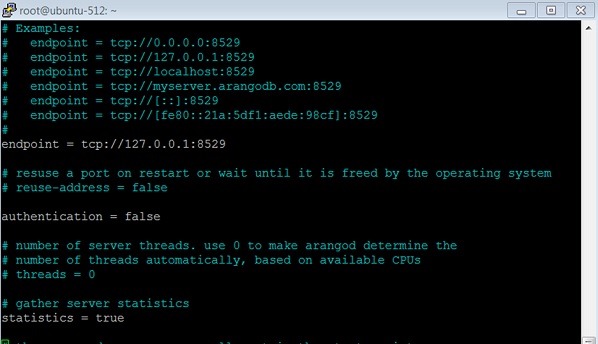
為了避免在學習過程中每次都輸入密碼,我們將停用身份驗證。為此,開啟配置檔案 −
# vim /etc/arangodb3/arangod.conf
如果程式碼不可見,應更改配色方案。
:colorscheme desert
如下面的螢幕截圖所示,將身份驗證設定為 false。
重新啟動服務 −
# service arangodb3 restart
將身份驗證設為 false 後,你將能夠登入(在本例中使用 root 或建立的使用者,如 Harry),而無需在 請指定密碼中輸入任何密碼。
當身份驗證關閉時,讓我們檢查一下 api 版本 −
# curl --dump - http://127.0.0.1:8529/_api/version
輸出
HTTP/1.1 200 OK
X-Content-Type-Options: nosniff
Server: ArangoDB
Connection: Keep-Alive
Content-Type: application/json; charset=utf-8
Content-Length: 60
{"server":"arango","version":"3.1.27","license":"community"}
廣告