- Symfony 教程
- Symfony - 首頁
- Symfony - 簡介
- Symfony - 安裝
- Symfony - 架構
- Symfony - 元件
- Symfony - 服務容器
- Symfony - 事件 & 事件監聽器
- Symfony - 表示式
- Symfony - 捆綁包
- 建立簡單的 Web 應用程式
- Symfony - 控制器
- Symfony - 路由
- Symfony - 檢視引擎
- Symfony - Doctrine ORM
- Symfony - 表單
- Symfony - 驗證
- Symfony - 檔案上傳
- Symfony - Ajax 控制
- Cookie & 會話管理
- Symfony - 國際化
- Symfony - 日誌記錄
- Symfony - 郵件管理
- Symfony - 單元測試
- Symfony - 高階概念
- Symfony - REST 版本
- Symfony - CMF 版本
- 完整的執行示例
- Symfony 有用資源
- Symfony - 快速指南
- Symfony - 有用資源
- Symfony - 討論
Symfony - Doctrine ORM
在 Symfony Web 框架中,模型扮演著重要的角色。它們是業務實體。它們要麼由客戶提供,要麼從後端資料庫中獲取,根據業務規則進行操作並持久化回資料庫。它們是由檢視呈現的資料。在本節中,讓我們瞭解模型以及它們如何與後端系統互動。
資料庫模型
我們需要將我們的模型對映到後端關係資料庫項,以便安全有效地獲取和持久化模型。可以使用物件關係對映 (ORM) 工具來完成此對映。Symfony 提供了一個單獨的捆綁包,**DoctrineBundle**,它將 Symfony 與第三方 PHP 資料庫 ORM 工具 **Doctrine** 整合。
Doctrine ORM
預設情況下,Symfony 框架不提供任何用於處理資料庫的元件。但是,它與 **Doctrine ORM** 緊密整合。Doctrine 包含多個用於資料庫儲存和物件對映的 PHP 庫。
以下示例將幫助您瞭解 Doctrine 的工作原理,如何配置資料庫以及如何儲存和檢索資料。
Doctrine ORM 示例
在本示例中,我們將首先配置資料庫並建立一個 Student 物件,然後在其上執行一些操作。
為此,我們需要遵循以下步驟。
步驟 1:建立 Symfony 應用程式
使用以下命令建立一個名為 **dbsample** 的 Symfony 應用程式。
symfony new dbsample
步驟 2:配置資料庫
通常,資料庫資訊在“app/config/parameters.yml”檔案中配置。
開啟檔案並新增以下更改。
parameter.yml
parameters:
   database_host: 127.0.0.1
   database_port: null
   database_name: studentsdb
   database_user: <user_name>
   database_password: <password>
   mailer_transport: smtp
   mailer_host: 127.0.0.1
   mailer_user: null
   mailer_password: null
   secret: 037ab82c601c10402408b2b190d5530d602b5809

   doctrine:
      dbal:
      driver:   pdo_mysql
      host:     '%database_host%'
      dbname:   '%database_name%'
      user:     '%database_user%'
      password: '%database_password%'
      charset: utf8mb4
現在,Doctrine ORM 可以連線到資料庫。
步驟 3:建立資料庫
發出以下命令以生成“studentsdb”資料庫。此步驟用於在 Doctrine ORM 中繫結資料庫。
php bin/console doctrine:database:create
執行命令後,它會自動生成一個空的“studentsdb”資料庫。您可以在螢幕上看到以下響應。
Created database `studentsdb` for connection named default
步驟 4:對映資訊
對映資訊只不過是“元資料”。它是一組規則,準確地告知 Doctrine ORM Student 類及其屬性如何對映到特定的資料庫表。
嗯,此元資料可以用多種不同的格式指定,包括 YAML、XML 或您可以直接使用註釋傳遞 Student 類。它定義如下。
Student.php
在檔案中新增以下更改。
<?php
namespace AppBundle\Entity;

use Doctrine\ORM\Mapping as ORM;
/**
   * @ORM\Entity
   * @ORM\Table(name = "students")
*/
class Student {
   /**
      * @ORM\Column(type = "integer")
      * @ORM\Id
      * @ORM\GeneratedValue(strategy = "AUTO")
   */
   private $id;

   /**
      * @ORM\Column(type = "string", length = 50)
   */
   private $name;

   /**
     * @ORM\Column(type = "text")
     */
   private $address;
}
這裡,表名是可選的。如果未指定表名,則將根據實體類的名稱自動確定。
步驟 5:繫結實體
Doctrine 為您建立簡單的實體類。它可以幫助您構建任何實體。
發出以下命令以生成實體。
php bin/console doctrine:generate:entities AppBundle/Entity/Student
然後您將看到以下結果,並且實體將被更新。
Generating entity "AppBundle\Entity\Student"
   > backing up Student.php to Student.php~
   > generating AppBundle\Entity\Student
Student.php
<?php
namespace AppBundle\Entity;

use Doctrine\ORM\Mapping as ORM;
/**
   * @ORM\Entity
   * @ORM\Table(name="students")
*/
class Student {
   /**
      * @ORM\Column(type="integer")
      * @ORM\Id
      * @ORM\GeneratedValue(strategy="AUTO")
   */
   private $id;

   /**
      * @ORM\Column(type = "string", length = 50)
   */
   private $name;

   /**
      * @ORM\Column(type = "text")
   */
   private $address;

   /**
      * Get id
      *
      * @return integer
   */
   public function getId() {
      return $this->id;
   }

   /**
      * Set name
      *
      * @param string $name
      *
      * @return Student
   */

   public function setName($name) {
      $this->name = $name;
      return $this;
   }

   /**
      * Get name
      *
      * @return string
   */

   public function getName() {
      return $this->name;
   }

   /**
      * Set address
      *
      * @param string $address
      *
      * @return Student
   */

   public function setAddress($address) {
      $this->address = $address;
      return $this;
   }

   /**
      * Get address
      *
      * @return string
   */

   public function getAddress() {
      return $this->address;
   }
}
步驟 6:對映驗證
建立實體後,應使用以下命令驗證對映。
php bin/console doctrine:schema:validate
它將產生以下結果 -
[Mapping]  OK - The mapping files are correct.
[Database] FAIL - The database schema is not in sync with the current mapping file
由於我們尚未建立 students 表,因此實體不同步。讓我們在下一步中使用 Symfony 命令建立 students 表。
步驟 7:建立模式
Doctrine 可以自動建立 Student 實體所需的所有資料庫表。這可以透過以下命令完成。
php bin/console doctrine:schema:update --force
執行命令後,您可以看到以下響應。
Updating database schema...
Database schema updated successfully! "1" query was executed
此命令將資料庫應該是什麼樣子與它實際是什麼樣子進行比較,並執行更新資料庫模式以使其達到預期狀態所需的 SQL 語句。
現在,再次使用以下命令驗證模式。
php bin/console doctrine:schema:validate
它將產生以下結果 -
[Mapping]  OK - The mapping files are correct.
[Database] OK - The database schema is in sync with the mapping files
步驟 8:Getter 和 Setter
如“繫結實體”部分所示,以下命令將為 Student 類生成所有 Getter 和 Setter。
$ php bin/console doctrine:generate:entities AppBundle/Entity/Student
步驟 9:將物件持久化到資料庫
現在,我們已將 Student 實體對映到其對應的 Student 表。我們現在應該能夠將 Student 物件持久化到資料庫。將以下方法新增到捆綁包的 StudentController 中。
StudentController.php
<?php
namespace AppBundle\Controller;

use Sensio\Bundle\FrameworkExtraBundle\Configuration\Route;
use Symfony\Bundle\FrameworkBundle\Controller\Controller;
use Symfony\Component\HttpFoundation\Response;
use AppBundle\Entity\Student;

class StudentController extends Controller {
   /**
      * @Route("/student/add")
   */
   public function addAction() {
      $stud = new Student();
      $stud->setName('Adam');
      $stud->setAddress('12 north street');
      $doct = $this->getDoctrine()->getManager();

      // tells Doctrine you want to save the Product
      $doct->persist($stud);

      //executes the queries (i.e. the INSERT query)
      $doct->flush();

      return new Response('Saved new student with id ' . $stud->getId());
   }
}
在這裡,我們透過基本控制器的 getDoctrine() 使用 getManager() 方法訪問了 doctrine 管理器,然後使用 doctrine 管理器的 persist() 方法持久化當前物件。**persist()** 方法將命令新增到佇列中,但 **flush()** 方法執行實際工作(持久化學生物件)。
步驟 10:從資料庫中獲取物件
在 StudentController 中建立一個函式,該函式將顯示學生詳細資訊。
StudentController.php
/**
   * @Route("/student/display")
*/
public function displayAction() {
   $stud = $this->getDoctrine()
   ->getRepository('AppBundle:Student')
   ->findAll();
   return $this->render('student/display.html.twig', array('data' => $stud));
}
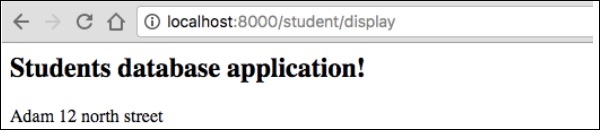
步驟 11:建立檢視
讓我們建立一個指向顯示操作的檢視。移動到 views 目錄並建立一個檔案“display.html.twig”。在檔案中新增以下更改。
display.html.twig
<style>
   .table { border-collapse: collapse; }
   .table th, td {
      border-bottom: 1px solid #ddd;
      width: 250px;
      text-align: left;
      align: left;
   }
</style>

<h2>Students database application!</h2>
<table class = "table">
   <tr>
      <th>Name</th>
      <th>Address</th>
   </tr>
   {% for x in data %}
   <tr>
      <td>{{ x.Name }}</td>
      <td>{{ x.Address }}</td>
   </tr>
   {% endfor %}
</table>
您可以在瀏覽器中請求 URL“https://:8000/student/display”以獲取結果。
它將在螢幕上產生以下輸出 -
步驟 12:更新物件
要在 StudentController 中更新物件,請建立一個操作並新增以下更改。
/**
   * @Route("/student/update/{id}")
*/
public function updateAction($id) {
   $doct = $this->getDoctrine()->getManager();
   $stud = $doct->getRepository('AppBundle:Student')->find($id);

   if (!$stud) {
      throw $this->createNotFoundException(
         'No student found for id '.$id
      );
   }
   $stud->setAddress('7 south street');
   $doct->flush();

   return new Response('Changes updated!');
}
現在,請求 URL“https://:8000/Student/update/1”,它將產生以下結果。
它將在螢幕上產生以下輸出 -

步驟 13:刪除物件
刪除物件類似,它需要呼叫實體(doctrine)管理器的 remove() 方法。
這可以透過以下命令完成。
/**
   * @Route("/student/delete/{id}")
*/
public function deleteAction($id) {
   $doct = $this->getDoctrine()->getManager();
   $stud = $doct->getRepository('AppBundle:Student')->find($id);

   if (!$stud) {
      throw $this->createNotFoundException('No student found for id '.$id);
   }

   $doct->remove($stud);
   $doct->flush();

   return new Response('Record deleted!');
}