- Spring MVC 基礎
- Spring MVC - 首頁
- Spring MVC - 概述
- Spring MVC - 環境搭建
- Spring MVC - Hello World 示例
- Spring MVC - 表單處理
- Spring MVC - 表單處理
- Spring MVC - 頁面重定向
- Spring MVC - 靜態頁面
- Spring MVC - 表單標籤庫
- Spring MVC - 文字框
- Spring MVC - 密碼框
- Spring MVC - 文字區域
- Spring MVC - 複選框
- Spring MVC - 複選框組
- Spring MVC - 單選按鈕
- Spring MVC - 單選按鈕組
- Spring MVC - 下拉列表
- Spring MVC - 列表框
- Spring MVC - 隱藏域
- Spring MVC - 錯誤處理
- Spring MVC - 檔案上傳
- Spring MVC - 處理器對映
- Bean 名稱 URL 處理器對映
- 控制器類名稱處理器對映
- 簡單 URL 處理器對映
- Spring MVC - 控制器
- Spring MVC - 多動作控制器
- 屬性方法名稱解析器
- 引數方法名稱解析器
- 可引數化檢視控制器
- Spring MVC - 檢視解析器
- 內部資源檢視解析器
- Spring MVC - XML 檢視解析器
- 資源包檢視解析器
- 多解析器對映
- Spring MVC - 整合
- Spring MVC - Hibernate 驗證器
- Spring MVC - 生成 RSS Feed
- Spring MVC - 生成 XML
- Spring MVC - 生成 JSON
- Spring MVC - 生成 Excel
- Spring MVC - 生成 PDF
- Spring MVC - 使用 log4j
- Spring 常見問題解答
- Spring - 常見問題解答
- Spring 有用資源
- Spring MVC - 快速指南
- Spring MVC - 有用資源
- Spring MVC - 討論
Spring MVC - 複選框示例
以下示例描述瞭如何使用 Spring Web MVC 框架在表單中使用單個複選框。首先,我們假設已經安裝了一個可用的 Eclipse IDE,並考慮以下步驟來使用 Spring Web 框架開發一個基於動態表單的 Web 應用程式。
| 步驟 | 描述 |
|---|---|
| 1 | 建立一個名為 HelloWeb 的專案,位於 com.tutorialspoint 包下,如 Spring MVC - Hello World 示例章節中所述。 |
| 2 | 在 com.tutorialspoint 包下建立 Java 類 User 和 UserController。 |
| 3 | 在 jsp 子資料夾下建立檢視檔案 user.jsp 和 users.jsp。 |
| 4 | 最後一步是建立原始檔和配置檔案的內容,並匯出應用程式,如下所述。 |
User.java
package com.tutorialspoint;

public class User {

   private String username;
   private String password;
   private String address;
   private boolean receivePaper;

   public String getUsername() {
      return username;
   }
   public void setUsername(String username) {
      this.username = username;
   }

   public String getPassword() {
      return password;
   }
   public void setPassword(String password) {
      this.password = password;
   }
   public String getAddress() {
      return address;
   }
   public void setAddress(String address) {
      this.address = address;
   }
   public boolean isReceivePaper() {
      return receivePaper;
   }
   public void setReceivePaper(boolean receivePaper) {
      this.receivePaper = receivePaper;
   }
}
UserController.java
package com.tutorialspoint;

import org.springframework.stereotype.Controller;
import org.springframework.web.bind.annotation.ModelAttribute;
import org.springframework.web.bind.annotation.RequestMapping;
import org.springframework.web.bind.annotation.RequestMethod;
import org.springframework.web.servlet.ModelAndView;
import org.springframework.ui.ModelMap;

@Controller
public class UserController {

   @RequestMapping(value = "/user", method = RequestMethod.GET)
   public ModelAndView user() {
      return new ModelAndView("user", "command", new User());
   }

   @RequestMapping(value = "/addUser", method = RequestMethod.POST)
   public String addUser(@ModelAttribute("SpringWeb")User user,
      ModelMap model) {
      model.addAttribute("username", user.getUsername());
      model.addAttribute("password", user.getPassword());
      model.addAttribute("address", user.getAddress());
      model.addAttribute("receivePaper", user.isReceivePaper());
      return "users";
   }
}
在這裡,對於第一個服務方法 user(),我們在 ModelAndView 物件中傳遞了一個空的 User 物件,名稱為 "command",因為如果在 JSP 檔案中使用 <form:form> 標籤,Spring 框架期望有一個名為 "command" 的物件。因此,當呼叫 user() 方法時,它會返回 user.jsp 檢視。
第二個服務方法 addUser() 將針對 HelloWeb/addUser URL 上的 POST 方法呼叫。您將根據提交的資訊準備模型物件。最後,"users" 檢視將從服務方法返回,這將導致渲染 users.jsp。
user.jsp
<%@taglib uri = "http://www.springframework.org/tags/form" prefix = "form"%>
<html>
   <head>
      <title>Spring MVC Form Handling</title>
   </head>
   <body>

      <h2>User Information</h2>
      <form:form method = "POST" action = "/HelloWeb/addUser">
         <table>
            <tr>
               <td><form:label path = "username">User Name</form:label></td>
               <td><form:input path = "username" /></td>
            </tr>
            <tr>
               <td><form:label path = "password">Age</form:label></td>
               <td><form:password path = "password" /></td>
            </tr>
            <tr>
               <td><form:label path = "address">Address</form:label></td>
               <td><form:textarea path = "address" rows = "5" cols = "30" /></td>
            </tr>
            <tr>
               <td><form:label path = "receivePaper">Subscribe Newsletter</form:label></td>
               <td><form:checkbox path = "receivePaper" /></td>
            </tr>
            <tr>
               <td colspan = "2">
                  <input type = "submit" value = "Submit"/>
               </td>
            </tr>
         </table>
      </form:form>
   </body>
</html>
在這裡,我們使用<form:checkboxes />標籤來渲染 HTML 複選框。
例如 -
<form:checkbox path="receivePaper" />
它將渲染以下 HTML 內容。
<input id="receivePaper1" name = "receivePaper" type = "checkbox" value = "true"/>
<input type = "hidden" name = "_receivePaper" value = "on"/>
users.jsp
<%@taglib uri = "http://www.springframework.org/tags/form" prefix = "form"%>
<html>
   <head>
      <title>Spring MVC Form Handling</title>
   </head>
   <body>

      <h2>Submitted User Information</h2>
      <table>
         <tr>
            <td>Username</td>
            <td>${username}</td>
         </tr>
         <tr>
            <td>Password</td>
            <td>${password}</td>
         </tr>
         <tr>
            <td>Address</td>
            <td>${address}</td>
         </tr>
         <tr>
            <td>Subscribed to Newsletter</td>
            <td>${receivePaper}</td>
         </tr>
      </table>
   </body>
</html>
完成原始檔和配置檔案的建立後,匯出應用程式。右鍵單擊您的應用程式,使用匯出 → WAR 檔案選項,並將 HelloWeb.war 檔案儲存到 Tomcat 的 webapps 資料夾中。
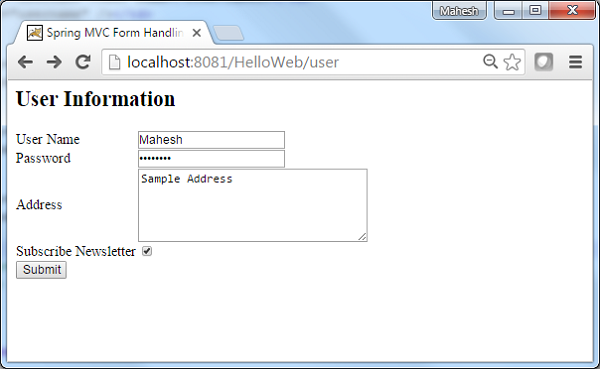
現在,啟動 Tomcat 伺服器,並確保您可以使用標準瀏覽器從 webapps 資料夾訪問其他網頁。嘗試一個 URL – https://:8080/HelloWeb/user,如果 Spring Web 應用程式一切正常,我們將看到以下螢幕。
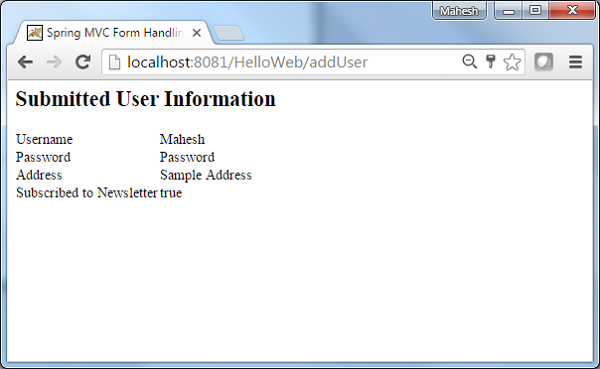
提交所需資訊後,單擊提交按鈕提交表單。如果 Spring Web 應用程式一切正常,我們將看到以下螢幕。
廣告