- Spring AOP 教程
- Spring AOP - 首頁
- Spring AOP - 概述
- Spring AOP - 環境搭建
- Spring AOP - 核心概念
- Spring AOP - 通知型別
- Spring AOP - 實現
- 透過 XML 配置示例
- Spring AOP - 應用
- Spring AOP - 切點方法
- Spring AOP - 前置通知
- Spring AOP - 後置通知
- Spring AOP - 返回後通知
- Spring AOP - 異常丟擲通知
- Spring AOP - 環繞通知
- 透過註解示例
- Spring AOP - 應用
- Spring AOP - 切點方法
- Spring AOP - 前置切面
- Spring AOP - 後置通知
- Spring AOP - 返回後通知
- Spring AOP - 異常丟擲通知
- Spring AOP - 環繞通知
- Spring AOP 高階
- Spring AOP - 代理
- Spring AOP - 自定義註解
- Spring AOP 有用資源
- Spring AOP - 快速指南
- Spring AOP - 有用資源
- Spring AOP - 討論
Spring AOP - 快速指南
Spring AOP - 概述
Spring 框架的關鍵元件之一是面向切面程式設計 (AOP) 框架。面向切面程式設計需要將程式邏輯分解成稱為所謂的關注點的不同部分。跨越應用程式多個點的函式稱為橫切關注點。這些橫切關注點在概念上與應用程式的業務邏輯是分開的。日誌記錄、審計、宣告式事務、安全、快取等是各種常見的良好方面示例。
OOP 中模組化的關鍵單元是類,而在 AOP 中,模組化的單元是方面。依賴注入有助於將應用程式物件彼此解耦,而 AOP 則有助於將橫切關注點與受其影響的物件解耦。AOP 就像 Perl、.NET、Java 等程式語言中的觸發器。
Spring AOP 模組允許攔截器攔截應用程式。例如,當執行方法時,您可以在方法執行之前或之後新增額外的功能。
Spring AOP - 環境搭建
本章將指導您如何準備開發環境以開始使用 Spring 框架。在您設定 Spring 框架之前,它還將教您如何在您的機器上設定 JDK、Maven 和 Eclipse -
步驟 1 - 設定 Java 開發工具包 (JDK)
您可以從 Oracle 的 Java 網站下載最新版本的 SDK - Java SE 下載。您將在下載的檔案中找到安裝 JDK 的說明,請按照給定的說明安裝和配置設定。最後設定 PATH 和 JAVA_HOME 環境變數以引用包含 java 和 javac 的目錄,通常分別為 java_install_dir/bin 和 java_install_dir。
如果您正在執行 Windows 並已在 C:\jdk-11.0.11 中安裝了 JDK,則必須在 C:\autoexec.bat 檔案中新增以下行。
set PATH=C:\jdk-11.0.11;%PATH%
set JAVA_HOME=C:\jdk-11.0.11
或者,在 Windows NT/2000/XP 上,您需要右鍵單擊“我的電腦”,選擇“屬性”→“高階”→“環境變數”。然後,您需要更新 PATH 值並單擊“確定”按鈕。
在 Unix(Solaris、Linux 等)上,如果 SDK 安裝在 /usr/local/jdk-11.0.11 中並且您使用的是 C shell,則需要將以下內容放入您的 .cshrc 檔案中。
setenv PATH /usr/local/jdk-11.0.11/bin:$PATH
setenv JAVA_HOME /usr/local/jdk-11.0.11
或者,如果您使用整合開發環境 (IDE),如 Borland JBuilder、Eclipse、IntelliJ IDEA 或 Sun ONE Studio,則需要編譯並執行一個簡單的程式以確認 IDE 知道您已安裝 Java 的位置。否則,您需要按照 IDE 文件中給出的說明進行正確的設定。
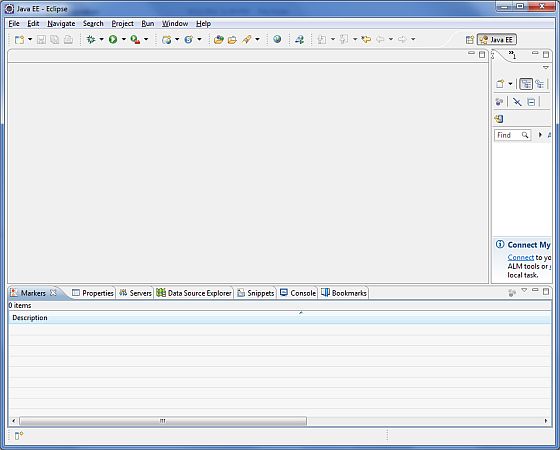
步驟 2 - 設定 Eclipse IDE
本教程中的所有示例均使用 Eclipse IDE 編寫。因此,我們建議您在機器上安裝最新版本的 Eclipse。
要安裝 Eclipse IDE,請從 https://www.eclipse.org/downloads/ 下載最新的 Eclipse 二進位制檔案。下載安裝後,將二進位制分發版解壓縮到一個方便的位置。例如,在 Windows 上的 C:\eclipse 中,或在 Linux/Unix 上的 /usr/local/eclipse 中,最後適當地設定 PATH 變數。
可以透過在 Windows 機器上執行以下命令啟動 Eclipse,或者您只需雙擊 eclipse.exe
%C:\eclipse\eclipse.exe
可以透過在 Unix(Solaris、Linux 等)機器上執行以下命令啟動 Eclipse -
$/usr/local/eclipse/eclipse
成功啟動後,如果一切正常,則應顯示以下結果 -
步驟 3 - 下載 Maven 存檔
從 https://maven.apache.org/download.cgi 下載 Maven 3.8.4。
| 作業系統 | 存檔名稱 |
|---|---|
| Windows | apache-maven-3.8.4-bin.zip |
| Linux | apache-maven-3.8.4-bin.tar.gz |
| Mac | apache-maven-3.8.4-bin.tar.gz |
步驟 4 - 解壓縮 Maven 存檔
將存檔解壓縮到您希望安裝 Maven 3.8.4 的目錄中。將從存檔建立子目錄 apache-maven-3.8.4。
| 作業系統 | 位置(根據您的安裝可能有所不同) |
|---|---|
| Windows | C:\Program Files\Apache Software Foundation\apache-maven-3.8.4 |
| Linux | /usr/local/apache-maven |
| Mac | /usr/local/apache-maven |
步驟 5 - 設定 Maven 環境變數
將 M2_HOME、M2、MAVEN_OPTS 新增到環境變數中。
| 作業系統 | 輸出 |
|---|---|
| Windows | 使用系統屬性設定環境變數。 M2_HOME=C:\Program Files\Apache Software Foundation\apache-maven-3.8.4 M2=%M2_HOME%\bin MAVEN_OPTS=-Xms256m -Xmx512m |
| Linux | 開啟命令終端並設定環境變數。 export M2_HOME=/usr/local/apache-maven/apache-maven-3.8.4 export M2=$M2_HOME/bin export MAVEN_OPTS=-Xms256m -Xmx512m |
| Mac | 開啟命令終端並設定環境變數。 export M2_HOME=/usr/local/apache-maven/apache-maven-3.8.4 export M2=$M2_HOME/bin export MAVEN_OPTS=-Xms256m -Xmx512m |
步驟 6 - 將 Maven bin 目錄位置新增到系統路徑
現在將 M2 變數附加到系統路徑。
| 作業系統 | 輸出 |
|---|---|
| Windows | 將字串 ;%M2% 附加到系統變數 Path 的末尾。 |
| Linux | export PATH=$M2:$PATH |
| Mac | export PATH=$M2:$PATH |
步驟 7 - 驗證 Maven 安裝
現在開啟控制檯並執行以下mvn命令。
| 作業系統 | 任務 | 命令 |
|---|---|---|
| Windows | 開啟命令控制檯 | c:\> mvn --version |
| Linux | 開啟命令終端 | $ mvn --version |
| Mac | 開啟終端 | machine:~ joseph$ mvn --version |
最後,驗證上述命令的輸出,它應如下所示 -
| 作業系統 | 輸出 |
|---|---|
| Windows | Apache Maven 3.8.4 (9b656c72d54e5bacbed989b64718c159fe39b537) Maven 主目錄:C:\Program Files\Apache Software Foundation\apache-maven-3.8.4 Java 版本:11.0.11,供應商:Oracle Corporation,執行時:C:\Program Files\Java\jdk11.0.11\ 預設語言環境:en_IN,平臺編碼:Cp1252 作業系統名稱:“windows 10”,版本:“10.0”,體系結構:“amd64”,系列:“windows” |
| Linux | Apache Maven 3.8.4 (9b656c72d54e5bacbed989b64718c159fe39b537) Java 版本:11.0.11 Java 主目錄:/usr/local/java-current/jre |
| Mac | Apache Maven 3.8.4 (9b656c72d54e5bacbed989b64718c159fe39b537) Java 版本:11.0.11 Java 主目錄:/Library/Java/Home/jre |
Spring AOP - 核心概念
在我們開始使用 AOP 之前,讓我們熟悉一下 AOP 概念和術語。這些術語並非特定於 Spring,而是與 AOP 相關。
| 序號 | 術語和描述 |
|---|---|
| 1 | 方面 一個模組,它具有一組提供橫切需求的 API。例如,日誌記錄模組將被稱為用於日誌記錄的 AOP 方面。應用程式可以根據需要擁有任意數量的方面。 |
| 2 | 連線點 這表示您可以在其中插入 AOP 方面的應用程式中的一個點。您也可以說,它是應用程式中使用 Spring AOP 框架採取操作的實際位置。 |
| 3 | 通知 這是在方法執行之前或之後要採取的實際操作。這是 Spring AOP 框架在程式執行期間呼叫的實際程式碼片段。 |
| 4 | 切點 這是一組一個或多個連線點,其中應執行通知。您可以使用表示式或模式指定切點,正如我們將在我們的 AOP 示例中看到的那樣。 |
| 5 | 引入 引入允許您向現有類新增新方法或屬性。 |
| 6 | 目標物件 被一個或多個方面建議的物件。此物件始終是代理物件。也稱為建議物件。 |
| 7 | 織入 織入是將方面與其他應用程式型別或物件連結以建立建議物件的流程。這可以在編譯時、載入時或執行時完成。 |
Spring AOP - 通知型別
Spring 方面可以與下表中提到的五種通知一起使用。
| 序號 | 通知和描述 |
|---|---|
| 1 | before 在方法執行之前執行通知。 |
| 2 | after 在方法執行之後執行通知,無論其結果如何。 |
| 3 | after-returning 僅當方法成功完成時,在方法執行之後執行通知。 |
| 4 | after-throwing 僅當方法透過丟擲異常退出時,在方法執行之後執行通知。 |
| 5 | around 在呼叫建議方法之前和之後執行通知。 |
Spring AOP - 實現
Spring 支援@AspectJ 註解樣式方法和基於模式的方法來實現自定義方面。
基於 XML 模式
方面使用常規類以及基於 XML 的配置來實現。
要使用本節中描述的 AOP 名稱空間標籤,您需要匯入 spring AOP 模式,如下所述 -
<?xml version = "1.0" encoding = "UTF-8"?>
<beans xmlns = "http://www.springframework.org/schema/beans"

   xmlns:xsi = "http://www.w3.org/2001/XMLSchema-instance"
   xmlns:aop = "http://www.springframework.org/schema/aop"
   xsi:schemaLocation = "http://www.springframework.org/schema/beans
   http://www.springframework.org/schema/beans/spring-beans-3.0.xsd
   http://www.springframework.org/schema/aop
   http://www.springframework.org/schema/aop/spring-aop-3.0.xsd ">

   <!-- bean definition & AOP specific configuration -->
</beans>
宣告方面
方面使用<aop:aspect>元素宣告,並使用ref屬性引用支援 bean,如下所示。
<aop:config>
   <aop:aspect id = "myAspect" ref = "aBean">
   ...
   </aop:aspect>
</aop:config>

<bean id = "aBean" class = "...">
   ...
</bean>
此處“aBean”將配置並依賴注入,就像您在前面章節中看到的任何其他 Spring bean 一樣。
宣告切點
切點有助於確定要與不同通知一起執行的感興趣的連線點(即方法)。在使用基於 XML 模式的配置時,切點將定義如下 -
<aop:config>
   <aop:aspect id = "myAspect" ref = "aBean">

   <aop:pointcut id = "businessService"
      expression = "execution(* com.xyz.myapp.service.*.*(..))"/>
      ...
   </aop:aspect>
</aop:config>

<bean id = "aBean" class = "...">
   ...
</bean>
以下示例定義了一個名為“businessService”的切點,它將匹配 com.tutorialspoint 包下 Student 類中 getName() 方法的執行。
<aop:config>
   <aop:aspect id = "myAspect" ref = "aBean">

   <aop:pointcut id = "businessService"
      expression = "execution(* com.tutorialspoint.Student.getName(..))"/>
   ...
   </aop:aspect>
</aop:config>

<bean id = "aBean" class = "...">
   ...
</bean>
宣告通知
您可以在<aop:aspect>內使用<aop:{ADVICE NAME}>元素宣告五個通知中的任何一個,如下所示。
<aop:config>
   <aop:aspect id = "myAspect" ref = "aBean">
      <aop:pointcut id = "businessService"
         expression = "execution(* com.xyz.myapp.service.*.*(..))"/>

      <!-- a before advice definition -->
      <aop:before pointcut-ref = "businessService"
         method = "doRequiredTask"/>

      <!-- an after advice definition -->
      <aop:after pointcut-ref = "businessService"
         method = "doRequiredTask"/>

      <!-- an after-returning advice definition -->
      <!--The doRequiredTask method must have parameter named retVal -->
      <aop:after-returning pointcut-ref = "businessService"
         returning = "retVal"
         method = "doRequiredTask"/>

      <!-- an after-throwing advice definition -->
      <!--The doRequiredTask method must have parameter named ex -->
      <aop:after-throwing pointcut-ref = "businessService"
        throwing = "ex"
         method = "doRequiredTask"/>

      <!-- an around advice definition -->
      <aop:around pointcut-ref = "businessService"
         method = "doRequiredTask"/>
   ...
   </aop:aspect>
</aop:config>

<bean id = "aBean" class = "...">
   ...
</bean>
您可以對不同的通知使用相同的doRequiredTask或不同的方法。這些方法將定義為方面模組的一部分。
基於 @AspectJ
@AspectJ 指的是一種將切面宣告為使用 Java 5 註解的普通 Java 類的方式。可以透過在基於 XML Schema 的配置檔案中包含以下元素來啟用 @AspectJ 支援。
<aop:aspectj-autoproxy/>
宣告方面
切面類與任何其他普通 Bean 一樣,可以像任何其他類一樣擁有方法和欄位,除了它們將使用 @Aspect 註解如下。
package org.xyz;

import org.aspectj.lang.annotation.Aspect;

@Aspect
public class AspectModule {
}
它們將在 XML 中像任何其他 Bean 一樣配置,如下所示。
<bean id = "myAspect" class = "org.xyz.AspectModule">
   <!-- configure properties of aspect here as normal -->
</bean>
宣告切點
切點有助於確定要使用不同通知執行的目標連線點(即方法)。在使用基於 @AspectJ 的配置時,切點宣告有兩個部分:
確定我們感興趣的確切方法執行的切點表示式。
包含名稱和任意數量引數的切點簽名。方法的實際主體無關緊要,實際上應該為空。
以下示例定義了一個名為“businessService”的切點,它將匹配 com.xyz.myapp.service 包下所有類中可用方法的執行。
import org.aspectj.lang.annotation.Pointcut;

@Pointcut("execution(* com.xyz.myapp.service.*.*(..))") // expression
private void businessService() {}  // signature
以下示例定義了一個名為“getname”的切點,它將匹配 com.tutorialspoint 包下 Student 類中 getName() 方法的執行。
import org.aspectj.lang.annotation.Pointcut;

@Pointcut("execution(* com.tutorialspoint.Student.getName(..))")
private void getname() {}
宣告通知
您可以使用 @{ADVICE-NAME} 註解宣告任何五種通知,如下所示。這假設您已經定義了一個切點簽名方法 businessService()。
@Before("businessService()")
public void doBeforeTask(){
   ...
}
@After("businessService()")
public void doAfterTask(){
   ...
}
@AfterReturning(Pointcut = "businessService()", returning = "retVal")
public void doAfterReturnningTask(Object retVal){
   // you can intercept retVal here.
   ...
}
@AfterThrowing(Pointcut = "businessService()", throwing = "ex")
public void doAfterThrowingTask(Exception ex){
   // you can intercept thrown exception here.
   ...
}
@Around("businessService()")
public void doAroundTask(){
   ...
}
您可以為任何通知定義內聯切點。以下是為 before 通知定義內聯切點的示例。
@Before("execution(* com.xyz.myapp.service.*.*(..))")
public doBeforeTask(){
   ...
}
Spring AOP - 基於 XML 的應用
在本章中,我們將使用 Spring AOP 框架編寫實際的 AOP 應用程式。在開始使用 Spring-WS 框架編寫您的第一個示例之前,您必須確保已正確設定 Spring AOP 環境,如 Spring Web Services - 環境設定 章中所述。
現在,繼續編寫一個簡單的基於控制檯的 Spring AOP 應用程式,它將演示 AOP 概念。
建立專案
步驟 1 - 開啟命令控制檯,轉到 C:\MVN 目錄並執行以下 mvn 命令。
C:\MVN>mvn archetype:generate -DgroupId=com.tutorialspoint
-DartifactId=Student -DarchetypeArtifactId=maven-archetype-quickstart
-DinteractiveMode=false
Maven 將開始處理並建立完整的 Java 應用程式專案結構。
[INFO] Scanning for projects...
[INFO]
[INFO] ------------------< org.apache.maven:standalone-pom >-------------------
[INFO] Building Maven Stub Project (No POM) 1
[INFO] --------------------------------[ pom ]---------------------------------
[INFO]
[INFO] >>> maven-archetype-plugin:3.2.0:generate (default-cli) > generate-sources @ standalone-pom >>>
[INFO]
[INFO] <<< maven-archetype-plugin:3.2.0:generate (default-cli) < generate-sources @ standalone-pom <<<
[INFO]
[INFO]
[INFO] --- maven-archetype-plugin:3.2.0:generate (default-cli) @ standalone-pom ---
[INFO] Generating project in Batch mode
[INFO] ----------------------------------------------------------------------------
[INFO] Using following parameters for creating project from Old (1.x) Archetype: maven-archetype-quickstart:1.0
[INFO] ----------------------------------------------------------------------------
[INFO] Parameter: basedir, Value: C:\MVN
[INFO] Parameter: package, Value: com.tutorialspoint
[INFO] Parameter: groupId, Value: com.tutorialspoint
[INFO] Parameter: artifactId, Value: Student
[INFO] Parameter: packageName, Value: com.tutorialspoint
[INFO] Parameter: version, Value: 1.0-SNAPSHOT
[INFO] project created from Old (1.x) Archetype in dir: C:\MVN\Student
[INFO] ------------------------------------------------------------------------
[INFO] BUILD SUCCESS
[INFO] ------------------------------------------------------------------------
[INFO] Total time:  13.388 s
[INFO] Finished at: 2021-12-27T20:18:26+05:30
[INFO] ------------------------------------------------------------------------
步驟 2 - 轉到 C:/MVN 目錄。您將看到一個建立的 Java 應用程式專案,名為 student(如 artifactId 中指定)。更新 POM.xml 以包含 Spring-AOP 依賴項。新增 MainApp.java、Student.java 和 Logging.java 檔案。
POM.xml
<project xmlns = "http://maven.apache.org/POM/4.0.0"
   xmlns:xsi = "http://www.w3.org/2001/XMLSchema-instance"
   xsi:schemaLocation = "http://maven.apache.org/POM/4.0.0
   http://maven.apache.org/maven-v4_0_0.xsd">
   <modelVersion>4.0.0</modelVersion>
   <groupId>com.tutorialspoint</groupId>
   <artifactId>Student</artifactId>
   <packaging>jar</packaging>
   <version>1.0-SNAPSHOT</version>
   <name>Student</name>
   <url>http://maven.apache.org</url>

   <properties>
      <project.build.sourceEncoding>UTF-8</project.build.sourceEncoding>
      <maven.compiler.source>1.7</maven.compiler.source>
      <maven.compiler.target>1.7</maven.compiler.target>
   </properties>

   <dependencies>
      <dependency>
         <groupId>junit</groupId>
         <artifactId>junit</artifactId>
         <version>4.11</version>
         <scope>test</scope>
      </dependency>
      <dependency>
         <groupId>org.springframework</groupId>
         <artifactId>spring-aop</artifactId>
         <version>5.3.14</version>
      </dependency>
      <dependency>
         <groupId>org.springframework</groupId>
         <artifactId>spring-context</artifactId>
         <version>5.3.14</version>
      </dependency>
      <dependency>
         <groupId>org.aspectj</groupId>
         <artifactId>aspectjweaver</artifactId>
         <version>1.9.7</version>
      </dependency>
   </dependencies>
</project>
以下是 Logging.java 檔案的內容。
package com.tutorialspoint;

public class Logging {
   /**
      * This is the method which I would like to execute
      * before a selected method execution.
   */
   public void beforeAdvice() {
      System.out.println("Going to setup student profile.");
   }
   /**
      * This is the method which I would like to execute
      * after a selected method execution.
   */
   public void afterAdvice() {
      System.out.println("Student profile has been setup.");
   }
   /**
      * This is the method which I would like to execute
      * when any method returns.
   */
   public void afterReturningAdvice(Object retVal){
      System.out.println("Returning:" + retVal.toString() );
   }
   /**
      * This is the method which I would like to execute
      * if there is an exception raised.
   */
   public void AfterThrowingAdvice(IllegalArgumentException ex) {
      System.out.println("There has been an exception: " + ex.toString());
   }
}
以下是 Student.java 檔案的內容。
package com.tutorialspoint;

public class Student {
   private Integer age;
   private String name;

   public void setAge(Integer age) {
      this.age = age;
   }
   public Integer getAge() {
      System.out.println("Age : " + age );
      return age;
   }
   public void setName(String name) {
      this.name = name;
   }
   public String getName() {
      System.out.println("Name : " + name );
      return name;
   }
   public void printThrowException(){
      System.out.println("Exception raised");
      throw new IllegalArgumentException();
   }
}
以下是 MainApp.java 檔案的內容。
package com.tutorialspoint;

import org.springframework.context.ApplicationContext;
import org.springframework.context.support.ClassPathXmlApplicationContext;

public class MainApp {
   public static void main(String[] args) {
      ApplicationContext context = new ClassPathXmlApplicationContext("Beans.xml");

      Student student = (Student) context.getBean("student");
      student.getName();
      student.getAge();
      student.printThrowException();
   }
}
步驟 3 - 在 src > main > resources 資料夾下新增配置檔案 Beans.xml。
<?xml version = "1.0" encoding = "UTF-8"?>
<beans xmlns = "http://www.springframework.org/schema/beans"
   xmlns:xsi = "http://www.w3.org/2001/XMLSchema-instance"
   xmlns:aop = "http://www.springframework.org/schema/aop"
   xsi:schemaLocation = "http://www.springframework.org/schema/beans
   http://www.springframework.org/schema/beans/spring-beans-3.0.xsd
   http://www.springframework.org/schema/aop
   http://www.springframework.org/schema/aop/spring-aop-3.0.xsd ">

   <aop:config>
      <aop:aspect id = "log" ref = "logging">
         <aop:pointcut id = "selectAll"
            expression = "execution(* com.tutorialspoint.*.*(..))"/>
         <aop:before pointcut-ref = "selectAll" method = "beforeAdvice"/>
         <aop:after pointcut-ref = "selectAll" method = "afterAdvice"/>
         <aop:after-returning pointcut-ref = "selectAll"
            returning = "retVal"
            method = "afterReturningAdvice"/>
         <aop:after-throwing pointcut-ref = "selectAll"
            throwing = "ex"
            method = "AfterThrowingAdvice"/>
      </aop:aspect>
   </aop:config>

   <!-- Definition for student bean -->
   <bean id = "student" class = "com.tutorialspoint.Student">
      <property name = "name"  value = "Zara" />
      <property name = "age"  value = "11"/>
   </bean>

   <!-- Definition for logging aspect -->
   <bean id = "logging" class = "com.tutorialspoint.Logging"/>
</beans>
步驟 4 - 開啟命令控制檯,轉到 C:\MVN 目錄並執行以下 mvn 命令。
C:\MVN>Student> mvn package
Maven 將開始處理並下載所需的庫。
C:\MVN\Student>mvn package
[INFO] Scanning for projects...
[INFO]
[INFO] ---------------------< com.tutorialspoint:Student >---------------------
[INFO] Building Student 1.0-SNAPSHOT
[INFO] --------------------------------[ jar ]---------------------------------
[INFO]
[INFO] --- maven-resources-plugin:2.6:resources (default-resources) @ Student ---
[INFO] Using 'UTF-8' encoding to copy filtered resources.
[INFO] Copying 1 resource
[INFO]
[INFO] --- maven-compiler-plugin:3.1:compile (default-compile) @ Student ---
[INFO] Nothing to compile - all classes are up to date
[INFO]
[INFO] --- maven-resources-plugin:2.6:testResources (default-testResources) @ Student ---
[INFO] Using 'UTF-8' encoding to copy filtered resources.
[INFO] skip non existing resourceDirectory C:\MVN\Student\src\test\resources
[INFO]
[INFO] --- maven-compiler-plugin:3.1:testCompile (default-testCompile) @ Student ---
[INFO] Nothing to compile - all classes are up to date
[INFO]
[INFO] --- maven-surefire-plugin:2.12.4:test (default-test) @ Student ---
[INFO] Surefire report directory: C:\MVN\Student\target\surefire-reports

-------------------------------------------------------
 T E S T S
-------------------------------------------------------
Running com.tutorialspoint.AppTest
Tests run: 1, Failures: 0, Errors: 0, Skipped: 0, Time elapsed: 0.093 sec

Results :

Tests run: 1, Failures: 0, Errors: 0, Skipped: 0

[INFO]
[INFO] --- maven-jar-plugin:2.4:jar (default-jar) @ Student ---
[INFO] ------------------------------------------------------------------------
[INFO] BUILD SUCCESS
[INFO] ------------------------------------------------------------------------
[INFO] Total time:  4.213 s
[INFO] Finished at: 2021-12-27T20:42:00+05:30
[INFO] ------------------------------------------------------------------------
C:\MVN\Student>
在 Eclipse 中匯入專案
步驟 1 - 開啟 Eclipse。
步驟 2 - 選擇 檔案 → 匯入 → 選項。
步驟 3 - 選擇 Maven 專案選項。點選下一步按鈕。
步驟 4 - 選擇專案位置,使用 Maven 在其中建立 Student 專案的位置。
步驟 5 - 點選完成按鈕。
執行專案
建立原始檔和配置檔案後,執行您的應用程式。右鍵點選應用程式中的 MainApp.java 並使用 以 Java 應用程式執行 命令。如果應用程式一切正常,它將列印以下訊息。
Going to setup student profile.
Name : Zara
Student profile has been setup.
Returning:Zara
Going to setup student profile.
Age : 11
Student profile has been setup.
Returning:11
Going to setup student profile.
Exception raised
Student profile has been setup.
There has been an exception: java.lang.IllegalArgumentException
Exception in thread "main" java.lang.IllegalArgumentException
	at com.tutorialspoint.Student.printThrowException(Student.java:25)
...
Spring AOP - 基於 XML 的切點
連線點
連線點表示應用程式中您可以插入 AOP 切面的一個點。您也可以說,它是應用程式中使用 Spring AOP 框架採取行動的實際位置。考慮以下示例:
包中包含的所有方法類。
類的特定方法。
切點
切點是一組一個或多個連線點,在這些連線點上應執行通知。您可以使用表示式或模式指定切點,正如我們將在 AOP 示例中看到的那樣。在 Spring 中,切點有助於使用特定的連線點來應用通知。考慮以下示例:
expression = "execution(* com.tutorialspoint.*.*(..))"
expression = "execution(* com.tutorialspoint.Student.getName(..))"
語法
<aop:config>
   <aop:aspect id = "log" ref = "adviceClass">
      <aop:pointcut id = "PointCut-id" expression = "execution( expression )"/>
   </aop:aspect>
</aop:config>
其中,
adviceClass - 包含通知方法的類的引用
PointCut-id - 切點的 ID
execution( expression ) - 涵蓋要應用通知的方法的表示式。
為了理解上面提到的與連線點和切點相關的概念,讓我們編寫一個示例,該示例將實現一些切點。為了用一些通知編寫我們的示例,讓我們準備好一個正在執行的 Eclipse IDE,並使用以下步驟建立一個 Spring 應用程式。
| 步驟 | 描述 |
|---|---|
| 1 | 更新在 Spring AOP - 應用程式 章下建立的專案 Student。 |
| 2 | 更新 Bean 配置並執行應用程式,如下所述。 |
以下是 Logging.java 檔案的內容。這實際上是切面模組的一個示例,它定義了要在各個點呼叫的方法。
package com.tutorialspoint;

public class Logging {
   /**
      * This is the method which I would like to execute
      * before a selected method execution.
   */
   public void beforeAdvice(){
      System.out.println("Going to setup student profile.");
   }
}
以下是 Student.java 檔案的內容。
package com.tutorialspoint;

public class Student {
   private Integer age;
   private String name;

   public void setAge(Integer age) {
      this.age = age;
   }
   public Integer getAge() {
      System.out.println("Age : " + age );
      return age;
   }
   public void setName(String name) {
      this.name = name;
   }
   public String getName() {
      System.out.println("Name : " + name );
      return name;
   }
   public void printThrowException(){
      System.out.println("Exception raised");
      throw new IllegalArgumentException();
   }
}
以下是 MainApp.java 檔案的內容。
package com.tutorialspoint;

import org.springframework.context.ApplicationContext;
import org.springframework.context.support.ClassPathXmlApplicationContext;

public class MainApp {
   public static void main(String[] args) {
      ApplicationContext context = new ClassPathXmlApplicationContext("Beans.xml");

      Student student = (Student) context.getBean("student");
      student.getName();
      student.getAge();
   }
}
以下是配置檔案 Beans.xml。
<?xml version = "1.0" encoding = "UTF-8"?>
<beans xmlns = "http://www.springframework.org/schema/beans"
   xmlns:xsi = "http://www.w3.org/2001/XMLSchema-instance"
   xmlns:aop = "http://www.springframework.org/schema/aop"
   xsi:schemaLocation = "http://www.springframework.org/schema/beans
   http://www.springframework.org/schema/beans/spring-beans-3.0.xsd
   http://www.springframework.org/schema/aop
   http://www.springframework.org/schema/aop/spring-aop-3.0.xsd ">

   <aop:config>
      <aop:aspect id = "log" ref = "logging">
         <aop:pointcut id = "selectAll"
         expression = "execution(* com.tutorialspoint.*.*(..))"/>
         <aop:before pointcut-ref = "selectAll" method = "beforeAdvice"/>
      </aop:aspect>
   </aop:config>

   <!-- Definition for student bean -->
   <bean id = "student" class = "com.tutorialspoint.Student">
      <property name = "name"  value = "Zara" />
      <property name = "age"  value = "11"/>
   </bean>

   <!-- Definition for logging aspect -->
   <bean id = "logging" class = "com.tutorialspoint.Logging"/>

</beans>
建立原始檔和 Bean 配置檔案後,執行應用程式。如果應用程式一切正常,它將列印以下訊息。
Going to setup student profile.
Name : Zara
Going to setup student profile.
Age : 11
上面定義的 <aop:pointcut> 選擇了 com.tutorialspoint 包下定義的所有方法。假設您希望在特定方法之前或之後執行您的通知,您可以定義您的切點以透過用實際的類和方法名稱替換切點定義中的星號 (*) 來縮小您的執行範圍。以下是一個修改後的 XML 配置檔案,用於演示此概念。
<?xml version = "1.0" encoding = "UTF-8"?>
<beans xmlns = "http://www.springframework.org/schema/beans"
   xmlns:xsi = "http://www.w3.org/2001/XMLSchema-instance"
   xmlns:aop = "http://www.springframework.org/schema/aop"
   xsi:schemaLocation = "http://www.springframework.org/schema/beans
   http://www.springframework.org/schema/beans/spring-beans-3.0.xsd
   http://www.springframework.org/schema/aop
   http://www.springframework.org/schema/aop/spring-aop-3.0.xsd ">

   <aop:config>
      <aop:aspect id = "log" ref = "logging">
         <aop:pointcut id = "selectAll"
         expression = "execution(* com.tutorialspoint.Student.getName(..))"/>
         <aop:before pointcut-ref = "selectAll" method = "beforeAdvice"/>
      </aop:aspect>
   </aop:config>

   <!-- Definition for student bean -->
   <bean id = "student" class = "com.tutorialspoint.Student">
      <property name = "name"  value = "Zara" />
      <property name = "age"  value = "11"/>
   </bean>

   <!-- Definition for logging aspect -->
   <bean id = "logging" class = "com.tutorialspoint.Logging"/>

</beans>
執行專案
建立原始檔和配置檔案後,執行您的應用程式。右鍵點選應用程式中的 MainApp.java 並使用 以 Java 應用程式執行 命令。如果應用程式一切正常,它將列印以下訊息。
Going to setup student profile.
Name : Zara
Age : 11
Spring AOP - 基於 XML 的 Before 通知
Before 是一種通知型別,它確保通知在方法執行之前執行。以下是 before 通知語法。
語法
<aop:config>
   <aop:aspect id = "log" ref = "logging">
      <aop:pointcut id = "PointCut-id" expression = "execution( expression )"/>
      <aop:before pointcut-ref = "PointCut-id" method = "methodName"/>
   </aop:aspect>
</aop:config>
其中,
PointCut-id - 切點的 ID。
methodName - 要在被呼叫函式之前呼叫的函式的名稱。
為了理解上面提到的與 Before 通知相關的概念,讓我們編寫一個示例,該示例將實現 Before 通知。為了用一些通知編寫我們的示例,讓我們準備好一個正在執行的 Eclipse IDE,並使用以下步驟建立一個 Spring 應用程式。
| 步驟 | 描述 |
|---|---|
| 1 | 更新在 Spring AOP - 應用程式 章下建立的專案 Student。 |
| 2 | 更新 Bean 配置並執行應用程式,如下所述。 |
以下是 Logging.java 檔案的內容。這實際上是切面模組的一個示例,它定義了要在各個點呼叫的方法。
package com.tutorialspoint;

public class Logging {
   /**
      * This is the method which I would like to execute
      * before a selected method execution.
   */
   public void beforeAdvice(){
      System.out.println("Going to setup student profile.");
   }
}
以下是 Student.java 檔案的內容。
package com.tutorialspoint;

public class Student {
   private Integer age;
   private String name;

   public void setAge(Integer age) {
      this.age = age;
   }
   public Integer getAge() {
      System.out.println("Age : " + age );
      return age;
   }
   public void setName(String name) {
      this.name = name;
   }
   public String getName() {
      System.out.println("Name : " + name );
      return name;
   }
   public void printThrowException(){
      System.out.println("Exception raised");
      throw new IllegalArgumentException();
   }
}
以下是 MainApp.java 檔案的內容。
package com.tutorialspoint;

import org.springframework.context.ApplicationContext;
import org.springframework.context.support.ClassPathXmlApplicationContext;

public class MainApp {
   public static void main(String[] args) {
      ApplicationContext context = new ClassPathXmlApplicationContext("Beans.xml");

      Student student = (Student) context.getBean("student");
      student.getName();
      student.getAge();
   }
}
以下是配置檔案 Beans.xml。
<?xml version = "1.0" encoding = "UTF-8"?>
<beans xmlns = "http://www.springframework.org/schema/beans"
   xmlns:xsi = "http://www.w3.org/2001/XMLSchema-instance"
   xmlns:aop = "http://www.springframework.org/schema/aop"
   xsi:schemaLocation = "http://www.springframework.org/schema/beans
   http://www.springframework.org/schema/beans/spring-beans-3.0.xsd
   http://www.springframework.org/schema/aop
   http://www.springframework.org/schema/aop/spring-aop-3.0.xsd ">

   <aop:config>
      <aop:aspect id = "log" ref = "logging">
         <aop:pointcut id = "selectAll"
            expression = "execution(* com.tutorialspoint.Student.getName(..))"/>
         <aop:before pointcut-ref = "selectAll" method = "beforeAdvice"/>
      </aop:aspect>
   </aop:config>

   <!-- Definition for student bean -->
   <bean id = "student" class = "com.tutorialspoint.Student">
      <property name = "name"  value = "Zara" />
      <property name = "age"  value = "11"/>
   </bean>

   <!-- Definition for logging aspect -->
   <bean id = "logging" class = "com.tutorialspoint.Logging"/>

</beans>
執行專案
建立原始檔和配置檔案後,執行您的應用程式。右鍵點選應用程式中的 MainApp.java 並使用 以 Java 應用程式執行 命令。如果應用程式一切正常,它將列印以下訊息。
Going to setup student profile.
Name : Zara
Age : 11
Spring AOP - 基於 XML 的 After 通知
After 是一種通知型別,它確保通知在方法執行之後執行。以下是 after 通知語法。
語法
<aop:config>
   <aop:aspect id = "log" ref = "logging">
      <aop:pointcut id = "PointCut-id" expression = "execution( expression )"/>
      <aop:after pointcut-ref = "PointCut-id" method = "methodName"/>
   </aop:aspect>
</aop:config>
其中,
PointCut-id - 切點的 ID。
methodName - 要在被呼叫函式之後呼叫的函式的名稱。
為了理解上面提到的與 After 通知相關的概念,讓我們編寫一個示例,該示例將實現 After 通知。為了用一些通知編寫我們的示例,讓我們準備好一個正在執行的 Eclipse IDE,並使用以下步驟建立一個 Spring 應用程式。
| 步驟 | 描述 |
|---|---|
| 1 | 更新在 Spring AOP - 應用程式 章下建立的專案 Student。 |
| 2 | 更新 Bean 配置並執行應用程式,如下所述。 |
以下是 Logging.java 檔案的內容。這實際上是切面模組的一個示例,它定義了要在各個點呼叫的方法。
package com.tutorialspoint;

public class Logging {
   /**
      * This is the method which I would like to execute
      * after a selected method execution.
   */
   public void afterAdvice(){
      System.out.println("Student profile setup complete.");
   }
}
以下是 Student.java 檔案的內容。
package com.tutorialspoint;

public class Student {
   private Integer age;
   private String name;
   public void setAge(Integer age) {
      this.age = age;
   }
   public Integer getAge() {
      System.out.println("Age : " + age );
      return age;
   }
   public void setName(String name) {
      this.name = name;
   }
   public String getName() {
      System.out.println("Name : " + name );
      return name;
   }
   public void printThrowException(){
      System.out.println("Exception raised");
      throw new IllegalArgumentException();
   }
}
以下是 MainApp.java 檔案的內容。
package com.tutorialspoint;

import org.springframework.context.ApplicationContext;
import org.springframework.context.support.ClassPathXmlApplicationContext;

public class MainApp {
   public static void main(String[] args) {
      ApplicationContext context = new ClassPathXmlApplicationContext("Beans.xml");

      Student student = (Student) context.getBean("student");
      student.getName();
      student.getAge();
   }
}
以下是配置檔案 Beans.xml。
<?xml version = "1.0" encoding = "UTF-8"?>
<beans xmlns = "http://www.springframework.org/schema/beans"
   xmlns:xsi = "http://www.w3.org/2001/XMLSchema-instance"
   xmlns:aop = "http://www.springframework.org/schema/aop"
   xsi:schemaLocation = "http://www.springframework.org/schema/beans
   http://www.springframework.org/schema/beans/spring-beans-3.0.xsd
   http://www.springframework.org/schema/aop
   http://www.springframework.org/schema/aop/spring-aop-3.0.xsd ">

   <aop:config>
      <aop:aspect id = "log" ref = "logging">
         <aop:pointcut id = "selectAll"
            expression = "execution(* com.tutorialspoint.Student.getAge(..))"/>
         <aop:after pointcut-ref = "selectAll" method = "afterAdvice"/>
      </aop:aspect>
   </aop:config>

   <!-- Definition for student bean -->
   <bean id = "student" class = "com.tutorialspoint.Student">
      <property name = "name"  value = "Zara" />
      <property name = "age"  value = "11"/>
   </bean>

   <!-- Definition for logging aspect -->
   <bean id = "logging" class = "com.tutorialspoint.Logging"/>
</beans>
執行專案
建立原始檔和配置檔案後,執行您的應用程式。右鍵點選應用程式中的 MainApp.java 並使用 以 Java 應用程式執行 命令。如果應用程式一切正常,它將列印以下訊息。
Name : Zara
Age : 11
Student profile setup complete.
Spring AOP - 基於 XML 的 After Returning 通知
After Returning 是一種通知型別,它確保通知僅在方法成功完成執行後執行。以下是 after returning 通知語法。
語法
<aop:config>
   <aop:aspect id = "log" ref = "logging">
      <aop:pointcut id = "PointCut-id" expression = "execution( expression )"/>
      <aop:after-returning pointcut-ref = "PointCut-id"
         returning = "retVal" method = "methodName"/>
   </aop:aspect>
</aop:config>
其中,
PointCut-id - 切點的 ID。
methodName - 要在被呼叫函式成功返回後呼叫的函式的名稱。
為了理解上面提到的與 After Returning 通知相關的概念,讓我們編寫一個示例,該示例將實現 After Returning 通知。為了用一些通知編寫我們的示例,讓我們準備好一個正在執行的 Eclipse IDE,並使用以下步驟建立一個 Spring 應用程式:
| 步驟 | 描述 |
|---|---|
| 1 | 更新在 Spring AOP - 應用程式 章下建立的專案 Student。 |
| 2 | 更新 Bean 配置並執行應用程式,如下所述。 |
以下是 Logging.java 檔案的內容。這實際上是切面模組的一個示例,它定義了要在各個點呼叫的方法。
package com.tutorialspoint;

public class Logging {
   /**
      * This is the method which I would like to execute
      * when any method returns.
   */
   public void afterReturningAdvice(Object retVal){
      System.out.println("Returning:" + retVal.toString() );
   }
}
以下是 Student.java 檔案的內容。
package com.tutorialspoint;

public class Student {
   private Integer age;
   private String name;
   public void setAge(Integer age) {
      this.age = age;
   }
   public Integer getAge() {
      System.out.println("Age : " + age );
      System.out.println("Exception raised");
      throw new IllegalArgumentException();
      return age;
   }
   public void setName(String name) {
      this.name = name;
   }
   public String getName() {
      System.out.println("Name : " + name );
      return name;
   }
   public void printThrowException(){
      System.out.println("Exception raised");
      throw new IllegalArgumentException();
   }
}
以下是 MainApp.java 檔案的內容。
package com.tutorialspoint;

import org.springframework.context.ApplicationContext;
import org.springframework.context.support.ClassPathXmlApplicationContext;

public class MainApp {
   public static void main(String[] args) {
      ApplicationContext context = new ClassPathXmlApplicationContext("Beans.xml");

      Student student = (Student) context.getBean("student");
      student.getName();
      student.getAge();
   }
}
以下是配置檔案 Beans.xml。
<?xml version = "1.0" encoding = "UTF-8"?>
<beans xmlns = "http://www.springframework.org/schema/beans"
   xmlns:xsi = "http://www.w3.org/2001/XMLSchema-instance"
   xmlns:aop = "http://www.springframework.org/schema/aop"
   xsi:schemaLocation = "http://www.springframework.org/schema/beans
   http://www.springframework.org/schema/beans/spring-beans-3.0.xsd
   http://www.springframework.org/schema/aop
   http://www.springframework.org/schema/aop/spring-aop-3.0.xsd ">

   <aop:config>
      <aop:aspect id = "log" ref = "logging">
         <aop:pointcut id = "selectAll"
         expression = "execution(* com.tutorialspoint.*.*(..))"/>
         <aop:after-returning pointcut-ref = "selectAll"
            method = "afterReturningAdvice" returning = "retVal"/>
      </aop:aspect>
   </aop:config>

   <!-- Definition for student bean -->
   <bean id = "student" class = "com.tutorialspoint.Student">
      <property name = "name"  value = "Zara" />
      <property name = "age"  value = "11"/>
   </bean>

   <!-- Definition for logging aspect -->
   <bean id = "logging" class = "com.tutorialspoint.Logging"/>
</beans>
執行專案
建立原始檔和配置檔案後,執行您的應用程式。右鍵點選應用程式中的 MainApp.java 並使用 以 Java 應用程式執行 命令。如果應用程式一切正常,它將列印以下訊息。
Name : Zara
Returning : Name
Age : 11
Exception raised
Spring AOP - 基於 XML 的 After Throwing 通知
After-throwing 是一種通知型別,它確保通知僅在方法透過丟擲異常退出時執行。以下是 after-throwing 通知語法。
語法
<aop:config>
   <aop:aspect id = "log" ref = "logging">
      <aop:pointcut id = "PointCut-id" expression = "execution( expression )"/>
      <aop:after-throwing pointcut-ref = "PointCut-id" throwing = "ex"
         method = "methodName"/>
   </aop:aspect>
</aop:config>
其中,
PointCut-id - 切點的 ID。
ex - 要丟擲的異常。
methodName - 當被呼叫函式丟擲異常並退出時要呼叫的函式的名稱。
為了理解上面提到的與 After Throwing 通知相關的概念,讓我們編寫一個示例,該示例將實現 After Throwing 通知。為了用一些通知編寫我們的示例,讓我們準備好一個正在執行的 Eclipse IDE,並使用以下步驟建立一個 Spring 應用程式:
| 步驟 | 描述 |
|---|---|
| 1 | 更新在 Spring AOP - 應用程式 章下建立的專案 Student。 |
| 2 | 更新 Bean 配置並執行應用程式,如下所述。 |
以下是 Logging.java 檔案的內容。這實際上是切面模組的一個示例,它定義了要在各個點呼叫的方法。
package com.tutorialspoint;

public class Logging {
   /**
      * This is the method which I would like to execute
      * if there is an exception raised.
   */
   public void afterThrowingAdvice(IllegalArgumentException ex) {
      System.out.println("There has been an exception: " + ex.toString());
   }
}
以下是 Student.java 檔案的內容。
package com.tutorialspoint;

public class Student {
   private Integer age;
   private String name;

   public void setAge(Integer age) {
      this.age = age;
   }
   public Integer getAge() {
      System.out.println("Age : " + age );
	  return age;
   }
   public void setName(String name) {
      this.name = name;
   }
   public String getName() {
      System.out.println("Name : " + name );
      return name;
   }
   public void printThrowException(){
      System.out.println("Exception raised");
      throw new IllegalArgumentException();
   }
}
以下是 MainApp.java 檔案的內容。
package com.tutorialspoint;

import org.springframework.context.ApplicationContext;
import org.springframework.context.support.ClassPathXmlApplicationContext;

public class MainApp {
   public static void main(String[] args) {
      ApplicationContext context = new ClassPathXmlApplicationContext("Beans.xml");

      Student student = (Student) context.getBean("student");
      student.printThrowException();
   }
}
以下是配置檔案 Beans.xml。
<?xml version = "1.0" encoding = "UTF-8"?>
<beans xmlns = "http://www.springframework.org/schema/beans"
   xmlns:xsi = "http://www.w3.org/2001/XMLSchema-instance"
   xmlns:aop = "http://www.springframework.org/schema/aop"
   xsi:schemaLocation = "http://www.springframework.org/schema/beans
   http://www.springframework.org/schema/beans/spring-beans-3.0.xsd
   http://www.springframework.org/schema/aop
   http://www.springframework.org/schema/aop/spring-aop-3.0.xsd ">

   <aop:config>
      <aop:aspect id = "log" ref = "logging">
         <aop:pointcut id = "selectAll"
         expression = "execution(* com.tutorialspoint.*.*(..))"/>
         <aop:after-throwing pointcut-ref = "selectAll"
            throwing = "ex" method = "afterThrowingAdvice"/>
      </aop:aspect>
   </aop:config>

   <!-- Definition for student bean -->
   <bean id = "student" class = "com.tutorialspoint.Student">
      <property name = "name"  value = "Zara" />
      <property name = "age"  value = "11"/>
   </bean>

   <!-- Definition for logging aspect -->
   <bean id = "logging" class = "com.tutorialspoint.Logging"/>
</beans>
執行專案
建立原始檔和配置檔案後,執行您的應用程式。右鍵點選應用程式中的 MainApp.java 並使用 以 Java 應用程式執行 命令。如果應用程式一切正常,它將列印以下訊息。
Exception raised
There has been an exception: java.lang.IllegalArgumentException
Exception in thread "main" java.lang.IllegalArgumentException
   at com.tutorialspoint.Student.printThrowException(Student.java:25)
...
Spring AOP - 基於 XML 的 Around 通知
Around 是一種通知型別,它確保通知在方法執行之前和之後執行。以下是 around 通知語法。
語法
<aop:config>
   <aop:aspect id = "log" ref = "logging">
      <aop:pointcut id = "PointCut-id" expression = "execution( expression )"/>
      <aop:around pointcut-ref = "PointCut-id" method = "methodName"/>
   </aop:aspect>
</aop:config>
其中,
PointCut-id - 切點的 ID。
methodName - 要在被呼叫函式之前呼叫的函式的名稱。
為了理解上面提到的與 Around 通知相關的概念,讓我們編寫一個示例,該示例將實現 Around 通知。為了用一些通知編寫我們的示例,讓我們準備好一個正在執行的 Eclipse IDE,並使用以下步驟建立一個 Spring 應用程式:
| 步驟 | 描述 |
|---|---|
| 1 | 更新在 Spring AOP - 應用程式 章下建立的專案 Student。 |
| 2 | 更新 Bean 配置並執行應用程式,如下所述。 |
以下是 Logging.java 檔案的內容。這實際上是切面模組的一個示例,它定義了要在各個點呼叫的方法。
package com.tutorialspoint;
import org.aspectj.lang.ProceedingJoinPoint;

public class Logging {
   /**
      * This is the method which I would like to execute
      * around a selected method execution.
   */
   public String aroundAdvice(ProceedingJoinPoint jp) throws Throwable{
      System.out.println("Around advice");
      Object[] args = jp.getArgs();
      if(args.length>0){
         System.out.print("Arguments passed: " );
         for (int i = 0; i < args.length; i++) {
            System.out.print("arg "+(i+1)+": "+args[i]);
         }
      }
      Object result = jp.proceed(args);
      System.out.println("Returning " + result);
      return result.toString();
   }
}
以下是 Student.java 檔案的內容。
package com.tutorialspoint;

public class Student {
   private Integer age;
   private String name;
   public void setAge(Integer age) {
      this.age = age;
   }
   public Integer getAge() {
      System.out.println("Age : " + age );
      return age;
   }
   public void setName(String name) {
      this.name = name;
   }
   public String getName() {
      System.out.println("Name : " + name );
      return name;
   }
   public void printThrowException(){
      System.out.println("Exception raised");
      throw new IllegalArgumentException();
   }
}
以下是 MainApp.java 檔案的內容。
package com.tutorialspoint;

import org.springframework.context.ApplicationContext;
import org.springframework.context.support.ClassPathXmlApplicationContext;

public class MainApp {
   public static void main(String[] args) {
      ApplicationContext context = new ClassPathXmlApplicationContext("Beans.xml");

      Student student = (Student) context.getBean("student");
      student.getName();
   }
}
以下是配置檔案 Beans.xml。
<?xml version = "1.0" encoding = "UTF-8"?>
<beans xmlns = "http://www.springframework.org/schema/beans"
   xmlns:xsi = "http://www.w3.org/2001/XMLSchema-instance"
   xmlns:aop = "http://www.springframework.org/schema/aop"
   xsi:schemaLocation = "http://www.springframework.org/schema/beans
   http://www.springframework.org/schema/beans/spring-beans-3.0.xsd
   http://www.springframework.org/schema/aop
   http://www.springframework.org/schema/aop/spring-aop-3.0.xsd ">

   <aop:config>
      <aop:aspect id = "log" ref = "logging">
         <aop:pointcut id = "selectName"
            expression = "execution(* com.tutorialspoint.Student.getName(..))"/>
         <aop:around pointcut-ref = "selectName" method = "aroundAdvice"/>
      </aop:aspect>
   </aop:config>

   <!-- Definition for student bean -->
   <bean id = "student" class = "com.tutorialspoint.Student">
      <property name = "name"  value = "Zara" />
      <property name = "age"  value = "11"/>
   </bean>

   <!-- Definition for logging aspect -->
   <bean id = "logging" class = "com.tutorialspoint.Logging"/>
</beans>
執行專案
建立原始檔和配置檔案後,執行您的應用程式。右鍵點選應用程式中的 MainApp.java 並使用 以 Java 應用程式執行 命令。如果應用程式一切正常,它將列印以下訊息。
Around advice
Name : Zara
Returning Zara
Spring AOP - 基於註解的應用
讓我們編寫一個使用基於註解的配置實現通知的示例。為此,讓我們準備好一個正在執行的 Eclipse IDE,並使用以下步驟建立一個 Spring 應用程式。
| 步驟 | 描述 |
|---|---|
| 1 | 更新在 Spring AOP - 應用程式 章下建立的專案 Student。 |
| 2 | 更新 Bean 配置並執行應用程式,如下所述。 |
以下是 Logging.java 檔案的內容。這實際上是切面模組的一個示例,它定義了要在各個點呼叫的方法。
package com.tutorialspoint;

import org.aspectj.lang.annotation.Aspect;
import org.aspectj.lang.annotation.Before;
import org.aspectj.lang.annotation.Pointcut;

@Aspect
public class Logging {
   /** Following is the definition for a Pointcut to select
      *  all the methods available. So advice will be called
      *  for all the methods.
   */
   @Pointcut("execution(* com.tutorialspoint.*.*(..))")
   private void selectAll(){}

   /**
      * This is the method which I would like to execute
      * before a selected method execution.
   */
   @Before("selectAll()")
   public void beforeAdvice(){
      System.out.println("Going to setup student profile.");
   }
}
以下是 Student.java 檔案的內容。
package com.tutorialspoint;

public class Student {
   private Integer age;
   private String name;

   public void setAge(Integer age) {
      this.age = age;
   }
   public Integer getAge() {
      System.out.println("Age : " + age );
      return age;
   }
   public void setName(String name) {
      this.name = name;
   }
   public String getName() {
      System.out.println("Name : " + name );
      return name;
   }
   public void printThrowException(){
      System.out.println("Exception raised");
      throw new IllegalArgumentException();
   }
}
以下是 MainApp.java 檔案的內容。
package com.tutorialspoint;

import org.springframework.context.ApplicationContext;
import org.springframework.context.support.ClassPathXmlApplicationContext;

public class MainApp {
   public static void main(String[] args) {
      ApplicationContext context = new ClassPathXmlApplicationContext("Beans.xml");

      Student student = (Student) context.getBean("student");
      student.getName();
      student.getAge();
   }
}
以下是配置檔案 Beans.xml。
<?xml version = "1.0" encoding = "UTF-8"?>
<beans xmlns = "http://www.springframework.org/schema/beans"
   xmlns:xsi = "http://www.w3.org/2001/XMLSchema-instance"
   xmlns:aop = "http://www.springframework.org/schema/aop"
   xsi:schemaLocation = "http://www.springframework.org/schema/beans
   http://www.springframework.org/schema/beans/spring-beans-3.0.xsd
   http://www.springframework.org/schema/aop
   http://www.springframework.org/schema/aop/spring-aop-3.0.xsd ">

   <aop:aspectj-autoproxy/>

   <!-- Definition for student bean -->
   <bean id = "student" class = "com.tutorialspoint.Student">
      <property name = "name"  value = "Zara" />
      <property name = "age"  value = "11"/>
   </bean>

   <!-- Definition for logging aspect -->
   <bean id = "logging" class = "com.tutorialspoint.Logging"/>
</beans>
執行專案
建立原始檔和配置檔案後,執行您的應用程式。右鍵點選應用程式中的 MainApp.java 並使用 以 Java 應用程式執行 命令。如果應用程式一切正常,它將列印以下訊息。
Going to setup student profile.
Name : Zara
Going to setup student profile.
Age : 11
Spring AOP - 基於註解的切點
連線點
連線點表示應用程式中您可以插入 AOP 切面的一個點。您也可以說,它是應用程式中使用 Spring AOP 框架採取行動的實際位置。考慮以下示例:
包中包含的所有方法類。
類的特定方法。
切點
切點是一組一個或多個連線點,在這些連線點上應執行通知。您可以使用表示式或模式指定切點,正如我們將在 AOP 示例中看到的那樣。在 Spring 中,切點有助於使用特定的連線點來應用通知。考慮以下示例:
@Pointcut("execution(* com.tutorialspoint.*.*(..))")
@Pointcut("execution(* com.tutorialspoint.Student.getName(..))")
語法
@Aspect
public class Logging {
   @Pointcut("execution(* com.tutorialspoint.*.*(..))")
   private void selectAll(){}
}
其中,
@Aspect - 將類標記為包含通知方法的類。
@Pointcut - 將函式標記為切點
execution( expression ) - 涵蓋要應用通知的方法的表示式。
為了理解上面提到的與連線點和切點相關的概念,讓我們編寫一個示例,該示例將實現一些切點。為了用一些通知編寫我們的示例,讓我們準備好一個正在執行的 Eclipse IDE,並使用以下步驟建立一個 Spring 應用程式:
| 步驟 | 描述 |
|---|---|
| 1 | 更新在 Spring AOP - 應用程式 章下建立的專案 Student。 |
| 2 | 更新 Bean 配置並執行應用程式,如下所述。 |
以下是 Logging.java 檔案的內容。這實際上是切面模組的一個示例,它定義了要在各個點呼叫的方法。
package com.tutorialspoint;

import org.aspectj.lang.annotation.Aspect;
import org.aspectj.lang.annotation.Pointcut;
import org.aspectj.lang.annotation.Before;

@Aspect
public class Logging {
   /** Following is the definition for a PointCut to select
      *  all the methods available. So advice will be called
      *  for all the methods.
   */
   @Pointcut("execution(* com.tutorialspoint.*.*(..))")
   private void selectAll(){}

   /**
      * This is the method which I would like to execute
      * before a selected method execution.
   */
   @Before("selectAll()")
   public void beforeAdvice(){
      System.out.println("Going to setup student profile.");
   }
}
以下是 Student.java 檔案的內容。
package com.tutorialspoint;

public class Student {
   private Integer age;
   private String name;

   public void setAge(Integer age) {
      this.age = age;
   }
   public Integer getAge() {
      System.out.println("Age : " + age );
      return age;
   }
   public void setName(String name) {
      this.name = name;
   }
   public String getName() {
      System.out.println("Name : " + name );
      return name;
   }
   public void printThrowException(){
      System.out.println("Exception raised");
      throw new IllegalArgumentException();
   }
}
以下是 MainApp.java 檔案的內容。
package com.tutorialspoint;

import org.springframework.context.ApplicationContext;
import org.springframework.context.support.ClassPathXmlApplicationContext;

public class MainApp {
   public static void main(String[] args) {
      ApplicationContext context = new ClassPathXmlApplicationContext("Beans.xml");

      Student student = (Student) context.getBean("student");
      student.getName();
      student.getAge();
   }
}
以下是配置檔案 Beans.xml。
<?xml version = "1.0" encoding = "UTF-8"?>
<beans xmlns = "http://www.springframework.org/schema/beans"
   xmlns:xsi = "http://www.w3.org/2001/XMLSchema-instance"
   xmlns:aop = "http://www.springframework.org/schema/aop"
   xsi:schemaLocation = "http://www.springframework.org/schema/beans
   http://www.springframework.org/schema/beans/spring-beans-3.0.xsd
   http://www.springframework.org/schema/aop
   http://www.springframework.org/schema/aop/spring-aop-3.0.xsd ">

   <aop:aspectj-autoproxy/>

   <!-- Definition for student bean -->
   <bean id = "student" class = "com.tutorialspoint.Student">
      <property name = "name"  value = "Zara" />
      <property name = "age"  value = "11"/>
   </bean>

   <!-- Definition for logging aspect -->
   <bean id = "logging" class = "com.tutorialspoint.Logging"/>

</beans>
執行專案
建立原始檔和配置檔案後,執行您的應用程式。右鍵點選應用程式中的 MainApp.java 並使用 以 Java 應用程式執行 命令。如果應用程式一切正常,它將列印以下訊息。
Going to setup student profile.
Name : Zara
Going to setup student profile.
Age : 11
上面定義的 @Pointcut 使用表示式選擇 com.tutorialspoint 包下定義的所有方法。@Before 通知使用上面定義的切點作為引數。實際上,beforeAdvice() 方法將在上面切點涵蓋的每個方法之前被呼叫。
Spring AOP - 基於註解的 Before 通知
@Before 是一種通知型別,它確保通知在方法執行之前執行。以下是 @Before 通知語法。
語法
@Pointcut("execution(* com.tutorialspoint.Student.getName(..))")
private void selectGetName(){}

@Before("selectGetName()")
public void beforeAdvice(){
   System.out.println("Going to setup student profile.");
}
其中,
@Pointcut - 將函式標記為切點
execution( expression ) - 涵蓋要應用通知的方法的表示式。
@Before - 將函式標記為在切點涵蓋的方法之前執行的通知。
為了理解上面提到的與@Before Advice相關的概念,讓我們編寫一個實現@Before Advice的示例。為了編寫包含少量Advice的示例,讓我們準備一個可用的Eclipse IDE,並使用以下步驟建立一個Spring應用程式。
| 步驟 | 描述 |
|---|---|
| 1 | 更新在 Spring AOP - 應用程式 章下建立的專案 Student。 |
| 2 | 更新 Bean 配置並執行應用程式,如下所述。 |
以下是 Logging.java 檔案的內容。這實際上是切面模組的一個示例,它定義了要在各個點呼叫的方法。
package com.tutorialspoint;

import org.aspectj.lang.annotation.Aspect;
import org.aspectj.lang.annotation.Pointcut;
import org.aspectj.lang.annotation.Before;

@Aspect
public class Logging {

   /** Following is the definition for a Pointcut to select
      *  all the methods available. So advice will be called
      *  for all the methods.
   */
   @Pointcut("execution(* com.tutorialspoint.Student.getName(..))")
   private void selectGetName(){}
   /**
      * This is the method which I would like to execute
      * before a selected method execution.
   */
   @Before("selectGetName()")
   public void beforeAdvice(){
      System.out.println("Going to setup student profile.");
   }
}
以下是 Student.java 檔案的內容。
package com.tutorialspoint;

public class Student {
   private Integer age;
   private String name;

   public void setAge(Integer age) {
      this.age = age;
   }
   public Integer getAge() {
      System.out.println("Age : " + age );
      return age;
   }
   public void setName(String name) {
      this.name = name;
   }
   public String getName() {
      System.out.println("Name : " + name );
      return name;
   }
   public void printThrowException(){
      System.out.println("Exception raised");
      throw new IllegalArgumentException();
   }
}
以下是 MainApp.java 檔案的內容。
package com.tutorialspoint;

import org.springframework.context.ApplicationContext;
import org.springframework.context.support.ClassPathXmlApplicationContext;

public class MainApp {
   public static void main(String[] args) {
      ApplicationContext context = new ClassPathXmlApplicationContext("Beans.xml");

      Student student = (Student) context.getBean("student");
      student.getName();
      student.getAge();
   }
}
以下是配置檔案 Beans.xml。
<?xml version = "1.0" encoding = "UTF-8"?>
<beans xmlns = "http://www.springframework.org/schema/beans"
   xmlns:xsi = "http://www.w3.org/2001/XMLSchema-instance"
   xmlns:aop = "http://www.springframework.org/schema/aop"
   xsi:schemaLocation = "http://www.springframework.org/schema/beans
   http://www.springframework.org/schema/beans/spring-beans-3.0.xsd
   http://www.springframework.org/schema/aop
   http://www.springframework.org/schema/aop/spring-aop-3.0.xsd ">

   <aop:aspectj-autoproxy/>

   <!-- Definition for student bean -->
   <bean id = "student" class = "com.tutorialspoint.Student">
      <property name = "name"  value = "Zara" />
      <property name = "age"  value = "11"/>
   </bean>

   <!-- Definition for logging aspect -->
   <bean id = "logging" class = "com.tutorialspoint.Logging"/>
</beans>
執行專案
建立原始檔和配置檔案後,執行您的應用程式。右鍵點選應用程式中的 MainApp.java 並使用 以 Java 應用程式執行 命令。如果應用程式一切正常,它將列印以下訊息。
Going to setup student profile.
Name : Zara
Age : 11
上面定義的@Pointcut使用表示式來選擇在com.tutorialspoint包下類(class)中定義的getAge()方法。@After advice使用上面定義的Pointcut作為引數。實際上,afterAdvice()方法將在Pointcut覆蓋的每個方法之前被呼叫。
Spring AOP - 基於註解的After Advice
@After是一種Advice型別,它確保Advice在方法執行之後執行。以下是@After advice的語法。
語法
@Pointcut("execution(* com.tutorialspoint.Student.getAge(..))")
private void selectGetName(){}

@After("selectGetAge()")
public void afterAdvice(){
   System.out.println("Student profile setup completed.");
}
其中,
@Pointcut - 將函式標記為切點
execution( expression ) - 涵蓋要應用通知的方法的表示式。
@After - 將函式標記為Advice,以便在Pointcut覆蓋的方法之前執行。
為了理解上面提到的與@After Advice相關的概念,讓我們編寫一個實現@After Advice的示例。為了編寫包含少量Advice的示例,讓我們準備一個可用的Eclipse IDE,並使用以下步驟建立一個Spring應用程式。
| 步驟 | 描述 |
|---|---|
| 1 | 更新在 Spring AOP - 應用程式 章下建立的專案 Student。 |
| 2 | 更新 Bean 配置並執行應用程式,如下所述。 |
以下是 Logging.java 檔案的內容。這實際上是切面模組的一個示例,它定義了要在各個點呼叫的方法。
package com.tutorialspoint;

import org.aspectj.lang.annotation.Aspect;
import org.aspectj.lang.annotation.Pointcut;
import org.aspectj.lang.annotation.After;

@Aspect
public class Logging {
   /** Following is the definition for a Pointcut to select
      *  all the methods available. So advice will be called
      *  for all the methods.
   */
   @Pointcut("execution(* com.tutorialspoint.Student.getAge(..))")
   private void selectGetAge(){}

   /**
      * This is the method which I would like to execute
      * after a selected method execution.
   */
   @After("selectGetAge()")
   public void afterAdvice(){
      System.out.println("Student profile setup completed.");
   }
}
以下是 Student.java 檔案的內容。
package com.tutorialspoint;

public class Student {
   private Integer age;
   private String name;
   public void setAge(Integer age) {
      this.age = age;
   }
   public Integer getAge() {
      System.out.println("Age : " + age );
      return age;
   }
   public void setName(String name) {
      this.name = name;
   }
   public String getName() {
      System.out.println("Name : " + name );
      return name;
   }
   public void printThrowException(){
      System.out.println("Exception raised");
      throw new IllegalArgumentException();
   }
}
以下是 MainApp.java 檔案的內容。
package com.tutorialspoint;

import org.springframework.context.ApplicationContext;
import org.springframework.context.support.ClassPathXmlApplicationContext;

public class MainApp {
   public static void main(String[] args) {
      ApplicationContext context = new ClassPathXmlApplicationContext("Beans.xml");

      Student student = (Student) context.getBean("student");
      student.getName();
      student.getAge();
   }
}
以下是配置檔案 Beans.xml。
<?xml version = "1.0" encoding = "UTF-8"?>
<beans xmlns = "http://www.springframework.org/schema/beans"
   xmlns:xsi = "http://www.w3.org/2001/XMLSchema-instance"
   xmlns:aop = "http://www.springframework.org/schema/aop"
   xsi:schemaLocation = "http://www.springframework.org/schema/beans
   http://www.springframework.org/schema/beans/spring-beans-3.0.xsd
   http://www.springframework.org/schema/aop
   http://www.springframework.org/schema/aop/spring-aop-3.0.xsd ">

   <aop:aspectj-autoproxy/>

   <!-- Definition for student bean -->
   <bean id = "student" class = "com.tutorialspoint.Student">
      <property name = "name"  value = "Zara" />
      <property name = "age"  value = "11"/>
   </bean>

   <!-- Definition for logging aspect -->
   <bean id = "logging" class = "com.tutorialspoint.Logging"/>

</beans>
執行專案
建立原始檔和配置檔案後,執行您的應用程式。右鍵點選應用程式中的 MainApp.java 並使用 以 Java 應用程式執行 命令。如果應用程式一切正常,它將列印以下訊息。
Name : Zara
Age : 11
Student profile setup completed.
上面定義的@Pointcut使用表示式來選擇在com.tutorialspoint包下類(class)中定義的getAge()方法。@After advice使用上面定義的Pointcut作為引數。實際上,afterAdvice()方法將在Pointcut覆蓋的每個方法之前被呼叫。
基於註解的After Returning Advice
@AfterReturning是一種Advice型別,它確保Advice在方法成功執行之後執行。以下是@AfterReturning advice的語法。
語法
@AfterReturning(Pointcut = "execution(* com.tutorialspoint.Student.*(..))", returning = "retVal")
public void afterReturningAdvice(JoinPoint jp, Object retVal){
   System.out.println("Method Signature: "  + jp.getSignature());
   System.out.println("Returning:" + retVal.toString() );
}
其中,
@AfterReturning - 將函式標記為Advice,以便在Pointcut覆蓋的方法之後執行,前提是方法成功返回。
Pointcut - 提供表示式來選擇一個函式。
execution( expression ) - 涵蓋要應用通知的方法的表示式。
returning - 要返回的變數的名稱。
為了理解上面提到的與@AfterReturning Advice相關的概念,讓我們編寫一個實現@AfterReturning Advice的示例。為了編寫包含少量Advice的示例,讓我們準備一個可用的Eclipse IDE,並使用以下步驟建立一個Spring應用程式。
| 步驟 | 描述 |
|---|---|
| 1 | 更新在 Spring AOP - 應用程式 章下建立的專案 Student。 |
| 2 | 更新 Bean 配置並執行應用程式,如下所述。 |
以下是 Logging.java 檔案的內容。這實際上是切面模組的一個示例,它定義了要在各個點呼叫的方法。
package com.tutorialspoint;

import org.aspectj.lang.annotation.Aspect;
import org.aspectj.lang.JoinPoint;
import org.aspectj.lang.annotation.AfterReturning;

@Aspect
public class Logging {
   /**
      * This is the method which I would like to execute
      * after a selected method execution.
   */
   @AfterReturning(Pointcut = "execution(* com.tutorialspoint.Student.*(..))", returning = "retVal")
   public void afterReturningAdvice(JoinPoint jp, Object retVal){
      System.out.println("Method Signature: "  + jp.getSignature());
      System.out.println("Returning:" + retVal.toString() );
   }
}
以下是 Student.java 檔案的內容。
package com.tutorialspoint;

public class Student {
   private Integer age;
   private String name;
   public void setAge(Integer age) {
      this.age = age;
   }
   public Integer getAge() {
      System.out.println("Age : " + age );
      return age;
   }
   public void setName(String name) {
      this.name = name;
   }
   public String getName() {
      System.out.println("Name : " + name );
      return name;
   }
   public void printThrowException(){
      System.out.println("Exception raised");
      throw new IllegalArgumentException();
   }
}
以下是 MainApp.java 檔案的內容。
package com.tutorialspoint;

import org.springframework.context.ApplicationContext;
import org.springframework.context.support.ClassPathXmlApplicationContext;

public class MainApp {
   public static void main(String[] args) {
      ApplicationContext context = new ClassPathXmlApplicationContext("Beans.xml");

      Student student = (Student) context.getBean("student");
      student.getAge();
   }
}
以下是配置檔案 Beans.xml。
<?xml version = "1.0" encoding = "UTF-8"?>
<beans xmlns = "http://www.springframework.org/schema/beans"
   xmlns:xsi = "http://www.w3.org/2001/XMLSchema-instance"
   xmlns:aop = "http://www.springframework.org/schema/aop"
   xsi:schemaLocation = "http://www.springframework.org/schema/beans
   http://www.springframework.org/schema/beans/spring-beans-3.0.xsd
   http://www.springframework.org/schema/aop
   http://www.springframework.org/schema/aop/spring-aop-3.0.xsd ">

   <aop:aspectj-autoproxy/>

   <!-- Definition for student bean -->
   <bean id = "student" class = "com.tutorialspoint.Student">
      <property name = "name"  value = "Zara" />
      <property name = "age"  value = "11"/>
   </bean>

   <!-- Definition for logging aspect -->
   <bean id = "logging" class = "com.tutorialspoint.Logging"/>

</beans>
執行專案
建立原始檔和配置檔案後,執行您的應用程式。右鍵點選應用程式中的 MainApp.java 並使用 以 Java 應用程式執行 命令。如果應用程式一切正常,它將列印以下訊息。
Age : 11
Method Signature: Integer com.tutorialspoint.Student.getAge()
Returning 11
Spring AOP - 基於註解的After Throwing Advice
@AfterThrowing是一種Advice型別,它確保如果方法丟擲異常,則執行Advice。以下是@AfterThrowing advice的語法。
語法
@AfterThrowing(Pointcut = "execution(* com.tutorialspoint.Student.*(..))", throwing = "error")
public void afterThrowingAdvice(JoinPoint jp, Throwable error){
   System.out.println("Method Signature: "  + jp.getSignature());
   System.out.println("Exception: "+error);
}
其中,
@AfterThrowing - 將函式標記為Advice,以便在Pointcut覆蓋的方法之後執行,前提是方法丟擲異常。
Pointcut - 提供表示式來選擇一個函式。
execution( expression ) - 涵蓋要應用通知的方法的表示式。
throwing - 要返回的異常的名稱。
為了理解上面提到的與@AfterThrowing Advice相關的概念,讓我們編寫一個實現@AfterThrowing Advice的示例。為了編寫包含少量Advice的示例,讓我們準備一個可用的Eclipse IDE,並使用以下步驟建立一個Spring應用程式。
| 步驟 | 描述 |
|---|---|
| 1 | 更新在 Spring AOP - 應用程式 章下建立的專案 Student。 |
| 2 | 更新 Bean 配置並執行應用程式,如下所述。 |
以下是 Logging.java 檔案的內容。這實際上是切面模組的一個示例,它定義了要在各個點呼叫的方法。
package com.tutorialspoint;

import org.aspectj.lang.annotation.Aspect;
import org.aspectj.lang.JoinPoint;
import org.aspectj.lang.annotation.AfterThrowing;

@Aspect
public class Logging {
   /**
      * This is the method which I would like to execute
      * after a selected method execution throws exception.
   */
   @AfterThrowing(Pointcut = "execution(* com.tutorialspoint.Student.*(..))", throwing = "error")
   public void afterThrowingAdvice(JoinPoint jp, Throwable error){
      System.out.println("Method Signature: "  + jp.getSignature());
      System.out.println("Exception: "+error);
   }
}
以下是 Student.java 檔案的內容。
package com.tutorialspoint;

public class Student {
   private Integer age;
   private String name;

   public void setAge(Integer age) {
      this.age = age;
   }
   public Integer getAge() {
      System.out.println("Age : " + age );
      return age;
   }
   public void setName(String name) {
      this.name = name;
   }
   public String getName() {
      System.out.println("Name : " + name );
      return name;
   }
   public void printThrowException(){
      System.out.println("Exception raised");
      throw new IllegalArgumentException();
   }
}
以下是 MainApp.java 檔案的內容。
package com.tutorialspoint;

import org.springframework.context.ApplicationContext;
import org.springframework.context.support.ClassPathXmlApplicationContext;

public class MainApp {
   public static void main(String[] args) {
      ApplicationContext context = new ClassPathXmlApplicationContext("Beans.xml");

      Student student = (Student) context.getBean("student");
      student.printThrowException();
   }
}
以下是配置檔案 Beans.xml。
<?xml version = "1.0" encoding = "UTF-8"?>
<beans xmlns = "http://www.springframework.org/schema/beans"
   xmlns:xsi = "http://www.w3.org/2001/XMLSchema-instance"
   xmlns:aop = "http://www.springframework.org/schema/aop"
   xsi:schemaLocation = "http://www.springframework.org/schema/beans
   http://www.springframework.org/schema/beans/spring-beans-3.0.xsd
   http://www.springframework.org/schema/aop
   http://www.springframework.org/schema/aop/spring-aop-3.0.xsd ">

   <aop:aspectj-autoproxy/>

   <!-- Definition for student bean -->
   <bean id = "student" class = "com.tutorialspoint.Student">
      <property name = "name"  value = "Zara" />
      <property name = "age"  value = "11"/>
   </bean>

   <!-- Definition for logging aspect -->
   <bean id = "logging" class = "com.tutorialspoint.Logging"/>

</beans>
執行專案
建立原始檔和配置檔案後,執行您的應用程式。右鍵點選應用程式中的 MainApp.java 並使用 以 Java 應用程式執行 命令。如果應用程式一切正常,它將列印以下訊息。
Exception raised
Method Signature: void com.tutorialspoint.Student.printThrowException()
Exception: java.lang.IllegalArgumentException
Exception in thread "main" java.lang.IllegalArgumentException

   at com.tutorialspoint.Student.printThrowException(Student.java:25)
   ...
Spring AOP - 基於註解的Around Advice
@Around是一種Advice型別,它確保Advice可以在方法執行之前和之後執行。以下是@Around advice的語法。
語法
@Pointcut("execution(* com.tutorialspoint.Student.getAge(..))")
private void selectGetName(){}

@Around("selectGetAge()")
public void aroundAdvice(ProceedingJoinPoint proceedingJoinPoint){
   System.out.println("Around advice");
   Object[] args = jp.getArgs();
   if(args.length>0){
      System.out.print("Arguments passed: " );
      for (int i = 0; i < args.length; i++) {
         System.out.print("arg "+(i+1)+": "+args[i]);
      }
   }
   Object result = jp.proceed(args);
   System.out.println("Returning " + result);
   return result.toString();
}
其中,
@Pointcut - 將函式標記為切點
execution( expression ) - 涵蓋要應用通知的方法的表示式。
@Around - 將函式標記為Advice,以便在Pointcut覆蓋的方法之前執行。
為了理解上面提到的與@Around Advice相關的概念,讓我們編寫一個實現@Around Advice的示例。為了編寫包含少量Advice的示例,讓我們準備一個可用的Eclipse IDE,並使用以下步驟建立一個Spring應用程式。
| 步驟 | 描述 |
|---|---|
| 1 | 更新在 Spring AOP - 應用程式 章下建立的專案 Student。 |
| 2 | 更新 Bean 配置並執行應用程式,如下所述。 |
以下是 Logging.java 檔案的內容。這實際上是切面模組的一個示例,它定義了要在各個點呼叫的方法。
package com.tutorialspoint;

import org.aspectj.lang.annotation.Aspect;
import org.aspectj.lang.annotation.Pointcut;
import org.aspectj.lang.annotation.Around;
import org.aspectj.lang.ProceedingJoinPoint;

@Aspect
public class Logging {
   /** Following is the definition for a Pointcut to select
      *  all the methods available. So advice will be called
      *  for all the methods.
   */
   @Pointcut("execution(* com.tutorialspoint.Student.getAge(..))")
   private void selectGetAge(){}

   /**
      * This is the method which I would like to execute
      * around a selected method execution.
   */
   @Around("selectGetAge()")
   public void aroundAdvice(ProceedingJoinPoint proceedingJoinPoint) throws Throwable{
      System.out.println("Around advice");
      Object[] args = proceedingJoinPoint.getArgs();
      if(args.length>0){
         System.out.print("Arguments passed: " );
         for (int i = 0; i < args.length; i++) {
            System.out.print("arg "+(i+1)+": "+args[i]);
         }
      }
      Object result = proceedingJoinPoint.proceed(args);
      System.out.println("Returning " + result);
   }
}
以下是 Student.java 檔案的內容。
package com.tutorialspoint;

public class Student {
   private Integer age;
   private String name;

   public void setAge(Integer age) {
      this.age = age;
   }
   public Integer getAge() {
      System.out.println("Age : " + age );
      return age;
   }
   public void setName(String name) {
      this.name = name;
   }
   public String getName() {
      System.out.println("Name : " + name );
      return name;
   }
   public void printThrowException(){
      System.out.println("Exception raised");
      throw new IllegalArgumentException();
   }
}
以下是 MainApp.java 檔案的內容。
package com.tutorialspoint;

import org.springframework.context.ApplicationContext;
import org.springframework.context.support.ClassPathXmlApplicationContext;

public class MainApp {
   public static void main(String[] args) {
      ApplicationContext context = new ClassPathXmlApplicationContext("Beans.xml");

      Student student = (Student) context.getBean("student");
      student.getAge();
   }
}
以下是配置檔案 Beans.xml。
<?xml version = "1.0" encoding = "UTF-8"?>
<beans xmlns = "http://www.springframework.org/schema/beans"
   xmlns:xsi = "http://www.w3.org/2001/XMLSchema-instance"
   xmlns:aop = "http://www.springframework.org/schema/aop"
   xsi:schemaLocation = "http://www.springframework.org/schema/beans
   http://www.springframework.org/schema/beans/spring-beans-3.0.xsd
   http://www.springframework.org/schema/aop
   http://www.springframework.org/schema/aop/spring-aop-3.0.xsd ">

   <aop:aspectj-autoproxy/>

   <!-- Definition for student bean -->
   <bean id = "student" class = "com.tutorialspoint.Student">
      <property name = "name"  value = "Zara" />
      <property name = "age"  value = "11"/>
   </bean>

   <!-- Definition for logging aspect -->
   <bean id = "logging" class = "com.tutorialspoint.Logging"/>

</beans>
執行專案
建立原始檔和配置檔案後,執行您的應用程式。右鍵點選應用程式中的 MainApp.java 並使用 以 Java 應用程式執行 命令。如果應用程式一切正常,它將列印以下訊息。
Around advice
Age : 11
Returning 11
Spring AOP - 代理
到目前為止,我們已經使用<aop:config>或< aop:aspectj-autoproxy>聲明瞭Aspect。我們也可以以程式設計方式建立代理,並使用代理物件以程式設計方式呼叫Aspect。
語法
//Create object to be proxied
Student student = new Student();

//Create the Proxy Factory
AspectJProxyFactory proxyFactory = new AspectJProxyFactory(student);

//Add Aspect class to the factory
proxyFactory.addAspect(Logging.class);

//Get the proxy object
Student proxyStudent = proxyFactory.getProxy();

//Invoke the proxied method.
proxyStudent.getAge();
其中,
AspectJProxyFactory - 用於建立代理物件的工廠類。
Logging.class - 包含Advice的Aspect的類。
Student - 要被Advice的業務類。
為了理解上面提到的與代理相關的概念,讓我們編寫一個實現代理的示例。為了編寫包含少量Advice的示例,讓我們準備一個可用的Eclipse IDE,並使用以下步驟建立一個Spring應用程式。
| 步驟 | 描述 |
|---|---|
| 1 | 更新在 Spring AOP - 應用程式 章下建立的專案 Student。 |
| 2 | 更新 Bean 配置並執行應用程式,如下所述。 |
以下是 Logging.java 檔案的內容。這實際上是切面模組的一個示例,它定義了要在各個點呼叫的方法。
package com.tutorialspoint;

import org.aspectj.lang.annotation.Aspect;
import org.aspectj.lang.annotation.PointCut;
import org.aspectj.lang.annotation.Before;

@Aspect
public class Logging {
   /** Following is the definition for a PointCut to select
      *  all the methods available. So advice will be called
      *  for all the methods.
   */
   @PointCut("execution(* com.tutorialspoint.Student.getAge(..))")
   private void selectGetAge(){}

   /**
      * This is the method which I would like to execute
      * before a selected method execution.
   */
   @Before("selectGetAge()")
   public void beforeAdvice(){
      System.out.println("Going to setup student profile.");
   }
}
以下是 Student.java 檔案的內容。
package com.tutorialspoint;

public class Student {
   private Integer age;
   public void setAge(Integer age) {
      this.age = age;
   }
   public Integer getAge() {
      System.out.println("Age : " + age );
      return age;
   }
}
以下是 MainApp.java 檔案的內容。
package com.tutorialspoint;

import org.springframework.context.ApplicationContext;
import org.springframework.context.support.ClassPathXmlApplicationContext;
import org.springframework.aop.aspectj.annotation.AspectJProxyFactory;

public class MainApp {
   public static void main(String[] args) {
      ApplicationContext context = new ClassPathXmlApplicationContext("Beans.xml");

      Student student = (Student) context.getBean("student");

      //Create the Proxy Factory
      AspectJProxyFactory proxyFactory = new AspectJProxyFactory(student);

      //Add Aspect class to the factory
      proxyFactory.addAspect(Logging.class);

      //Get the proxy object
      Student proxyStudent = proxyFactory.getProxy();

      //Invoke the proxied method.
      proxyStudent.getAge();
   }
}
以下是配置檔案 Beans.xml。
<?xml version = "1.0" encoding = "UTF-8"?>
<beans xmlns = "http://www.springframework.org/schema/beans"
   xmlns:xsi = "http://www.w3.org/2001/XMLSchema-instance"
   xmlns:aop = "http://www.springframework.org/schema/aop"
   xsi:schemaLocation = "http://www.springframework.org/schema/beans
   http://www.springframework.org/schema/beans/spring-beans-3.0.xsd
   http://www.springframework.org/schema/aop
   http://www.springframework.org/schema/aop/spring-aop-3.0.xsd ">

   <!-- Definition for student bean -->
   <bean id = "student" class = "com.tutorialspoint.Student">
      <property name = "age"  value = "11"/>
   </bean>

   <!-- Definition for logging aspect -->
   <bean id = "logging" class = "com.tutorialspoint.Logging"/>
</beans>
執行專案
建立原始檔和配置檔案後,執行您的應用程式。右鍵點選應用程式中的 MainApp.java 並使用 以 Java 應用程式執行 命令。如果應用程式一切正常,它將列印以下訊息。
Going to setup student profile.
Age : 11
Spring AOP - 自定義註解
根據Pointcut表示式,它們可能會應用於某些不打算應用Advice的其他Bean。例如,考慮以下表達式。
execution(* com.tutorialspoint.*.getAge(..))
添加了一個新的Spring Bean,它具有getAge()方法,Advice將開始應用於它,儘管這可能並非預期。為了實現這一點,我們可以建立一個自定義註解,並將其註釋到要應用Advice的方法上。
@Before("@annotation(com.tutorialspoint.Loggable)")
為了理解上面提到的與@Before Advice相關的概念,讓我們編寫一個實現@Before Advice的示例。為了編寫包含少量Advice的示例,讓我們準備一個可用的Eclipse IDE,並使用以下步驟建立一個Spring應用程式。
| 步驟 | 描述 |
|---|---|
| 1 | 更新在 Spring AOP - 應用程式 章下建立的專案 Student。 |
| 2 | 更新 Bean 配置並執行應用程式,如下所述。 |
以下是 Logging.java 檔案的內容。這實際上是切面模組的一個示例,它定義了要在各個點呼叫的方法。
package com.tutorialspoint;

import org.aspectj.lang.annotation.Aspect;
import org.aspectj.lang.annotation.Before;

@Aspect
public class Logging {
   /**
      * This is the method which I would like to execute
      * before a selected method execution.
   */
   @Before("@annotation(com.tutorialspoint.Loggable)")
   public void beforeAdvice(){
      System.out.println("Going to setup student profile.");
   }
}
以下是Loggable.java檔案的內容:
package com.tutorialspoint;
public @interface Loggable {
}
以下是 Student.java 檔案的內容。
package com.tutorialspoint;

public class Student {
   private Integer age;
   private String name;
   public void setAge(Integer age) {
      this.age = age;
   }
   public Integer getAge() {
      System.out.println("Age : " + age );
      return age;
   }
   public void setName(String name) {
      this.name = name;
   }
   @Loggable
   public String getName() {
      System.out.println("Name : " + name );
      return name;
   }
   public void printThrowException(){
      System.out.println("Exception raised");
      throw new IllegalArgumentException();
   }
}
以下是 MainApp.java 檔案的內容。
package com.tutorialspoint;

import org.springframework.context.ApplicationContext;
import org.springframework.context.support.ClassPathXmlApplicationContext;

public class MainApp {
   public static void main(String[] args) {
      ApplicationContext context = new ClassPathXmlApplicationContext("Beans.xml");

      Student student = (Student) context.getBean("student");
      student.getName();
      student.getAge();
   }
}
以下是配置檔案 Beans.xml。
<?xml version = "1.0" encoding = "UTF-8"?>
<beans xmlns = "http://www.springframework.org/schema/beans"
   xmlns:xsi = "http://www.w3.org/2001/XMLSchema-instance"
   xmlns:aop = "http://www.springframework.org/schema/aop"
   xsi:schemaLocation = "http://www.springframework.org/schema/beans
   http://www.springframework.org/schema/beans/spring-beans-3.0.xsd
   http://www.springframework.org/schema/aop
   http://www.springframework.org/schema/aop/spring-aop-3.0.xsd ">

   <aop:aspectj-autoproxy/>

   <!-- Definition for student bean -->
   <bean id = "student" class = "com.tutorialspoint.Student">
      <property name = "name"  value = "Zara" />
      <property name = "age"  value = "11"/>
   </bean>

   <!-- Definition for logging aspect -->
   <bean id = "logging" class = "com.tutorialspoint.Logging"/>
</beans>
執行專案
建立原始檔和配置檔案後,執行您的應用程式。右鍵點選應用程式中的 MainApp.java 並使用 以 Java 應用程式執行 命令。如果應用程式一切正常,它將列印以下訊息。
Going to setup student profile.
Name : Zara
Age : 11