- NativeScript 教程
- NativeScript - 首頁
- NativeScript - 簡介
- NativeScript - 安裝
- NativeScript - 架構
- NativeScript - Angular 應用
- NativeScript - 模板
- NativeScript - 小部件
- NativeScript - 佈局容器
- NativeScript - 導航
- NativeScript - 事件處理
- NativeScript - 資料繫結
- NativeScript - 模組
- NativeScript - 外掛
- NativeScript - 使用 JavaScript 的原生 API
- NativeScript - 在 Android 上建立應用
- NativeScript - 在 iOS 上建立應用
- NativeScript - 測試
- NativeScript 有用資源
- NativeScript 快速指南
- NativeScript - 有用資源
- NativeScript - 討論
NativeScript 快速指南
NativeScript - 簡介
通常情況下,開發移動應用程式是一項複雜且具有挑戰性的任務。有很多框架可用於開發移動應用程式。Android 提供基於 Java 語言的原生框架,而 iOS 提供基於 Objective-C/Swift 語言的原生框架。但是,要開發支援兩種作業系統的應用程式,我們需要使用兩種不同的框架用兩種不同的語言進行編碼。
為了克服這種複雜性,移動框架支援此功能。使用跨平臺或混合框架的主要原因是更容易維護單個程式碼庫。一些流行的框架包括 NativeScript、Apache Cordova、Xamarin 等。
JavaScript 框架概述
JavaScript 是一種多正規化語言。它支援函數語言程式設計、面向物件程式設計和基於原型的程式設計。JavaScript 最初用於客戶端。如今,JavaScript 也被用作伺服器端程式語言。JavaScript 框架是一種使使用 JavaScript 更輕鬆、更流暢的工具。
使用此框架,程式設計師可以輕鬆地將應用程式編碼為裝置響應式。響應式是此框架變得非常流行的原因之一。
讓我們看看一些流行的 JS 框架:
Angular
Angular 是一個最強大、高效且開源的 JavaScript 框架之一。我們可以構建移動和桌面應用程式。谷歌使用此框架。它用於開發單頁應用程式 (SPA)。
Vue.js
VueJS 是一個漸進式 JavaScript 框架,用於開發互動式 Web 介面。它是用於簡化 Web 開發的著名框架之一。它可以輕鬆地整合到大型專案中以進行前端開發,沒有任何問題。其雙重整合模式是建立高階 SPA 或單頁應用程式最吸引人的功能之一。
React
ReactJS 是一個用於構建可重用 UI 元件的 JavaScript 庫。它由 Facebook 開發。它目前是最流行的 JavaScript 庫之一,擁有強大的基礎和龐大的社群。
Node.js
Node.js 是一個開源的、跨平臺的執行時環境,用於開發伺服器端和網路應用程式。它基於 Google Chrome 的 JavaScript 引擎 (V8 引擎)。Node.js 應用程式是用 JavaScript 編寫的,可以在 OS X、Microsoft Windows 和 Linux 上執行。它提供豐富的各種 JavaScript 模組庫,簡化了 Web 應用程式的開發。
NativeScript 概述
NativeScript 是一個開源框架,用於建立原生 iOS 和 Android 移動應用程式。它是一個 JIT 編譯框架。NativeScript 程式碼執行在 JS 虛擬機器上。它對 Android 和 iOS 平臺都使用 V8 引擎執行時。NativeScript 使用 XML、JS 和 CSS 進行開發。它有一個名為 PlayGround 的 WebIDE。此 PlayGround 支援易於使用的介面、易於管理的專案、熱過載和裝置上的除錯。
NativeScript 允許開發人員快速有效地建立原生跨平臺應用程式,並節省開發、測試和培訓成本。因此,原生應用程式在未來幾年內將繼續豐富強大,以使其更好用。
功能
NativeScript 擁有充滿活力的社群支援。以下是 NativeScript 的一些主要功能:
可擴充套件的
熱模組替換
易於設定
我們可以構建豐富的動畫、圖形、圖表和列表
開發人員可以使用任何檢視作為應用程式的根檢視
惰性編碼
好處
NativeScript 幫助小型或大型公司構建跨平臺移動應用程式。一些主要好處包括:
開發人員可以重用現有的工具和程式碼
易於修改、故障排除和更新新版本
開發體驗良好,因此我們不必花費時間學習新工具
來自 JavaScript 的平臺特定 API,無需學習 Cordova 外掛
輕鬆使用不同的登入提供商進行身份驗證
NativeScript - 安裝
本節說明如何在您的機器上安裝 NativeScript。
先決條件
在進行安裝之前,我們需要以下先決條件:
Node.js
Android
iOS
驗證 Node.js
Node.js 是一個基於 Google Chrome 內部 JavaScript 引擎 v8 構建的 JavaScript 執行時引擎。NativeScript 廣泛使用 Node.js 來執行各種目的,例如建立啟動模板應用程式、編譯應用程式等。您的機器上必須安裝 Node.js。
希望您已在機器上安裝了 Node.js。如果尚未安裝,請訪問連結 https://nodejs.com.tw/ 下載最新的 LTS 包並安裝它。
要在終端上驗證 Node.js 是否已正確安裝,請輸入以下命令:
node --version
您應該能夠看到版本號。截至目前,當前穩定的“LTS”版本為 node 12.14.0。
CLI 設定
NativeScript CLI 是一個基於終端/命令列的應用程式,允許您建立和開發 NativeScript 應用程式。Node.js 包管理器 npm 用於在您的機器上安裝 NativeScript CLI。
使用以下命令安裝 NativeScript CLI:
npm install -g nativescript
執行此命令後,我們應該看到以下輸出:

setupcli
我們已在系統中安裝了最新的 NativeScript CLI,tns。現在,在您的終端中輸入以下命令:
tns
這將列出快速入門指南。您應該看到以下輸出:

cli
即使沒有任何其他設定,我們也可以使用 tns 來建立和開發應用程式。但是,我們無法將應用程式部署到真實裝置。相反,我們可以使用 NativeScript PlayGround iOS / Android 應用程式執行應用程式。我們將在接下來的章節中檢查它。
安裝 NativeScript Playground 應用
轉到您的 iOS App Store 或 Google Play 商店並搜尋 NativeScript Playground 應用。應用程式出現在搜尋結果中後,點選安裝選項。它將把 NativeScript Playground 應用安裝到您的裝置上。
NativeScript Playground 應用程式將有助於在 Android 或 iOS 裝置上測試您的應用程式,而無需將應用程式部署到真實裝置或模擬器。這將減少開發應用程式的時間,並提供一種輕鬆啟動移動應用程式開發的方法。
Android 和 iOS 設定
在本節中,讓我們學習如何設定系統以在模擬器或真實裝置上構建和執行 iOS 和 Android 應用程式。
步驟 1:Windows 依賴項
在 Windows 命令提示符中以管理員身份執行以下命令:
@powershell -NoProfile -ExecutionPolicy Bypass -Command "iex
((new-object net.webclient).DownloadString('https://www.nativescript.org/setup/win'))"
此命令之後,指令碼將下載、安裝依賴項並進行配置。
步驟 2:macOS 依賴項
要在 macOS 上安裝,您必須確保已安裝 Xcode。Xcode 對 NativeScript 來說是必需的。如果未安裝 Xcode,請訪問以下連結 https://developer.apple.com/xcode/ 下載並安裝它。
現在在您的終端中執行以下命令:
sudo ruby -e "$(curl -fsSL https://www.nativescript.org/setup/mac)"
執行上述命令後,指令碼將安裝 iOS 和 Android 開發的依賴項。完成後,關閉並重新啟動終端。
步驟 3:Android 依賴項
希望您已配置以下先決條件:
JDK 8 或更高版本
Android SDK
Android 支援庫
Google 儲存庫
Android SDK Build-tools 28.0.3 或更高版本
Android Studio
如果未配置上述先決條件,請訪問以下連結 https://developer.android.com/studio/ 進行安裝。最後,在環境變數中新增 JAVA_HOME 和 ANDROID_HOME。
步驟 4:驗證依賴項
現在一切就緒。您可以使用以下命令驗證依賴項:
tns doctor
這將驗證所有依賴項並總結如下結果:
√ Getting environment information
No issues were detected.
√ Your ANDROID_HOME environment variable is set and points to correct directory.
√ Your adb from the Android SDK is correctly installed.
√ The Android SDK is installed.
√ A compatible Android SDK for compilation is found.
√ Javac is installed and is configured properly.
√ The Java Development Kit (JDK) is installed and is configured properly.
√ Local builds for iOS can be executed only on a macOS system.
   To build for iOS on a different operating system, you can use the
   NativeScript cloud infrastructure.
√ Getting NativeScript components versions information...
√ Component nativescript has 6.3.0 version and is up to date.
√ Component tns-core-modules has 6.3.2 version and is up to date.
√ Component tns-android has 6.3.1 version and is up to date.
√ Component tns-ios has 6.3.0 version and is up to date.
如果您發現任何問題,請在繼續開發應用程式之前更正這些問題。
NativeScript - 架構
NativeScript 是一個建立移動應用程式的高階框架。它隱藏了建立移動應用程式的複雜性,並公開了一個相當簡單的 API 來建立高度最佳化和高階的移動應用程式。NativeScript 使即使是入門級開發人員也能輕鬆地在 Android 和 iOS 上建立移動應用程式。
讓我們在本節中瞭解 NativeScript 框架的架構。
簡介
NativeScript 框架的核心概念是使開發人員能夠建立混合風格的移動應用程式。混合應用程式使用平臺特定的瀏覽器 API 在普通移動應用程式內託管 Web 應用程式,並透過 JavaScript API 嚮應用程式提供系統訪問。
NativeScript 大量投資於 **JavaScript 語言**,為開發人員提供高效的框架。由於 **JavaScript** 是客戶端程式設計(Web 開發)的事實上的標準,並且每個開發人員都非常瞭解 JavaScript 語言,因此它有助於開發人員輕鬆地進入 NativeScript 框架。在底層,NativeScript 透過一組稱為 **原生外掛** 的 JavaScript 外掛公開原生 API。
NativeScript 建立在 原生外掛 的基礎之上,並提供許多高階且易於使用的 JavaScript 模組。每個模組都執行特定功能,例如訪問攝像頭、設計螢幕等。所有這些模組都可以多種方式組合以構建複雜的移動應用程式。
下圖顯示了 NativeScript 框架的高階概述:

**NativeScript 應用程式** - NativeScript 框架允許開發人員使用 Angular 風格的應用程式或 Vue 風格的應用程式。
**JavaScript 模組** - NativeScript 框架提供了一套豐富的 JavaScript 模組,清晰地分為 UI 模組、應用程式模組、核心模組等。應用程式可以隨時訪問所有模組來編寫任何級別的複雜應用程式。
**JavaScript 外掛** - NativeScript 框架提供大量 JavaScript 外掛來訪問平臺相關功能。模組使用 JavaScript 外掛來提供平臺特定的功能。
**原生外掛** - 原生外掛是用平臺特定的語言編寫的,用於包裝系統功能,然後 JavaScript 外掛將進一步使用這些功能。
**平臺 API** - 平臺供應商提供的 API。
簡而言之,NativeScript應用程式使用模組編寫和組織。模組是用純JavaScript編寫的,並且模組透過外掛訪問平臺相關的功能(在需要時),最終,外掛橋接平臺API和JavaScript API。
NativeScript應用程式的工作流程
正如我們之前瞭解到的,NativeScript應用程式由模組組成。每個模組都啟用一個特定的功能。引導NativeScript應用程式的兩個重要模組類別如下:
根模組
頁面模組
根模組和頁面模組可以歸類為應用程式模組。應用程式模組是NativeScript應用程式的入口點。它引導一個頁面,使開發人員能夠建立頁面的使用者介面,並最終允許執行頁面的業務邏輯。應用程式模組包含以下三個專案:
使用XML編碼的使用者介面設計(例如page.xml/page.component.html)
使用CSS編碼的樣式(例如page.css/page.component.css)
模組在JavaScript中的實際業務邏輯(例如page.js/page.component.ts)
NativeScript提供了許多UI元件(在UI模組下)來設計應用程式頁面。在基於Angular的應用程式中,UI元件可以用XML格式或HTML格式表示。應用程式模組使用UI元件設計頁面並將設計儲存在單獨的XML檔案中,例如 *page.xml/page.component.html*。可以使用標準CSS設定設計樣式。
應用程式模組將設計的樣式儲存在單獨的CSS檔案中,例如 *page.css/page.component.css*。可以使用JavaScript/TypeScript完成頁面的功能,它可以完全訪問設計以及平臺功能。應用程式模組使用單獨的檔案,例如page.js/page.component.ts來編寫頁面的實際功能。
根模組
NativeScript透過UI容器管理使用者介面和使用者互動。每個UI容器都應該有一個*根模組*,UI容器透過它來管理UI。NativeScript應用程式有兩種型別的UI容器:
應用程式容器 - 每個NativeScript應用程式都應該有一個應用程式容器,它將使用application.run()方法設定。它初始化應用程式的UI。
模型檢視容器 - NativeScript使用模型檢視容器管理模式對話方塊。NativeScript應用程式可以擁有任意數量的模型檢視容器。
每個根模組都應該只有一個UI元件作為其內容。UI元件又可以擁有其他UI元件作為其子元件。NativeScript提供了許多UI元件,例如TabView、ScrollView等,具有子元件功能。我們可以將它們用作根UI元件。一個例外是*Frame*,它沒有子元件選項,但可以用作根元件。Frame提供載入頁面模組和導航到其他*頁面模組*的選項。
頁面模組
在NativeScript中,每個頁面基本上都是一個*頁面模組*。頁面模組使用NativeScript提供的豐富的UI元件進行設計。頁面模組透過*Frame*元件(使用其defaultPage屬性或使用navigate()方法)載入到應用程式中,而*Frame*元件又使用*根模組*載入,*根模組*又在應用程式啟動時使用application.run()載入。
應用程式的工作流程可以用下圖表示:

下文將詳細解釋上圖:
NativeScript應用程式啟動並呼叫application.run()方法。
application.run()載入一個*根模組*。
使用以下任何一個UI元件設計*根模組*:
Frame
TabView
SideDrawer
任何佈局檢視
Frame元件載入指定的頁面(頁面模組)並進行渲染。其他UI元件將根據*根模組*中的指定進行渲染。其他UI元件還可以選擇將*頁面模組*作為其主要內容載入。
基於Angular的NativeScript應用程式的工作流程
正如我們之前瞭解到的,NativeScript框架提供了多種方法來滿足不同類別的開發人員。NativeScript支援的方法如下:
NativeScript核心 - NativeScript框架的基本或核心概念
Angular + NativeScript - 基於Angular的方法
Vuejs + NativeScript - 基於Vue.js的方法
讓我們學習如何將Angular框架整合到NativeScript框架中。
步驟1
NativeScript提供了一個物件(platformNativeScriptDynamic)來引導Angular應用程式。platformNativeScriptDynamic有一個方法bootstrapModule,用於啟動應用程式。
使用Angular框架引導應用程式的語法如下:
import { platformNativeScriptDynamic } from "nativescript-angular/platform";
import { AppModule } from "./app/app.module";
platformNativeScriptDynamic().bootstrapModule(AppModule);
這裡:
AppModule 是我們的根模組。
步驟2
應用程式模組的一個簡單實現(如下所示程式碼)。
import { NgModule } from "@angular/core";
import { NativeScriptModule } from "nativescript-angular/nativescript.module";
import { AppRoutingModule } from "./app-routing.module";
import { AppComponent } from "./app.component";
@NgModule(
   {
      bootstrap: [
         AppComponent
      ], imports: [
         NativeScriptModule,
         AppRoutingModule
      ], declarations: [
         AppComponent
      ]
   }
) export class AppModule { }
這裡:
AppModule 透過載入AppComponent元件來啟動應用程式。Angular元件類似於頁面,用於設計和程式設計邏輯。
AppComponent (app.component.ts) 的簡單實現及其演示邏輯 (app.component.css) 如下:
app.component.ts
import { Component } from "@angular/core";
@Component(
   {
      selector: "ns-app",
      templateUrl: "app.component.html"
   }
)
export class AppComponent { }
這裡:
templateUrl 指的是元件的設計。
app.component.html
<page-router-outlet></page-router-outlet>
這裡:
page-router-outlet 是Angular應用程式附加的位置。
總而言之,Angular框架由類似於NativeScript框架的模組組成,但略有不同。Angular中的每個模組都將有一個Angular元件和一個路由設定檔案(page-routing.mocdule.ts)。路由按模組設定,負責導航。Angular元件類似於NativeScript核心中的頁面。
每個元件都將有一個UI設計(page.component.html)、一個樣式表(page.component.css)和一個JavaScript/TypeScript程式碼檔案(page.component.ts)。
NativeScript - Angular 應用
讓我們建立一個簡單的基本應用程式來了解NativeScript應用程式的工作流程。
建立應用程式
讓我們學習如何使用NativeScript CLI,tns建立簡單的應用程式。tns提供了一個create命令,用於在NativeScript中建立一個新專案。
建立新應用程式的基本語法如下:
tns create <projectname> --template <template_name>
其中:
Projectname 是專案名稱。
template_name 是專案模板。NativeScript提供了許多啟動模板來建立不同型別的應用程式。使用基於Angular的模板。
讓我們建立一個名為NativeScriptSamples的新目錄來處理我們的新應用程式。現在,開啟一個新的終端,然後移動到我們的目錄並鍵入以下命令:
tns create BlankNgApp --template tns-template-blank-ng
其中,tns-template-blank-ng 指的是基於AngularJS的空白移動應用程式。
輸出
.....
.....
.....
Project BlankNgApp was successfully created.
Now you can navigate to your project with $ cd BlankNgApp
After that you can preview it on device by executing $ tns preview
現在,我們的第一個移動應用程式 *BlankNgApp* 已建立。
應用程式的結構
在本章中,讓我們透過分析我們的第一個應用程式BlankNgApp來了解NativeScript應用程式的結構。NativeScript應用程式被組織成多個部分,它們如下:
配置部分
Node模組
Android原始碼
iOS原始碼
應用程式原始碼
應用程式的總體結構如下:
│ angular.json
│ LICENSE
│ nsconfig.json
│ package-lock.json
│ package.json
│ tsconfig.json
│ tsconfig.tns.json
│ tsfmt.json
│ webpack.config.js
│
├───App_Resources
│  ├───Android
│  │
│  └───iOS
│
├───hooks
│
├───node_modules
|
└───src
   │ app.css
   │ main.ts
   │ package.json
   │
   └───app
      │  app-routing.module.ts
      │  app.component.html
      │  app.component.ts
      │  app.module.ts
      │
      └───home
         home-routing.module.ts
         home.component.html
         home.component.ts
         home.module.ts
讓我們瞭解應用程式的每個部分以及它如何幫助我們建立應用程式。
配置部分
應用程式根目錄中的所有檔案都是配置檔案。配置檔案的格式為JSON格式,這有助於開發人員輕鬆理解配置詳細資訊。NativeScript應用程式依賴於這些檔案來獲取所有可用的配置資訊。讓我們在本節中瀏覽所有配置檔案。
package.json
package.json檔案設定應用程式的標識(id)以及應用程式正常工作所依賴的所有模組。以下是我們的package.json:
{
   "nativescript": {
      "id": "org.nativescript.BlankNgApp",
      "tns-android": {
         "version": "6.3.1"
      }, "tns-ios": {
         "version": "6.3.0"
      }
   }, "description": "NativeScript Application",
   "license": "SEE LICENSE IN <your-license-filename>",
   "repository": "<fill-your-repository-here>",
   "dependencies": {
      "@angular/animations": "~8.2.0",
      "@angular/common": "~8.2.0",
      "@angular/compiler": "~8.2.0",
      "@angular/core": "~8.2.0",
      "@angular/forms": "~8.2.0",
      "@angular/platform-browser": "~8.2.0",
      "@angular/platform-browser-dynamic": "~8.2.0",
      "@angular/router": "~8.2.0",
      "@nativescript/theme": "~2.2.1",
      "nativescript-angular": "~8.20.3",
      "reflect-metadata": "~0.1.12",
      "rxjs": "^6.4.0",
      "tns-core-modules": "~6.3.0",
      "zone.js": "~0.9.1"
   },
   "devDependencies": {
      "@angular/compiler-cli": "~8.2.0",
      "@ngtools/webpack": "~8.2.0",
      "nativescript-dev-webpack": "~1.4.0",
      "typescript": "~3.5.3"
   },
   "gitHead": "fa98f785df3fba482e5e2a0c76f4be1fa6dc7a14",
   "readme": "NativeScript Application"
}
這裡:
應用程式的標識 (nativescript/id) - 將應用程式的id設定為org.nativescript.BlankNgApp。此id用於將我們的應用程式釋出到Play商店或iTunes。此id將是我們的應用程式識別符號或包名稱。
依賴項 (dependencies) - 指定我們所有依賴的節點模組。由於預設的NativeScript實現依賴於Angular框架,因此包含Angular模組。
開發依賴項 - 指定應用程式依賴的所有工具。由於我們使用TypeScript開發應用程式,因此它包含TypeScript作為其中一個依賴模組。
angular.json - Angular框架配置資訊。
nsconfig.json - NativeScript框架配置資訊。
tsconfig.json, tsfmt.json & tsconfig.tns.json - TypeScript語言配置資訊
webpack.config.js - 使用JavaScript編寫的Webpack配置。
Node模組
由於NativeScript專案是基於節點的專案,因此它將所有依賴項儲存在node_modules資料夾中。我們可以使用npm (npm install) 或tns將所有應用程式依賴項下載並安裝到node_moduels中。
Android原始碼
NativeScript自動生成Android原始碼並將其放置在App_Resources\Android資料夾中。它將用於使用*Android SDK*建立Android應用程式
iOS原始碼
NativeScript自動生成iOS原始碼並將其放置在App_Resources\iOS資料夾中。它將用於使用iOS SDK和XCode建立iOS應用程式
應用程式原始碼
實際的應用程式程式碼放在src資料夾中。我們的應用程式在src資料夾中具有以下檔案。
└───src
   │ app.css
   │ main.ts
   │ package.json
   │
   └───app
   │ app-routing.module.ts
   │ app.component.html
   │ app.component.ts
   │ app.module.ts
   │
   └───home
         home-routing.module.ts
         home.component.html
         home.component.ts
         home.module.ts
讓我們瞭解所有檔案的作用以及它們在本節中的組織方式:
步驟1
main.ts - 應用程式的入口點。
// this import should be first in order to load some required settings (like globals and reflect-metadata)
import { platformNativeScriptDynamic } from "nativescript-angular/platform";
import { AppModule } from "./app/app.module";
platformNativeScriptDynamic().bootstrapModule(AppModule);
在這裡,我們將AppModule設定為應用程式的引導模組。
步驟2
app.css - 應用程式的主要樣式表如下所示:
@import "~@nativescript/theme/css/core.css";
@import "~@nativescript/theme/css/brown.css";
/* Place any CSS rules you want to apply on both iOS and Android here.
This is where the vast majority of your CSS code goes. */
這裡:
app.css匯入NativeScript框架的核心樣式表和棕色主題樣式表。
步驟3
app\app.module.ts - 應用程式的根模組。
import { NgModule, NO_ERRORS_SCHEMA } from "@angular/core";
import { NativeScriptModule } from "nativescript-angular/nativescript.module";
import { AppRoutingModule } from "./app-routing.module";
import { AppComponent } from "./app.component";
@NgModule(
   {
      bootstrap: [
         AppComponent
      ],
      imports: [
         NativeScriptModule,
         AppRoutingModule
      ],
      declarations: [
         AppComponent
      ], schemas: [
         NO_ERRORS_SCHEMA
      ]
   }
)
export class AppModule { }
這裡:
AppModule基於NgModule建立,並設定應用程式的元件和模組。它匯入兩個模組NativeScriptModule和AppRoutingModule以及一個元件AppComponent。它還將AppComponent設定為應用程式的根元件。
步驟4
app.component.ts - 應用程式的根元件。
import { Component } from "@angular/core";
@Component(
   {
      selector: "ns-app",
      templateUrl: "app.component.html"
   }
)
export class AppComponent { }
這裡:
AppComponent設定元件的模板和樣式表。模板使用NativeScript UI元件以純HTML設計。
步驟5
app-routing.module.ts - AppModule的路由模組
import { NgModule } from "@angular/core";
import { Routes } from "@angular/router";
import { NativeScriptRouterModule } from "nativescript-angular/router";
const routes: Routes = [
   { path: "", redirectTo: "/home", pathMatch: "full" },
   { path: "home", loadChildren: () =>
   import("~/app/home/home.module").then((m) => m.HomeModule) }
];
@NgModule(
   {
      imports: [NativeScriptRouterModule.forRoot(routes)],
      exports: [NativeScriptRouterModule]
   }
)
export class AppRoutingModule { }
這裡:
AppRoutingModule使用NativeScriptRouterModule並設定AppModule的路由。它基本上將空路徑重定向到/home,並將/home指向HomeModule。
步驟6
app\home\home.module.ts - 定義一個新的模組,HomeModule。
import { NgModule, NO_ERRORS_SCHEMA } from "@angular/core";
import { NativeScriptCommonModule } from "nativescript-angular/common";
import { HomeRoutingModule } from "./home-routing.module";
import { HomeComponent } from "./home.component";
@NgModule(
   {
      imports: [
         NativeScriptCommonModule,
         HomeRoutingModule
      ],
      declarations: [
         HomeComponent
      ],
      schemas: [
         NO_ERRORS_SCHEMA
      ]
   }
)
export class HomeModule { }
這裡:
HomeModule匯入兩個模組,HomeRoutingModule和NativeScriptCommonModule以及一個元件HomeComponent
步驟7
app\home\home.component.ts - 定義Home元件,並用作應用程式的主頁。
import { Component, OnInit } from "@angular/core";
@Component(
   {
      selector: "Home", templateUrl: "./home.component.html"
   }
)
export class HomeComponent implements OnInit {
   constructor() {
      // Use the component constructor to inject providers.
   }
   ngOnInit(): void {
      // Init your component properties here.
   }
}
這裡:
HomeComponent設定Home元件的模板和選擇器。
步驟8
app\home\home-routing.module.ts - HomeModule的路由模組,用於定義Home模組的路由。
import { NgModule } from "@angular/core";
import { Routes } from "@angular/router";
import { NativeScriptRouterModule } from "nativescript-angular/router";
import { HomeComponent } from "./home.component";
const routes: Routes = [
   { path: "", component: HomeComponent }
];
@NgModule(
   {
      imports: [NativeScriptRouterModule.forChild(routes)],
      exports: [NativeScriptRouterModule]
   }
)
export class HomeRoutingModule { }
這裡:
HomeRoutingModule將空路徑設定為HomeComponent。
步驟9
app.component.html 和 home.component.html - 它們使用 NativeScript UI 元件來設計應用程式的 UI。
執行你的應用
如果你想在不使用任何裝置的情況下執行你的應用,請鍵入以下命令:
tns preview
執行此命令後,它將生成一個二維碼,你可以掃描並連線到你的裝置。
輸出

二維碼
現在二維碼已生成,下一步連線到 PlayGround。
NativeScript PlayGround
在你的 iOS 或 Android 手機上開啟 NativeScript PlayGround 應用,然後選擇“掃描二維碼”選項。它將開啟相機。將相機對準控制檯中顯示的二維碼。這將掃描二維碼。掃描二維碼將觸發應用程式構建,然後將應用程式同步到裝置,如下所示:
Copying template files...
Platform android successfully added. v6.3.1
Preparing project...
File change detected. Starting incremental webpack compilation...
webpack is watching the files…
Hash: 1f38aaf6fcda4e082b88
Version: webpack 4.27.1
Time: 9333ms
Built at: 01/04/2020 4:22:31 PM
               Asset          Size        Chunks         Chunk Names
               0.js           8.32 KiB     0     [emitted]
          bundle.js           22.9 KiB    bundle [emitted] bundle
       package.json          112 bytes           [emitted]
         runtime.js             73 KiB   runtime [emitted] runtime
tns-java-classes.js            0 bytes  [emitted]
          vendor.js            345 KiB   vendor  [emitted] vendor
Entrypoint bundle = runtime.js vendor.js bundle.js
[../$$_lazy_route_resource lazy recursive] ../$$_lazy_route_resource lazy
namespace object 160 bytes {bundle} [built] [./app.css] 1.18 KiB {bundle} [built] [./app/app-routing.module.ts] 688 bytes {bundle} [built]
[./app/app.component.html] 62 bytes {bundle} [built]
[./app/app.component.ts] 354 bytes {bundle} [built]
[./app/app.module.ts] 3.22 KiB {bundle} [built]
[./app/home/home.module.ts] 710 bytes {0} [built]
[./main.ts] 1.84 KiB {bundle} [built]
[@angular/core] external "@angular/core" 42 bytes {bundle} [built] [nativescript-angular/nativescript.module] external "nativescript-
angular/nativescript.module" 42 bytes {bundle} [built]
[nativescript-angular/platform] external "nativescript-angular/platform" 42
bytes {bundle} [built] [tns-core-modules/application] external "tns-core-
modules/application" 42 bytes {bundle} [built]
[tns-core-modules/bundle-entry-points] external "tns-core-modules/bundle-entry-points" 42
bytes {bundle} [built]
[tns-core-modules/ui/frame] external "tns-core-
modules/ui/frame" 42 bytes {bundle} [built]
[tns-core-modules/ui/frame/activity] external "tns-core-
modules/ui/frame/activity" 42 bytes {bundle} [built]
   + 15 hidden modules Webpack compilation complete. Watching for file changes.
Webpack build done!
Project successfully prepared (android)
Start sending initial files for device Bala Honor Holly (ff5e8622-7a01-4f9c-
b02f-3dc6d4ee0e1f).
Successfully sent initial files for device Bala Honor Holly (ff5e8622-7a01-4f9c-b02f-3dc6d4ee0e1f).
LOG from device Bala Honor Holly: HMR: Hot Module Replacement Enabled. Waiting for signal.
LOG from device Bala Honor Holly: Angular is running in the development mode.
Call enableProdMode() to enable the production mode.
輸出
掃描後,你應該在你的裝置上看到你的 BlankNgApp。如下圖所示:

在裝置上執行你的應用
如果你想在你的應用程式中測試連線的裝置,你可以使用以下語法進行驗證:
'tns device <Platform> --available-devices'
之後,你可以使用以下命令執行你的應用程式:
tns run
以上命令用於在本地構建你的應用程式並安裝到 Android 或 iOS 裝置上。如果你想在 Android 模擬器上執行你的應用程式,請鍵入以下命令:
tns run android
對於 iOS 裝置,你可以使用以下命令:
tns run ios
這將在 Android/iOS 裝置上初始化應用程式。我們將在後續章節中更詳細地討論這一點。
LiveSync (即時同步)
NativeScript 提供應用程式更改與預覽應用程式的即時同步。讓我們使用你喜歡的任何編輯器(Visual Studio Code 是更好的選擇)開啟專案。讓我們在程式碼中新增一些更改,看看 LiveSync 如何檢測到這些更改。
現在開啟檔案 app.css,它將包含以下內容:
@import "~@nativescript/theme/css/core.css";
@import "~@nativescript/theme/css/blue.css";
/* Place any CSS rules you want to apply on both iOS and Android here.
This is where the vast majority of your CSS code goes. */
這裡,import 語句指定了我們應用程式的顏色方案。讓我們將藍色方案更改為棕色方案,如下所示:
@import "~@nativescript/theme/css/core.css";
@import "~@nativescript/theme/css/brown.css";
/* Place any CSS rules you want to apply on both iOS and Android here.
This is where the vast majority of your CSS code goes. */
裝置上的應用程式將重新整理,你應該看到一個棕色的 ActionBar,如下所示:
輸出
以下是 BlankNgApp 首頁 - 棕色主題。

NativeScript - 模板
NativeScript 提供了許多現成的模板,可以建立從簡單的空白但功能齊全的應用程式到複雜的基於 Tab 的應用程式。
使用模板
如前所述,可以使用 tns 命令的create 子命令建立新的應用程式。
tns create <app-name> --template <tns-template-name>
這裡:
tns-template-name 是模板的名稱。
如果你想使用 JavaScript 建立一個只有一個頁面且沒有任何自定義樣式的模板,請使用以下命令:
tns create <app-name> --template tns-template-blank
可以使用 TypeScript 建立相同的模板,如下所示:
tns create <app-name> --template tns-template-blank-ts
導航模板
導航模板用於建立中等複雜程度到複雜的應用程式。它預配置了SideDrawer 元件和多個頁面。SideDrawer 元件包含一個隱藏的檢視,用於導航 UI 或常用設定。使用以下命令建立基於導航的應用程式:
tns create <app-name> --template tns-template-drawer-navigation
Tab 導航模板
Tab 導航模板用於建立基於 Tab 的應用程式。它預配置了TabView 元件和多個頁面。使用以下命令建立基於 Tab 的應用程式:
tns create <app-name> --template tns-template-tab-navigation
主從模板
主從模板用於建立基於列表的應用程式,以及列表中每個專案的詳細資訊頁面。
tns create <app-name> --template tns-template-master-detail
自定義模板
要建立簡單的自定義模板,我們需要克隆空白模板。正如你已經知道的,NativeScript 支援 JavaScript、TypeScript、Angular 和 Vue.js 模板,因此你可以選擇任何語言並建立你自己的自定義模板。
例如,使用以下命令從 git 倉庫克隆簡單和自定義模板:
git clone https://github.com/NativeScript/template-blank-ts.git
現在,它將建立移動應用程式結構,以便你可以進行任何更改並執行你的 Android/iOS 裝置。此結構基於一系列指南。讓我們簡要了解一下這些指南。
結構
你的自定義模板必須滿足以下要求:
不要將你的程式碼放在應用程式根資料夾內。
建立一個單獨的資料夾,並在其中新增功能區域。
頁面、檢視模型和服務應放置在功能區域中。這有助於建立整潔的程式碼。
建立頁面資料夾,並將.ts、.xml、.scss/css 等檔案放在其中。
package.json
將 package.json 檔案放在應用程式模板的根資料夾中。使用以下格式為 name 屬性提供值:
{
   "name": "tns-template-blank-ts",
   displayName": "template-blank",
}
為 version 屬性賦值。定義如下:
"version": "3.2.1",
為 main 屬性賦值,指定應用程式的主要入口點。定義如下:
"main": "app.js",
為 android 屬性賦值。定義如下:
"android": {
   "v8Flags": "--expose_gc"
},
應在你的程式碼中指定 repository 屬性,如下所示:
"repository": {
   "type": "git",
   "url": "https://github.com/NativeScript/template-master-detail-ts"
},
樣式
使用以下語法在你的應用程式模板中匯入樣式和主題:
@import '~nativescript-theme-core/scss/light';
我們還可以使用以下程式碼分配自定義背景顏色:
/* Colors */
$background: #fff;
$primary: lighten(#000, 13%);
NativeScript - 小部件
NativeScript 提供大量使用者介面元件,稱為“widget”(部件)。每個部件執行一項特殊任務,並帶有一組方法。讓我們在本節中詳細瞭解 NativeScript 部件。
按鈕 (Button)
按鈕是一個用於執行點選事件操作的元件。當用戶點選按鈕時,它將執行相應的操作。定義如下:
<Button text="Click here!" tap="onTap"></Button>
讓我們在我們的 BlankNgApp 中新增按鈕,如下所示:
步驟1
開啟src\app\home\home.component.html。這是我們 home 元件的 UI 設計頁面。
步驟2
在GirdLayout 元件內新增一個按鈕。完整的程式碼如下:
<ActionBar>
   <Label text="Home"></Label>
</ActionBar>
<GridLayout>
   <button text="Click Here!"></button>
</GridLayout>
輸出
以下是按鈕的輸出:

步驟3
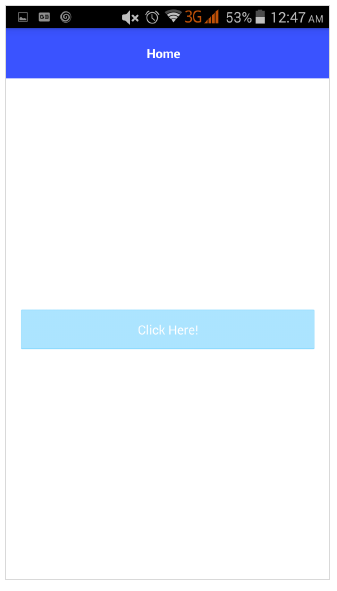
我們可以使用 CSS 來設定按鈕的樣式,如下所示:
<ActionBar>
   <Label text="Home"></Label>
</ActionBar>
<GridLayout>
   <button text="Click Here!" class="-primary"></button>
</GridLayout>
這裡,-primary 類用於表示主按鈕。
輸出
以下是ButtonPrimary 的輸出:
步驟4
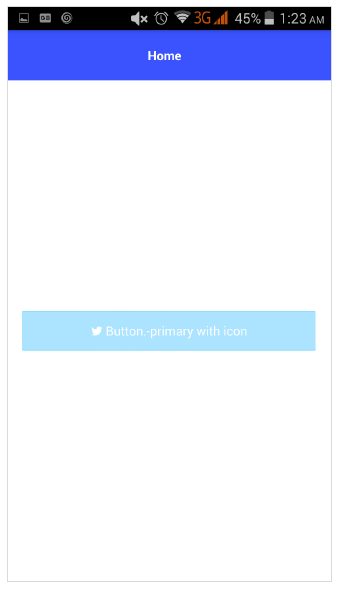
NativeScript 提供格式化選項,可在按鈕中提供自定義圖示。示例程式碼如下:
<GridLayout>
<Button class="-primary">
<FormattedString>
<Span text="" class="fa"></Span>
<Span text=" Button.-primary with icon"></Span>
</FormattedString>
</Button>
</GridLayout>
.fa {
font-family: "FontAwesome", "fontawesome-webfont";
}
這裡:
 指定圖示在字型 FontAwesome 中的位置。下載最新的 Font Awesome 字型並將 fontawesome-webfont.ttf 放入 src\fonts 資料夾。
輸出
以下是ButtonPrimary 的輸出:
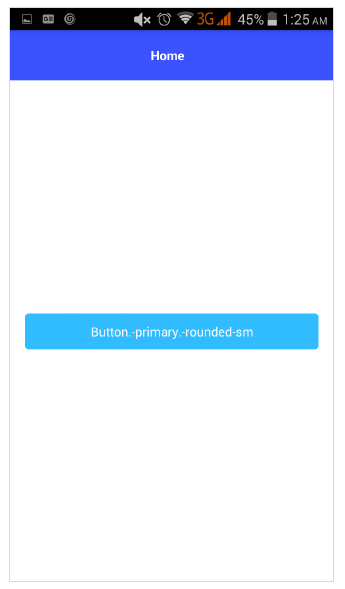
步驟5
可以使用以下語法建立圓角按鈕:
<Button text="Button.-primary.-rounded-sm" class="-primary -rounded-sm"></Button>
輸出
以下是 ButtonPrimary 的輸出:
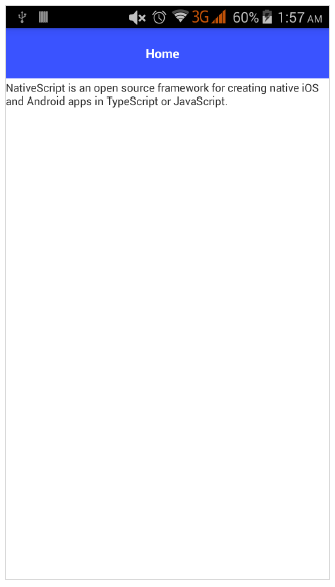
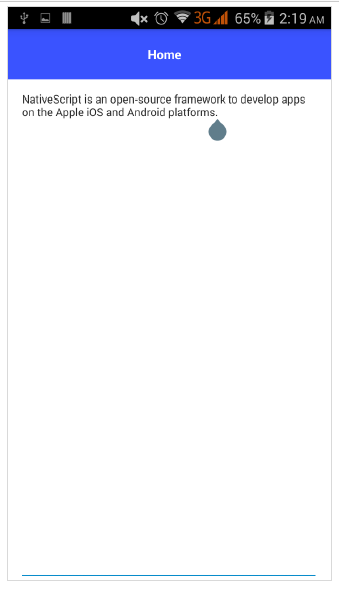
標籤 (Label)
Label 元件 用於顯示靜態文字。將主頁更改為如下所示:
<GridLayout>
   <Label text="NativeScript is an open source framework for creating native iOS and Android apps in TypeScript or JavaScript." textWrap="true">
   </Label>
</GridLayout>
這裡,textWrap 將包裝標籤的內容,如果標籤超出螢幕寬度。
輸出
以下是 Label 的輸出:
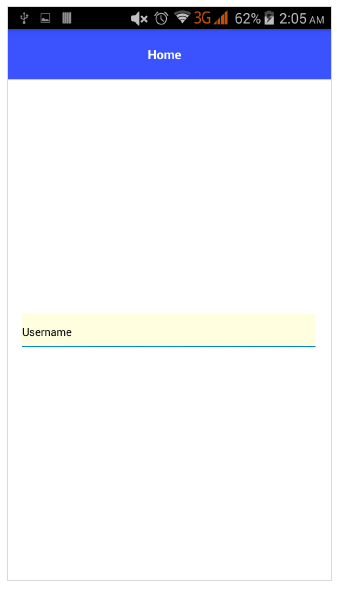
文字欄位 (TextField)
TextField 元件 用於獲取使用者資訊。讓我們將主頁更改為如下所示:
<GridLayout>
   <TextField hint="Username"
      color="lightblue"
      backgroundColor="lightyellow"
      height="75px">
   </TextField>
</GridLayout>
這裡:
color 表示文字顏色
backgroundColor 表示文字框的背景
height 表示文字框的高度
輸出
以下是文字欄位的輸出:
文字檢視 (TextView)
TextView 元件 用於獲取使用者的多行文字內容。讓我們將主頁更改為如下所示:
<GridLayout>
   <TextView loaded="onTextViewLoaded" hint="Enter text" returnKeyType="done" autocorrect="false" maxLength="100">
   </TextView>
</GridLayout>
這裡,maxLength 表示TextView 接受的最大長度。
輸出
以下是 TextView 的輸出:
搜尋欄 (SearchBar)
此元件用於搜尋任何查詢或提交任何請求。定義如下:
<StackLayout>
   <SearchBar id="bar" hint="click here to search ..."></SearchBar>
<StackLayout>

我們可以應用樣式:
<StackLayout>
   <SearchBar id="bar" hint="click here to search ..." color="green" backgroundColor="green"></SearchBar>
</StackLayout>
以下是 SearchBarStyle 的輸出:

開關 (Switch)
Switch 基於切換,在選項之間進行選擇。預設狀態為 false。定義如下:
<StackLayout>
   <Switch checked="false" loaded="onSwitchLoaded"></Switch>
</StackLayout>
以上程式的輸出如下所示:

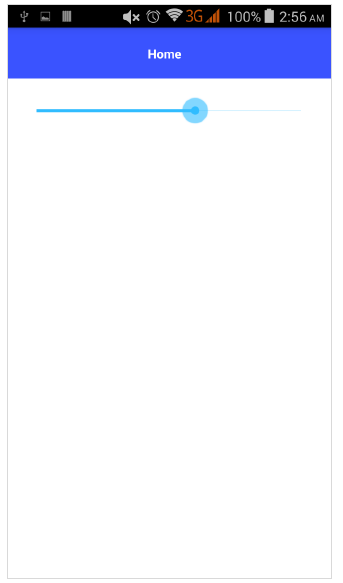
滑塊 (Slider)
滑塊是一個滑動元件,用於選擇一個數值範圍。定義如下:
<Slider value="30" minValue="0" maxValue="50" loaded="onSliderLoaded"></Slider>
以上程式的輸出如下所示:
進度條 (Progress)
Progress 部件指示操作的進度。當前進度以條形表示。定義如下:
<StackLayout verticalAlign="center" height="50">
   <Progress value="90" maxValue="100" backgroundColor="red" color="green" row="0"></Progress>
</StackLayout>
以下是 Progress 部件的輸出:

活動指示器 (ActivityIndicator)
ActivityIndicator 顯示任務的進度。定義如下:
<StackLayout verticalAlign="center" height="50">
   <ActivityIndicator busy="true" color="red" width="50"
   height="50"></ActivityIndicator>
</StackLayout>
以下是 ActivityIndicator 的輸出:

影像 (Image)
Image 部件用於顯示影像。可以使用 'ImageSource' url 載入它。定義如下:
<StackLayout class="m-15" backgroundColor="lightgray">
   <Image src="~/images/logo.png" stretch="aspectFill"></Image>
</StackLayout>
Image 部件的輸出如下所示:

網頁檢視 (WebView)
WebView 顯示網頁。可以使用 URL 載入網頁。定義如下:
<WebView row="1" loaded="onWebViewLoaded" id="myWebView" src="http://www.google.com"></WebView>
以上程式碼的輸出如下所示:

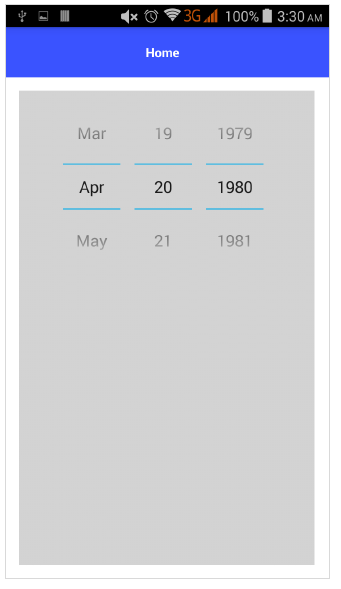
日期選擇器 (DatePicker)
DatePicker 元件用於選擇日期。定義如下:
<StackLayout class="m-15" backgroundColor="lightgray">
   <DatePicker year="1980" month="4" day="20" verticalAlignment="center"></DatePicker>
</StackLayout>
DatePicker 元件的輸出如下所示:
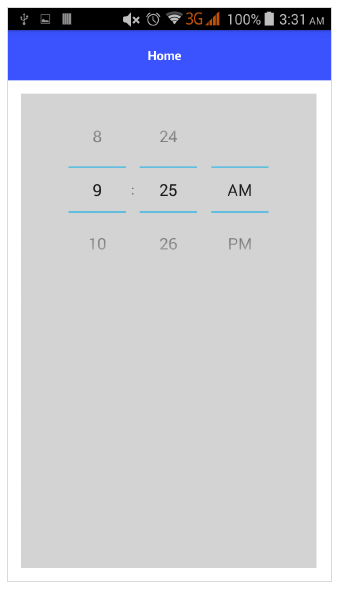
時間選擇器 (TimePicker)
TimePicker 元件用於選擇時間。定義如下:
<StackLayout class="m-15" backgroundColor="lightgray">
<TimePicker hour="9"
   minute="25"
   maxHour="23"
   maxMinute="59"
   minuteInterval="5">
</TimePicker>
</StackLayout>
以下是 TimePicker 元件的輸出:
NativeScript - 佈局容器
NativeScript 提供一系列容器元件,其唯一目的是佈局 UI 部件元件。佈局容器充當父元件,可以擁有一個或多個子元件。佈局容器的全部子元件可以根據其父佈局容器提供的方法進行排列。
NativeScript 支援六種佈局容器,它們如下:
絕對佈局容器
停靠佈局容器
網格佈局容器
堆疊佈局容器
換行佈局容器
FlexBox 佈局容器
讓我們在本節中詳細瞭解所有佈局容器的概念。
絕對佈局 (Absolute Layout)
AbsoluteLayout 容器是 NativeScript 中最簡單的佈局容器。AbsoluteLayout 不對其子元素施加任何約束,並將使用二維座標系(左上角為原點)在其內部放置其子元素。
AbsoluteLayout 使用其子元素的四個屬性來定位它們,它們如下:
top - 定義子元素從原點向下(y 方向)的放置位置。
left - 定義子元素從原點向側(x 方向)的放置位置。
width - 定義子元素的寬度。
height - 定義子元素的高度。
讓我們在應用程式的主頁中新增 AbsoluteLayout 容器,如下所示:
<ActionBar>
   <Label text="Home"></Label>
</ActionBar>

<AbsoluteLayout width="200" height="300" backgroundColor="blue">
   <Label text="Top Left" left="0" top="0" width="100" height="150" backgroundColor="green">
   </Label>
   <Label text="Top Right" left="100" top="0" width="100" height="150" backgroundColor="blue"></Label>
   <Label text="Bottom Left" left="0" top="150" width="100" height="150" backgroundColor="orange">
   </Label>
   <Label text="Bottom Right" left="100" top="150" width="100" height="150" backgroundColor="red"></Label>
</AbsoluteLayout>
輸出
AbsoluteLayout 的輸出如下所示:

停靠佈局 (DockLayout)
Docklayout 容器元件允許其子元素在其內部停靠。容器的每一側(頂部、底部、左側、右側)都可以停靠一個子元件。DockLayout 容器使用其子元素的 dock 屬性來正確停靠它們。
dock 屬性的可能值如下:
top - 佈局容器將子元件停靠在頂部角落。
bottom - 佈局容器將子元件停靠在底部角落。
left - 佈局容器將子元件停靠在左側角落。
right - 佈局容器將子元件停靠在右側角落。
預設情況下,DockLayout 容器停靠其最後一個子元件。可以透過將 stretchLastChild 屬性設定為零來覆蓋它。
讓我們在應用程式的主頁中新增DockLayout 容器,如下所示:
<ActionBar>
   <Label text="Home"></Label>
</ActionBar>
<DockLayout width="250" height="300" backgroundColor="blue" stretchLastChild="false">
   <Label text="left" dock="left" width="50" backgroundColor="green"></Label>
   <Label text="top" dock="top" height="50" backgroundColor="orange"></Label>
   <Label text="right" dock="right" width="50" backgroundColor="red"></Label<
   <Label text="bottom" dock="bottom" height="50"
   backgroundColor="orange"></Label>
</DockLayout>
輸出
以下是 DockLayout 的輸出:

網格佈局 (GridLayout)
GridLayout 容器元件是一個複雜的佈局容器,它以表格格式(帶有行和列)排列子元素。預設情況下,它有一行一列。它具有以下屬性:
columns - 用於表示每列的預設寬度,由逗號分隔。可能的值是數字、* 和 auto 關鍵字。
其中:
數字表示絕對列寬。
表示列寬相對於其他列的寬度。它前面可以加上數字,表示列寬應該是最小列寬的多少倍。例如,2* 表示列寬應該是最小列寬的兩倍。
auto 表示列寬與其最寬子元素一樣寬。
例如,*,2* 表示兩列,第二列是第一列的兩倍大小。
rows − 用於表示用逗號分隔的每一行預設高度。值表示方式類似於 columns。
GridLayout 使用其子元素的以下指定屬性進行佈局:
row − 行號
rowSpan − 子內容在佈局中跨越的總行數。
colSpan − 子內容在佈局中跨越的總列數。
讓我們在應用程式的主頁中新增 GridLayout 容器,如下所示:
<ActionBar>
   <Label text="Home"></Label>
</ActionBar>
<GridLayout columns="50, auto, *" rows="50, auto, *" width="210" height="210"
   backgroundColor="blue">
   <Label text="Row: 0; Column 0" row="0" col="0" backgroundColor="green"></Label>
   <Label text="Row: 0; Column 1" row="0" col="1" colSpan="1" backgroundColor="brown"></Label>
   <Label text="Row: 1; Column 0" row="1" col="0" rowSpan="1" backgroundColor="red"></Label>
   <Label text="Row: 1; Column 1" row="1" col="1" backgroundColor="orange"></Label>
</GridLayout>
輸出
以下是 GridLayout 的輸出:

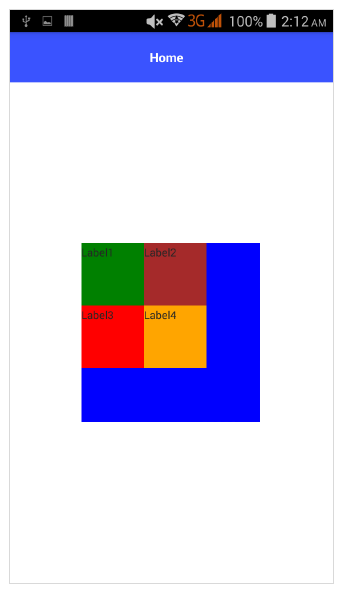
StackLayout
StackLayout 以一維線狀(水平或垂直)的方式組織其子元素。它可以使用佈局選項根據佈局中的空間進行大小調整。它具有 orientation 屬性,可用於指定方向,水平或垂直。
讓我們在應用程式的主頁中新增 StackLayout 容器,如下所示:
<ActionBar>
   <Label text="Home"></Label>
</ActionBar>
<StackLayout orientation="vertical" width="200" height="200" backgroundColor="blue">
   <Label text="Label1" width="50" height="50" backgroundColor="green"></Label>
   <Label text="Label2" width="50" height="50" backgroundColor="brown"></Label>
   <Label text="Label3" width="50" height="50" backgroundColor="red"></Label>
   <Label text="Label4" width="50" height="50" backgroundColor="orange"></Label>
</StackLayout>
輸出
StackLayout 的輸出如下所示:

WrapLayout
WrapLayout 用於在新行或新列上換行內容。
它具有以下三個屬性:
orientation − 水平或垂直顯示。
itemWidth − 每個子元素的佈局寬度。
itemHeight − 每個子元素的佈局高度。
讓我們在應用程式的主頁中新增 WrapLayout 容器,如下所示:
<ActionBar>
   <Label text="Home"></Label>
</ActionBar> <WrapLayout orientation="horizontal" width="200" height="200" backgroundColor="blue">
   <Label text="Label1" width="70" height="70" backgroundColor="green"></Label>
   <Label text="Label2" width="70" height="70" backgroundColor="brown"></Label
   <Label text="Label3" width="70" height="70" backgroundColor="red"></Label>
   <Label text="Label4" width="70" height="70" backgroundColor="orange"></Label>
</WrapLayout>
輸出
Flexbox 佈局
FlexboxLayout 容器元件是高階佈局容器之一。它提供選項來呈現從簡單的佈局到非常複雜和精密的佈局。它基於 CSS Flexbox。
FlexboxLayout 元件有很多屬性,如下所示:
flexDirection
它表示子元件排列的方向。flexDirection 的可能值如下:
row − 子元件並排排列。
row-reverse − 子元件並排排列,但方向相反。
column − 子元件上下排列。
column-reverse − 子元件上下排列,但方向相反。
讓我們在應用程式的主頁中新增 FlexLayout 容器,如下所示:
<ActionBar>
   <Label text="Home"></Label>
</ActionBar>
<FlexboxLayout flexDirection="row">
   <Label text="First Item" backgroundColor="red"></Label>
   <Label text="Second Item" backgroundColor="green"></Label>
   <Label text="Third Item" backgroundColor="red"></Label>
   <Label text="Fourth Item" backgroundColor="green"></Label>
   <Label text="Fifth Item" backgroundColor="red"></Label>
</FlexboxLayout>
輸出
以下是 FlexLayout - Row 的輸出:

現在,讓我們將 flexDirection 值從 row 更改為 row-reverse,並檢查它如何影響佈局。
<ActionBar>
   <Label text="Home"></Label>
</ActionBar> <FlexboxLayout flexDirection="row-reverse">
   <Label text="First Item" backgroundColor="red"></Label>
   <Label text="Second Item" backgroundColor="green"></Label>
   <Label text="Third Item" backgroundColor="red"></Label>
   <Label text="Fourth Item" backgroundColor="green"></Label>
   <Label text="Fifth Item" backgroundColor="red"></Label>
</FlexboxLayout>
輸出
以下是 Flex 佈局 - Row Reverse 的輸出:

讓我們將 flexDirection 值從 row-reverse 更改為 column,並檢查它如何影響佈局。
<ActionBar>
   <Label text="Home"></Label>
</ActionBar>
<FlexboxLayout flexDirection="column">
   <Label text="First Item" backgroundColor="red"></Label>
   <Label text="Second Item" backgroundColor="green"></Label>
   <Label text="Third Item" backgroundColor="red"></Label>
   <Label text="Fourth Item" backgroundColor="green"></Label>
   <Label text="Fifth Item" backgroundColor="red"></Label>
</FlexboxLayout>
輸出
以下是 FlexLayout - Column 的輸出:

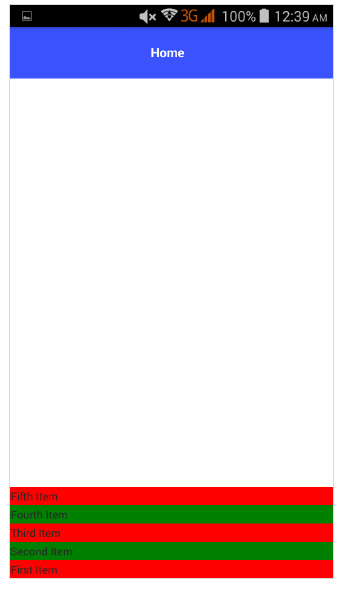
讓我們將 flexDirection 值從 column 更改為 column-reverse,並檢查它如何影響佈局。
<ActionBar>
   <Label text="Home"></Label>
</ActionBar>
<FlexboxLayout flexDirection="column-reverse">
   <Label text="First Item" backgroundColor="red"></Label>
   <Label text="Second Item" backgroundColor="green"></Label>
   <Label text="Third Item" backgroundColor="red"></Label>
   <Label text="Fourth Item" backgroundColor="green"></Label>
   <Label text="Fifth Item" backgroundColor="red"></Label>
</FlexboxLayout>
輸出
以下是 FlexLayout - Column Reverse 的輸出:
flexWrap
它表示子元件將以單行/單列呈現,還是透過在 flexDirection 設定的方向上換行流入多行。
可能的值如下:
wrap − 如果在給定方向 (flexDirection) 中沒有可用空間,則換行子元件。
wrap-reverse − 與 wrap 相同,只是元件流向相反。
讓我們新增 flexWrap 屬性,然後將其值設定為 wrap。還要新增如下所示的三個子元素:
<ActionBar>
   <Label text="Home"></Label>
&tl;/ActionBar>
<FlexboxLayout flexDirection="row" flexWrap="wrap">
   <Label text="First Item" backgroundColor="red"></Label>
   <Label text="Second Item" backgroundColor="green"></Label>
   <Label text="Third Item" backgroundColor="red"></Label>
   <Label text="Fourth Item" backgroundColor="green"></Label>
   <Label text="Fifth Item" backgroundColor="red"></Label>
   <Label text="Sixth Item" backgroundColor="green"></Label>
   <Label text="Seventh Item" backgroundColor="red"></Label>
   <Label text="Eighth Item" backgroundColor="green"></Label>
</FlexboxLayout>
輸出
以下是 flexWrap 的輸出:

JustifyContent
它表示子元件彼此之間以及整體結構如何排列。它具有以下三個屬性:
flex-end − 它將子元件打包到末尾。
space-between − 它透過均勻分佈在行中來打包子元件。
space-around − 與 space-between 類似,但它透過均勻分佈在行中以及它們周圍的相等空間來打包子元件。
讓我們也新增 justifyContent 並檢查它的行為:
<ActionBar>
   <Label text="Home"></Label>
</ActionBar>
<FlexboxLayout flexDirection="row" flexWrap="wrap" justifyContent="space-around">
   <Label text="First Item" backgroundColor="red"></Label>
   <Label text="Second Item" backgroundColor="green"></Label>
   <Label text="Third Item" backgroundColor="red"></Label>
   <Label text="Fourth Item" backgroundColor="green"></Label>
   <Label text="Fifth Item" backgroundColor="red"></Label>
   <Label text="Sixth Item" backgroundColor="green"></Label>
   <Label text="Seventh Item" backgroundColor="red"></Label>
   <Label text="Eighth Item" backgroundColor="green"></Label>
</FlexboxLayout>
輸出
以下是 Flex 佈局 - JustifyContent 的輸出:

FlexLayout 容器為其子元素提供了另外兩個屬性來指定順序和收縮能力。它們如下:
order − 它確定 FlexLayout 容器的子元素呈現的順序。
flexShrink − 它確定子元素收縮到 0 級別的能力。
NativeScript - 導航
導航使使用者能夠快速滑動到他們想要的螢幕,或者在應用程式中導航,或者執行特定操作。導航元件幫助您實現導航,從簡單的按鈕點選到更復雜的模式。
NativeScript 的核心版本和 Angular 版本之間的導航差異很大。雖然核心框架導航是導航過程的基礎,但 NativeScript 的 Angular 模型採用核心導航概念並對其進行擴充套件,使其與 Angular 框架相容。
讓我們在本節中同時瞭解核心導航概念和 Angular 對導航的採用。
核心概念
讓我們在本節中瞭解 NativeScript 中的導航是如何工作的。
在 NativeScript 中,導航根據其應用的方向分為四個不同的類別,如下所示:
向前導航
向後導航
橫向導航
底部導航
向前導航
向前導航 指的是將使用者導航到層次結構下一級的螢幕。它基於兩個 NativeScript 元件,Frame 和 Page。
Frame
Frame 是導航的根級別元件。它不是可見容器,而是充當頁面之間轉換的容器。
一個簡單的示例如下:
<Frame id="featured" defaultPage="featured-page" />
這裡:
Frame 導航到(或載入)featured-page 頁面元件並呈現它。
Page
Page 緊挨著 Frame 元件,它充當 UI 元件的容器。簡單的示例定義如下:
<Page loaded="onPageLoaded">
   <ActionBar title="Item" class="action-bar"></ActionBar>
   <AbsoluteLayout>
      <Label text="Label"/<
      <Button text="navigate('another-page')" tap="onTap"/>
   </AbsoluteLayout>
</Page>
這裡:
最初,Page 載入螢幕的所有 UI 元件並呈現它。
當用戶點選按鈕時,它會將使用者導航到another-page 頁面。
向後導航
向後導航方法允許在單個應用程式內或跨不同應用程式在螢幕之間向後移動。它與向前導航的方向相反。簡單的 goBack() 方法用於導航回上一頁。
它定義如下:
<Page class="page" loaded="onPageLoaded">
   <ActionBar title="Item" class="action-bar"></ActionBar>
   <StackLayout class="home-panel">
      <Button class="btn btn-primary" text="Back" tap="goBack"/>
   </StackLayout>
</Page>
這裡:
當用戶點選按鈕時,將觸發goBack() 方法。goBack() 將使用者導航到上一頁(如果可用)。
橫向導航
橫向導航是指在同一層次結構級別的螢幕之間導航。它基於中心模式。它透過特定的導航元件啟用,例如 BottomNavigation、Tabs、TabView、SideDrawer 和 Modal View。
一個簡單的示例定義如下:
<Page class="page" xmlns="http://www.nativescript.org/tns.xsd">
   <ActionBar title="Hub" class="action-bar"></ActionBar>
   <StackLayout class="home-panel">
      <Button class="btn btn-primary" text="navigate('featured-page')" tap="navigateToFeatured" />
      <Button class="btn btn-primary" text="navigate('search-page')" tap="navigateToSearch" />
   </StackLayout>
</Page>
這裡:
navigateToFeatured 函式使用 navigate() 方法將使用者導航到特色頁面。
同樣,navigateToSearch 函式將使用者導航到搜尋頁面。
中心頁面也可以使用頁面螢幕中可用的 navigate 方法訪問,並且可以使用 goBack() 方法離開中心頁面。
一個簡單的示例如下:
<Page class="page">
   <ActionBar title="Item" class="action-bar"></ActionBar>
   <StackLayout class="home-panel">
      <Button class="btn btn-primary" text="navigate('hub-page')" tap="navigateToHub" />
      <Button class="btn btn-primary" text="goBack()" tap="goBack" />
   </StackLayout>
</Page>
底部和標籤導航
移動應用程式中最常見的導航樣式是基於標籤的導航。標籤導航位於螢幕底部或標題下方的頂部。它是透過使用TabView 和BottomNavigation 元件實現的。
基於 Angular 的導航
NativeScript 擴充套件其導航概念以適應 Angular 路由概念。NativeScript 透過擴充套件 Angular RouterModule 提供了一個新模組 NativeScriptRouterModule。
NativeScript Angular 導航概念可以分為以下幾節:
page-router-outlet 標籤
nsRouterLink 屬性
RouterExtension 類
自定義RouterReuseStrategy
讓我們在本節中學習所有上述 Angular 導航。
頁面路由出口
如前所述,page-router-outlet 是 Angular 的 router-outlet 的替代品。page-router-outlet 包裝了 Nativescript 核心導航框架的 Frame 和 Page 策略。每個 page-router-outlet 建立一個新的 Frame 元件,並且出口中配置的每個元件都將使用 Page 元件進行包裝。然後,使用本機 navigate 方法導航到另一個頁面/路由。
路由連結 (nsRouterLink)
nsRouterLink 是 Angular 的 RouterLink 的替代品。它使 UI 元件能夠使用路由連結到另一個頁面。nsRouterLink 還提供以下兩個選項:
pageTransition − 用於設定頁面轉換動畫。true 啟用預設轉換。false 停用轉換。特定值(如 slide、fadein 等)設定特定轉換。
clearHistory − true 清除 nsRouterLink 的導航歷史記錄。
一個簡單的示例程式碼如下:
<Button text="Go to Home" [nsRouterLink]="['/home']"
   pageTransition="slide" clearHistory="true"></Button>
路由擴充套件
NativeScript 提供 RouterExtensions 類並公開核心 NativeScript 的導航功能。
RouterExtensions 公開的的方法如下:
navigate
navigateByUrl
back
canGoBack
backToPreviousPage
canGoBackToPreviousPage
使用 RouterExtensions 的一個簡單的示例程式碼如下:
import { RouterExtensions } from "nativescript-angular/router";
@Component({
   // ...
})
export class HomeComponent {
   constructor(private routerExtensions: RouterExtensions) { }
}
自定義路由重用策略
NativeScript 使用自定義路由重用策略 (RouterReuseStrategy) 來適應移動應用程式的體系結構。與 Web 應用程式相比,移動應用程式在某些方面有所不同。
例如,當用戶從頁面導航離開時,可以在 Web 應用程式中銷燬頁面,並在使用者導航到頁面時重新建立它。但是,在移動應用程式中,頁面將被保留並重用。在設計路由概念時,會考慮這些概念。
路由
NativeScript Angular 應用程式中的一個簡單的路由模組如下所示:
import { NgModule } from "@angular/core";
import { Routes } from "@angular/router";
import { NativeScriptRouterModule } from "nativescript-angular/router";
import { HomeComponent } from "./home.component";
import { SearchComponent } from "./search.component";
const routes: Routes = [
   { path: "", redirectTo: "/home", pathMatch: "full" },
   { path: "home", component: HomeComponent },
   { path: "search", component: SearchComponent },
];
@NgModule({
   imports: [NativeScriptRouterModule.forRoot(routes)],
   exports: [NativeScriptRouterModule]
})
export class AppRoutingModule { }
這裡:
路由模組與 Angular 版本非常相似,除了極少數例外。實際上,NativeScript 透過以類似於 Angular 框架的方式公開它來使用其核心導航策略。
NativeScript - 事件處理
在每個 GUI 應用程式中,事件在啟用使用者互動方面都扮演著非常重要的角色。每當使用者與應用程式互動時,都會觸發一個事件,然後執行相應的操作。
例如,當用戶單擊應用程式登入頁面上的登入按鈕時,它會觸發登入過程。
事件涉及兩個參與者:
事件傳送者 − 觸發實際事件的物件。
事件監聽器 − 監聽特定事件並在觸發事件時執行的函式。
Observable 類
它是一個預定義的類,用於處理事件。它定義如下:
const Observable = require("tns-core-modules/data/observable").Observable;
在 NativeScript 中,幾乎每個物件都派生自 Observable 類,因此每個物件都支援事件。
事件監聽器
讓我們在本節中瞭解如何建立一個物件並向該物件新增事件監聽器。
步驟1
建立一個用於生成事件的按鈕,如下所示:
const Button = require("tns-core-modules/ui/button").Button;
const testButton = new Button();
步驟2
接下來,向按鈕新增文字,如下所示:
testButton.text = "Click";
步驟3
建立一個函式 onTap,如下所示:
let onTap = function(args) {
   console.log("you clicked!");
};
步驟4
現在將 tap 事件附加到 onTap 函式,如下所示:
testButton.on("tap", onTap, this);
新增事件監聽器的另一種方法如下:
testButton.addEventListener("tap", onTap, this);
步驟5
透過 UI 本身附加事件的另一種方法如下所示:
<Button text="click" (tap)="onTap($event)"></Button>
這裡:
$event 的型別為 EventData。EventData 包含兩個屬性,如下所示:
Object − 用於觸發事件的可觀察例項。在本例中,它是 Button 物件。
EventName − 它是事件名稱。在本例中,它是 tap 事件。
步驟6
最後,事件監聽器可以隨時分離/刪除,如下所示:
testButton.off(Button.onTap);
您還可以使用另一種格式,如下所示:
testButton.removeEventListener(Button.onTap);
修改 BlankNgApp
讓我們修改 BlankNgApp 應用程式以更好地理解 NativeScript 中的事件。
步驟1
開啟 home 元件的 UI,src/app/home/home.component.html 並新增以下程式碼:
<ActionBar>
   <Label text="Home"></Label>
</ActionBar>
<StackLayout>
   <Button text='Fire an event' class="-primary" color='gray' (tap)='onButtonTap($event)'></Button>
</StackLayout>
這裡:
tap 是事件,Button 是事件觸發器。
onButtonTap 是事件監聽器。
步驟2
開啟 home 元件的程式碼,‘src/app/home/home.component.ts’ 並更新以下程式碼:
import { Component, OnInit } from "@angular/core";
import { EventData } from "tns-core-modules/data/observable";
import { Button } from "tns-core-modules/ui/button"
@Component({
   selector: "Home",
   templateUrl: "./home.component.html"
})
export class HomeComponent implements OnInit {
   constructor() {
      // Use the component constructor to inject providers.
   }
   ngOnInit(): void {
      // Init your component properties here.
   }
   onButtonTap(args: EventData): void {
      console.log(args.eventName);
      const button = <Button>args.object;
      console.log(button.text);
   }
}
這裡:
添加了新的事件監聽器 onButtonTap。
列印事件名稱 tap 和按鈕文字,在控制檯中觸發事件。
步驟3
執行應用程式並點選按鈕。它會在控制檯列印以下內容。
LOG from device <device name>: tap
LOG from device <device name>: Fire an event
NativeScript - 資料繫結
資料繫結是NativeScript支援的高階概念之一。NativeScript儘可能遵循Angular資料繫結的概念。資料繫結使UI元件能夠無需任何程式設計工作即可顯示/更新應用程式資料模型的當前值。
NativeScript支援兩種資料繫結型別,如下所示:
單向資料繫結 - 模型更改時更新UI。
雙向資料繫結 - 同步UI和模型。無論何時更新模型,UI都會自動更新;同樣,無論何時UI從使用者處獲取資料(UI更新),模型也會更新。
讓我們在本節中學習這兩個概念。
單向資料繫結
NativeScript提供了一個簡單的選項,可以在UI元件中啟用單向資料繫結。要啟用單向資料繫結,只需在目標UI的屬性中新增方括號,然後為其賦值必要的模型屬性。
例如,要更新Label元件的文字內容,只需按如下所示更改UI程式碼:
<Label [text]='this.model.prop' />
這裡:
this.model.prop 指的是模型this.model的屬性。
讓我們修改我們的BlankNgApp來理解單向資料繫結。
步驟1
新增一個新的模型User (src/model/user.ts),如下所示:
export class User {
   name: string
}
步驟2
開啟元件的UI,src/app/home/home.component.html 並按如下所示更新程式碼:
<ActionBar>
   <Label text="Home"></Label>
</ActionBar>
<GridLayout columns="*" rows="auto, auto, auto">
   <Button text="Click here to greet" class="-primary" color='gray'
      (tap)='onButtonTap($event)' row='1' column='0'>
   </Button>
   <Label [text]='this.user.name' row='2' column='0'
      height="50px" textAlignment='center' style='font-size: 16px;
      font-weight: bold; margin: 0px 32px 0 25px;'>
   </Label>
</GridLayout>
這裡:
Label的文字設定為使用者模型的屬性名稱。
按鈕點選事件附加到onButtonTap方法。
步驟3
開啟home元件的程式碼,src/app/home/home.component.ts 並按如下所示更新程式碼:
import { Component, OnInit } from "@angular/core";
import { User } from "../../model/user"
@Component({
   selector: "Home",
   templateUrl: "./home.component.html"
})
export class HomeComponent implements OnInit {
   public user: User;
   constructor() {
      // Use the component constructor to inject providers.
      this.user = new User();
      this.user.name = "User1";
   }
   ngOnInit(): void {
      // Init your component properties here.
   }
   onButtonTap(args: EventData) {
      this.user.name = 'User2';
   }
}
這裡:
匯入了user模型
在元件的建構函式中建立User物件
實現了onButtonTap事件。onButtonTap的實現更新User物件並將屬性名稱設定為User2
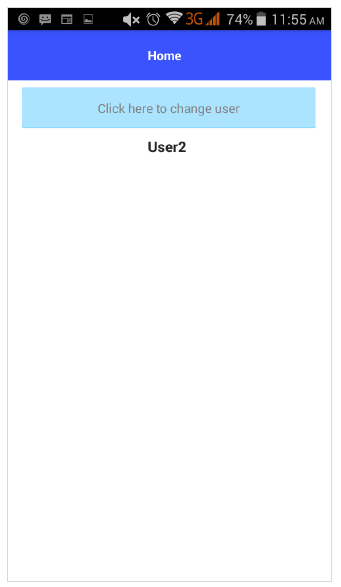
步驟4
編譯並執行應用程式,然後單擊按鈕更改模型,它將自動更改Label文字。
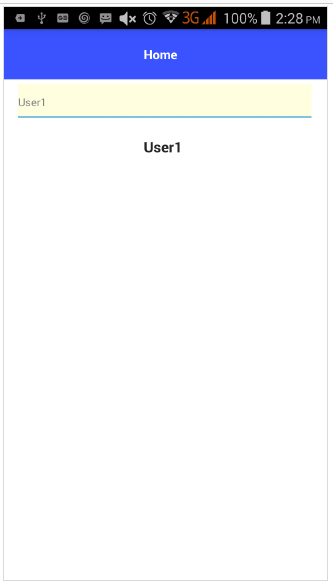
應用程式的初始狀態和最終狀態如下所示:
初始狀態
單向資料繫結初始狀態如下所示:

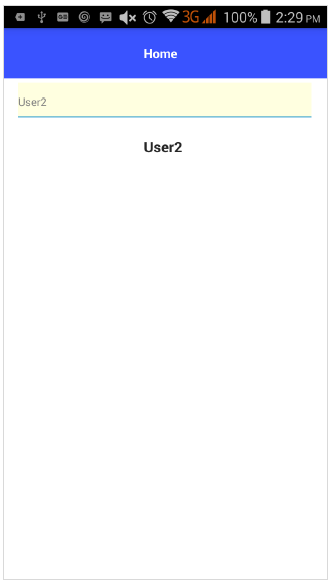
最終狀態
單向資料繫結最終狀態如下所示:
雙向資料繫結
NativeScript還為高階功能提供雙向資料繫結。它將模型資料繫結到UI,並將UI中更新的資料繫結到模型。
要進行雙向資料繫結,請使用ngModel屬性,然後將其用[]和()括起來,如下所示:
<TextField [(ngModel)] = 'this.user.name'></TextField>
讓我們修改BlankNgApp應用程式以更好地理解雙向資料繫結。
步驟1
將NativeScriptFormsModule匯入HomeModule (src/app/home/home.module.ts),如下所示:
import { NgModule, NO_ERRORS_SCHEMA } from "@angular/core";
import { NativeScriptCommonModule } from "nativescript-angular/common";
import { HomeRoutingModule } from "./home-routing.module";
import { HomeComponent } from "./home.component";
import { NativeScriptFormsModule } from "nativescript-angular/forms";
@NgModule({
   imports: [
      NativeScriptCommonModule,
      HomeRoutingModule,
      NativeScriptFormsModule
   ],
   declarations: [
      HomeComponent
   ],
   schemas: [
      NO_ERRORS_SCHEMA
   ]
})
export class HomeModule { }
這裡:
NativeScriptFormsModule啟用雙向資料繫結。否則,雙向資料繫結將無法按預期工作。
步驟2
更改home元件的UI,如下所示:
<ActionBar> <Label text="Home"></Label></ActionBar>
<GridLayout columns="*" rows="auto, auto">
   <TextField hint="Username" row='0' column='0' color="gray"
      backgroundColor="lightyellow" height="75px" [(ngModel)]='this.user.name'>
   </TextField>
   <Label [text]='this.user.name' row='1' column='0' height="50px"
      textAlignment='center' style='font-size: 16px; font-weight: bold;
      margin: 0px 32px 0 25px;'>
   </Label>
</GridLayout>
這裡:
Label元件的text屬性使用單向資料繫結設定。如果更新模型user,則其text屬性將自動更新。
TextField元件將ngModel設定為this.user.name。如果更新模型user,則其text屬性將自動更新。同時,如果使用者更改TextField的值,則模型也會更新。如果模型更新,它也會觸發Label的text屬性更改。因此,如果使用者更改資料,它將顯示在Label的text屬性中。
步驟3
執行應用程式並嘗試更改文字框的值。
應用程式的初始狀態和最終狀態將類似於以下指定的狀態:
初始狀態
雙向資料繫結 – 初始狀態如下所示:
最終狀態
雙向資料繫結 – 最終狀態如下所示:
NativeScript - 模組
一個NativeScript模組包含一組打包為單個庫的相關功能。讓我們學習NativeScript框架提供的模組。
它包含NativeScript框架的核心功能。讓我們在本節中瞭解核心模組。
Application
Application包含移動應用程式的平臺特定實現。簡單的核心模組定義如下:
const applicationModule = require("tns-core-modules/application");
Console
Console模組用於記錄訊息。它具有以下方法:
console.log("My FirstApp project");
console.info("Native apps!");
console.warn("Warning message!");
console.error("Exception occurred");
application-settings
application-settings 模組包含管理應用程式設定的方法。要新增此模組,我們需要新增以下程式碼:
const appSettings = require("tns-core-modules/application-settings");
application-setting中提供的一些方法如下:
setBoolean(key: string, value: boolean) - 設定布林物件
setNumber(key: string, value: number) - 設定數字物件
setString(key: string, value: string) - 設定字串物件
getAllKeys() - 包含所有儲存的鍵
hasKey(key: string) - 檢查鍵是否存在
clear - 清除儲存的值
remove - 基於鍵刪除任何條目。
使用應用程式設定的簡單示例如下:
function onNavigatingTo(args) {
   appSettings.setBoolean("isTurnedOff", false);
   appSettings.setString("name", "nativescript");
   appSettings.setNumber("locationX", 54.321);
   const isTurnedOn = appSettings.getBoolean("isTurnedOn");
   const username = appSettings.getString("username");
   const locationX = appSettings.getNumber("locationX");
   // Will return "not present" if there is no value for "noKey"
   const someKey = appSettings.getString("noKey", "not present");
}
exports.onNavigatingTo = onNavigatingTo;
function onClear() {
   // Removing a single entry via its key name
   appSettings.remove("isTurnedOff");
   // Clearing the whole settings
   appSettings.clear();
}
http
此模組用於處理http請求和響應。要將此模組新增到您的應用程式中,請新增以下程式碼:
const httpModule = require("tns-core-modules/http");
我們可以使用以下方法傳送資料:
getString - 用於發出請求並從URL下載資料作為字串。其定義如下:
httpModule.getString("https://.../get").then(
   (r) => {
      viewModel.set("getStringResult", r);
   }, (e) =>
   {
   }
);
getJSON - 用於訪問JSON中的資料。其定義如下:
httpModule.getJSON("https://.../get").then((r) => {
}, (e) => {
});
getImage - 從指定的URL下載內容並返回ImageSource物件。其定義如下:
httpModule.getImage("https://.../image/jpeg").then((r) => {
}, (e) => {
});
getFile - 它有兩個引數URL和檔案路徑。
URL - 下載資料。
檔案路徑 - 將URL資料儲存到檔案中。其定義如下:
httpModule.getFile("https://").then((resultFile) => {
}, (e) => {
});
request - 它具有options引數。它用於請求選項並返回HttpResponse物件。其定義如下:
httpModule.request({
   url: "https://.../get",
   method: "GET"
}).then((response) => {
}, (e) => {
});
Image-source
image-source模組用於儲存影像。我們可以使用以下語句新增此模組:
const imageSourceModule = require("tns-core-modules/image-source");
如果要從資源載入影像,請使用以下程式碼:
const imgFromResources = imageSourceModule.fromResource("icon");
要從本地檔案新增影像,請使用以下命令:
const folder = fileSystemModule.knownFolders.currentApp();
const path = fileSystemModule.path.join(folder.path, "images/sample.png");
const imageFromLocalFile = imageSourceModule.fromFile(path);
要將影像儲存到檔案路徑,請使用以下命令:
const img = imageSourceModule.fromFile(imagePath);
const folderDest = fileSystemModule.knownFolders.documents();
const pathDest = fileSystemModule.path.join(folderDest.path, "sample.png");
const saved = img.saveToFile(pathDest, "png"); if (saved) {
   console.log(" sample image saved successfully!");
}
Timer
此模組用於在特定時間間隔執行程式碼。要新增它,我們需要使用require:
const timerModule = require("tns-core-modules/timer");
它基於兩種方法:
setTimeout - 用於延遲執行。它以毫秒錶示。
setInterval - 用於以特定間隔重複應用。
Trace
此模組對於除錯很有用。它提供日誌資訊。此模組可以表示為:
const traceModule = require("tns-core-modules/trace");
如果要在您的應用程式中啟用它,請使用以下命令:
traceModule.enable();
ui/image-cache
image-cache模組用於處理影像下載請求和快取下載的影像。此模組可以表示如下:
const Cache = require("tns-core-modules/ui/image-cache").Cache;
connectivity
此模組用於接收已連線網路的連線資訊。它可以表示為:
const connectivityModule = require("tns-core-modules/connectivity");
功能模組
功能模組包括許多特定於系統/平臺的模組。一些重要的模組如下:
platform - 用於顯示有關裝置的資訊。它可以定義如下:
const platformModule = require("tns-core-modules/platform");
fps-meter - 用於捕獲每秒幀數。它可以定義如下:
const fpsMeter = require("tns-core-modules/fps-meter");
file-system - 用於處理裝置檔案系統。其定義如下:
const fileSystemModule = require("tns-core-modules/file-system");
ui/gestures - 用於處理UI手勢。
UI模組
UI模組包括UI元件及其相關功能。一些重要的UI模組如下:
frame
page
color
text/formatted-string
xml
styling
animation
NativeScript - 外掛
npm包用於新增原生功能。使用此包,我們可以安裝、搜尋或刪除任何外掛。本節詳細解釋了外掛。
命令
add - 用於安裝外掛。
update - 更新指定的外掛並修改其依賴項。
remove - 刪除外掛。
build - 用於為iOS或Android專案構建外掛。
create - 為您的專案建立外掛。
新增外掛
以下語法用於新增新外掛:
tns plugin add <plugin-name>
例如,如果要新增nativescript-barcodescanner,可以使用以下程式碼:
tns plugin add nativescript-barcodescanner
您可以看到以下響應:
+ nativescript-barcodescanner@3.4.1
added 1 package from 1 contributor and audited 11704 packages in 8.76s
您也可以使用npm模組新增上述外掛:
npm install nativescript-barcodescanner
現在,NativeScript CLI從npm下載外掛並將其新增到您的node_modules資料夾中。
如果要將外掛直接新增到您的package.json並解決所有依賴項問題,可以使用以下命令代替之前的命令:
npm i nativescript-barcodescanner
如果要在開發過程中安裝開發依賴項,請使用以下程式碼:
npm i tns-platform-declarations --save-dev
這裡:
tns-platform-declarations是開發過程中僅IntelliSense所需的開發依賴項。
匯入外掛
現在,我們已經安裝了nativescript-barcodescanner外掛。讓我們使用以下命令將其新增到您的專案中:
const maps = require("nativescript-barcodescanner");
maps.requestPermissions();
更新外掛
此方法用於更新指定的外掛,因此它會解除安裝之前的外掛並安裝新版本並修改其依賴項。其定義如下:
tns plugin update <Plugin name version>
刪除外掛
如果要刪除外掛(如果不需要),可以使用以下語法:
tns plugin remove <plugin-name>
例如,如果要刪除上面安裝的nativescript-google-maps-sdk,請使用以下命令:
tns plugin remove nativescript-barcodescanner
您可以看到以下響應:
Successfully removed plugin nativescript-barcodescanner
構建外掛
它用於構建位於platforms/android中的外掛的Android特定專案檔案。讓我們使用以下命令構建nativescript-barcodescanner外掛:
tns plugin build nativescript-barcodescanner
建立外掛
NativeScript外掛是簡單的JavaScript模組。它定義在您的應用程式src\package.json檔案中。此模組用於為NativeScript外掛開發建立一個新專案。其定義如下:
tns plugin create <Plugin Repository Name> [--path <Directory>]
NativeScript - 使用 JavaScript 的原生 API
本節解釋了使用JavaScript訪問原生API的概述。
編組
NativeScript執行時為Android和iOS平臺提供隱式型別轉換。這個概念稱為編組。例如,NativeScript-iOS平臺可以隱式轉換JavaScript和Objective-C資料型別,類似地,Java/Kotlin可以輕鬆對映到JavaScript專案型別和值。讓我們簡要了解如何在每種型別中執行編組。
數值
我們可以輕鬆地將iOS和Android數值型別轉換為JavaScript數字。iOS到JavaScript的簡單數值轉換定義如下:
console.log(`max(7,9) = ${max(7,9)}`);
這裡:
本機max()函式被轉換為JavaScript數字。
Android環境
Java支援不同的數值型別,例如byte、short、int、float、double和long。JavaScript只有number型別。
考慮以下所示的簡單Java類:
class Demo extends java.lang.Object {
   public int maxMethod(int a,int b) {
      if(a>b) {
         return a;
      } else {
         return b;
      }
   }
}
這裡:
以上程式碼包含兩個整型引數。我們可以使用JavaScript呼叫以上程式碼物件,如下所示:
//Create an instance for Demo class
var obj = new Demo();

//implicit integer conversion for calling the above method
obj.maxMethod(7,9);
字串
Android字串定義在java.lang.string中,iOS字串定義在NSSring中。讓我們看看如何在兩個平臺上執行編組。
Android
字串是不可變的,但字串緩衝區支援可變字串。
以下程式碼是簡單對映的示例:
//Create android label widget
var label = new android.widget.Label();

//Create JavaScript string
var str = "Label1";

//Convert JavaScript string into java label.setText(str);
// text is converted to java.lang.String
布林類定義在 java.lang.Boolean 中。此類將布林值包裝在一個物件中。我們可以輕鬆地將布林值轉換為字串,反之亦然。下面給出了一個簡單的示例:
//create java string
let data = new java.lang.String('NativeScript');

//map java String to JavaScript string,
let result = data.startsWith('N');

//return result
console.log(result);// true
iOS 環境
NSString 類是不可變的,但其子類 NSMutableString 是可變的。此類包含用於處理字串的各種方法。其宣告如下:
class NSString : NSObject
考慮如下所示的一個簡單的 Objective-C 宣告:
NSString *str = @"nativescript";
//convert the string to uppercase
NSString *str1;
str1 = [str uppercaseString];
NSLog(@"Uppercase String : %@\n", str1 );
NSString 可以輕鬆地對映到 JavaScript 字串。
陣列
本節解釋如何在陣列中執行編組。讓我們先來看一個 iOS 環境的例子。
陣列宣告
class NSArray : NSObject
這裡:
NSArray 用於管理稱為陣列的物件的有序集合。它用於建立靜態陣列。其子類NSMutableArray 用於建立動態陣列。
考慮可以使用陣列文字建立 NSArray 物件,如下所示:
let array: NSArray = ["React","Vue","TypeScript"]
現在,我們可以將此陣列對映到 JavaScript,如下所示:
//create native array
let nsArr = NSArray.arrayWithArray("React","Vue","TypeScript"]);

//create simple javascript array
let jsArr = ["Hello,World","NativeScript"];

//Now compare the two arrays,
let compare = nsArr.isEqual(jsArr);
console.log(comapre);
這將返回 false。
Android 陣列宣告
Java 陣列定義在java.util.Arrays 中。此類包含各種用於運算元組的方法。下面是一個例子:
//javascript array
let data = [12,45,23,56,34,78,50];

//create java array
let result = ns.example.Math.maxElement(data);
console.log(result);
類和物件
類和物件是面向物件程式設計的基本概念。類是使用者定義的原型。物件是類的例項。類表示一類物件共有的屬性或方法的集合。讓我們瞭解兩種移動開發環境的原生類和物件。
Android環境
Java 和 Kotlin 類具有由完整包名稱表示的唯一識別符號。
例如:
android.view.View - 這是用於屏幕布局和與使用者互動的基本使用者介面類。我們可以如下所示在 JavaScript 中訪問此類:
const View = android.view.View;
首先,我們使用以下語句匯入類:
import android.view.View;
接下來,建立一個類,如下所示:
public class MyClass {
   public static void staticMethod(context) {
      //create view instance
      android.view.View myview = new android.view.View(context);
   }
}
在上述同一個類中,我們可以使用以下程式碼訪問 JavaScript 函式:
const myview = new android.view.View(context);
同樣,我們可以訪問 java.lang 包中的介面、常量和列舉。
iOS 環境
Objective-C 類定義在兩個部分 @interface 和 @implementation 中。類定義以關鍵字@interface 開始,後跟介面(類)名稱。在 Objective-C 中,所有類都派生自名為 NSObject 的基類。
它是所有 Objective-C 類的超類。簡單的 Circle 類定義如下:
@interface Circle:NSObject {
   //Instance variable
   int radius;
}
@end
考慮一個帶有一個方法的類,如下所示:
@interface MyClass : NSObject
+ (void)baseStaticMethod;
@end
可以使用以下程式碼將此類轉換為 javascript:
function MyClass() { /* native call */ };
Object.setPrototypeOf(MyClass, NSObject);
BaseClass.baseStaticMethod = function () { /* native call */ };
JavaScript instanceof 運算子用於驗證物件是否繼承自給定類。這可以定義為:
var obj = MyClass.alloc().init(); // object creation
console.log(obj instanceof NSObject); //return true
這裡:
Objective-C 例項是使用 alloc、init 或 new 方法建立的。在上面的例子中,我們可以很容易地使用 new 方法建立物件初始化,如下所示:
var obj = MyClass.new();
同樣,您可以訪問靜態方法和屬性。
NativeScript - 在 Android 上建立應用
建立和釋出您的應用可以讓所有使用者都可以使用您的 Android 應用程式。Google Play 是一個強大的釋出平臺。它可以幫助您向全球所有使用者釋出和分發您的 Android 應用程式。本章介紹如何在 Google Play 上釋出您的原生應用。
NativeScript Sidekick
SideKick 是一個 GUI 客戶端,支援所有型別的作業系統。它簡化了 NativeScript CLI 過程,並有助於建立移動應用程式。
從 Sidekick 釋出您的應用到 Google Play Console
下載和安裝 Sidekick 取決於您的作業系統。請按照以下步驟在 Sidekick 中執行您的應用。
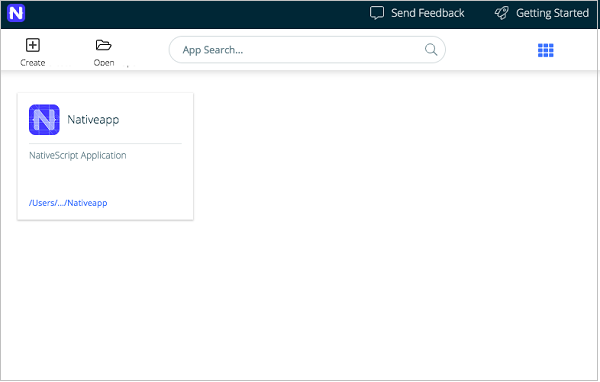
步驟 1:啟動 Sidekick
讓我們啟動 Sidekick。它看起來類似於下圖:
步驟 2:構建您的裝置
現在,從您的裝置開啟您的應用,並從工具欄中選擇構建選項,然後選擇 Android。您將獲得類似於下圖的響應:

步驟 3:屬性
單擊屬性選項卡並新增您的 Android 配置。螢幕看起來類似於以下內容:

步驟 4:外掛
Sidekick 有助於查詢您的應用程式所依賴的外掛。單擊外掛選項卡,它將列出以下內容:

步驟 5:Android 證書
單擊 Android 的齒輪圖示並選擇瀏覽選項,然後選擇儲存在檔案系統中的證書。如下所示:

選擇後,關閉對話方塊。
步驟 6:構建您的應用程式
最後,從構建型別中單擊本地構建選項,並從配置中選擇釋出選項。之後構建您的應用程式。
步驟 7:應用程式包
構建完成後,它將生成一個路徑和apk檔案。儲存應用程式包的位置。此 apk 檔案用於將其上傳到 Google Play 商店。
步驟 8:在 Google Play 上釋出
從工具欄中選擇釋出選項,然後選擇 Google Play。然後,新增用於 Google Play 商店的管理 Android 證書對話方塊。如下所示:

之後,選擇構建型別並提供服務帳戶 JSON 金鑰,然後選擇 Alpha、Beta 或 Production 軌道,最後單擊上傳。
在 Google Play 上釋出您的應用
要在 Google Play Console 上釋出您的應用,您必須滿足以下先決條件。
先決條件
您必須在 Google Play 上註冊
您擁有有效的 Google Play 自簽名程式碼簽名身份
釋出您的應用的過程
以下步驟有助於瞭解如何在 Google Play 商店中釋出您的應用。
步驟 1:登入 Google Play Console
開啟 Google Play Console 並使用您的帳戶登入。
步驟 2:建立應用
轉到“所有應用”選項卡,然後單擊“建立應用”並建立一個新應用。現在,新增預設語言、應用程式標題,最後單擊“繼續”以繼續。
步驟 3:填寫所需欄位
轉到商店列表選項卡並填寫所需欄位,然後完成所需的資源並儲存所有更改。
步驟 4:價格和分發
轉到“價格和分發”選項卡,完成所有設定並儲存所有更改。
步驟 5:釋出您的應用
選擇“應用版本”選項卡並選擇 Alpha、Beta。它用於測試您的應用程式。並且,選擇 Production 軌道。它用於將您的應用釋出到 Google Play。最後新增應用程式包 (apk)。
步驟 6:稽核您的應用
這是您的最後一步。在稽核中,驗證是否存在任何問題。如果沒有任何問題,則確認推出以釋出您的應用。
NativeScript - 在 iOS 上建立應用
本章介紹如何在 App Store 上釋出您的原生應用。請按照以下步驟釋出您的應用。
先決條件
要執行此操作,您必須需要以下先決條件:
分發證書
分發配置檔案
在 iOS Dev 中心註冊的捆綁包 ID
iTunes Connect 中的應用記錄
釋出您的應用的步驟
以下是釋出您的應用的步驟:
步驟 1:開啟 NativeScript Sidekick
啟動 NativeScript Sidekick 並開啟 Sidekick 中的應用。
步驟 2:選擇釋出
轉到工具欄,然後從工具欄中選擇釋出選項。如下所示:

現在,選擇 Apple App Store 選項。它看起來類似於下圖:

步驟 3:管理 iOS 配置檔案和證書
單擊 Apple App Store 齒輪圖示並選擇瀏覽選項並新增詳細資訊。

步驟 4:構建您的應用
接下來,單擊構建選項並構建您的應用,然後等待該過程完成。
步驟 5:提供憑據
這是您的最後一步。在您的帳戶中指定 Apple 使用者名稱和密碼,然後單擊上傳並檢查確認訊息。如果您想提交您的應用以供稽核,請轉到 iTunes Connect 並提交。
NativeScript - 測試
測試是應用程式開發生命週期中非常重要的階段。它確保應用程式質量。它需要仔細的計劃和執行。它也是開發中最耗時的階段。NativeScript 框架為應用程式的自動化測試提供了廣泛的支援。
測試型別
通常,可以使用三種類型的測試過程來測試應用程式。它們如下:
單元測試
單元測試是測試應用程式最簡單的方法。它基於確保一段程式碼(通常是函式)或類的某個方法的正確性。但是,它不能反映真實環境,因此它是查詢錯誤的選擇最少的選項。
通常,NativeScript 使用 Jasmine、Mocha with Chai 和 QUnit 單元測試框架。
要執行此操作,首先需要使用以下命令在專案中進行配置:
tns test init
現在,您將得到以下響應:
? Select testing framework: (Use arrow keys)
> jasmine
   mocha
   qunit
現在,選擇jasmine框架,您的螢幕看起來類似於此:
? Select testing framework: jasmine
+ karma@4.4.1
added 90 packages from 432 contributors and audited 11944 packages in 8.753s

+ karma-nativescript-launcher@0.4.0
added 2 packages from 1 contributor and audited 11946 packages in 7.299s

> core-js@2.6.11 postinstall
/Users/workspace/NativeScript/NativeApp/node_modules/core-js

> node -e "try{require('./postinstall')}catch(e){}"
Thank you for using core-js ( https://github.com/zloirock/core-js ) for
polyfilling JavaScript standard library!
The project needs your help! Please consider supporting of core-js on Open
Collective or Patreon:

> https://opencollective.com/core-js
> https://www.patreon.com/zloirock
Also, the author of core-js ( https://github.com/zloirock ) is looking for a
good job -)
npm WARN karma-webpack@3.0.5 requires a peer of webpack@^2.0.0
|| ^3.0.0 but none is installed. You must install peer dependencies yourself.

+ karma-webpack@3.0.5
added 19 packages from 52 contributors and audited 12012 packages in 9.368s

+ karma-jasmine@2.0.1
added 2 packages from 35 contributors and audited 12014 packages in 6.925s

+ karma@4.4.1
updated 1 package and audited 12014 packages in 7.328s
+ @types/jasmine@3.4.6

> nativescript-unit-test-runner@0.7.0 postinstall /Users/deiva/workspace/NativeScript/NativeApp/node_modules/nativescript-unit
-test-runner

> node postinstall.js
+ nativescript-unit-test-runner@0.7.0

added 1 package from 1 contributor and audited 12032 packages in 7.14s
Successfully installed plugin nativescript-unit-test-runner.

Example test file created in src/tests
Run your tests using the "$ tns test <platform>" command.
現在,測試檔案已建立在 src\tests\example.ts 中。
建立您的測試
讓我們在 example.ts 檔案中新增一個簡單的測試,如下所示:
describe("NativeApp test:", function() {
   it("Check counter.", function() {
      expect(mainViewModel.createViewModel().counter).toEqual(10);
   });
   it("Check message.", function () {
      expect(mainViewModel.createViewModel().message).toBe("10 taps left");
   });
});
這裡:
首先,檢查計數器是否等於 10,並檢查訊息是否為“還剩 10 次點選”。
讓我們在下一步執行測試。
執行您的測試
現在,使用以下命令在已連線的 Android 或 iOS 裝置上執行測試:
tns test android
這將返回以下狀態:
? To continue, choose one of the following options: (Use arrow keys)
> Configure for Cloud Builds
   Configure for Local Builds
   Configure for Both Local and Cloud Builds
   Skip Step and Configure Manually
然後選擇以下選項:
? To continue, choose one of the following options: Configure for Local Builds
Running the setup script to try and automatically configure your environment.
These scripts require sudo permissions
.....
要在 Android 模擬器中執行您的測試套件,請執行以下命令:
tns test android --emulator
現在,karma 伺服器準備構建並部署您的專案。
端到端 (E2E) 測試
單元測試是一個小型、簡單且快速的流程,而 E2E 測試階段則涉及多個元件並協同工作,涵蓋應用程式中的流程。單元測試和整合測試無法實現這一點。
NativeScript Appium 外掛用於執行 E2E 自動化測試。Appium 是一個用於移動應用程式的開源測試框架。要在您的專案中新增此框架,您必須擁有 XCode 的最新版本或 Android SDK 25.3.0 以上版本。
安裝 Appium
讓我們使用 npm 模組全域性安裝 Appium:
npm install -g appium
現在,您可以看到以下響應:
npm install -g appium
/Users/.npm-global/bin/authorize-ios ->
/Users/.npm-global/lib/node_modules/ appium/node_modules/.bin/authorize-ios

> appium-windows-driver@1.8.0 install
/Users/.npm-global/lib/node_modules/ appium/node_modules/appium-windows-driver

> node install-npm.js
Not installing WinAppDriver since did not detect a Windows system

> core-js@2.6.11 postinstall /Users/.npm-
global/lib/node_modules/appium/node_modules/core-js

> node -e "try{require('./postinstall')}catch(e){}"
Thank you for using core-js ( https://github.com/zloirock/core-js ) for
polyfilling JavaScript
standard library!
The project needs your help! Please consider supporting of core-js on Open Collective or Patreon:

> https://opencollective.com/core-js
> https://www.patreon.com/zloirock
Also, the author of core-js ( https://github.com/zloirock )
is looking for a good job -)

> appium-chromedriver@4.19.0 postinstall/Users/.npm-
global/lib/node_modules/appium/node_modules
/appium-chromedriver

> node install-npm.js
............................................
.............................................
+ appium@1.16.0
added 671 packages from 487 contributors in 28.889s
新增外掛
讓我們使用以下命令將nativescript-dev-appium外掛作為 devDependency 新增到您的專案:
$ npm install -D nativescript-dev-appium
執行此操作後,選擇mocha框架,您將獲得類似於此的響應:
> node ./postinstall.js
? What kind of project do you use
? javascript ? Which testing framework do you prefer? mocha
+ nativescript-dev-appium@6.1.3
現在,檔案儲存在您的專案資料夾中。

構建您的裝置
讓我們使用以下命令構建 Android 裝置:
tns build android
上述命令將執行測試,應指定目標功能。如果您有 iOS 裝置,您可以使用iOS裝置進行構建。
執行測試
現在,我們已配置好裝置。讓我們使用以下命令執行我們的測試:
npm run e2e -- --runType <capability-name>
這裡:
capability-name 定義在您的應用程式e2e/config/appium.capabilities.json中。
輸出

NativeScript - 結論
NativeScript 對於 Web 開發人員來說是一個很棒的移動應用程式,它可以非常輕鬆地完全測試他們的應用程式,而無需付出額外的努力。開發人員可以自信地開發外觀精美且成功的應用程式,而不會在短時間內出現任何問題。