- NativeScript 教程
- NativeScript - 首頁
- NativeScript - 簡介
- NativeScript - 安裝
- NativeScript - 架構
- NativeScript - Angular 應用
- NativeScript - 模板
- NativeScript - 元件
- NativeScript - 佈局容器
- NativeScript - 導航
- NativeScript - 事件處理
- NativeScript - 資料繫結
- NativeScript - 模組
- NativeScript - 外掛
- NativeScript - 使用 JavaScript 的原生 API
- NativeScript - 在 Android 中建立應用
- NativeScript - 在 iOS 中建立應用
- NativeScript - 測試
- NativeScript 有用資源
- NativeScript - 快速指南
- NativeScript - 有用資源
- NativeScript - 討論
NativeScript - 資料繫結
資料繫結是 NativeScript 支援的高階概念之一。NativeScript 儘可能地遵循 Angular 資料繫結概念。資料繫結使 UI 元件能夠在沒有任何程式設計工作的情況下顯示/更新應用程式資料模型的當前值。
NativeScript 支援兩種型別的資料繫結。它們如下所示:
單向資料繫結 - 當模型發生更改時更新 UI。
雙向資料繫結 - 同步 UI 和模型。無論何時更新模型,UI 都會自動更新,並且無論何時 UI 從使用者那裡獲取資料(UI 更新),模型也會更新。
讓我們在本節中學習這兩個概念。
單向資料繫結
NativeScript 提供了一個簡單的選項來在 UI 元件中啟用單向資料繫結。要啟用單向資料繫結,只需在目標 UI 的屬性中新增方括號,然後為其分配必要的模型屬性。
例如,要更新 Label 元件的文字內容,只需將 UI 程式碼更改如下所示:
<Label [text]='this.model.prop' />
這裡,
this.model.prop 指的是模型的屬性,this.model。
讓我們更改我們的 BlankNgApp 以瞭解單向資料繫結。
步驟 1
新增一個新的模型 User (src/model/user.ts),如下所示:
export class User {
   name: string
}
步驟 2
開啟元件的 UI,src/app/home/home.component.html,並將程式碼更新如下所示:
<ActionBar>
   <Label text="Home"></Label>
</ActionBar>
<GridLayout columns="*" rows="auto, auto, auto">
   <Button text="Click here to greet" class="-primary" color='gray'
      (tap)='onButtonTap($event)' row='1' column='0'>
   </Button>
   <Label [text]='this.user.name' row='2' column='0'
      height="50px" textAlignment='center' style='font-size: 16px;
      font-weight: bold; margin: 0px 32px 0 25px;'>
   </Label>
</GridLayout>
這裡,
Label 的文字設定為使用者模型的屬性名稱。
按鈕點選事件附加到 onButtonTap 方法。
步驟 3
開啟 home 元件的程式碼,src/app/home/home.component.ts,並將程式碼更新如下所示:
import { Component, OnInit } from "@angular/core";
import { User } from "../../model/user"
@Component({
   selector: "Home",
   templateUrl: "./home.component.html"
})
export class HomeComponent implements OnInit {
   public user: User;
   constructor() {
      // Use the component constructor to inject providers.
      this.user = new User();
      this.user.name = "User1";
   }
   ngOnInit(): void {
      // Init your component properties here.
   }
   onButtonTap(args: EventData) {
      this.user.name = 'User2';
   }
}
這裡,
匯入了 user 模型
在元件的建構函式中建立 User 物件
實現了 onButtonTap 事件。onButtonTap 的實現更新了 User 物件並將屬性名稱設定為 User2
步驟 4
編譯並執行應用程式,然後單擊按鈕以更改模型,它將自動更改Label文字。
應用程式的初始狀態和最終狀態如下所示:
初始狀態
單向資料繫結初始狀態如下所示:

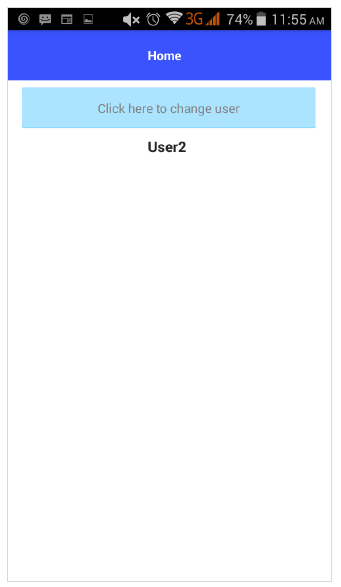
最終狀態
單向資料繫結最終狀態如下所示:
雙向資料繫結
NativeScript 還為高階功能提供了雙向資料繫結。它將模型資料繫結到 UI,並將 UI 中更新的資料繫結到模型。
要進行雙向資料繫結,請使用 ngModel 屬性,然後將其用 [] 和 () 括起來,如下所示:
<TextField [(ngModel)] = 'this.user.name'></TextField>
讓我們更改 BlankNgApp 應用程式以更好地理解雙向資料繫結。
步驟 1
將 NativeScriptFormsModule 匯入到 HomeModule (src/app/home/home.module.ts) 中,如下所示:
import { NgModule, NO_ERRORS_SCHEMA } from "@angular/core";
import { NativeScriptCommonModule } from "nativescript-angular/common";
import { HomeRoutingModule } from "./home-routing.module";
import { HomeComponent } from "./home.component";
import { NativeScriptFormsModule } from "nativescript-angular/forms";
@NgModule({
   imports: [
      NativeScriptCommonModule,
      HomeRoutingModule,
      NativeScriptFormsModule
   ],
   declarations: [
      HomeComponent
   ],
   schemas: [
      NO_ERRORS_SCHEMA
   ]
})
export class HomeModule { }
這裡,
NativeScriptFormsModule 啟用了雙向資料繫結。否則,雙向資料繫結將無法按預期工作。
步驟 2
更改 home 元件的 UI,如下所示:
<ActionBar> <Label text="Home"></Label></ActionBar>
<GridLayout columns="*" rows="auto, auto">
   <TextField hint="Username" row='0' column='0' color="gray"
      backgroundColor="lightyellow" height="75px" [(ngModel)]='this.user.name'>
   </TextField>
   <Label [text]='this.user.name' row='1' column='0' height="50px"
      textAlignment='center' style='font-size: 16px; font-weight: bold;
      margin: 0px 32px 0 25px;'>
   </Label>
</GridLayout>
這裡,
Label 元件的 text 屬性使用單向資料繫結設定。如果模型 user 更新,則其 text 屬性將自動更新。
TextField 元件將 ngModel 設定為 this.user.name。如果模型 user 更新,則其 text 屬性將自動更新。同時,如果使用者更改 TextField 的值,則模型也會更新。如果模型更新,它也會觸發 Label 的 text 屬性更改。因此,如果使用者更改資料,它將顯示在 Label 的 text 屬性中。
步驟 3
執行應用程式並嘗試更改文字框的值。
應用程式的初始狀態和最終狀態將類似於以下所示:
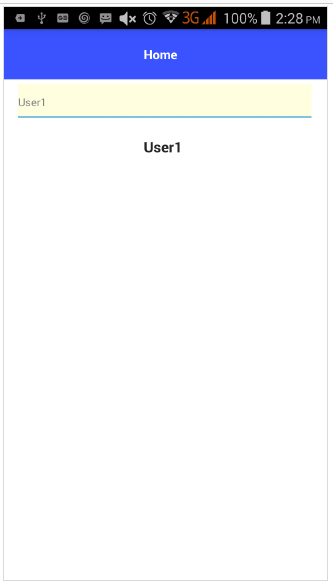
初始狀態
雙向資料繫結 - 初始狀態如下所示:
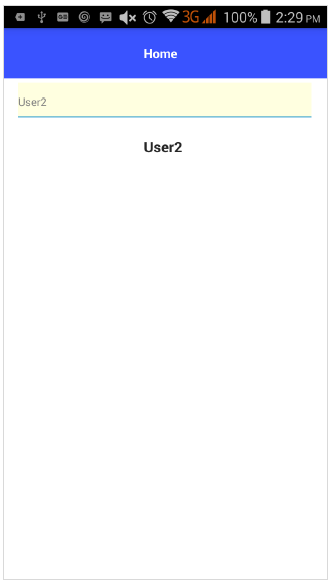
最終狀態
雙向資料繫結 - 最終狀態如下所示: