- Silverlight 教程
- Silverlight - 首頁
- Silverlight - 概述
- Silverlight - 環境設定
- Silverlight - 開始
- Silverlight - XAML 概述
- Silverlight - 專案型別
- Silverlight - 固定佈局
- Silverlight - 動態佈局
- 受約束與不受約束
- Silverlight - CSS
- Silverlight - 控制元件
- Silverlight - 按鈕
- Silverlight - 內容模型
- Silverlight - ListBox
- Silverlight - 模板
- Silverlight - 可視狀態
- Silverlight - 資料繫結
- Silverlight - 瀏覽器整合
- Silverlight - 瀏覽器外執行
- Silverlight - 應用程式和資源
- Silverlight - 檔案訪問
- Silverlight - 檢視模型
- Silverlight - 輸入處理
- Silverlight - 隔離儲存
- Silverlight - 文字
- Silverlight - 動畫
- Silverlight - 影片和音訊
- Silverlight - 列印
- Silverlight 有用資源
- Silverlight - 快速指南
- Silverlight - 有用資源
- Silverlight - 討論
Silverlight - 列印
列印對於某些型別的應用程式來說是一項重要的功能。本章將介紹 Silverlight 中的相關功能。
列印 API,以及所有想要列印的 Silverlight 應用程式必須執行的基本步驟。選擇水印的各種選項。
最簡單的方法是列印螢幕上已有的使用者介面元素的副本。
大多數應用程式都希望比這更高階一些,並生成專門用於列印的內容,在某些情況下,需要將內容分成多個頁面。
列印步驟
無論您是列印螢幕截圖還是螢幕上已有的內容,還是進行完全自定義的多頁列印輸出,都需要執行相同的步驟。
列印 API 的核心是 PrintDocument 類。
您首先構造一個這樣的物件,當您呼叫其 Print 方法時,它會顯示啟動列印作業的標準使用者介面。

使用者可以像往常一樣選擇印表機並配置設定。如果使用者隨後點選**列印**繼續,**PrintDocument** 將立即引發其**PrintPage** 事件,而您對此事件的處理程式將提供要列印的內容。
事件引數為此目的提供了一個**PageVisual** 屬性。
您可以將其設定為任何 Silverlight 使用者介面元素,無論是螢幕上已有的元素,還是專門為列印建立的新元素。
列印現有元素
元素 最簡單的選項是列印 Silverlight 應用程式中螢幕上已有的內容。由於**PrintPage** 事件引數**PageVisual** 接受任何使用者介面元素,因此您可以選擇使用者介面中的任何內容並進行列印。
這只是比使用 PrintScreen 鍵抓取螢幕截圖略微好一點的步驟。它比這稍好一點,因為使用者不必手動將螢幕截圖貼上到其他程式中進行裁剪和列印。但這仍然只是略微的改進。
列印螢幕上已有的內容是有問題的。
首先,無法保證在螢幕上有效的佈局在紙張上也能有效。
讓我們來看一個簡單的示例,其中**ScrollViewer** 包含一些 UI 元素,其佈局已適應螢幕。它根據瀏覽器視窗大小調整大小,並提供捲軸以確保即使內容不適合也能訪問所有內容。
以下是 XAML 程式碼。
<UserControl
   xmlns = "http://schemas.microsoft.com/winfx/2006/xaml/presentation"
   xmlns:x = "http://schemas.microsoft.com/winfx/2006/xaml"
   xmlns:d = "http://schemas.microsoft.com/expression/blend/2008"
   xmlns:mc = "http://schemas.openxmlformats.org/markup-compatibility/2006"
   xmlns:sdk = "http://schemas.microsoft.com/winfx/2006/xaml/presentation/sdk"
   x:Class = "SilverlightPrinting.MainPage"
   mc:Ignorable = "d"
   d:DesignHeight = "300" d:DesignWidth = "500">

   <Grid x:Name = "LayoutRoot" Background = "White">

      <Button x:Name = "print" Content = "Print" Click = "print_Click" Width = "60"
         Height = "20" Margin = "10,10,430,270"/>

      <ScrollViewer x:Name = "myScrollViewer"
         HorizontalScrollBarVisibility = "Auto"
         VerticalScrollBarVisibility = "Auto"
         Width = "400" Margin = "90,0,10,0">

         <StackPanel>
            <Rectangle Fill = "Gray" Width = "100" Height = "100" />
            <Button x:Name = "button" Content = "Button" Width = "75"/>
            <sdk:Calendar Height = "169" Width = "230"/>
            <Rectangle Fill = "AliceBlue" Width = "475" Height = "100" />
         </StackPanel>

      </ScrollViewer>

   </Grid>

</UserControl>
以下是**列印按鈕**點選事件的實現,它將列印**ScrollViewer**及其可見資料。
using System;
using System.Windows;
using System.Windows.Controls;
using System.Windows.Printing;

namespace SilverlightPrinting {

   public partial class MainPage : UserControl {

      public MainPage() {
         InitializeComponent();
      }

      private void print_Click(object sender, RoutedEventArgs e) {
         PrintDocument pd = new PrintDocument();
         pd.PrintPage += new System.EventHandler<PrintPageEventArgs>(pd_PrintPage);
         pd.Print("Print Screen Content");
      }

      private void pd_PrintPage(object sender, PrintPageEventArgs e) {
         e.PageVisual = myScrollViewer;
      }
   }
}
如您所見,在**列印按鈕點選事件**中建立了**PrintDocument**物件,我們將其處理程式附加到其 PrintPage 事件。
您可以將**PageVisual**屬性設定為引用**ScrollViewer**。
然後呼叫**Print方法**。這將接受一個字串,該字串將在列印佇列中顯示為作業名稱。
編譯並執行上述程式碼後,您將看到以下輸出。

單擊**列印**按鈕,您將看到標準的列印對話方塊。
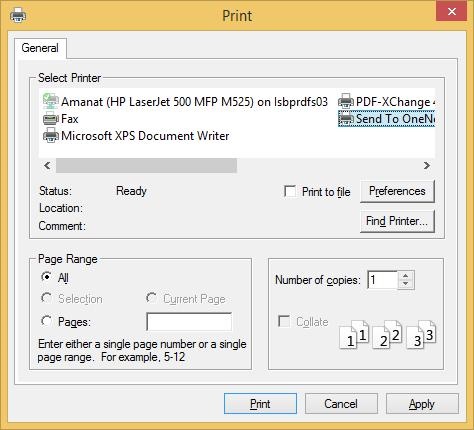
現在,選擇預設印表機。為了演示,讓我們選擇**OneNote**並單擊**列印**按鈕。您將看到**ScrollViewer**被列印。

請注意,捲軸仍然顯示在**ScrollViewer**上。
自定義 UI 樹
通常,與其列印螢幕上已有的內容,不如構建專門用於列印的使用者介面元素樹更有意義。這樣,您可以確保只在紙張上使用非互動式元素,並且可以建立更適合紙張形狀和大小的專用佈局。您可以建立一個僅用於列印的 UserControl。
讓我們來看一個簡單的示例,建立一個 Silverlight 專案並新增一個名為**PrintLayout**的**UserControl**。

將設計時寬度和高度設定為近似於紙張形狀。以下是**PrintLayout.xaml**檔案的 XAML 程式碼。
<UserControl x:Class = "PrintCustomUI.PrintLayout"
   xmlns = "http://schemas.microsoft.com/winfx/2006/xaml/presentation"
   xmlns:x = "http://schemas.microsoft.com/winfx/2006/xaml"
   xmlns:d = "http://schemas.microsoft.com/expression/blend/2008"
   xmlns:mc = "http://schemas.openxmlformats.org/markup-compatibility/2006"
   mc:Ignorable = "d"
   d:DesignHeight = "768" d:DesignWidth = "960">

   <Grid x:Name = "LayoutRoot" Background = "White">

      <Grid.RowDefinitions>
         <RowDefinition Height = "Auto" />
         <RowDefinition />
         <RowDefinition Height = "Auto" />
      </Grid.RowDefinitions>

      <TextBlock Text = "Silverlight" HorizontalAlignment = "Center"
         FontSize = "60" FontWeight = "Bold" FontFamily = "Georgia" />

      <TextBlock Grid.Row = "2" Text = "Print Testing"
         HorizontalAlignment = "Center" FontFamily = "Georgia"
         FontSize = "24" Margin = "0,10"/>

      <Rectangle Grid.Row = "2" Height = "1" Fill = "Black"
         VerticalAlignment = "Top"/>

      <Ellipse Grid.Row = "1" Stroke = "Black" StrokeThickness = "10" Margin = "10">

         <Ellipse.Fill>

            <RadialGradientBrush
               GradientOrigin = "0.2,0.2"
               Center = "0.4,0.4">
               <GradientStop Color = "Aqua" Offset = "0.006" />
               <GradientStop Color = "AntiqueWhite" Offset = "1" />
            </RadialGradientBrush>

         </Ellipse.Fill>

      </Ellipse>

   </Grid>

</UserControl>
以下是**MainPage.xaml**檔案中的程式碼,該檔案僅包含一個**列印**按鈕。
<UserControl x:Class = "PrintCustomUI.MainPage"
   xmlns = "http://schemas.microsoft.com/winfx/2006/xaml/presentation"
   xmlns:x = "http://schemas.microsoft.com/winfx/2006/xaml"
   xmlns:d = "http://schemas.microsoft.com/expression/blend/2008"
   xmlns:mc = "http://schemas.openxmlformats.org/markup-compatibility/2006"
   mc:Ignorable = "d"
   d:DesignHeight = "300" d:DesignWidth = "400">

   <Grid x:Name = "LayoutRoot" Background = "White">

      <Button Content = "Print..." Height = "23" HorizontalAlignment = "Left"
         Margin = "12,28,0,0" Name = "printButton"
         VerticalAlignment = "Top" Width = "75"
         Click = "printButton_Click" />

   </Grid>

</UserControl>
以下是列印按鈕的**點選事件**實現。
using System;
using System.Collections.Generic;
using System;

using System.Windows;
using System.Windows.Controls;
using System.Windows.Printing;

namespace PrintCustomUI {

   public partial class MainPage : UserControl {

      public MainPage() {
         InitializeComponent();
      }

      private void printButton_Click(object sender, RoutedEventArgs e) {
         PrintDocument pd = new PrintDocument();
         pd.PrintPage += new EventHandler<PrintPageEventArgs>(pd_PrintPage);
         pd.Print("Custom");
      }

      void pd_PrintPage(object sender, PrintPageEventArgs e) {
         var pl = new PrintLayout();
         pl.Width = e.PrintableArea.Width;
         pl.Height = e.PrintableArea.Height;
         e.PageVisual = pl;
      }
   }
}
編譯並執行上述程式碼後,您將在網頁上看到以下輸出。
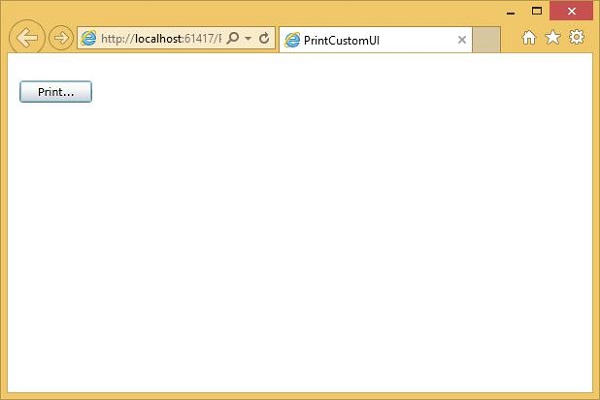
單擊**列印**並選擇**OneNote**以列印佈局。您將看到佈局已列印。

您可以看到它已填滿了可用空間。我們建議您執行上述示例以更好地理解。