- iText 教程
- iText - 首頁
- iText 畫布
- iText - 繪製弧線
- iText - 繪製直線
- iText - 繪製圓形
- iText 有用資源
- iText 快速指南
- iText - 有用資源
- iText - 討論
iText 快速指南
iText - 概述
可移植文件格式 (PDF) 是一種檔案格式,它有助於以獨立於應用程式軟體、硬體和作業系統的方式呈現資料。每個 PDF 檔案都包含對固定版式平面文件的描述,包括文字、字型、圖形以及顯示它所需的其他資訊。
有幾個庫可用於透過程式建立和操作 PDF 文件,例如:
Adobe PDF 庫 - 此庫提供 C++、.NET 和 Java 等語言的 API。使用它,我們可以編輯、檢視、列印和從 PDF 文件中提取文字。
格式物件處理器 - 由 XSL 格式物件驅動的開源列印格式化程式和與輸出無關的格式化程式。主要輸出目標是 PDF。
PDF Box - Apache PDFBox 是一個開源 Java 庫,支援 PDF 文件的開發和轉換。使用此庫,您可以開發建立、轉換和操作 PDF 文件的 Java 程式。
Jasper Reports - 這是一款 Java 報表工具,可以生成 PDF 文件中的報表,包括 Microsoft Excel、RTF、ODT、逗號分隔值和 XML 檔案。
什麼是 iText?
與上面列出的軟體類似,iText 是一個 Java PDF 庫,可以使用它開發建立、轉換和操作 PDF 文件的 Java 程式。
iText 的特性
以下是 iText 庫的顯著特性:
互動式 - iText 提供類 (API) 來生成互動式 PDF 文件。使用這些,您可以建立地圖和書籍。
新增書籤、頁碼等 - 使用 iText,您可以新增書籤、頁碼和水印。
分割和合並 - 使用 iText,您可以將現有 PDF 分割成多個 PDF,也可以向其中新增/連線其他頁面。
填寫表單 - 使用 iText,您可以填寫 PDF 文件中的互動式表單。
另存為影像 - 使用 iText,您可以將 PDF 另存為影像檔案,例如 PNG 或 JPEG。
畫布 - iText 庫提供了一個 Canvas 類,您可以使用它在 PDF 文件上繪製各種幾何形狀,例如圓形、直線等。
建立 PDF - 使用 iText,您可以從 Java 程式建立一個新的 PDF 檔案。您也可以包含影像和字型。
iText 環境
按照以下步驟在 Eclipse 中設定 iText 環境。
步驟 1 - 安裝 Eclipse 並開啟一個新專案,如下所示。

步驟 2 - 建立一個名為 iTextSample 的專案,如下所示。
步驟 3 - 右鍵單擊專案,將其轉換為 Maven 專案,如下所示。一旦將其轉換為 Maven 專案,它將為您提供一個 pom.xml 檔案,您需要在其中提及所需的依賴項。之後,這些依賴項的 jar 檔案將自動下載到您的專案中。

步驟 4 - 現在,在專案的 pom.xml 中,複製並貼上以下內容(iText 應用程式的依賴項)並重新整理專案。
使用 pom.xml
將專案轉換為 Maven 專案,並將以下內容新增到其 pom.xml 檔案中。
<project xmlns="http://maven.apache.org/POM/4.0.0"
   xmlns:xsi="http://www.w3.org/2001/XMLSchema-instance"
   xsi:schemaLocation="http://maven.apache.org/POM/4.0.0
   http://maven.apache.org/xsd/maven-4.0.0.xsd">

   <modelVersion>4.0.0</modelVersion>
   <groupId>SanthoshExample</groupId>
   <artifactId>SanthoshExample</artifactId>
   <version>0.0.1-SNAPSHOT</version>
   <build>
      <sourceDirectory>src</sourceDirectory>
      <plugins>
         <plugin>
            <artifactId>maven-compiler-plugin</artifactId>
            <version>3.5.1</version>
            <configuration>
               <source>1.8</source>
               <target>1.8</target>
            </configuration>
         </plugin>
      </plugins>
   </build>

   <dependencies>
      <!-- always needed -->
      <dependency>
         <groupId>com.itextpdf</groupId>
         <artifactId>kernel</artifactId>
         <version>7.0.2</version>
      </dependency>

      <dependency>
         <groupId>com.itextpdf</groupId>
         <artifactId>io</artifactId>
         <version>7.0.2</version>
      </dependency>

      <dependency>
         <groupId>com.itextpdf</groupId>
         <artifactId>layout</artifactId>
         <version>7.0.2</version>
      </dependency>

      <dependency>
         <groupId>com.itextpdf</groupId>
         <artifactId>forms</artifactId>
         <version>7.0.2</version>
      </dependency>

      <dependency>
         <groupId>com.itextpdf</groupId>
         <artifactId>pdfa</artifactId>
         <version>7.0.2</version>
      </dependency>

      <dependency>
         <groupId>com.itextpdf</groupId>
         <artifactId>sign</artifactId>
         <version>7.0.2</version>
      </dependency>

      <dependency>
         <groupId>com.itextpdf</groupId>
         <artifactId>barcodes</artifactId>
         <version>7.0.2</version>
      </dependency>

      <dependency>
         <groupId>com.itextpdf</groupId>
         <artifactId>font-asian</artifactId>
         <version>7.0.2</version>
      </dependency>

      <dependency>
         <groupId>com.itextpdf</groupId>
         <artifactId>hyph</artifactId>
         <version>7.0.2</version>
      </dependency>
   </dependencies>

</project>
最後,如果您檢視 Maven 依賴項,您可以看到所有所需的 jar 檔案都已下載。

iText - 建立 PDF 文件
現在讓我們瞭解如何使用 iText 庫建立 PDF 文件。
建立空 PDF 文件
您可以透過例項化 Document 類來建立一個空的 PDF 文件。例項化此類時,需要將 PdfDocument 物件作為引數傳遞給其建構函式。
以下是建立空 PDF 文件的步驟。
步驟 1:建立 PdfWriter 物件
PdfWriter 類代表 PDF 的文件編寫器。此類屬於 com.itextpdf.kernel.pdf 包。此類的建構函式接受一個字串,表示要建立 PDF 檔案的路徑。
透過將字串值(表示您需要建立 PDF 的路徑)傳遞給其建構函式來例項化 PdfWriter 類,如下所示。
// Creating a PdfWriter
String dest = "C:/itextExamples/sample.pdf";
PdfWriter writer = new PdfWriter(dest);
當將此型別的物件傳遞給 PdfDocument(類)時,新增到此文件的每個元素都將寫入指定的檔案。
步驟 2:建立 PdfDocument 物件
PdfDocument 類是代表 iText 中 PDF 文件的類。此類屬於 com.itextpdf.kernel.pdf 包。要例項化此類(在寫入模式下),需要將 PdfWriter 類的物件傳遞給其建構函式。
透過將上面建立的 PdfWriter 物件傳遞給其建構函式來例項化 PdfDocument 類,如下所示。
// Creating a PdfDocument
PdfDocument pdfDoc = new PdfDocument(writer);
建立 PdfDocument 物件後,您可以使用其類提供的相應方法新增各種元素,例如頁面、字型、檔案附件和事件處理程式。
步驟 3:新增空頁面
PdfDocument 類的 addNewPage() 方法用於在 PDF 文件中建立空頁面。
如下所示,向上一步驟中建立的 PDF 文件新增一個空頁面。
// Adding an empty page
pdfDoc.addNewPage();
步驟 4:建立 Document 物件
com.itextpdf.layout 包的 Document 類是建立自包含 PDF 時的根元素。此類的建構函式之一接受 PdfDocument 類的物件。
透過將上一步驟中建立的 PdfDocument 類物件傳遞給建構函式來例項化 Document 類,如下所示。
// Creating a Document
Document document = new Document(pdfDoc);
步驟 5:關閉 Document
使用 Document 類的 close() 方法關閉文件,如下所示。
// Closing the document
document.close();
示例
以下 Java 程式演示瞭如何建立 PDF 文件。它建立一個名為 sample.pdf 的 PDF 文件,向其中新增一個空頁面,並將其儲存在 C:/itextExamples/ 路徑下。
將此程式碼儲存在名為 create_PDF.java 的檔案中。
import com.itextpdf.kernel.pdf.PdfDocument;
import com.itextpdf.kernel.pdf.PdfWriter;
import com.itextpdf.layout.Document;

public class create_PDF {
   public static void main(String args[]) throws Exception {
      // Creating a PdfWriter
      String dest = "C:/itextExamples/sample.pdf";
      PdfWriter writer = new PdfWriter(dest);

      // Creating a PdfDocument
      PdfDocument pdfDoc = new PdfDocument(writer);

      // Adding a new page
      pdfDoc.addNewPage();

      // Creating a Document
      Document document = new Document(pdfDoc);

      // Closing the document
      document.close();
      System.out.println("PDF Created");
   }
}
使用以下命令從命令提示符編譯並執行儲存的 Java 檔案:
javac create_PDF.java
java create_PDF
執行後,上述程式將建立一個 PDF 文件,並顯示以下訊息。
PDF created
如果您驗證指定的路徑,則可以找到建立的 PDF 文件,如下所示。

由於這是一個空文件,如果您嘗試開啟此文件,它將顯示錯誤訊息,如下面的螢幕截圖所示。

iText - 新增 AreaBreak
在本節中,我們將學習如何使用 iText 庫建立包含 AreaBreak 的 PDF 文件。
建立 AreaBreak
您可以透過例項化 Document 類來建立一個空的 PDF 文件。例項化此類時,需要將 PdfDocument 物件作為引數傳遞給其建構函式。然後,要向文件新增 areabreak,需要例項化 AreaBreak 類,並使用 add() 方法將此物件新增到文件中。
以下是建立包含 AreaBreak 的空 PDF 文件的步驟。
步驟 1:建立 PdfWriter 物件
PdfWriter 類代表 PDF 的文件編寫器,此類屬於 com.itextpdf.kernel.pdf 包。此類的建構函式接受一個字串,表示要建立 PDF 檔案的路徑。
透過將表示您需要建立 PDF 的路徑的字串值傳遞給其建構函式來例項化 PdfWriter 類,如下所示。
// Creating a PdfWriter
String dest = "C:/itextExamples/addingAreaBreak.pdf";
PdfWriter writer = new PdfWriter(dest);
當將此型別的物件傳遞給 PdfDocument(類)時,新增到此文件的每個元素都將寫入指定的檔案。
步驟 2:建立 PdfDocument 物件
PdfDocument 類是代表 iText 中 PDF 文件的類,此類屬於 com.itextpdf.kernel.pdf 包。要例項化此類(在寫入模式下),需要將 PdfWriter 類的物件傳遞給其建構函式。
透過將上面建立的 PdfWriter 物件傳遞給其建構函式來例項化 PdfDocument 類,如下所示。
// Creating a PdfDocument
PdfDocument pdfDoc = new PdfDocument(writer);
建立 PdfDocument 物件後,您可以使用其類提供的相應方法新增各種元素,例如頁面、字型、檔案附件和事件處理程式。
步驟 3:建立 Document 物件
com.itextpdf.layout 包的 Document 類是建立自包含 PDF 時的根元素。此類的建構函式之一接受 PdfDocument 類的物件。
透過將上一步驟中建立的 PdfDocument 類物件傳遞給建構函式來例項化 Document 類,如下所示。
// Creating a Document
Document document = new Document(pdfDoc);
步驟 4:建立 Area Break 物件
AreaBreak 類屬於 com.itextpdf.layout.element 包。例項化此類時,當前上下文區域將被終止,並將建立一個具有相同大小的新區域(如果我們使用預設建構函式)。
如下所示例項化 AreaBreak 類。
// Creating an Area Break
AreaBreak aB = new AreaBreak();
步驟 5:新增 AreaBreak
使用 Document 類的 add() 方法新增上一步驟中建立的 areabreak 物件,如下所示。
// Adding area break to the PDF
document.add(aB);
步驟 6:關閉 Document
使用 Document 類的 close() 方法關閉文件,如下所示。
// Closing the document
document.close();
示例
以下 Java 程式演示瞭如何使用 iText 庫建立包含 AreaBreak 的 PDF 文件。它建立一個名為 addingAreaBreak.pdf 的 PDF 文件,向其中新增一個 areabreak,並將其儲存在 C:/itextExamples/ 路徑下。
將此程式碼儲存在名為 AddingAreaBreak.java 的檔案中。
import com.itextpdf.kernel.pdf.PdfDocument;
import com.itextpdf.kernel.pdf.PdfWriter;
import com.itextpdf.layout.Document;
import com.itextpdf.layout.element.AreaBreak;

public class AddingAreaBreak {
   public static void main(String args[]) throws Exception {
      // Creating a PdfWriter
      String dest = "C:/itextExamples/addingAreaBreak.pdf";
      PdfWriter writer = new PdfWriter(dest);

      // Creating a PdfDocument
      PdfDocument pdf = new PdfDocument(writer);

      // Creating a Document by passing PdfDocument object to its constructor
      Document document = new Document(pdf);

      // Creating an Area Break
      AreaBreak aB = new AreaBreak();

      // Adding area break to the PDF
      document.add(aB);

      // Closing the document
      document.close();
      System.out.println("Pdf created");
   }
}
使用以下命令從命令提示符編譯並執行儲存的 Java 檔案:
javac AddingAreaBreak.java
java AddingAreaBreak
執行後,上述程式將建立一個 PDF 文件,並顯示以下訊息。
Pdf Created
如果您驗證指定的路徑,則可以找到建立的 PDF 文件,如下所示。

iText - 新增段落
在本節中,我們將學習如何使用 iText 庫建立 PDF 文件並在其中新增段落。
建立段落
您可以透過例項化 Document 類來建立一個空的 PDF 文件。例項化此類時,需要將 PdfDocument 物件作為引數傳遞給其建構函式。然後,要向文件新增段落,需要例項化 Paragraph 類,並使用 add() 方法將此物件新增到文件中。
以下是建立包含段落的 PDF 文件的步驟。
步驟 1:建立 PdfWriter 物件
PdfWriter 類代表 PDF 的文件編寫器。此類屬於 com.itextpdf.kernel.pdf 包。此類的建構函式接受一個字串,表示要建立 PDF 檔案的路徑。
透過將字串值(表示您需要建立 PDF 的路徑)傳遞給其建構函式來例項化 PdfWriter 類,如下所示。
// Creating a PdfWriter
String dest = "C:/itextExamples/addingParagraph.pdf";
PdfWriter writer = new PdfWriter(dest);
當將此型別的物件傳遞給 PdfDocument(類)時,新增到此文件的每個元素都將寫入指定的檔案。
步驟 2:建立 PdfDocument
PdfDocument 類是代表 iText 中 PDF 文件的類。此類屬於 com.itextpdf.kernel.pdf 包。要例項化此類(在寫入模式下),需要將 PdfWriter 類的物件傳遞給其建構函式。
透過將上面建立的 PdfWriter 物件傳遞給其建構函式來例項化 PdfDocument 類,如下所示。
// Creating a PdfDocument
PdfDocument pdfDoc = new PdfDocument(writer);
建立 PdfDocument 物件後,您可以使用其類提供的相應方法新增各種元素,例如頁面、字型、檔案附件和事件處理程式。
步驟 3:建立 Document 類
com.itextpdf.layout 包的 Document 類是建立自包含 PDF 時的根元素。此類的建構函式之一接受 PdfDocument 類的物件。
透過將上一步驟中建立的 PdfDocument 類物件傳遞給建構函式來例項化 Document 類,如下所示。
// Creating a Document
Document document = new Document(pdfDoc);
步驟 4:建立 Paragraph 物件
Paragraph 類代表一個自包含的文字和圖形資訊塊。它屬於 com.itextpdf.layout.element 包。
透過將文字內容作為字串傳遞給其建構函式來例項化 Paragraph 類,如下所示。
String para = "Welcome to Tutorialspoint.";
// Creating an Area Break
Paragraph para = new Paragraph (para);
步驟 5:新增 Paragraph
使用 Document 類的 add() 方法新增上一步驟中建立的 Paragraph 物件,如下所示。
// Adding area break to the PDF
document.add(para);
步驟 6:關閉 Document
使用 Document 類的 close() 方法關閉文件,如下所示。
// Closing the document
document.close();
示例
以下Java程式演示瞭如何使用iText庫建立PDF文件並向其中新增段落。它建立一個名為addingParagraph.pdf的PDF文件,向其中新增一個段落,並將其儲存在C:/itextExamples/路徑下。
將此程式碼儲存在名為AddingParagraph.java的檔案中。
import com.itextpdf.kernel.pdf.PdfDocument;
import com.itextpdf.kernel.pdf.PdfWriter;
import com.itextpdf.layout.Document;
import com.itextpdf.layout.element.Paragraph;

public class AddingParagraph {
   public static void main(String args[]) throws Exception {
      // Creating a PdfWriter
      String dest = "C:/itextExamples/addingParagraph.pdf";
      PdfWriter writer = new PdfWriter(dest);

      // Creating a PdfDocument
      PdfDocument pdf = new PdfDocument(writer);

      // Creating a Document
      Document document = new Document(pdf);
      String para1 = "Tutorials Point originated from the idea that there exists
      a class of readers who respond better to online content and prefer to learn
      new skills at their own pace from the comforts of their drawing rooms.";

      String para2 = "The journey commenced with a single tutorial on HTML in 2006
      and elated by the response it generated, we worked our way to adding fresh
      tutorials to our repository which now proudly flaunts a wealth of tutorials
      and allied articles on topics ranging from programming languages to web designing
      to academics and much more.";

      // Creating Paragraphs
      Paragraph paragraph1 = new Paragraph(para1);
      Paragraph paragraph2 = new Paragraph(para2);

      // Adding paragraphs to document
      document.add(paragraph1);
      document.add(paragraph2);

      // Closing the document
      document.close();
      System.out.println("Paragraph added");
   }
}
使用以下命令從命令提示符編譯並執行儲存的 Java 檔案:
javac AddingParagraph.java
java AddingParagraph
執行後,上述程式將建立一個 PDF 文件,並顯示以下訊息。
Paragraph added
如果您驗證指定的路徑,則可以找到建立的 PDF 文件,如下所示。

iText - 新增列表
本章我們將學習如何使用iText庫建立PDF文件並向其中新增列表。
建立列表
您可以透過例項化Document類來建立一個空的PDF文件。例項化此類時,需要將PdfDocument物件作為引數傳遞給其建構函式。然後,要向文件新增列表,需要例項化List類並將此物件使用add()方法新增到文件中。
以下是建立PDF文件並在其中新增列表的步驟。
步驟 1:建立 PdfWriter 物件
PdfWriter類表示PDF的DocWriter。此類屬於com.itextpdf.kernel.pdf包。此類的建構函式接受一個字串,表示要建立PDF檔案的路徑。
透過將字串值(表示您需要建立 PDF 的路徑)傳遞給其建構函式來例項化 PdfWriter 類,如下所示。
// Creating a PdfWriter
String dest = "C:/itextExamples/addingList.pdf";
PdfWriter writer = new PdfWriter(dest);
當將此型別的物件傳遞給 PdfDocument(類)時,新增到此文件的每個元素都將寫入指定的檔案。
步驟 2:建立 PdfDocument 物件
PdfDocument類是表示iText中PDF文件的類,此類屬於com.itextpdf.kernel.pdf包。要例項化此類(寫入模式),需要將其PdfWriter類的物件傳遞給其建構函式。
透過將上面建立的 PdfWriter 物件傳遞給其建構函式來例項化 PdfDocument 類,如下所示。
// Creating a PdfDocument
PdfDocument pdfDoc = new PdfDocument(writer);
建立 PdfDocument 物件後,您可以使用其類提供的相應方法新增各種元素,例如頁面、字型、檔案附件和事件處理程式。
步驟3:建立Document物件
com.itextpdf.layout 包的 Document 類是建立自包含 PDF 時的根元素。此類的建構函式之一接受 PdfDocument 類的物件。
透過將上一步驟中建立的 PdfDocument 類物件傳遞給建構函式來例項化 Document 類,如下所示。
// Creating a Document
Document document = new Document(pdfDoc);
步驟4:建立List物件
List類表示一系列垂直排列的物件。它屬於com.itextpdf.layout.element包。
如下所示例項化List類。
// Creating a list
List list = new List();
步驟5:向列表中新增元素
使用List類的add()方法透過傳遞字串值向list物件新增內容,如下所示。
//  Add elements to the list
list.add("Java");
list.add("JavaFX");
list.add("Apache Tika");
list.add("OpenCV");
步驟6:將列表新增到文件
使用Document類的add()方法新增上一步中建立的list物件,如下所示。
// Adding list to the document
document.add(list);
步驟7:關閉文件
使用 Document 類的 close() 方法關閉文件,如下所示。
// Closing the document
document.close();
示例
以下Java程式演示瞭如何使用iText庫建立PDF文件並向其中新增列表。它建立一個名為addingList.pdf的PDF文件,向其中新增一個列表,並將其儲存在C:/itextExamples/路徑下。
將此程式碼儲存在名為AddingList.java的檔案中。
import com.itextpdf.kernel.pdf.PdfDocument;
import com.itextpdf.kernel.pdf.PdfWriter;

import com.itextpdf.layout.Document;
import com.itextpdf.layout.element.List;
import com.itextpdf.layout.element.Paragraph;

public class AddingList {
   public static void main(String args[]) throws Exception {
      // Creating a PdfWriter
      String dest = "C:/itextExamples/addngList.pdf";
      PdfWriter writer = new PdfWriter(dest);

      // Creating a PdfDocument
      PdfDocument pdf = new PdfDocument(writer);

      // Creating a Document
      Document document = new Document(pdf);

      // Creating a Paragraph
      Paragraph paragraph = new Paragraph("Tutorials Point provides the following tutorials");

      // Creating a list
      List list = new List();

      // Add elements to the list
      list.add("Java");
      list.add("JavaFX");
      list.add("Apache Tika");
      list.add("OpenCV");
      list.add("WebGL");
      list.add("Coffee Script");
      list.add("Java RMI");
      list.add("Apache Pig");

      // Adding paragraph to the document
      document.add(paragraph);

      // Adding list to the document
      document.add(list);

      // Closing the document
      document.close();
      System.out.println("List added");
   }
}
使用以下命令從命令提示符編譯並執行儲存的 Java 檔案:
javac AddingList.java
java AddingList
執行後,上述程式將建立一個 PDF 文件,並顯示以下訊息。
List added
如果您驗證指定的路徑,則可以找到建立的 PDF 文件,如下所示。

iText - 新增表格
本章我們將學習如何使用iText庫建立PDF文件並向其中新增表格。
向Pdf新增表格
您可以透過例項化Document類來建立一個空的PDF文件。例項化此類時,需要將PdfDocument物件作為引數傳遞給其建構函式。然後,要向文件新增表格,需要例項化Table類並將此物件使用add()方法新增到文件中。
以下是建立包含表格的PDF文件的步驟。
步驟 1:建立 PdfWriter 物件
PdfWriter類表示PDF的DocWriter。此類屬於com.itextpdf.kernel.pdf包。此類的建構函式接受一個字串,表示要建立PDF檔案的路徑。
透過將字串值(表示需要建立PDF的路徑)傳遞給其建構函式來例項化PdfWriter類,如下所示。
// Creating a PdfWriter
String dest = "C:/itextExamples/addingTable.pdf";
PdfWriter writer = new PdfWriter(dest);
當將此型別的物件傳遞給 PdfDocument(類)時,新增到此文件的每個元素都將寫入指定的檔案。
步驟 2:建立 PdfDocument 物件
PdfDocument 類是代表 iText 中 PDF 文件的類。此類屬於 com.itextpdf.kernel.pdf 包。要例項化此類(在寫入模式下),需要將 PdfWriter 類的物件傳遞給其建構函式。
透過將上面建立的 PdfWriter 物件傳遞給其建構函式來例項化 PdfDocument 類,如下所示。
// Creating a PdfDocument
PdfDocument pdfDoc = new PdfDocument(writer);
建立 PdfDocument 物件後,您可以使用其類提供的相應方法新增各種元素,例如頁面、字型、檔案附件和事件處理程式。
步驟3:建立Document物件
com.itextpdf.layout包中的Document類是建立自包含PDF時的根元素。此類的建構函式之一接受PdfDocument類的物件。
透過將上一步驟中建立的 PdfDocument 類物件傳遞給建構函式來例項化 Document 類,如下所示。
// Creating a Document
Document document = new Document(pdfDoc);
步驟4:建立Table物件
Table類表示一個二維網格,其中填充按行和列排序的單元格。它屬於com.itextpdf.layout.element包。
如下所示例項化Table類。
// Creating a table object
float [] pointColumnWidths = {150F, 150F, 150F};
Table table = new Table(pointColumnWidths);
步驟5:向表格中新增單元格
透過例項化com.itextpdf.layout.element包的Cell類來建立一個cell物件。使用此類的add()方法新增單元格的內容。
最後,要將此單元格新增到表格中,請呼叫Table類的addCell()方法並將cell物件作為引數傳遞給此方法,如下所示。
// Adding cell 1 to the table
Cell cell1 = new Cell();   // Creating a cell
cell1.add("Name");         // Adding content to the cell
table.addCell(cell1);      // Adding cell to the table

// Adding cell 2 to the table Cell
cell2 = new Cell();       // Creating a cell
cell2.add("Raju");        // Adding content to the cell
table.addCell(cell2);     // Adding cell to the table
步驟6:將表格新增到文件
使用Document類的add()方法新增上一步中建立的table物件,如下所示。
// Adding list to the document
document.add(table);
步驟7:關閉文件
使用 Document 類的 close() 方法關閉文件,如下所示。
// Closing the document
document.close();
示例
以下Java程式演示瞭如何使用iText庫建立PDF文件並向其中新增表格。它建立一個名為addingTable.pdf的PDF文件,向其中新增一個表格,並將其儲存在C:/itextExamples/路徑下。
將此程式碼儲存在名為AddingTable.java的檔案中。
import com.itextpdf.kernel.pdf.PdfDocument;
import com.itextpdf.kernel.pdf.PdfWriter;

import com.itextpdf.layout.Document;
import com.itextpdf.layout.element.Cell;
import com.itextpdf.layout.element.Table;

public class AddingTable {
   public static void main(String args[]) throws Exception {
      // Creating a PdfDocument object
      String dest = "C:/itextExamples/addingTable.pdf";
      PdfWriter writer = new PdfWriter(dest);

      // Creating a PdfDocument object
      PdfDocument pdf = new PdfDocument(writer);

      // Creating a Document object
      Document doc = new Document(pdf);

      // Creating a table
      float [] pointColumnWidths = {150F, 150F, 150F};
      Table table = new Table(pointColumnWidths);

      // Adding cells to the table
      table.addCell(new Cell().add("Name"));
      table.addCell(new Cell().add("Raju"));
      table.addCell(new Cell().add("Id"));
      table.addCell(new Cell().add("1001"));
      table.addCell(new Cell().add("Designation"));
      table.addCell(new Cell().add("Programmer"));

      // Adding Table to document
      doc.add(table);

      // Closing the document
      doc.close();
      System.out.println("Table created successfully..");
   }
}
使用以下命令從命令提示符編譯並執行儲存的 Java 檔案:
javac AddingTable.java
java AddingTable
執行後,上述程式將建立一個 PDF 文件,並顯示以下訊息。
Table created successfully..
如果您驗證指定的路徑,則可以找到建立的 PDF 文件,如下所示。

iText - 格式化單元格內容
本章我們將學習如何使用iText庫建立PDF文件,並新增表格以及設定表格單元格內容的格式。
設定表格單元格格式
您可以透過例項化Document類來建立一個空的PDFDocument。例項化此類時,需要將PdfDocument物件作為引數傳遞給其建構函式。然後,要向文件新增表格,需要例項化Table類並將此物件使用add()方法新增到文件中。您可以使用Cell類的各種方法設定表格單元格內容的格式。
以下是設定表格單元格內容格式的步驟。
步驟 1:建立 PdfWriter 物件
PdfWriter類表示PDF的DocWriter。此類屬於com.itextpdf.kernel.pdf包。此類的建構函式接受一個字串,表示要建立PDF檔案的路徑。
透過將字串值(表示您需要建立 PDF 的路徑)傳遞給其建構函式來例項化 PdfWriter 類,如下所示。
// Creating a PdfWriter
String dest = "C:/itextExamples/addingBackground.pdf";
PdfWriter writer = new PdfWriter(dest);
當將此型別的物件傳遞給 PdfDocument(類)時,新增到此文件的每個元素都將寫入指定的檔案。
步驟 2:建立 PdfDocument 物件
PdfDocument類是表示iText中PDF文件的類。此類屬於com.itextpdf.kernel.pdf包。要例項化此類(寫入模式),需要將其PdfWriter類的物件傳遞給其建構函式。
透過將上面建立的PdfWriter物件傳遞給其建構函式來例項化PdfDocument類,如下所示。
// Creating a PdfDocument
PdfDocument pdfDoc = new PdfDocument(writer);
建立PdfDocument物件後,可以使用其類提供的相應方法新增各種元素,例如頁面、字型、檔案附件和事件處理程式。
步驟3:建立Document物件
com.itextpdf.layout 包的 Document 類是建立自包含 PDF 時的根元素。此類的建構函式之一接受 PdfDocument 類的物件。
透過將上一步驟中建立的 PdfDocument 類物件傳遞給建構函式來例項化 Document 類,如下所示。
// Creating a Document
Document document = new Document(pdfDoc);
步驟4:建立Table物件
Table類表示一個二維網格,其中填充按行和列排序的單元格。它屬於com.itextpdf.layout.element包。
如下所示例項化Table類。
// Creating a table
float [] pointColumnWidths = {200F, 200F};
Table table = new Table(pointColumnWidths);
步驟5:建立單元格
透過例項化com.itextpdf.layout.element包的Cell類來建立一個cell物件。使用Cell類的add()方法新增單元格的內容,如下所示。
// Adding cell 1 to the table
Cell cell1 = new Cell();     // Creating a cell
cell1.add("Name");           // Adding content to the cell

// Adding cell 2 to the table
Cell cell2 = new Cell();     // Creating a cell
cell2.add("Raju");           // Adding content to the cell
步驟6:向單元格新增背景
建立單元格並向其中新增內容後,您可以設定單元格格式。例如,您可以使用單元格類的不同方法(例如setBackgroundColor(),setBorder(),setTextAlignment())設定其背景、對齊單元格內的文字、更改文字顏色等。
您可以將背景顏色、邊框和文字對齊方式設定到上一步中建立的單元格,如下所示。
c1.setBackgroundColor(Color.DARK_GRAY);    // Setting background color to cell1
c1.setBorder(Border.NO_BORDER);            // Setting border to cell1
c1.setTextAlignment(TextAlignment.CENTER); // Setting text alignment to cell1
步驟7:將單元格新增到表格
最後,要將此單元格新增到表格中,請呼叫Table類的addCell()方法並將cell物件作為引數傳遞給此方法,如下所示。
table.addCell(c1);
步驟8:將表格新增到文件
使用Document類的add()方法新增上一步中建立的table物件,如下所示。
// Adding list to the document
document.add(table);
步驟9:關閉文件
使用 Document 類的 close() 方法關閉文件,如下所示。
// Closing the document
document.close();
示例
以下Java程式演示瞭如何使用iText庫設定表格單元格內容的格式。它建立一個名為addingBackground.pdf的PDF文件,向其中新增一個表格,設定其單元格內容的格式,並將其儲存在C:/itextExamples/路徑下。
將此程式碼儲存在名為BackgroundToTable.java的檔案中。
import com.itextpdf.kernel.color.Color;
import com.itextpdf.kernel.pdf.PdfDocument;
import com.itextpdf.kernel.pdf.PdfWriter;

import com.itextpdf.layout.Document;
import com.itextpdf.layout.border.Border;
import com.itextpdf.layout.element.Cell;
import com.itextpdf.layout.element.Table;
import com.itextpdf.layout.property.TextAlignment;

public class BackgroundToTable {
   public static void main(String args[]) throws Exception {
      // Creating a PdfWriter object
      String dest = "C:/itextExamples/addingBackground.pdf";
      PdfWriter writer = new PdfWriter(dest);

      // Creating a PdfDocument object
      PdfDocument pdfDoc = new PdfDocument(writer);

      // Creating a Document object
      Document doc = new Document(pdfDoc);

      // Creating a table
      float [] pointColumnWidths = {200F, 200F};
      Table table = new Table(pointColumnWidths);

      // Populating row 1 and adding it to the table
      Cell c1 = new Cell();                        // Creating cell 1
      c1.add("Name");                              // Adding name to cell 1
      c1.setBackgroundColor(Color.DARK_GRAY);      // Setting background color
      c1.setBorder(Border.NO_BORDER);              // Setting border
      c1.setTextAlignment(TextAlignment.CENTER);   // Setting text alignment
      table.addCell(c1);                           // Adding cell 1 to the table

      Cell c2 = new
      Cell();
      c2.add("Raju");
      c2.setBackgroundColor(Color.GRAY);
      c2.setBorder(Border.NO_BORDER);
      c2.setTextAlignment(TextAlignment.CENTER);
      table.addCell(c2);

      // Populating row 2 and adding it to the table
      Cell c3 = new Cell();
      c3.add("Id");
      c3.setBackgroundColor(Color.WHITE);
      c3.setBorder(Border.NO_BORDER);
      c3.setTextAlignment(TextAlignment.CENTER);
      table.addCell(c3);

      Cell c4 = new Cell();
      c4.add("001");
      c4.setBackgroundColor(Color.WHITE);
      c4.setBorder(Border.NO_BORDER);
      c4.setTextAlignment(TextAlignment.CENTER);
      table.addCell(c4);

      // Populating row 3 and adding it to the table
      Cell c5 = new Cell();
      c5.add("Designation");
      c5.setBackgroundColor(Color.DARK_GRAY);
      c5.setBorder(Border.NO_BORDER);
      c5.setTextAlignment(TextAlignment.CENTER);
      table.addCell(c5);

      Cell c6 = new Cell();
      c6.add("Programmer");
      c6.setBackgroundColor(Color.GRAY);
      c6.setBorder(Border.NO_BORDER);
      c6.setTextAlignment(TextAlignment.CENTER);
      table.addCell(c6);

      // Adding Table to document
      doc.add(table);

      // Closing the document
      doc.close();

      System.out.println("Background added successfully..");
   }
}
使用以下命令從命令提示符編譯並執行儲存的 Java 檔案:
javac BackgroundToTable.java
java BackgroundToTable
執行後,上述程式將建立一個 PDF 文件,並顯示以下訊息。
Background added successfully..
如果您驗證指定的路徑,則可以找到建立的 PDF 文件,如下所示。

iText - 設定單元格邊框格式
本章我們將學習如何使用iText庫設定表格單元格邊框的格式。
格式化單元格邊框
您可以透過例項化 Document 類來建立一個空的 PDF 文件。例項化此類時,需要將 PdfDocument 物件作為引數傳遞給其建構函式。
然後,要向文件新增表格,需要例項化Table類並將此物件使用add()方法新增到文件中。
您可以使用Cell類的setBorder()方法新增各種型別的邊框,例如DashedBorder、SolidBorder、DottedBorder、DoubleBorder、RoundDotsBorder等,並使用各種顏色。
以下是設定表格單元格邊框格式的步驟。
步驟 1:建立 PdfWriter 物件
PdfWriter類表示PDF的DocWriter。此類屬於com.itextpdf.kernel.pdf包。此類的建構函式接受一個字串,表示要建立PDF檔案的路徑。
透過將字串值(表示您需要建立 PDF 的路徑)傳遞給其建構函式來例項化 PdfWriter 類,如下所示。
// Creating a PdfWriter
String dest = "C:/itextExamples/coloredBorders.pdf";
PdfWriter writer = new PdfWriter(dest);
當將此型別的物件傳遞給 PdfDocument(類)時,新增到此文件的每個元素都將寫入指定的檔案。
步驟 2:建立 PdfDocument 物件
PdfDocument類是表示iText中PDF文件的類。此類屬於com.itextpdf.kernel.pdf包。要例項化此類(寫入模式),需要將其PdfWriter類的物件傳遞給其建構函式。
透過將上面建立的PdfWriter物件傳遞給其建構函式來例項化PdfDocument類,如下所示。
// Creating a PdfDocument
PdfDocument pdfDoc = new PdfDocument(writer);
建立 PdfDocument 物件後,您可以使用其類提供的相應方法新增各種元素,例如頁面、字型、檔案附件和事件處理程式。
步驟3:建立Document物件
com.itextpdf.layout 包的 Document 類是建立自包含 PDF 時的根元素。此類的建構函式之一接受 PdfDocument 類的物件。
透過將上一步驟中建立的 PdfDocument 類物件傳遞給建構函式來例項化 Document 類,如下所示。
// Creating a Document
Document document = new Document(pdfDoc);
步驟4:建立Table物件
Table類表示一個二維網格,其中填充按行和列排序的單元格。它屬於com.itextpdf.layout.element包。
如下所示例項化Table類。
// Creating a table
float [] pointColumnWidths = {200F, 200F};
Table table = new Table(pointColumnWidths);
步驟5:建立單元格
透過例項化com.itextpdf.layout.element包的Cell類來建立一個單元格物件,使用Cell類的add()方法新增單元格的內容,如下所示。
// Adding cell 1 to the table
Cell cell1 = new Cell(); // Creating a cell
cell1.add("Name");       // Adding content to the cell
步驟6:設定單元格邊框格式
iText庫提供了表示邊框的各種類,例如DashedBorder、SolidBorder、DottedBorder、DoubleBorder、RoundDotsBorder等。
這些類的建構函式接受兩個引數:一個表示邊框顏色的color物件和一個表示邊框寬度的integer。
選擇其中一種邊框型別,並透過傳遞color物件和表示寬度的integer來例項化相應的邊框,如下所示。
Border b1 = new DashedBorder(Color.RED, 3);
現在,使用cell類的setBorder()方法設定單元格的邊框。此方法接受型別為Border的物件作為引數。
透過將上面建立的Border物件作為引數傳遞給setBorder()方法來設定單元格的邊框,如下所示。
c1.setBorder(b1)
最後,要將此單元格新增到表格中,請呼叫Table類的addCell()方法並將cell物件作為引數傳遞給此方法,如下所示。
table.addCell(c1);
步驟7:將表格新增到文件
使用Document類的add()方法新增上一步中建立的table物件,如下所示。
// Adding list to the document
document.add(table);
步驟8:關閉文件
使用 Document 類的 close() 方法關閉文件,如下所示。
// Closing the document
document.close();
示例
以下Java程式演示瞭如何使用iText庫設定表格單元格邊框的格式。它建立一個名為coloredBorders.pdf的PDF文件,向其中新增一個表格,設定其單元格內容的格式,並將其儲存在C:/itextExamples/路徑下。
將此程式碼儲存在名為FormatedBorders.java的檔案中。
import com.itextpdf.kernel.color.Color;
import com.itextpdf.kernel.pdf.PdfDocument;
import com.itextpdf.kernel.pdf.PdfWriter;

import com.itextpdf.layout.Document;
import com.itextpdf.layout.border.Border;
import com.itextpdf.layout.border.DashedBorder;
import com.itextpdf.layout.border.DottedBorder;
import com.itextpdf.layout.border.DoubleBorder;
import com.itextpdf.layout.border.RoundDotsBorder;
import com.itextpdf.layout.border.SolidBorder;

import com.itextpdf.layout.element.Cell;
import com.itextpdf.layout.element.Table;
import com.itextpdf.layout.property.TextAlignment;

public class FormatedBorders {
   public static void main(String args[]) throws Exception {
      // Creating a PdfWriter object
      String dest = "C:/itextExamples/coloredBorders.pdf";

      PdfWriter writer = new
      PdfWriter(dest);

      // Creating a PdfDocument object
      PdfDocument pdfDoc = new PdfDocument(writer);

      // Creating a Document object
      Document doc = new Document(pdfDoc);

      // Creating a table
      float [] pointColumnWidths = {200F, 200F};
      Table table = new Table(pointColumnWidths);

      // Adding row 1 to the table
      Cell c1 = new Cell();

      // Adding the contents of the cell
      c1.add("Name");

      // Setting the back ground color of the cell
      c1.setBackgroundColor(Color.DARK_GRAY);

      // Instantiating the Border class
      Border b1 = new DashedBorder(Color.RED, 3);

      // Setting the border of the cell
      c1.setBorder(b1);

      // Setting the text alignment
      c1.setTextAlignment(TextAlignment.CENTER);

      // Adding the cell to the table
      table.addCell(c1);
      Cell c2 = new Cell();
      c2.add("Raju");
      c1.setBorder(new SolidBorder(Color.RED, 3));
      c2.setTextAlignment(TextAlignment.CENTER);
      table.addCell(c2);

      // Adding row 2 to the table
      Cell c3 = new Cell();
      c3.add("Id");
      c3.setBorder(new DottedBorder(Color.DARK_GRAY, 3));
      c3.setTextAlignment(TextAlignment.CENTER);
      table.addCell(c3);

      Cell c4 = new Cell();
      c4.add("001");
      c4.setBorder(new DoubleBorder(Color.DARK_GRAY, 3));
      c4.setTextAlignment(TextAlignment.CENTER);
      table.addCell(c4);

      // Adding row 3 to the table
      Cell c5 = new Cell();
      c5.add("Designation");
      c5.setBorder(new RoundDotsBorder(Color.RED, 3));
      c5.setTextAlignment(TextAlignment.CENTER);
      table.addCell(c5);

      Cell c6 = new Cell();
      c6.add("Programmer");
      c6.setBorder(new RoundDotsBorder(Color.RED, 3));
      c6.setTextAlignment(TextAlignment.CENTER);
      table.addCell(c6);

      // Adding Table to document
      doc.add(table);

      // Closing the document
      doc.close();

      System.out.println("Borders added successfully..");
   }
}
使用以下命令從命令提示符編譯並執行儲存的 Java 檔案:
javac FormatedBorders.java
java FormatedBorders
執行後,上述程式將建立一個 PDF 文件,並顯示以下訊息。
Borders added successfully
如果您驗證指定的路徑,則可以找到建立的 PDF 文件,如下所示。

iText - 向表格新增影像
本章我們將學習如何使用iText庫在PDF文件的表格中新增影像。
向表格新增影像
您可以透過例項化Document類來建立一個空的PDF文件。例項化此類時,需要將PdfDocument物件作為引數傳遞給其建構函式。然後,要向文件新增表格,需要例項化Table類並將此物件使用add()方法新增到文件中。
要向此表格新增影像,需要例項化Cell類,建立要新增的影像物件,並使用Cell類的add()方法將影像新增到cell物件中。
以下是將影像插入表格單元格的步驟。
步驟 1:建立 PdfWriter 物件
PdfWriter 類代表 PDF 的文件編寫器,此類屬於 com.itextpdf.kernel.pdf 包。此類的建構函式接受一個字串,表示要建立 PDF 檔案的路徑。
透過將表示您需要建立 PDF 的路徑的字串值傳遞給其建構函式來例項化 PdfWriter 類,如下所示。
// Creating a PdfWriter
String dest = "C:/itextExamples/addingImage.pdf";
PdfWriter writer = new PdfWriter(dest);
當將此型別的物件傳遞給 PdfDocument(類)時,新增到此文件的每個元素都將寫入指定的檔案。
步驟 2:建立 PdfDocument 物件
PdfDocument 類是代表 iText 中 PDF 文件的類。此類屬於 com.itextpdf.kernel.pdf 包。要例項化此類(在寫入模式下),需要將 PdfWriter 類的物件傳遞給其建構函式。
透過將上面建立的PdfWriter物件傳遞給其建構函式來例項化PdfDocument類,如下所示。
// Creating a PdfDocument
PdfDocument pdfDoc = new PdfDocument(writer);
建立 PdfDocument 物件後,您可以使用其類提供的相應方法新增各種元素,例如頁面、字型、檔案附件和事件處理程式。
步驟3:建立Document物件
com.itextpdf.layout包中的Document類是建立自包含PDF時的根元素。此類的建構函式之一接受PdfDocument類的物件。
透過將上一步驟中建立的 PdfDocument 類物件傳遞給建構函式來例項化 Document 類,如下所示。
// Creating a Document
Document document = new Document(pdfDoc);
步驟4:建立Table物件
Table類表示一個二維網格,其中填充按行和列排序的單元格。它屬於com.itextpdf.layout.element包。
如下所示例項化Table類。
// Creating a table
float [] pointColumnWidths = {200F, 200F};
Table table = new Table(pointColumnWidths);
步驟5:建立單元格
透過例項化com.itextpdf.layout包的Cell類來建立一個cell物件,如下所示。
// Adding cell to the table
Cell cell = new Cell();  // Creating a cell
步驟6:建立影像
要建立image物件,首先使用ImageDataFactory類的create()方法建立一個ImageData物件。作為此方法的引數,傳遞一個表示影像路徑的字串引數,如下所示。
// Creating an ImageData object
String imageFile = "C:/itextExamples/javafxLogo.jpg";
ImageData data = ImageDataFactory.create(imageFile);
現在,例項化com.itextpdf.layout.element包的Image類。例項化時,將上面建立的ImageData物件作為引數傳遞給其建構函式,如下所示。
// Creating an Image object
Image img = new Image(data);
使用單元格類的add()方法將image物件新增到單元格中,如下所示。
// Adding image to the cell
cell.add(img.setAutoScale(true));
步驟7:將單元格新增到表格
最後,要將此單元格新增到表格中,請呼叫Table類的addCell()方法並將cell物件作為引數傳遞給此方法,如下所示。
table.addCell(cell);
步驟8:將表格新增到文件
使用Document類的add()方法新增上一步中建立的table物件,如下所示。
// Adding list to the document
document.add(table);
步驟9:關閉文件
使用 Document 類的 close() 方法關閉文件,如下所示。
// Closing the document
document.close();
示例
以下Java程式演示瞭如何使用iText庫在PDF文件的表格單元格中新增影像。它建立一個名為addingImage.pdf的PDF文件,向其中新增一個表格,將影像(javafxLogo.jpg)插入到其中一個單元格中,並將其儲存在C:/itextExamples/路徑下。
將此程式碼儲存在名為AddingImageToTable.java的檔案中。
import com.itextpdf.io.image.ImageData;
import com.itextpdf.io.image.ImageDataFactory;

import com.itextpdf.kernel.pdf.PdfDocument;
import com.itextpdf.kernel.pdf.PdfWriter;

import com.itextpdf.layout.Document;
import com.itextpdf.layout.element.Cell;
import com.itextpdf.layout.element.Image;
import com.itextpdf.layout.element.Table;

public class a3AddingImageToTable {
   public static void main(String args[]) throws Exception {
      // Creating a PdfWriter object
      String dest = "C:/itextExamples/addingImage.pdf";
      PdfWriter writer = new PdfWriter(dest);

      // Creating a PdfDocument object
      PdfDocument pdfDoc = new PdfDocument(writer);

      // Creating a Document object
      Document doc = new Document(pdfDoc);

      // Creating a table
      float [] pointColumnWidths = {150f, 150f};
      Table table = new Table(pointColumnWidths);

      // Populating row 1 and adding it to the table
      Cell cell1 = new Cell();
      cell1.add("Tutorial ID");
      table.addCell(cell1);

      Cell cell2 = new Cell();
      cell2.add("1");
      table.addCell(cell2);

      // Populating row 2 and adding it to the table
      Cell cell3 = new Cell();
      cell3.add("Tutorial Title");
      table.addCell(cell3);

      Cell cell4 = new Cell();
      cell4.add("JavaFX");
      table.addCell(cell4);

      // Populating row 3 and adding it to the table
      Cell cell5 = new Cell();
      cell5.add("Tutorial Author");
      table.addCell(cell5);

      Cell cell6 = new Cell();
      cell6.add("Krishna Kasyap");
      table.addCell(cell6);

      // Populating row 4 and adding it to the table
      Cell cell7 = new Cell();
      cell7.add("Submission date");
      table.addCell(cell7);

      Cell cell8 = new Cell();
      cell8.add("2016-07-06");
      table.addCell(cell8);

      // Populating row 5 and adding it to the table
      Cell cell9 = new Cell();
      cell9.add("Tutorial Icon");
      table.addCell(cell9);

      // Creating the cell10
      Cell cell10 = new Cell();

      // Creating an ImageData object
      String imageFile = "C:/itextExamples/javafxLogo.jpg";
      ImageData data = ImageDataFactory.create(imageFile);

      // Creating the image
      Image img = new Image(data);

      // Adding image to the cell10
      cell10.add(img.setAutoScale(true));

      // Adding cell110 to the table
      table.addCell(cell10);

      // Adding Table to document
      doc.add(table);

      // Closing the document
      doc.close();

      System.out.println("Image added to table successfully..");
   }
}
使用以下命令從命令提示符編譯並執行儲存的 Java 檔案:
javac AddingImageToTable.java
java AddingImageToTable
執行後,上述程式將建立一個 PDF 文件,並顯示以下訊息。
Image added to table successfully..
如果您驗證指定的路徑,則可以找到建立的 PDF 文件,如下所示。

iText - 巢狀表格
本章我們將學習如何使用iText庫在PDF文件的表格中新增巢狀表格。
在Pdf中新增巢狀表格
您可以透過例項化Document類來建立一個空的PDF文件。例項化此類時,需要將PdfDocument物件作為引數傳遞給其建構函式。然後,要向文件新增表格,需要例項化Table類並將此物件使用add()方法新增到文件中。
要向此表格新增表格,需要建立另一個表格(巢狀表格),並使用Cell類的add()方法將其傳遞給單元格物件。
以下是將表格插入表格單元格的步驟。
步驟 1:建立 PdfWriter 物件
PdfWriter類表示PDF的DocWriter。此類屬於com.itextpdf.kernel.pdf包。此類的建構函式接受一個字串,表示要建立PDF檔案的路徑。
透過將字串值(表示您需要建立 PDF 的路徑)傳遞給其建構函式來例項化 PdfWriter 類,如下所示。
// Creating a PdfWriter
String dest = "C:/itextExamples/addingNestedTable.pdf";
PdfWriter writer = new PdfWriter(dest);
當將此型別的物件傳遞給 PdfDocument(類)時,新增到此文件的每個元素都將寫入指定的檔案。
步驟 2:建立 PdfDocument 物件
PdfDocument 類在 iText 中代表 PDF 文件。此類屬於包 com.itextpdf.kernel.pdf。要例項化此類(在寫入模式下),需要將其PdfWriter類的物件傳遞給它的建構函式。
透過將上面建立的 PdfWriter 物件傳遞給其建構函式來例項化 PdfDocument 類,如下所示。
// Creating a PdfDocument
PdfDocument pdfDoc = new PdfDocument(writer);
建立 PdfDocument 物件後,您可以使用其類提供的相應方法新增各種元素,例如頁面、字型、檔案附件和事件處理程式。
步驟3:建立Document物件
com.itextpdf.layout 包的 Document 類是建立自包含 PDF 時的根元素。此類的建構函式之一接受 PdfDocument 類的物件。
透過將上一步驟中建立的 PdfDocument 類物件傳遞給建構函式來例項化 Document 類,如下所示。
// Creating a Document
Document document = new Document(pdfDoc);
步驟4:建立Table物件
Table類表示一個二維網格,其中填充按行和列排序的單元格。它屬於com.itextpdf.layout.element包。
如下所示例項化Table類。
// Creating a table
float [] pointColumnWidths = {200F, 200F};
Table table = new Table(pointColumnWidths);
步驟5:建立單元格
透過例項化com.itextpdf.layout包的Cell類來建立一個cell物件,如下所示。
// Adding cell to the table
Cell contact = new Cell();    // Creating a cell
步驟 6:建立巢狀表格
建立單元格後,建立一個巢狀表格,並填充其單元格,如下所示。
// Creating nested table for contact
float [] pointColumnWidths2 = {150f, 150f};
Table nestedTable = new Table(pointColumnWidths2);

// Populating row 1 and adding it to the nested table
Cell nested1 = new Cell();
nested1.add("Phone");
nestedTable.addCell(nested1);

Cell nested2 = new Cell();
nested2.add("9848022338");
nestedTable.addCell(nested2);

// Populating row 2 and adding it to the nested table
Cell nested3 = new Cell();
nested3.add("email");
nestedTable.addCell(nested3);

Cell nested4 = new Cell();
nested4.add("Raju123@gmail.com");
nestedTable.addCell(nested4);

// Populating row 3 and adding it to the nested table
Cell nested5 = new Cell();
nested5.add("Address");
nestedTable.addCell(nested5);

Cell nested6 = new Cell();
nested6.add("Hyderabad");
nestedTable.addCell(nested6);
步驟 7:將巢狀表格新增到單元格
現在,使用Cell類的add()方法將上面建立的巢狀表格新增到父(容器)表格的單元格中。然後,使用Table類的addCell()方法將此單元格新增到父表格中,如下所示。
contact.add(nestedTable);
table.addCell(contact);
步驟8:將表格新增到文件
使用Document類的add()方法新增上一步中建立的table物件,如下所示。
// Adding list to the document
document.add(table);
步驟9:關閉文件
使用 Document 類的 close() 方法關閉文件,如下所示。
// Closing the document
document.close();
示例
以下 Java 程式演示瞭如何使用 iText 庫將表格新增到 PDF 文件中表格的單元格(巢狀表格)中。它建立一個名為addingNestedTable.pdf的 PDF 文件,向其中新增一個表格,將另一個表格插入到其一個單元格中,並將其儲存到C:/itextExamples/路徑中。
將此程式碼儲存在名為AddNestedTable.java的檔案中。
import com.itextpdf.kernel.pdf.PdfDocument;
import com.itextpdf.kernel.pdf.PdfWriter;

import com.itextpdf.layout.Document;
import com.itextpdf.layout.element.Cell;
import com.itextpdf.layout.element.Table;

public class a4AddNestedTablesPdf {
   public static void main(String args[]) throws Exception {
      // Creating a PdfWriter object
      String dest = "C:/itextExamples/addingNestedTable.pdf";
      PdfWriter writer = new PdfWriter(dest);

      // Creating a PdfDocument object
      PdfDocument pdfDoc = new PdfDocument(writer);

      // Creating a Document object
      Document doc = new Document(pdfDoc);

      // Creating a table
      float [] pointColumnWidths1 = {150f, 150f};
      Table table = new Table(pointColumnWidths1);

      // Populating row 1 and adding it to the table
      Cell cell1 = new Cell();
      cell1.add("Name");
      table.addCell(cell1);

      Cell cell2 = new Cell();
      cell2.add("Raju");
      table.addCell(cell2);

      // Populating row 2 and adding it to the table
      Cell cell3 = new Cell();
      cell3.add("Id");
      table.addCell(cell3);

      Cell cell4 = new Cell();
      cell4.add("1001");
      table.addCell(cell4);

      // Populating row 3 and adding it to the table
      Cell cell5 = new Cell();
      cell5.add("Designation");
      table.addCell(cell5);

      Cell cell6 = new Cell();
      cell6.add("Programmer");
      table.addCell(cell6);

      // Creating nested table for contact
      float [] pointColumnWidths2 = {150f, 150f};
      Table nestedTable = new Table(pointColumnWidths2);

      // Populating row 1 and adding it to the nested table
      Cell nested1 = new Cell();
      nested1.add("Phone");
      nestedTable.addCell(nested1);

      Cell nested2 = new Cell();
      nested2.add("9848022338");
      nestedTable.addCell(nested2);

      // Populating row 2 and adding it to the nested table
      Cell nested3 = new Cell();
      nested3.add("email");
      nestedTable.addCell(nested3);

      Cell nested4 = new Cell();
      nested4.add("Raju123@gmail.com");
      nestedTable.addCell(nested4);

      // Populating row 3 and adding it to the nested table
      Cell nested5 = new Cell();
      nested5.add("Address");
      nestedTable.addCell(nested5);

      Cell nested6 = new Cell();
      nested6.add("Hyderabad");
      nestedTable.addCell(nested6);

      // Adding table to the cell
      Cell cell7 = new Cell();
      cell7.add("Contact");
      table.addCell(cell7);

      Cell cell8 = new Cell();
      cell8.add(nestedTable);
      table.addCell(cell8);

      // Adding table to the document
      doc.add(table);

      // Closing the document
      doc.close();
      System.out.println("Nested Table Added successfully..");
   }
}
使用以下命令從命令提示符編譯並執行儲存的 Java 檔案:
javac AddNestedTable.java
java AddNestedTable
執行後,上述程式將建立一個顯示以下訊息的 PDF 文件。
Nested Table Added successfully..
如果您驗證指定的路徑,則可以找到建立的 PDF 文件,如下所示。

iText - 向表格新增列表
本章將介紹如何使用 iText 庫將列表新增到 PDF 文件中的表格中。
在 PDF 中將列表新增到表格
您可以透過例項化Document類來建立一個空的PDF文件。例項化此類時,需要將PdfDocument物件作為引數傳遞給其建構函式。然後,要向文件新增表格,需要例項化Table類並將此物件使用add()方法新增到文件中。
要將列表新增到表格,需要例項化com.itextpdf.layout.element包的List類,並使用Cell類的add()方法將其插入到單元格物件中。
以下是將列表新增到表格單元格的步驟。
步驟 1:建立 PdfWriter 物件
PdfWriter 類代表 PDF 的文件編寫器。此類屬於 com.itextpdf.kernel.pdf 包。此類的建構函式接受一個字串,表示要建立 PDF 檔案的路徑。
透過向其建構函式傳遞字串值(表示需要在其中建立 PDF 的路徑)來例項化 PdfWriter 類,如下所示
// Creating a PdfWriter
String dest = "C:/itextExamples/addingObjects.pdf";
PdfWriter writer = new PdfWriter(dest);
當將此型別的物件傳遞給 PdfDocument(類)時,新增到此文件的每個元素都將寫入指定的檔案。
步驟 2:建立 PdfDocument 物件
PdfDocument 類在 iText 中代表 PDF 文件。此類屬於包com.itextpdf.kernel.pdf。要例項化此類(在寫入模式下),需要將其PdfWriter類的物件傳遞給它的建構函式。
透過將上面建立的PdfWriter物件傳遞給其建構函式來例項化PdfDocument類,如下所示。
// Creating a PdfDocument
PdfDocument pdfDoc = new PdfDocument(writer);
建立 PdfDocument 物件後,您可以使用其類提供的相應方法新增各種元素,例如頁面、字型、檔案附件和事件處理程式。
步驟3:建立Document物件
com.itextpdf.layout 包的 Document 類是建立自包含 PDF 時的根元素。此類的建構函式之一接受 PdfDocument 類的物件。
透過將上一步驟中建立的 PdfDocument 類物件傳遞給建構函式來例項化 Document 類,如下所示。
// Creating a Document
Document document = new Document(pdfDoc);
步驟4:建立Table物件
Table類表示一個二維網格,其中填充按行和列排序的單元格。它屬於com.itextpdf.layout.element包。
如下所示例項化Table類。
// Creating a table
float [] pointColumnWidths = {200F, 200F};
Table table = new Table(pointColumnWidths);
步驟5:建立單元格
透過例項化com.itextpdf.layout包的Cell類來建立一個cell物件,如下所示。
// Adding cell to the table
Cell listCell = new Cell(); // Creating a cell
步驟 6:建立列表物件
建立單元格後,透過例項化com.itextpdf.layout.element包的List類來建立一個列表物件。透過例項化ListItem類建立列表項,並使用List類的add()方法新增已建立的項,如下所示。
List list = new List();
ListItem item1 = new ListItem("JavaFX");
ListItem item2 = new ListItem("Java");
ListItem item3 = new ListItem("Java Servlets");
list.add(item1);
list.add(item2);
list.add(item3);
步驟 7:將列表新增到表格的單元格
現在,使用Cell類的add()方法將上面建立的列表新增到表格的單元格中。然後,使用Table類的addCell()方法將此單元格新增到表格中,如下所示。
listCell.add(list);
table.addCell(listCell);
步驟8:將表格新增到文件
使用Document類的add()方法新增上一步中建立的table物件,如下所示。
// Adding list to the document
document.add(table);
步驟9:關閉文件
使用 Document 類的 close() 方法關閉文件,如下所示。
// Closing the document
document.close();
示例
以下 Java 程式演示瞭如何使用 iText 庫將列表新增到 PDF 文件中表格的單元格中。它建立一個名為addingObjects.pdf的 PDF 文件,向其中新增一個表格,將一個列表插入到其一個單元格中,並將其儲存到C:/itextExamples/路徑中。
將此程式碼儲存在名為AddingListsToTable.java的檔案中。
import com.itextpdf.kernel.pdf.PdfDocument;
import com.itextpdf.kernel.pdf.PdfWriter;

import com.itextpdf.layout.Document;
import com.itextpdf.layout.element.Cell;
import com.itextpdf.layout.element.List;
import com.itextpdf.layout.element.ListItem;
import com.itextpdf.layout.element.Table;
import com.itextpdf.layout.property.TextAlignment;

public class AddingListsToTable {
   public static void main(String args[]) throws Exception {
      // Creating a PdfWriter object
      String file = "C:/itextExamples/addingObjects.pdf";
      PdfDocument pdfDoc = new PdfDocument(new PdfWriter(file));

      // Creating a Document object
      Document doc = new Document(pdfDoc);

      // Creating a table
      float [] pointColumnWidths = {300F, 300F};
      Table table = new Table(pointColumnWidths);

      // Adding row 1 to the table
      Cell c1 = new Cell();
      c1.add("Java Related Tutorials");
      c1.setTextAlignment(TextAlignment.LEFT);
      table.addCell(c1);

      List list1 = new List();
      ListItem item1 = new ListItem("JavaFX");
      ListItem item2 = new ListItem("Java");
      ListItem item3 = new ListItem("Java Servlets");
      list1.add(item1);
      list1.add(item2);
      list1.add(item3);

      Cell c2 = new Cell();
      c2.add(list1);
      c2.setTextAlignment(TextAlignment.LEFT);
      table.addCell(c2);

      // Adding row 2 to the table
      Cell c3 = new Cell();
      c3.add("No SQL Databases");
      c3.setTextAlignment(TextAlignment.LEFT);
      table.addCell(c3);

      List list2 = new List();
      list2.add(new ListItem("HBase"));
      list2.add(new ListItem("Neo4j"));
      list2.add(new ListItem("MongoDB"));

      Cell c4 = new Cell();
      c4.add(list2);
      c4.setTextAlignment(TextAlignment.LEFT);
      table.addCell(c4);

      // Adding Table to document
      doc.add(table);

      // Closing the document
      doc.close();
      System.out.println("Lists added to table successfully..");
   }
}
使用以下命令從命令提示符編譯並執行儲存的 Java 檔案:
javac AddingListsToTable.java
java AddingListsToTable
執行後,上述程式將建立一個 PDF 文件,並顯示以下訊息。
Lists added to table successfully..
如果您驗證指定的路徑,則可以找到建立的 PDF 文件,如下所示。

iText - 向 PDF 新增影像
本章將介紹如何使用 iText 庫將影像新增到 PDF 文件中。
將影像新增到 PDF
可以透過例項化Document類來建立一個空的 PDF 文件。例項化此類時,需要將其PdfDocument物件作為引數傳遞給它的建構函式。要將影像新增到 PDF,請建立一個需要新增的影像物件,並使用Document類的add()方法新增它。
以下是將影像新增到 PDF 文件的步驟。
步驟 1:建立 PdfWriter 物件
PdfWriter類表示PDF的DocWriter。此類屬於com.itextpdf.kernel.pdf包。此類的建構函式接受一個字串,表示要建立PDF檔案的路徑。
透過將字串值(表示您需要建立 PDF 的路徑)傳遞給其建構函式來例項化 PdfWriter 類,如下所示。
// Creating a PdfWriter
String dest = "C:/itextExamples/addingImage.pdf";
PdfWriter writer = new PdfWriter(dest);
當將此型別的物件傳遞給 PdfDocument(類)時,新增到此文件的每個元素都將寫入指定的檔案。
步驟 2:建立 PdfDocument 物件
PdfDocument 類是代表 iText 中 PDF 文件的類。此類屬於 com.itextpdf.kernel.pdf 包。要例項化此類(在寫入模式下),需要將 PdfWriter 類的物件傳遞給其建構函式。
透過將上面建立的 PdfWriter 物件傳遞給其建構函式來例項化 PdfDocument 類,如下所示。
// Creating a PdfDocument
PdfDocument pdfDoc = new PdfDocument(writer);
建立 PdfDocument 物件後,您可以使用其類提供的相應方法新增各種元素,例如頁面、字型、檔案附件和事件處理程式。
步驟3:建立Document物件
com.itextpdf.layout 包的 Document 類是建立自包含 PDF 時的根元素。此類的建構函式之一接受 PdfDocument 類的物件。
透過將上一步驟中建立的 PdfDocument 類物件傳遞給建構函式來例項化 Document 類,如下所示。
// Creating a Document   Document
document = new Document(pdfDoc);
步驟 4:建立影像物件
要建立image物件,首先使用ImageDataFactory類的create()方法建立一個ImageData物件。作為此方法的引數,傳遞一個表示影像路徑的字串引數,如下所示。
// Creating an ImageData object
String imageFile = "C:/itextExamples/javafxLogo.jpg";
ImageData data = ImageDataFactory.create(imageFile);
現在,例項化com.itextpdf.layout.element包的Image類。例項化時,將上面建立的ImageData物件作為引數傳遞給它的建構函式,如下所示。
// Creating an Image object
Image img = new Image(data);
步驟 5:將影像新增到文件
使用Document類的add()方法新增上一步中建立的影像物件,如下所示。
// Adding image to the document
document.add(img);
步驟 6:關閉 Document
使用 Document 類的 close() 方法關閉文件,如下所示。
// Closing the document
document.close();
示例
以下 Java 程式演示瞭如何使用 iText 庫將影像新增到 PDF 文件中。它建立一個名為addingImage.pdf的 PDF 文件,向其中新增一個影像,並將其儲存到C:/itextExamples/路徑中。
將此程式碼儲存在名為AddingImage.java的檔案中。
import com.itextpdf.io.image.ImageData;
import com.itextpdf.io.image.ImageDataFactory;

import com.itextpdf.kernel.pdf.PdfDocument;
import com.itextpdf.kernel.pdf.PdfWriter;

import com.itextpdf.layout.Document;
import com.itextpdf.layout.element.Image;

public class AddingImage {
   public static void main(String args[]) throws Exception {

      // Creating a PdfWriter
      String dest = "C:/itextExamples/addingImage.pdf";
      PdfWriter writer = new PdfWriter(dest);

      // Creating a PdfDocument
      PdfDocument pdf = new PdfDocument(writer);

      // Creating a Document
      Document document = new Document(pdf);

      // Creating an ImageData object
      String imFile = "C:/itextExamples/logo.jpg";
      ImageData data = ImageDataFactory.create(imFile);

      // Creating an Image object
      Image image = new Image(data);

      // Adding image to the document
      document.add(image);

      // Closing the document
      document.close();

      System.out.println("Image added");
   }
}
使用以下命令從命令提示符編譯並執行儲存的 Java 檔案:
javac AddingImage.java
java AddingImage
執行後,上述程式將建立一個顯示以下訊息的 PDF 文件。
Image added
如果您驗證指定的路徑,則可以找到建立的 PDF 文件,如下所示。

iText - 設定影像位置
本章將介紹如何使用 iText 庫設定 PDF 文件中影像的位置。
設定影像的位置
您可以透過例項化 Document 類來建立一個空的 PDF 文件。例項化此類時,需要將 PdfDocument 物件作為引數傳遞給其建構函式。
要將影像新增到 pdf,請建立一個需要新增的影像物件,並使用Document類的add()方法新增它。可以使用Image類的setFixedPosition()方法將影像插入文件上的所需位置。
以下是設定 PDF 文件中影像位置的步驟。
步驟 1:建立 PdfWriter 物件
PdfWriter類表示PDF的DocWriter。此類屬於com.itextpdf.kernel.pdf包。此類的建構函式接受一個字串,表示要建立PDF檔案的路徑。
透過將字串值(表示您需要建立 PDF 的路徑)傳遞給其建構函式來例項化 PdfWriter 類,如下所示。
// Creating a PdfWriter
String dest = "C:/itextExamples/positionOfImage.pdf";
PdfWriter writer = new PdfWriter(dest);
當將此型別的物件傳遞給 PdfDocument(類)時,新增到此文件的每個元素都將寫入指定的檔案。
步驟 2:建立 PdfDocument 物件
PdfDocument 類是代表 iText 中 PDF 文件的類。此類屬於 com.itextpdf.kernel.pdf 包。要例項化此類(在寫入模式下),需要將 PdfWriter 類的物件傳遞給其建構函式。
透過將上面建立的 PdfWriter 物件傳遞給其建構函式來例項化 PdfDocument 類,如下所示。
// Creating a PdfDocument
PdfDocument pdfDoc = new PdfDocument(writer);
建立 PdfDocument 物件後,您可以使用其類提供的相應方法新增各種元素,例如頁面、字型、檔案附件和事件處理程式。
步驟3:建立Document物件
com.itextpdf.layout 包的 Document 類是建立自包含 PDF 時的根元素。此類的建構函式之一接受 PdfDocument 類的物件。
透過將上一步驟中建立的 PdfDocument 類物件傳遞給建構函式來例項化 Document 類,如下所示。
// Creating a Document
Document document = new Document(pdfDoc);
步驟 4:建立影像物件
要建立影像物件,首先使用ImageDataFactory類的create()方法建立一個ImageData物件。作為此方法的引數,傳遞一個表示影像路徑的字串引數,如下所示。
// Creating an ImageData object
String imageFile = "C:/itextExamples/javafxLogo.jpg";
ImageData data = ImageDataFactory.create(imageFile);
現在,例項化com.itextpdf.layout.element包的Image類。例項化時,將ImageData物件作為引數傳遞給它的建構函式,如下所示。
// Creating an Image object
Image img = new Image(data);
步驟 5:設定影像的位置
可以使用Image的setFixedPosition()方法設定 PDF 文件中影像的位置。使用此方法將影像的位置設定為文件上的座標 (100, 250),如下所示。
// Setting the position of the image to the center of the page
image.setFixedPosition(100, 250);
步驟 6:將影像新增到文件
現在,使用Document類的add()方法新增上一步中建立的影像物件,如下所示。
// Adding image to the document
document.add(img);
步驟7:關閉文件
使用 Document 類的 close() 方法關閉文件,如下所示。
// Closing the document
document.close();
示例
以下 Java 程式演示瞭如何使用 iText 庫在 PDF 文件上設定影像的所需位置。它建立一個名為positionOfImage.pdf的 PDF 文件,向其中新增一個影像,將其設定得更靠近頁面中心,並將其儲存到C:/itextExamples/路徑中。
將此程式碼儲存在名為SettingPosition.java的檔案中。
import com.itextpdf.io.image.ImageData;
import com.itextpdf.io.image.ImageDataFactory;

import com.itextpdf.kernel.pdf.PdfDocument;
import com.itextpdf.kernel.pdf.PdfWriter;

import com.itextpdf.layout.Document;
import com.itextpdf.layout.element.Image;

public class SettingPosition {
   public static void main(String args[]) throws Exception {
      // Creating a PdfWriter
      String dest = "C:/EXAMPLES/itextExamples/3images/positionOfImage.pdf";
      PdfWriter writer = new PdfWriter(dest);

      // Creating a PdfDocument
      PdfDocument pdfDoc = new PdfDocument(writer);

      // Creating a Document
      Document document = new Document(pdfDoc);

      // Creating an ImageData object
      String imFile = "C:/EXAMPLES/itextExamples/3images/logo.jpg";
      ImageData data = ImageDataFactory.create(imFile);

      // Creating an Image object
      Image image = new Image(data);

      // Setting the position of the image to the center of the page
      image.setFixedPosition(100, 250);

      // Adding image to the document
      document.add(image);

      // Closing the document
      document.close();

      System.out.println("Image added");
   }
}
使用以下命令從命令提示符編譯並執行儲存的 Java 檔案。
javac SettingPosition.java
java SettingPosition
執行後,上述程式將建立一個 PDF 文件,並顯示以下訊息。
Image added
如果您驗證指定的路徑,則可以找到建立的 PDF 文件,如下所示。

iText - 縮放影像
本章將介紹如何使用 iText 庫縮放 PDF 文件中的影像。
縮放 PDF 中的影像
您可以透過例項化 Document 類來建立一個空的 PDF 文件。例項化此類時,需要將 PdfDocument 物件作為引數傳遞給其建構函式。
要將影像新增到 PDF,請建立一個需要新增的影像物件,並使用Document類的add()方法新增它。可以使用setAutoScale()方法縮放影像。
以下是縮放 PDF 文件中現有影像的步驟。
步驟 1:建立 PdfWriter 物件
PdfWriter類表示PDF的DocWriter。此類屬於com.itextpdf.kernel.pdf包。此類的建構函式接受一個字串,表示要建立PDF檔案的路徑。
透過將字串值(表示您需要建立 PDF 的路徑)傳遞給其建構函式來例項化 PdfWriter 類,如下所示。
// Creating a PdfWriter
String dest = "C:/itextExamples/autoScale.pdf";
PdfWriter writer = new PdfWriter(dest);
當將此型別的物件傳遞給 PdfDocument(類)時,新增到此文件的每個元素都將寫入指定的檔案。
步驟 2:建立 PdfDocument 物件
PdfDocument 類是代表 iText 中 PDF 文件的類。此類屬於 com.itextpdf.kernel.pdf 包。要例項化此類(在寫入模式下),需要將 PdfWriter 類的物件傳遞給其建構函式。
透過將上面建立的PdfWriter物件傳遞給其建構函式來例項化PdfDocument類,如下所示。
// Creating a PdfDocument
PdfDocument pdfDoc = new PdfDocument(writer);
建立 PdfDocument 物件後,您可以使用其類提供的相應方法新增各種元素,例如頁面、字型、檔案附件和事件處理程式。
步驟3:建立Document物件
com.itextpdf.layout 包的 Document 類是建立自包含 PDF 時的根元素。此類的建構函式之一接受 PdfDocument 類的物件。
透過將上一步驟中建立的 PdfDocument 類物件傳遞給建構函式來例項化 Document 類,如下所示。
// Creating a Document
Document document = new Document(pdfDoc);
步驟 4:建立影像物件
要建立影像物件,首先使用ImageDataFactory類的create()方法建立一個ImageData物件。作為此方法的引數,傳遞一個表示影像路徑的字串引數,如下所示。
// Creating an ImageData object
String imageFile = "C:/itextExamples/javafxLogo.jpg";
ImageData data = ImageDataFactory.create(imageFile);
現在,例項化com.itextpdf.layout.element包的Image類。例項化時,將ImageData物件作為引數傳遞給它的建構函式,如下所示。
// Creating an Image object
Image img = new Image(data);
步驟 5:縮放影像
可以使用setAutoScale()方法縮放影像。
// Setting the position of the image to the center of the page
image.setFixedPosition(100, 250);
步驟 6:將影像新增到文件
現在,使用Document類的add()方法新增上一步中建立的image物件,如下所示。
// Adding image to the document
document.add(img);
步驟7:關閉文件
使用 Document 類的 close() 方法關閉文件,如下所示。
// Closing the document
document.close();
示例
以下 Java 程式演示瞭如何使用 iText 庫根據文件大小縮放 PDF 文件中的影像。它建立一個名為autoScale.pdf的 PDF 文件,向其中新增一個影像,根據頁面尺寸縮放它,並將其儲存到C:/itextExamples/路徑中。
將此程式碼儲存在名為SettingAutoScale.java的檔案中。
import com.itextpdf.io.image.ImageData;
import com.itextpdf.io.image.ImageDataFactory;

import com.itextpdf.kernel.pdf.PdfDocument;
import com.itextpdf.kernel.pdf.PdfWriter;

import com.itextpdf.layout.Document;
import com.itextpdf.layout.element.Image;

public class SettingAutoScale {
   public static void main(String args[]) throws Exception{
      // Creating a PdfWriter
      String dest = "C:/itextExamples/positionOfImage.pdf";
      PdfWriter writer = new PdfWriter(dest);

      // Creating a PdfDocument
      PdfDocument pdfDoc = new PdfDocument(writer);

      // Creating a Document
      Document document = new Document(pdfDoc);

      // Creating an ImageData object
      String imFile = "C:/itextExamples/logo.jpg";
      ImageData data = ImageDataFactory.create(imFile);

      // Creating an Image object
      Image image = new Image(data);

      // Setting the position of the image to the center of the page
      image.setFixedPosition(100,250);

      // Adding image to the document
      document.add(image);

      // Closing the document
      document.close();
      System.out.println("Image Scaled");
   }
}
使用以下命令從命令提示符編譯並執行儲存的 Java 檔案。
javac SettingAutoScale.java
java SettingAutoScale
執行後,上述程式將建立一個顯示以下訊息的 PDF 文件。
Image Scaled
如果您驗證指定的路徑,則可以找到建立的 PDF 文件,如下所示。

iText - 旋轉影像
本章將介紹如何使用 iText 庫在 PDF 文件中插入影像以及如何旋轉該影像。
旋轉 PDF 中的影像
您可以透過例項化 Document 類來建立一個空的 PDF 文件。例項化此類時,需要將 PdfDocument 物件作為引數傳遞給其建構函式。
要將影像新增到 PDF,請建立一個需要新增的影像物件,並使用Document類的add()方法新增它。可以使用setRotationAngle()方法旋轉影像。
以下是旋轉 PDF 文件中影像的步驟。
步驟 1:建立 PdfWriter 物件
PdfWriter類表示PDF的DocWriter。此類屬於com.itextpdf.kernel.pdf包。此類的建構函式接受一個字串,表示要建立PDF檔案的路徑。
透過將字串值(表示您需要建立 PDF 的路徑)傳遞給其建構函式來例項化 PdfWriter 類,如下所示。
// Creating a PdfWriter
String dest = "C:/itextExamples/rotatingImage.pdf";
PdfWriter writer = new PdfWriter(dest);
當將此型別的物件傳遞給 PdfDocument(類)時,新增到此文件的每個元素都將寫入指定的檔案。
步驟 2:建立 PdfDocument 物件
PdfDocument 類是代表 iText 中 PDF 文件的類。此類屬於 com.itextpdf.kernel.pdf 包。要例項化此類(在寫入模式下),需要將 PdfWriter 類的物件傳遞給其建構函式。
透過將 PdfWriter 物件傳遞給其建構函式來例項化 PdfDocument 類,如下所示。
// Creating a PdfDocument
PdfDocument pdfDoc = new PdfDocument(writer);
建立 PdfDocument 物件後,您可以使用其類提供的相應方法新增各種元素,例如頁面、字型、檔案附件和事件處理程式。
步驟3:建立Document物件
com.itextpdf.layout 包的 Document 類是建立自包含 PDF 時的根元素。此類的建構函式之一接受 PdfDocument 類的物件。
透過將上一步驟中建立的 PdfDocument 類物件傳遞給建構函式來例項化 Document 類,如下所示。
// Creating a Document
Document document = new Document(pdfDoc);
步驟 4:建立影像物件
要建立影像物件,首先使用ImageDataFactory類的create()方法建立一個ImageData物件。作為此方法的引數,傳遞一個表示影像路徑的字串引數,如下所示。
// Creating an ImageData object
String imageFile = "C:/itextExamples/javafxLogo.jpg";
ImageData data = ImageDataFactory.create(imageFile);
現在,例項化com.itextpdf.layout.element包的Image類。例項化時,將ImageData物件作為引數傳遞給它的建構函式,如下所示。
// Creating an Image object
Image img = new Image(data);
步驟 5:旋轉影像
可以使用setRotationAngle()方法旋轉影像。對於此方法,需要傳遞一個整數,表示要旋轉影像的角度。
// Rotating the image
image.setRotationAngle(45);
步驟 6:將影像新增到文件
現在,使用Document類的add()方法新增上一步中建立的影像物件,如下所示。
// Adding image to the document
document.add(img);
步驟7:關閉文件
使用 Document 類的 close() 方法關閉文件,如下所示。
// Closing the document
document.close();
示例
以下 Java 程式演示瞭如何使用 iText 庫以給定角度旋轉 PDF 文件上的影像。
它建立一個名為rotatingImage.pdf的 PDF 文件,向其中新增一個影像,旋轉它,並將其儲存到C:/itextExamples/路徑中。
將此程式碼儲存在名為RotatingImage.java的檔案中。
import com.itextpdf.io.image.ImageData;
import com.itextpdf.io.image.ImageDataFactory;

import com.itextpdf.kernel.pdf.PdfDocument;
import com.itextpdf.kernel.pdf.PdfWriter;

import com.itextpdf.layout.Document;
import com.itextpdf.layout.element.Image;

public class RotatingImage {
   public static void main(String args[]) throws Exception {
      // Creating a PdfWriter
      String dest = "C:/itextExamples/rotatingImage.pdf";
      PdfWriter writer = new PdfWriter(dest);

      // Creating a PdfDocument
      PdfDocument pdfDoc = new PdfDocument(writer);

      // Creating a Document
      Document document = new Document(pdfDoc);

      // Creating an ImageData object
      String imFile = "C:/itextExamples/logo.jpg";
      ImageData data = ImageDataFactory.create(imFile);

      // Creating an Image object
      Image image = new Image(data);

      // Rotating the image
      image.setRotationAngle(45);

      // Adding image to the document
      document.add(image);

      // Closing the document
      document.close();

      System.out.println("Image rotated");
   }
}
使用以下命令從命令提示符編譯並執行儲存的 Java 檔案:
javac RotatingImage.java
java RotatingImage
執行後,上述程式將建立一個顯示以下訊息的 PDF 文件。
Image Rotated
如果您驗證指定的路徑,則可以找到建立的 PDF 文件,如下所示。
iText - 文字註釋
本章將介紹如何使用 iText 庫向 PDF 文件新增文字註釋。
在 PDF 中建立文字註釋
您可以透過例項化 Document 類來建立一個空的 PDF 文件。例項化此類時,需要將 PdfDocument 物件作為引數傳遞給其建構函式。
要在 PDF 文件中使用文字註釋,需要建立一個PdfTextAnnotation類的物件並將其新增到PdfPage中。
以下是如何在 PDF 文件中使用文字註釋的步驟。
步驟 1:建立 PdfWriter 物件
PdfWriter類表示PDF的DocWriter。此類屬於com.itextpdf.kernel.pdf包。此類的建構函式接受一個字串,表示要建立PDF檔案的路徑。
透過將字串值(表示您需要建立 PDF 的路徑)傳遞給其建構函式來例項化 PdfWriter 類,如下所示。
// Creating a PdfWriter
String dest = "C:/itextExamples/textAnnotation.pdf";
PdfWriter writer = new PdfWriter(dest);
當將此型別的物件傳遞給 PdfDocument(類)時,新增到此文件的每個元素都將寫入指定的檔案。
步驟 2:建立 PdfDocument 物件
PdfDocument 類是代表 iText 中 PDF 文件的類。此類屬於 com.itextpdf.kernel.pdf 包。要例項化此類(在寫入模式下),需要將 PdfWriter 類的物件傳遞給其建構函式。
透過將PdfWriter物件傳遞給其建構函式來例項化PdfDocument類,如下所示。
// Creating a PdfDocument
PdfDocument pdfDoc = new PdfDocument(writer);
建立 PdfDocument 物件後,您可以使用其類提供的相應方法新增各種元素,例如頁面、字型、檔案附件和事件處理程式。
步驟3:建立Document物件
com.itextpdf.layout包中的Document類是建立自包含PDF時的根元素。此類的建構函式之一接受PdfDocument類的物件。
透過將上一步驟中建立的 PdfDocument 類物件傳遞給建構函式來例項化 Document 類,如下所示。
// Creating a Document
Document document = new Document(pdfDoc);
步驟 4:建立 PdfAnnotation 物件
com.itextpdf.kernel.pdf.annot包的PdfAnnotation類表示所有註釋的超類。
在其派生類中,PdfTextAnnotation類表示文字註釋。建立此類的物件,如下所示。
// Creating PdfAnnotation
Rectangle rect = new Rectangle(20, 800, 0, 0);
PdfAnnotation ann = new PdfTextAnnotation(rect);
步驟 5:設定註釋的顏色
使用PdfAnnotation類的setColor()方法設定註釋的顏色。為此方法傳遞表示註釋顏色的color物件作為引數。
// Setting color to the annotation
ann.setColor(Color.GREEN);
步驟 6:設定註釋的標題和內容
分別使用PdfAnnotation類的setTitle()和setContents()方法設定註釋的標題和內容,如下所示。
// Setting title to the annotation
ann.setTitle(new PdfString("Hello"));

// Setting contents of the annotation
ann.setContents("Hi welcome to Tutorialspoint.");
步驟 7:將註釋新增到頁面
使用PdfDocument類的addNewPage()方法建立一個新的PdfPage類,並使用PdfPage類的addAnnotation()方法新增上述註釋,如下所示。
// Creating a new page PdfPage page =
pdf.addNewPage();

// Adding annotation to a page in a PDF
page.addAnnotation(ann);
步驟8:關閉文件
使用 Document 類的 close() 方法關閉文件,如下所示。
// Closing the document
document.close();
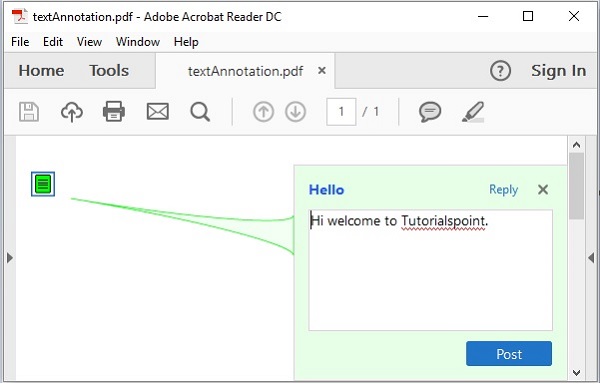
示例
以下Java程式演示瞭如何使用iText庫向PDF文件新增文字註釋。它建立一個名為textAnnotation.pdf的PDF文件,向其中新增文字註釋,並將其儲存到C:/itextExamples/路徑。
將此程式碼儲存在名為TextAnnotation.java的檔案中。
import com.itextpdf.kernel.color.Color;
import com.itextpdf.kernel.geom.Rectangle;
import com.itextpdf.kernel.pdf.PdfDocument;
import com.itextpdf.kernel.pdf.PdfPage;
import com.itextpdf.kernel.pdf.PdfString;
import com.itextpdf.kernel.pdf.PdfWriter;
import com.itextpdf.kernel.pdf.annot.PdfAnnotation;
import com.itextpdf.kernel.pdf.annot.PdfTextAnnotation;
import com.itextpdf.layout.Document;

public class TextAnnotation {
   public static void main(String args[]) throws Exception {
      // Creating a PdfWriter
      String dest = "C:/itextExamples/textAnnotation.pdf";
      PdfWriter writer = new PdfWriter(dest);

      // Creating a PdfDocument
      PdfDocument pdf = new PdfDocument(writer);

      // Creating a Document
      Document document = new Document(pdf);

      // Creating PdfTextAnnotation object
      Rectangle rect = new Rectangle(20, 800, 0, 0);
      PdfAnnotation ann = new PdfTextAnnotation(rect);

      // Setting color to the annotation
      ann.setColor(Color.GREEN);

      // Setting title to the annotation
      ann.setTitle(new PdfString("Hello"));

      // Setting contents of the annotation
      ann.setContents("Hi welcome to Tutorialspoint.");

      // Creating a new page
      PdfPage page =  pdf.addNewPage();

      // Adding annotation to a page in a PDF
      page.addAnnotation(ann);

      // Closing the document
      document.close();

      System.out.println("Annotation added successfully");
   }
}
使用以下命令從命令提示符編譯並執行儲存的 Java 檔案。
javac TextAnnotation.java
java TextAnnotation
執行後,上述程式將建立一個顯示以下訊息的 PDF 文件。
Annotation added successfully
如果您驗證指定的路徑,則可以找到建立的 PDF 文件,如下所示。
iText - 連結註釋
本章將介紹如何使用iText庫向PDF文件新增連結註釋。
在PDF中建立連結註釋
您可以透過例項化 Document 類來建立一個空的 PDF 文件。例項化此類時,需要將 PdfDocument 物件作為引數傳遞給其建構函式。
要在PDF文件中使用文字註釋,需要建立一個PdfTextAnnotation類的物件並將其新增到PdfPage。
以下是PDF文件中使用文字註釋的步驟。
步驟1:建立PdfWriter物件
PdfWriter類表示PDF的DocWriter。此類屬於com.itextpdf.kernel.pdf包。此類的建構函式接受一個字串,表示要建立PDF檔案的路徑。
透過將字串值(表示需要建立PDF的路徑)傳遞給其建構函式來例項化PdfWriter類,如下所示。
// Creating a PdfWriter
String dest = "C:/itextExamples/linkAnnotation.pdf";
PdfWriter writer = new PdfWriter(dest);
當將此型別的物件傳遞給 PdfDocument(類)時,新增到此文件的每個元素都將寫入指定的檔案。
步驟 2:建立 PdfDocument 物件
PdfDocument 類是代表 iText 中 PDF 文件的類。此類屬於 com.itextpdf.kernel.pdf 包。要例項化此類(在寫入模式下),需要將 PdfWriter 類的物件傳遞給其建構函式。
透過向其建構函式傳遞PdfWriter物件來例項化PdfDocument類,如下所示。
// Creating a PdfDocument
PdfDocument pdfDoc = new PdfDocument(writer);
建立 PdfDocument 物件後,您可以使用其類提供的相應方法新增各種元素,例如頁面、字型、檔案附件和事件處理程式。
步驟3:建立Document物件
com.itextpdf.layout包中的Document類是建立自包含PDF時的根元素。此類的建構函式之一接受PdfDocument類的物件。
透過傳遞在上一步建立的PdfDocument類的物件來例項化Document類,如下所示。
// Creating a Document
Document document = new Document(pdfDoc);
步驟 4:建立 PdfAnnotation 物件
com.itextpdf.kernel.pdf.annot包的PdfAnnotation類表示所有註釋的超類。
在其派生類中,PdfLinkAnnotation類表示連結註釋。建立此類的物件,如下所示。
// Creating a PdfLinkAnnotation object
Rectangle rect = new Rectangle(0, 0);
PdfLinkAnnotation annotation = new PdfLinkAnnotation(rect);
步驟5:設定註釋的動作
使用PdfLinkAnnotation類的setAction()方法設定註釋的動作,如下所示。
// Setting action of the annotation
PdfAction action = PdfAction.createURI("http: // www.tutorialspoint.com/");
annotation.setAction(action);
步驟6:建立連結
透過例項化com.itextpdf.layout.element包的Link類來建立連結,如下所示。
// Creating a link
Link link = new Link("Click here", annotation);
步驟7:將連結註釋新增到段落
透過例項化Paragraph類建立一個新的段落,並使用此類的add()方法新增上一步建立的連結,如下所示。
// Creating a paragraph
Paragraph paragraph = new Paragraph("Hi welcome to Tutorialspoint ");

// Adding link to paragraph
paragraph.add(link.setUnderline());
步驟8:將段落新增到文件
使用Document類的add()方法將段落新增到文件,如下所示。
// Adding paragraph to document
document.add(paragraph);
步驟9:關閉文件
使用 Document 類的 close() 方法關閉文件,如下所示。
// Closing the document
document.close();
示例
以下Java程式演示瞭如何使用iText庫向PDF文件新增連結註釋。
它建立一個名為linkAnnotation.pdf的PDF文件,向其中新增連結註釋,並將其儲存到C:/itextExamples/路徑。
將此程式碼儲存在名為LinkAnnotation.java的檔案中。
import com.itextpdf.kernel.geom.Rectangle;
import com.itextpdf.kernel.pdf.PdfDocument;
import com.itextpdf.kernel.pdf.PdfWriter;
import com.itextpdf.kernel.pdf.action.PdfAction;
import com.itextpdf.kernel.pdf.annot.PdfLinkAnnotation;

import com.itextpdf.layout.Document;
import com.itextpdf.layout.element.Link;
import com.itextpdf.layout.element.Paragraph;

public class LinkAnnotation {
   public static void main(String args[]) throws Exception {
      // Creating a PdfWriter
      String dest = "C:/itextExamples/linkAnnotation.pdf";

      PdfWriter writer = new
      PdfWriter(dest);

      // Creating a PdfDocument
      PdfDocument pdf = new PdfDocument(writer);

      // Creating a Document
      Document document = new Document(pdf);

      // Creating a PdfLinkAnnotation object
      Rectangle rect = new Rectangle(0, 0);
      PdfLinkAnnotation annotation = new PdfLinkAnnotation(rect);

      // Setting action of the annotation
      PdfAction action = PdfAction.createURI("http:// www.tutorialspoint.com/");
      annotation.setAction(action);

      // Creating a link
      Link link = new Link("Click here", annotation);

      // Creating a paragraph
      Paragraph paragraph = new Paragraph("Hi welcome to Tutorialspoint ");

      // Adding link to paragraph
      paragraph.add(link.setUnderline());

      // Adding paragraph to document
      document.add(paragraph);

      // Closing the document
      document.close();

      System.out.println("Annotation added successfully");
   }
}
使用以下命令從命令提示符編譯並執行儲存的 Java 檔案:
javac LinkAnnotation.java
java LinkAnnotation
執行後,上述程式將建立一個顯示以下訊息的 PDF 文件。
Annotation added successfully
如果您驗證指定的路徑,則可以找到建立的 PDF 文件,如下所示。

iText - 線性註釋
本章將介紹如何使用iText庫向PDF文件新增線條註釋。
在Pdf中建立線條註釋
可以透過例項化Document類來建立一個空的PDF文件。例項化此類時,需要將其建構函式中傳遞一個PdfDocument物件作為引數。
要在 PDF 文件中使用文字註釋,需要建立一個PdfTextAnnotation類的物件並將其新增到PdfPage中。
以下是如何在 PDF 文件中使用文字註釋的步驟。
步驟 1:建立 PdfWriter 物件
PdfWriter類表示PDF的DocWriter。此類屬於com.itextpdf.kernel.pdf包。此類的建構函式接受一個字串,表示要建立PDF檔案的路徑。
透過將表示您需要建立 PDF 的路徑的字串值傳遞給其建構函式來例項化 PdfWriter 類,如下所示。
// Creating a PdfWriter
String dest = "C:/itextExamples/lineAnnotation.pdf";
PdfWriter writer = new PdfWriter(dest);
當將此型別的物件傳遞給 PdfDocument(類)時,新增到此文件的每個元素都將寫入指定的檔案。
步驟 2:建立 PdfDocument 物件
PdfDocument類是表示iText中PDF文件的類。此類屬於com.itextpdf.kernel.pdf包。要例項化此類(寫入模式),需要將其PdfWriter類的物件傳遞給其建構函式。
透過將 PdfWriter 物件傳遞給其建構函式來例項化 PdfDocument 類,如下所示。
// Creating a PdfDocument
PdfDocument pdfDoc = new PdfDocument(writer);
建立PdfDocument物件後,可以使用其類提供的相應方法新增各種元素,如頁面、字型、檔案附件、事件處理程式。
步驟3:建立Document物件
com.itextpdf.layout包中的Document類是建立自包含PDF時的根元素。此類的建構函式之一接受PdfDocument類的物件。
透過傳遞在上一步建立的PdfDocument類的物件來例項化Document類,如下所示。
// Creating a Document
Document document = new Document(pdfDoc);
步驟 4:建立 PdfAnnotation 物件
com.itextpdf.kernel.pdf.annot包的PdfAnnotation類是所有註釋的超類。
在其派生類中,PdfLineAnnotation類表示線條註釋。建立此類的物件,如下所示。
// Creating PdfAnnotation
Rectangle rect = new Rectangle(20, 800, 0, 0);
PdfAnnotation annotation = new PdfLineAnnotation(rect);
步驟 5:設定註釋的顏色
使用PdfAnnotation類的setColor()方法設定註釋的顏色。此方法的引數是一個表示註釋顏色的顏色物件。
// Setting color to the annotation
annotation.setColor(Color.BLUE);
步驟 6:設定註釋的標題和內容
分別使用PdfAnnotation類的setTitle()和setContents()方法設定註釋的標題和內容,如下所示。
// Setting title to the PdfLineAnnotation
annotation.setTitle(new PdfString("iText"));

// Setting contents of the PdfLineAnnotation
annotation.setContents("Hi welcome to Tutorialspoint");
步驟 7:將註釋新增到頁面
使用PdfDocument類的addNewPage()方法建立一個新的PdfPage類,並使用PdfPage類的addAnnotation()方法新增上面建立的註釋,如下所示。
// Creating a new page
PdfPage page = pdf.addNewPage();

// Adding annotation to a page in a PDF
page.addAnnotation(annotation);
步驟8:關閉文件
使用 Document 類的 close() 方法關閉文件,如下所示。
// Closing the document
document.close();
示例
以下Java程式演示瞭如何使用iText庫向PDF文件新增線條註釋。它建立一個名為lineAnnotation.pdf的PDF文件,向其中新增線條註釋,並將其儲存到C:/itextExamples/路徑。
將此程式碼儲存在名為LineAnnotation.java的檔案中。
import com.itextpdf.kernel.color.Color;
import com.itextpdf.kernel.geom.Rectangle;
import com.itextpdf.kernel.pdf.PdfDocument;
import com.itextpdf.kernel.pdf.PdfPage;
import com.itextpdf.kernel.pdf.PdfString;
import com.itextpdf.kernel.pdf.PdfWriter;
import com.itextpdf.kernel.pdf.annot.PdfAnnotation;
import com.itextpdf.kernel.pdf.annot.PdfLineAnnotation;
import com.itextpdf.layout.Document;

public class LineAnnotation {
   public static void main(String args[]) throws Exception {
      // Creating a PdfWriter
      String dest = "C:/itextExamples/lineAnnotations.pdf";
      PdfWriter writer = new PdfWriter(dest);

      // Creating a PdfDocument
      PdfDocument pdf = new PdfDocument(writer);

      // Creating a Document
      Document document = new Document(pdf);

      // Creating a PdfPage
      PdfPage page = pdf.addNewPage();

      // creating PdfLineAnnotation object
      Rectangle rect = new Rectangle(0, 0);
      float[] floatArray  = new float[]{
         20, 790, page.getPageSize().getWidth() - 20, 790
      };
      PdfAnnotation annotation = new PdfLineAnnotation(rect, floatArray);

      // Setting color of the PdfLineAnnotation
      annotation.setColor(Color.BLUE);

      // Setting title to the PdfLineAnnotation
      annotation.setTitle(new PdfString("iText"));

      // Setting contents of the PdfLineAnnotation
      annotation.setContents("Hi welcome to Tutorialspoint");

      // Adding annotation to the page
      page.addAnnotation(annotation);

      // Closing the document
      document.close();

      System.out.println("Annotation added successfully");
   }
}
使用以下命令從命令提示符編譯並執行儲存的Java檔案:
javac LineAnnotation.java
java LineAnnotation
執行後,上述程式將建立一個顯示以下訊息的 PDF 文件。
Annotation added successfully
如果您驗證指定的路徑,則可以找到建立的 PDF 文件,如下所示。

iText - 標記註釋
本章將介紹如何使用iText庫向PDF文件新增文字標記註釋。
在PDF中建立標記註釋
可以透過例項化Document類來建立一個空的PDF文件。例項化此類時,需要將其建構函式中傳遞一個PdfDocument物件作為引數。要在PDF文件中使用文字註釋,需要建立一個PdfTextAnnotation類的物件並將其新增到PdfPage。
以下是如何在 PDF 文件中使用文字註釋的步驟。
步驟 1:建立 PdfWriter 物件
PdfWriter類表示PDF的DocWriter。此類屬於com.itextpdf.kernel.pdf包。此類的建構函式接受一個字串,表示要建立PDF檔案的路徑。
透過將字串值(表示您需要建立 PDF 的路徑)傳遞給其建構函式來例項化 PdfWriter 類,如下所示。
// Creating a PdfWriter
String dest = "C:/itextExamples/markupAnnotation.pdf";
PdfWriter writer = new PdfWriter(dest);
當將此型別的物件傳遞給 PdfDocument(類)時,新增到此文件的每個元素都將寫入指定的檔案。
步驟 2:建立 PdfDocument 物件
PdfDocument 類是代表 iText 中 PDF 文件的類。此類屬於 com.itextpdf.kernel.pdf 包。要例項化此類(在寫入模式下),需要將 PdfWriter 類的物件傳遞給其建構函式。
透過將 PdfWriter 物件傳遞給其建構函式來例項化 PdfDocument 類,如下所示。
// Creating a PdfDocument
PdfDocument pdfDoc = new PdfDocument(writer);
建立 PdfDocument 物件後,您可以使用其類提供的相應方法新增各種元素,例如頁面、字型、檔案附件和事件處理程式。
步驟3:建立Document物件
com.itextpdf.layout包中的Document類是建立自包含PDF時的根元素。此類的建構函式之一接受PdfDocument類的物件。
透過將上一步驟中建立的 PdfDocument 類物件傳遞給建構函式來例項化 Document 類,如下所示。
// Creating a Document
Document document = new Document(pdfDoc);
步驟 4:建立 PdfAnnotation 物件
com.itextpdf.kernel.pdf.annot包的PdfAnnotation類表示所有註釋的超類。
在其派生類中,PdfTextMarkupAnnotation類表示文字標記註釋。建立此類的物件,如下所示。
// Creating a PdfTextMarkupAnnotation object
Rectangle rect = new Rectangle(105, 790, 64, 10);
float[] floatArray = new float[]{169, 790, 105, 790, 169, 800, 105, 800};
PdfAnnotation annotation = PdfTextMarkupAnnotation.createHighLight(rect,floatArray);
步驟 5:設定註釋的顏色
使用PdfAnnotation類的setColor()方法設定註釋的顏色。此方法的引數是一個表示註釋顏色的顏色物件。
// Setting color to the annotation
annotation.setColor(Color.YELLOW);
步驟 6:設定註釋的標題和內容
分別使用PdfAnnotation類的setTitle()和setContents()方法設定註釋的標題和內容。
// Setting title to the annotation
annotation.setTitle(new PdfString("Hello!"));

// Setting contents to the annotation
annotation.setContents(new PdfString("Hi welcome to Tutorialspoint"));
步驟 7:將註釋新增到頁面
使用PdfDocument類的addNewPage()方法建立一個新的PdfPage類,並使用PdfPage類的addAnnotation()方法新增上面建立的註釋,如下所示。
// Creating a new Pdfpage
PdfPage pdfPage = pdfDoc.addNewPage();

// Adding annotation to a page in a PDF
pdfPage.addAnnotation(annotation);
步驟8:關閉文件
使用 Document 類的 close() 方法關閉文件,如下所示。
// Closing the document
document.close();
示例
以下Java程式演示瞭如何使用iText庫向PDF文件新增文字標記註釋。它建立一個名為markupAnnotation.pdf的PDF文件,向其中新增文字標記註釋,並將其儲存到C:/itextExamples/路徑。
將此程式碼儲存在名為MarkupAnnotation.java的檔案中。
import com.itextpdf.kernel.color.Color;
import com.itextpdf.kernel.geom.Rectangle;
import com.itextpdf.kernel.pdf.PdfDocument;
import com.itextpdf.kernel.pdf.PdfPage;
import com.itextpdf.kernel.pdf.PdfString;
import com.itextpdf.kernel.pdf.PdfWriter;
import com.itextpdf.kernel.pdf.annot.PdfAnnotation;
import com.itextpdf.kernel.pdf.annot.PdfTextMarkupAnnotation;
import com.itextpdf.layout.Document;

public class MarkupAnnotation {
   public static void main(String args[]) throws Exception {
      // Creating a PdfDocument object
      String file = "C:/itextExamples/markupAnnotation.pdf";
      PdfDocument pdfDoc = new PdfDocument(new PdfWriter(file));

      // Creating a Document object
      Document doc = new Document(pdfDoc);

      // Creating a PdfTextMarkupAnnotation object
      Rectangle rect = new Rectangle(105, 790, 64, 10);
      float[] floatArray = new float[]{169, 790, 105, 790, 169, 800, 105, 800};
      PdfAnnotation annotation =
         PdfTextMarkupAnnotation.createHighLight(rect,floatArray);

      // Setting color to the annotation
      annotation.setColor(Color.YELLOW);

      // Setting title to the annotation
      annotation.setTitle(new PdfString("Hello!"));

      // Setting contents to the annotation
      annotation.setContents(new PdfString("Hi welcome to Tutorialspoint"));

      // Creating a new Pdfpage
      PdfPage pdfPage = pdfDoc.addNewPage();

      // Adding annotation to a page in a PDF
      pdfPage.addAnnotation(annotation);

      // Closing the document
      doc.close();

      System.out.println("Annotation added successfully");
   }
}
使用以下命令從命令提示符編譯並執行儲存的 Java 檔案:
javac MarkupAnnotation.java
java MarkupAnnotation
執行後,上述程式將建立一個顯示以下訊息的 PDF 文件。
Annotation added successfully
如果您驗證指定的路徑,則可以找到建立的 PDF 文件,如下所示。

iText - 圓形註釋
本章將介紹如何使用iText庫向PDF文件新增圓形註釋。
在PDF中建立圓形註釋
您可以透過例項化 Document 類來建立一個空的 PDF 文件。例項化此類時,需要將 PdfDocument 物件作為引數傳遞給其建構函式。
要在PDF文件中使用文字註釋,需要建立一個PdfTextAnnotation類的物件並將其新增到Pdfpage。
以下是如何在 PDF 文件中使用文字註釋的步驟。
步驟 1:建立 PdfWriter 物件
PdfWriter類表示PDF的DocWriter。此類屬於com.itextpdf.kernel.pdf包。此類的建構函式接受一個字串,表示要建立PDF檔案的路徑。
透過將字串值(表示需要建立PDF的路徑)傳遞給其建構函式來例項化PdfWriter類,如下所示。
// Creating a PdfWriter
String dest = "C:/itextExamples/circleAnnotation.pdf";
PdfWriter writer = new PdfWriter(dest);
當將此型別的物件傳遞給 PdfDocument(類)時,新增到此文件的每個元素都將寫入指定的檔案。
步驟 2:建立 PdfDocument 物件
PdfDocument 類是代表 iText 中 PDF 文件的類。此類屬於 com.itextpdf.kernel.pdf 包。要例項化此類(在寫入模式下),需要將 PdfWriter 類的物件傳遞給其建構函式。
透過將 PdfWriter 物件傳遞給其建構函式來例項化 PdfDocument 類,如下所示。
// Creating a PdfDocument
PdfDocument pdfDoc = new PdfDocument(writer);
建立 PdfDocument 物件後,您可以使用其類提供的相應方法新增各種元素,例如頁面、字型、檔案附件和事件處理程式。
步驟3:建立Document物件
com.itextpdf.layout 包的 Document 類是建立自包含 PDF 時的根元素。此類的建構函式之一接受 PdfDocument 類的物件。
透過將上一步驟中建立的 PdfDocument 類物件傳遞給建構函式來例項化 Document 類,如下所示。
// Creating a Document
Document document = new Document(pdfDoc);
步驟 4:建立 PdfAnnotation 物件
com.itextpdf.kernel.pdf.annot包的PdfAnnotation類表示所有註釋的超類。
在其派生類中,PdfCircleAnnotation類表示圓形註釋。建立此類的物件,如下所示。
// Creating a PdfCircleAnnotation object Rectangle
rect = new Rectangle(150, 770, 50, 50);
PdfAnnotation annotation = new PdfCircleAnnotation(rect);
步驟 5:設定註釋的顏色
使用PdfAnnotation類的setColor()方法設定註釋的顏色。此方法的引數是一個表示註釋顏色的顏色物件。
// Setting color to the annotation
annotation.setColor(Color.YELLOW);
步驟 6:設定註釋的標題和內容
分別使用PdfAnnotation類的setTitle()和setContents()方法設定註釋的標題和內容。
// Setting title to the annotation
annotation.setTitle(new PdfString("circle annotation"));

// Setting contents of the annotation
annotation.setContents(new PdfString("Hi welcome to Tutorialspoint"));
步驟 7:將註釋新增到頁面
使用PdfDocument類的addNewPage()方法建立一個新的PdfPage類,並使用PdfPage類的addAnnotation()方法新增上面建立的註釋,如下所示。
// Creating a new page
PdfPage page = pdf.addNewPage();

// Adding annotation to a page in a PDF
page.addAnnotation(ann);
步驟8:關閉文件
使用 Document 類的 close() 方法關閉文件,如下所示。
// Closing the document
document.close();
示例
以下Java程式演示瞭如何使用iText庫向PDF文件新增圓形註釋。它建立一個名為circleAnnotation.pdf的PDF文件,向其中新增圓形註釋,並將其儲存到C:/itextExamples/路徑。
將此程式碼儲存在名為PdfCircleAnnotation.java的檔案中。
import com.itextpdf.kernel.color.Color;
import com.itextpdf.kernel.geom.Rectangle;
import com.itextpdf.kernel.pdf.PdfDocument;
import com.itextpdf.kernel.pdf.PdfPage;
import com.itextpdf.kernel.pdf.PdfString;
import com.itextpdf.kernel.pdf.PdfWriter;
import com.itextpdf.kernel.pdf.annot.PdfAnnotation;
import com.itextpdf.kernel.pdf.annot.PdfCircleAnnotation;
import com.itextpdf.layout.Document;

public class CircleAnnotation {
   public static void main(String args[]) throws Exception {
      // Creating a PdfDocument object
      String file = "C:/itextExamples// circleAnnotation.pdf";
      PdfDocument pdf = new PdfDocument(new PdfWriter(file));

      // Creating a Document object
      Document doc = new Document(pdf);

      // Creating a PdfCircleAnnotation object
      Rectangle rect = new Rectangle(150, 770, 50, 50);
      PdfAnnotation annotation = new PdfCircleAnnotation(rect);

      // Setting color to the annotation
      annotation.setColor(Color.YELLOW);

      // Setting title to the annotation
      annotation.setTitle(new PdfString("circle annotation"));

      // Setting contents of the annotation
      annotation.setContents(new PdfString("Hi welcome to Tutorialspoint"));

      // Creating a new page
      PdfPage page = pdf.addNewPage();

      // Adding annotation to a page in a PDF
      page.addAnnotation(annotation);

      // Closing the document
      doc.close();

      System.out.println("Annotation added successfully");
   }
}
使用以下命令從命令提示符編譯並執行儲存的 Java 檔案:
javac PdfCircleAnnotation.java
java PdfCircleAnnotation
執行後,上述程式將建立一個顯示以下訊息的 PDF 文件。
Annotation added successfully
如果您驗證指定的路徑,則可以找到建立的 PDF 文件,如下所示。

iText - 繪製弧線
本章將介紹如何使用iText庫在PDF文件上繪製弧線。
在PDF上繪製弧線
您可以透過例項化 Document 類來建立一個空的 PDF 文件。例項化此類時,需要將 PdfDocument 物件作為引數傳遞給其建構函式。
要在PdfDocument上繪製弧線,請例項化com.itextpdf.kernel.pdf.canvas包的PdfCanvas類,並使用此類的arc()方法建立弧線。
以下是PDF文件上繪製弧線的步驟。
步驟 1:建立 PdfWriter 物件
PdfWriter類表示PDF的DocWriter。此類屬於com.itextpdf.kernel.pdf包。此類的建構函式接受一個字串,表示要建立PDF檔案的路徑。
透過將字串值(表示您需要建立 PDF 的路徑)傳遞給其建構函式來例項化 PdfWriter 類,如下所示。
// Creating a PdfWriter
String dest = "C:/itextExamples/drawingArc.pdf";
PdfWriter writer = new PdfWriter(dest);
當將此型別的物件傳遞給 PdfDocument(類)時,新增到此文件的每個元素都將寫入指定的檔案。
步驟 2:建立 PdfDocument 物件
PdfDocument 類是代表 iText 中 PDF 文件的類。此類屬於 com.itextpdf.kernel.pdf 包。要例項化此類(在寫入模式下),需要將 PdfWriter 類的物件傳遞給其建構函式。
透過將 PdfWriter 物件傳遞給其建構函式來例項化 PdfDocument 類,如下所示。
// Creating a PdfDocument
PdfDocument pdfDoc = new PdfDocument(writer);
建立 PdfDocument 物件後,您可以使用其類提供的相應方法新增各種元素,例如頁面、字型、檔案附件和事件處理程式。
步驟3:建立Document物件
com.itextpdf.layout 包的 Document 類是建立自包含 PDF 時的根元素。此類的建構函式之一接受 PdfDocument 類的物件。
透過將上一步驟中建立的 PdfDocument 類物件傳遞給建構函式來例項化 Document 類,如下所示。
// Creating a Document
Document document = new Document(pdfDoc);
步驟4:建立PdfCanvas物件
使用PdfDocument類的addNewPage()方法建立一個新的PdfPage類。
透過將上面建立的PdfPage物件傳遞到此類的建構函式來例項化com.itextpdf.kernel.pdf.canvas包的PdfCanvas物件,如下所示。
// Creating a new page
PdfPage pdfPage = pdfDoc.addNewPage();

// Creating a PdfCanvas object
PdfCanvas canvas = new PdfCanvas(pdfPage);
步驟5:繪製弧線
使用Canvas類的arc()方法繪製弧線,並使用fill()方法填充它,如下所示。
// Drawing an arc
canvas.arc(50, 50, 300, 545, 0, 360);

// Filling the arc
canvas.fill();
步驟 6:關閉 Document
使用 Document 類的 close() 方法關閉文件,如下所示。
// Closing the document
document.close();
示例
以下Java程式演示瞭如何使用iText庫在PDF文件中繪製弧線。
它建立一個名為drawingArc.pdf的PDF文件,在其中繪製一個弧線,並將其儲存到C:/itextExamples/路徑。
將此程式碼儲存在名為DrawingArc.java的檔案中。
import com.itextpdf.kernel.color.Color;
import com.itextpdf.kernel.pdf.PdfDocument;
import com.itextpdf.kernel.pdf.PdfPage;
import com.itextpdf.kernel.pdf.PdfWriter;
import com.itextpdf.kernel.pdf.canvas.PdfCanvas;
import com.itextpdf.layout.Document;

public class DrawingArc {
   public static void main(String args[]) throws Exception {
      // Creating a PdfWriter
      String dest = "C:/itextExamples/drawingArc.pdf";
      PdfWriter writer = new PdfWriter(dest);

      // Creating a PdfDocument object
      PdfDocument pdfDoc = new PdfDocument(writer);

      // Creating a Document object
      Document doc = new Document(pdfDoc);

      // Creating a new page
      PdfPage pdfPage = pdfDoc.addNewPage();

      // Creating a PdfCanvas object
      PdfCanvas canvas = new PdfCanvas(pdfPage);

      // Drawing an arc
      canvas.arc(50, 50, 300, 545, 0, 360);

      // Filling the arc
      canvas.fill();

      // Closing the document
      doc.close();

      System.out.println("Object drawn on pdf successfully");
   }
}
使用以下命令從命令提示符編譯並執行儲存的 Java 檔案:
javac DrawingArc.java
java DrawingArc
執行後,上述程式將建立一個 PDF 文件,並顯示以下訊息。
Object drawn on pdf successfully
如果您驗證指定的路徑,則可以找到建立的 PDF 文件,如下所示。
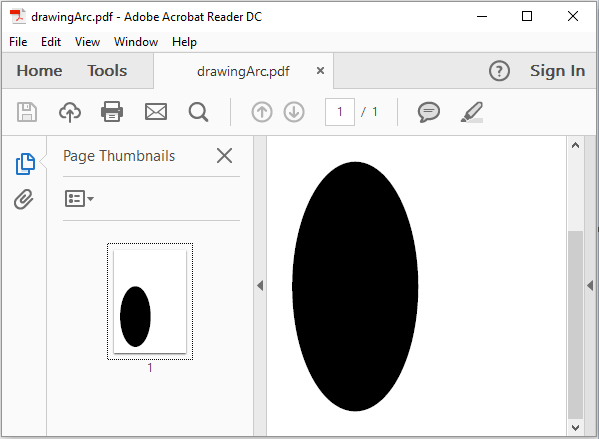
iText - 繪製直線
本章將介紹如何使用iText庫在PDF文件上繪製直線。
在PDF上繪製直線
可以透過例項化Document類來建立一個空的PDF文件。例項化此類時,需要將其建構函式中傳遞一個PdfDocument物件作為引數。
要在PdfDocument上繪製直線,請例項化com.itextpdf.kernel.pdf.canvas包的PdfCanvas類,並使用此類的moveTo()和lineTO()方法建立直線。
以下是PDF文件上繪製直線的步驟。
步驟 1:建立 PdfWriter 物件
PdfWriter類表示PDF的DocWriter。此類屬於com.itextpdf.kernel.pdf包。此類的建構函式接受一個字串,表示要建立PDF檔案的路徑。
透過將字串值(表示您需要建立 PDF 的路徑)傳遞給其建構函式來例項化 PdfWriter 類,如下所示。
// Creating a PdfWriter
String dest = "C:/itextExamples/drawingLine.pdf";
PdfWriter writer = new PdfWriter(dest);
當將此型別的物件傳遞給 PdfDocument(類)時,新增到此文件的每個元素都將寫入指定的檔案。
步驟 2:建立 PdfDocument 物件
PdfDocument 類是代表 iText 中 PDF 文件的類。此類屬於 com.itextpdf.kernel.pdf 包。要例項化此類(在寫入模式下),需要將 PdfWriter 類的物件傳遞給其建構函式。
透過將上面建立的 PdfWriter 物件傳遞給其建構函式來例項化 PdfDocument 類,如下所示。
// Creating a PdfDocument
PdfDocument pdfDoc = new PdfDocument(writer);
建立 PdfDocument 物件後,您可以使用其類提供的相應方法新增各種元素,例如頁面、字型、檔案附件和事件處理程式。
步驟3:建立Document物件
com.itextpdf.layout 包的 Document 類是建立自包含 PDF 時的根元素。此類的建構函式之一接受 PdfDocument 類的物件。
透過將上一步驟中建立的 PdfDocument 類物件傳遞給建構函式來例項化 Document 類,如下所示。
// Creating a Document
Document document = new Document(pdfDoc);
步驟4:建立PdfCanvas物件
使用PdfDocument類的addNewPage()方法建立一個新的PdfPage類。
透過將上面建立的PdfPage物件傳遞到此類的建構函式來例項化com.itextpdf.kernel.pdf.canvas包的PdfCanvas物件,如下所示。
// Creating a new page
PdfPage pdfPage = pdfDoc.addNewPage();

// Creating a PdfCanvas object
PdfCanvas canvas = new PdfCanvas(pdfPage);
步驟5:繪製直線
使用Canvas類的moveTO()方法設定直線的初始點,如下所示。
// Initial point of the line
canvas.moveTo(100, 300);
現在,使用lineTo()方法從該點繪製到另一個點的直線,如下所示。
// Drawing the line
canvas.lineTo(500, 300);
步驟 6:關閉 Document
使用 Document 類的 close() 方法關閉文件,如下所示。
// Closing the document
document.close();
示例
以下Java程式演示瞭如何使用iText庫在PDF文件中繪製直線。它建立一個名為drawingLine.pdf的PDF文件,在其中繪製一個弧線,並將其儲存到C:/itextExamples/路徑。
將此程式碼儲存在名為DrawingLine.java的檔案中。
import com.itextpdf.kernel.pdf.PdfDocument;
import com.itextpdf.kernel.pdf.PdfPage;
import com.itextpdf.kernel.pdf.PdfWriter;
import com.itextpdf.kernel.pdf.canvas.PdfCanvas;
import com.itextpdf.layout.Document;
public class DrawingLine {
public static void main(String args[]) throws Exception {
// Creating a PdfWriter
String dest = "C:/itextExamples/drawingLine.pdf";
PdfWriter writer = new PdfWriter(dest);
// Creating a PdfDocument object
PdfDocument pdfDoc = new PdfDocument(writer);
// Creating a Document object
Document doc = new Document(pdfDoc);
// Creating a new page
PdfPage pdfPage = pdfDoc.addNewPage();
// Creating a PdfCanvas object
PdfCanvas canvas = new PdfCanvas(pdfPage);
// Initial point of the line
canvas.moveTo(100, 300);
// Drawing the line
canvas.lineTo(500, 300);
// Closing the path stroke
canvas.closePathStroke();
// Closing the document
doc.close();
System.out.println("Object drawn on pdf successfully");
}
}
使用以下命令從命令提示符編譯並執行儲存的 Java 檔案:
javac DrawingLine.java java DrawingLine
執行後,上述程式將建立一個 PDF 文件,並顯示以下訊息。
Object drawn on pdf successfully
如果您驗證指定的路徑,則可以找到建立的 PDF 文件,如下所示。

iText - 繪製圓形
本章將介紹如何使用iText庫在PDF文件上繪製圓形。
在Pdf上繪製圓形
您可以透過例項化 Document 類來建立一個空的 PDF 文件。例項化此類時,需要將 PdfDocument 物件作為引數傳遞給其建構函式。
要在PdfDocument上繪製圓形,請例項化com.itextpdf.kernel.pdf.canvas包的PdfCanvas類,並呼叫此類的circle()方法。
以下是PDF文件上繪製圓形的步驟。
步驟 1:建立 PdfWriter 物件
PdfWriter類表示PDF的DocWriter。此類屬於com.itextpdf.kernel.pdf包。此類的建構函式接受一個字串,表示要建立PDF檔案的路徑。
透過將字串值(表示您需要建立 PDF 的路徑)傳遞給其建構函式來例項化 PdfWriter 類,如下所示。
// Creating a PdfWriter String dest = "C:/itextExamples/drawingCircle.pdf"; PdfWriter writer = new PdfWriter(dest);
當將此型別的物件傳遞給 PdfDocument(類)時,新增到此文件的每個元素都將寫入指定的檔案。
步驟 2:建立 PdfDocument 物件
PdfDocument 類是代表 iText 中 PDF 文件的類。此類屬於 com.itextpdf.kernel.pdf 包。要例項化此類(在寫入模式下),需要將 PdfWriter 類的物件傳遞給其建構函式。
透過向其建構函式傳遞PdfWriter物件來例項化PdfDocument類,如下所示。
// Creating a PdfDocument PdfDocument pdfDoc = new PdfDocument(writer);
建立 PdfDocument 物件後,您可以使用其類提供的相應方法新增各種元素,例如頁面、字型、檔案附件和事件處理程式。
步驟3:建立Document物件
com.itextpdf.layout 包的 Document 類是建立自包含 PDF 時的根元素。此類的建構函式之一接受 PdfDocument 類的物件。
透過將上一步驟中建立的 PdfDocument 類物件傳遞給建構函式來例項化 Document 類,如下所示。
// Creating a Document Document document = new Document(pdfDoc);
步驟4:建立PdfCanvas物件
使用PdfDocument類的addNewPage()方法建立一個新的PdfPage類。透過將PdfPage物件傳遞到此類的建構函式來例項化com.itextpdf.kernel.pdf.canvas包的PdfCanvas物件,如下所示。
// Creating a new page PdfPage pdfPage = pdfDoc.addNewPage(); // Creating a PdfCanvas object PdfCanvas canvas = new PdfCanvas(pdfPage);
步驟5:設定顏色
使用Canvas類的setColor()方法設定圓形的顏色,如下所示。
// Setting color to the circle Color color = Color.GREEN; canvas.setColor(color, true);
步驟6:繪製圓形
透過呼叫Canvas的circle()方法繪製圓形,如下所示。
// creating a circle canvas.circle(300, 400, 200);
步驟7:關閉文件
使用 Document 類的 close() 方法關閉文件,如下所示。
// Closing the document document.close();
示例
以下Java程式演示瞭如何使用iText庫在pdf文件上繪製圓形。它建立一個名為drawingCircle.pdf的PDF文件,在其中繪製一個圓形,並將其儲存到C:/itextExamples/路徑。
將此程式碼儲存在名為DrawingCircle.java的檔案中。
import com.itextpdf.kernel.color.Color;
import com.itextpdf.kernel.pdf.PdfDocument;
import com.itextpdf.kernel.pdf.PdfPage;
import com.itextpdf.kernel.pdf.PdfWriter;
import com.itextpdf.kernel.pdf.canvas.PdfCanvas;
import com.itextpdf.layout.Document;
public class DrawingCircle {
public static void main(String args[]) throws Exception {
// Creating a PdfWriter
String dest = "C:/itextExamples/drawingCircle.pdf";
PdfWriter writer = new PdfWriter(dest);
// Creating a PdfDocument object
PdfDocument pdfDoc = new PdfDocument(writer);
// Creating a Document object
Document doc = new Document(pdfDoc);
// Creating a new page
PdfPage pdfPage = pdfDoc.addNewPage();
// Creating a PdfCanvas object
PdfCanvas canvas = new PdfCanvas(pdfPage);
// Setting color to the circle
Color color = Color.GREEN;
canvas.setColor(color, true);
// creating a circle
canvas.circle(300, 400, 200);
// Filling the circle
canvas.fill();
// Closing the document
doc.close();
System.out.println("Object drawn on pdf successfully");
}
}
使用以下命令從命令提示符編譯並執行儲存的Java檔案。
javac DrawingCircle.java java DrawingCircle
執行後,上述程式將建立一個顯示以下訊息的 PDF 文件。
Object drawn on pdf successfully
如果您驗證指定的路徑,則可以找到建立的 PDF 文件,如下所示。

iText - 設定字型
本章將介紹如何使用iText庫在PDF文件中設定文字的顏色和字型。
在PDF中設定文字字型
您可以透過例項化 Document 類來建立一個空的 PDF 文件。例項化此類時,需要將 PdfDocument 物件作為引數傳遞給其建構函式。
要向文件新增段落,需要例項化Paragraph類並將此物件使用add()方法新增到文件中。可以使用setFontColor()和setFont()方法分別設定文字的顏色和字型。
以下是PDF文件中設定文字顏色和字型的步驟。
步驟 1:建立 PdfWriter 物件
PdfWriter類表示PDF的DocWriter。此類屬於com.itextpdf.kernel.pdf包。此類的建構函式接受一個字串,表示要建立PDF檔案的路徑。
透過將字串值(表示您需要建立 PDF 的路徑)傳遞給其建構函式來例項化 PdfWriter 類,如下所示。
// Creating a PdfWriter String dest = "C:/itextExamples/fonts.pdf"; PdfWriter writer = new PdfWriter(dest);
當將此型別的物件傳遞給 PdfDocument(類)時,新增到此文件的每個元素都將寫入指定的檔案。
步驟 2:建立 PdfDocument
PdfDocument 類是代表 iText 中 PDF 文件的類。此類屬於 com.itextpdf.kernel.pdf 包。要例項化此類(在寫入模式下),需要將 PdfWriter 類的物件傳遞給其建構函式。
透過將 PdfWriter 物件傳遞給其建構函式來例項化 PdfDocument 類,如下所示。
// Creating a PdfDocument PdfDocument pdfDoc = new PdfDocument(writer);
建立 PdfDocument 物件後,您可以使用其類提供的相應方法新增各種元素,例如頁面、字型、檔案附件和事件處理程式。
步驟 3:建立 Document 類
com.itextpdf.layout 包的 Document 類是建立自包含 PDF 時的根元素。此類的建構函式之一接受 PdfDocument 類的物件。
透過傳遞在上一步建立的PdfDocument類的物件來例項化Document類,如下所示。
// Creating a Document Document document = new Document(pdfDoc);
步驟4:建立文字
透過例項化com.itextpdf.layout.element包的Text類來建立文字,如下所示。
// Creating text object
Text text = new Text("Tutorialspoint");
步驟5:設定文字的字型和顏色
使用com.itextpdf.kernel.font包的PdfFontFactory類的createFont()方法建立PdfFont物件,如下所示
// Setting font of the text PdfFont font = PdfFontFactory.createFont(FontConstants.HELVETICA_BOLD);
現在,使用Text類的setFont()方法為文字設定字型。將PdfFont物件作為引數傳遞,如下所示。
text1.setFont(font);
要設定文字顏色,請呼叫Text類的setFontColor()方法,如下所示。
// Setting font color text.setFontColor(Color.GREEN);
步驟6:向段落新增文字
建立一個Paragraph類物件,並使用其add()方法新增上面建立的文字,如下所示。
// Creating Paragraph Paragraph paragraph = new Paragraph(); // Adding text to the paragraph paragraph.add(text);
步驟7:將段落新增到文件
使用Document類的add()方法將段落新增到文件,如下所示。
doc.add(paragraph1)
步驟8:關閉文件
使用 Document 類的 close() 方法關閉文件,如下所示。
// Closing the document document.close();
示例
下面的Java程式演示瞭如何使用iText庫在PDF中為文字設定顏色和字型。它建立一個名為fonts.pdf的PDF文件,格式化文字,並將其儲存到C:/itextExamples/路徑。
將此程式碼儲存在名為FormatingTheText.java的檔案中。
import com.itextpdf.io.font.FontConstants;
import com.itextpdf.kernel.color.Color;
import com.itextpdf.kernel.font.PdfFontFactory;
import com.itextpdf.kernel.font.PdfFont;
import com.itextpdf.kernel.pdf.PdfDocument;
import com.itextpdf.kernel.pdf.PdfWriter;
import com.itextpdf.layout.Document;
import com.itextpdf.layout.element.Paragraph;
import com.itextpdf.layout.element.Text;
public class FormatingTheText {
public static void main(String args[]) throws Exception {
// Creating a PdfWriter object
String dest = "C:/itextExamples/fonts.pdf";
PdfWriter writer = new PdfWriter(dest);
// Creating a PdfDocument object
PdfDocument pdf = new PdfDocument(writer);
// Creating a Document object
Document doc = new Document(pdf);
// Creating text object
Text text1 = new Text("Tutorialspoint");
// Setting font of the text
PdfFont font = PdfFontFactory.createFont(FontConstants.HELVETICA_BOLD);
text1.setFont(font);
// Setting font color
text1.setFontColor(Color.GREEN);
// Creating text object
Text text2 = new Text("Simply Easy Learning");
text2.setFont(PdfFontFactory.createFont(FontConstants.HELVETICA));
// Setting font color
text2.setFontColor(Color.BLUE);
// Creating Paragraph
Paragraph paragraph1 = new Paragraph();
// Adding text1 to the paragraph
paragraph1.add(text1);
paragraph1.add(text2);
// Adding paragraphs to the document
doc.add(paragraph1);
doc.close();
System.out.println("Text added to pdf ..");
}
}
使用以下命令從命令提示符編譯並執行儲存的 Java 檔案:
javac FormatingTheText.java java FormatingTheText
執行後,上述程式將建立一個顯示以下訊息的 PDF 文件。
Text added to pdf ..
如果您驗證指定的路徑,則可以找到建立的 PDF 文件,如下所示。

iText - 縮小內容
在本節中,我們將學習如何使用iText庫縮放PDF文件中的影像。
縮小PDF中的內容
以下是使用iText庫縮小PDF頁面內容的步驟。
步驟1:建立PdfWriter和PdfReader物件
PdfWriter類表示PDF的DocWriter。此類屬於com.itextpdf.kernel.pdf包。此類的建構函式接受一個字串,表示要建立PDF檔案的路徑。
透過將字串值(表示您需要建立 PDF 的路徑)傳遞給其建構函式來例項化 PdfWriter 類,如下所示。
// Creating a PdfWriter object String dest = "C:/itextExamples/shrinking.pdf"; PdfWriter writer = new PdfWriter(dest);
要讀取現有pdf中的資料,請建立一個PdfReader物件,如下所示。
// Creating a PdfReader String src = "C:/itextExamples/pdfWithImage.pdf"; PdfReader reader = new PdfReader(src);
步驟2:建立PdfDocument物件
PdfDocument 類是代表 iText 中 PDF 文件的類。此類屬於 com.itextpdf.kernel.pdf 包。要例項化此類(在寫入模式下),需要將 PdfWriter 類的物件傳遞給其建構函式。
透過將PdfWriter和PdfReader物件傳遞給建構函式,建立源和目標PDF文件,如下所示。
// Creating a PdfDocument objects PdfDocument destpdf = new PdfDocument(writer); PdfDocument srcPdf = new PdfDocument(reader);
步驟3:開啟現有PDF中的頁面
使用PdfPage類的getPage()方法從源PDF獲取頁面。使用此物件,獲取源文件頁面的大小,如下所示。
// Opening a page from the existing PDF PdfPage origPage = srcPdf.getPage(1); // Getting the page size Rectangle orig = origPage.getPageSizeWithRotation();
步驟4:縮小源pdf的內容
使用AffineTransform類的getScaleInstance()方法,縮小源文件頁面的內容,如下所示。
// Shrink original page content using transformation matrix AffineTransform transformationMatrix = AffineTransform.getScaleInstance( page.getPageSize().getWidth()/ orig.getWidth()/2, page.getPageSize().getHeight()/ orig.getHeight()/2);
步驟5:複製頁面
將上一步建立的仿射變換矩陣與目標PDF文件的canvas物件的矩陣連線,如下所示。
// Concatenating the affine transform matrix to the current matrix PdfCanvas canvas = new PdfCanvas(page); canvas.concatMatrix(transformationMatrix);
現在,將頁面副本新增到目標PDF的canvas物件到源文件,如下所示。
// Add the object to the canvas PdfFormXObject pageCopy = origPage.copyAsFormXObject(destpdf); canvas.addXObject(pageCopy, 0, 0);
步驟6:建立Document物件
com.itextpdf.layout 包的 Document 類是建立自包含 PDF 時的根元素。此類的建構函式之一接受 PdfDocument 類的物件。
透過傳遞PdfDocument類的物件來例項化Document類,如下所示。
// Creating a Document Document document = new Document(destpdf);
步驟7:關閉文件
使用 Document 類的 close() 方法關閉文件,如下所示。
// Closing the document document.close();
示例
下面的Java程式演示瞭如何使用iText庫縮小PDF頁面的內容。它建立一個名為shrinkingPDF.pdf的PDF文件,縮小pdf中的影像,並將其儲存到C:/itextExamples/路徑。
將此程式碼儲存在名為ShrinkingPDF.java的檔案中。
import com.itextpdf.kernel.geom.AffineTransform;
import com.itextpdf.kernel.geom.Rectangle;
import com.itextpdf.kernel.pdf.PdfDocument;
import com.itextpdf.kernel.pdf.PdfPage;
import com.itextpdf.kernel.pdf.PdfReader;
import com.itextpdf.kernel.pdf.PdfWriter;
import com.itextpdf.kernel.pdf.canvas.PdfCanvas;
import com.itextpdf.kernel.pdf.xobject.PdfFormXObject;
import com.itextpdf.layout.Document;
public class ShrinkPDF {
public static void main(String args[]) throws Exception {
// Creating a PdfWriter object
String dest = "C:/itextExamples/shrinking.pdf";
PdfWriter writer = new PdfWriter(dest);
// Creating a PdfReader
String src = "C:/itextExamples/pdfWithImage.pdf";
PdfReader reader = new PdfReader(src);
// Creating a PdfDocument objects
PdfDocument destpdf = new PdfDocument(writer);
PdfDocument srcPdf = new PdfDocument(reader);
// Opening a page from the existing PDF
PdfPage origPage = srcPdf.getPage(1);
// Getting the page size
Rectangle orig = origPage.getPageSizeWithRotation();
// Adding a page to destination Pdf
PdfPage page = destpdf.addNewPage();
// Scaling the image in a Pdf page
AffineTransform transformationMatrix = AffineTransform.getScaleInstance(
page.getPageSize().getWidth()/orig.getWidth()/2,
page.getPageSize().getHeight()/ orig.getHeight()/2);
// Shrink original page content using transformation matrix
PdfCanvas canvas = new PdfCanvas(page);
canvas.concatMatrix(transformationMatrix);
// Add the object to the canvas
PdfFormXObject pageCopy = origPage.copyAsFormXObject(destpdf);
canvas.addXObject(pageCopy, 0, 0);
// Creating a Document object
Document doc = new Document(destpdf);
// Closing the document
doc.close();
System.out.println("Table created successfully..");
}
}
使用以下命令從命令提示符編譯並執行儲存的Java檔案:
javac ShrinkingPDF.java java ShrinkingPDF
執行後,上述程式將建立一個 PDF 文件,並顯示以下訊息。
Table created successfully..
如果您驗證指定的路徑,則可以找到建立的 PDF 文件,如下所示。
iText - 平鋪 PDF 頁面
下面的Java程式演示瞭如何使用iText庫將PDF頁面的內容平鋪到不同的頁面。它建立一個名為tilingPdfPages.pdf的PDF文件,並將其儲存到C:/itextExamples/路徑。
將此程式碼儲存在名為TilingPDFPages.java的檔案中。
import com.itextpdf.kernel.geom.AffineTransform;
import com.itextpdf.kernel.geom.PageSize;
import com.itextpdf.kernel.geom.Rectangle;
import com.itextpdf.kernel.pdf.PdfDocument;
import com.itextpdf.kernel.pdf.PdfPage;
import com.itextpdf.kernel.pdf.PdfReader;
import com.itextpdf.kernel.pdf.PdfWriter;
import com.itextpdf.kernel.pdf.canvas.PdfCanvas;
import com.itextpdf.kernel.pdf.xobject.PdfFormXObject;
public class TilingPDFPages {
public static void main(String args[]) throws Exception {
// Creating a PdfWriter object
String dest = "C:/itextExamples/tilingPdfPages.pdf";
PdfWriter writer = new PdfWriter(dest);
// Creating a PdfReader
String src = "C:/itextExamples/pdfWithImage.pdf";
PdfReader reader = new PdfReader(src);
// Creating a PdfDocument objects
PdfDocument destpdf = new PdfDocument(writer);
PdfDocument srcPdf = new PdfDocument(reader);
// Opening a page from the existing PDF
PdfPage origPage = srcPdf.getPage(1);
// Getting the page size
Rectangle orig = origPage.getPageSizeWithRotation();
// Getting the size of the page
PdfFormXObject pageCopy = origPage.copyAsFormXObject(destpdf);
// Tile size
Rectangle tileSize = PageSize.A4.rotate();
AffineTransform transformationMatrix =
AffineTransform.getScaleInstance(tileSize.getWidth() / orig.getWidth() *
2f, tileSize.getHeight() / orig.getHeight() * 2f);
// The first tile
PdfPage page =
destpdf.addNewPage(PageSize.A4.rotate());
PdfCanvas canvas = new PdfCanvas(page);
canvas.concatMatrix(transformationMatrix);
canvas.addXObject(pageCopy, 0, -orig.getHeight() / 2f);
// The second tile
page = destpdf.addNewPage(PageSize.A4.rotate());
canvas = new PdfCanvas(page);
canvas.concatMatrix(transformationMatrix);
canvas.addXObject(pageCopy, -orig.getWidth() / 2f, -orig.getHeight() / 2f);
// The third tile
page = destpdf.addNewPage(PageSize.A4.rotate());
canvas = new PdfCanvas(page);
canvas.concatMatrix(transformationMatrix);
canvas.addXObject(pageCopy, 0, 0);
// The fourth tile
page = destpdf.addNewPage(PageSize.A4.rotate());
canvas = new PdfCanvas(page);
canvas.concatMatrix(transformationMatrix);
canvas.addXObject(pageCopy, -orig.getWidth() / 2f, 0);
// closing the documents
destpdf.close();
srcPdf.close();
System.out.println("PDF created successfully..");
}
}
使用以下命令從命令提示符編譯並執行儲存的 Java 檔案:
javac TilingPDFPages.java java TilingPDFPages
執行後,上述程式將建立一個 PDF 文件,並顯示以下訊息。
PDF created successfully..
如果驗證指定的路徑,您可以找到建立的PDF文件,如下所示:

iText - N-up (多頁排版)
下面的Java程式演示瞭如何使用iText庫在PDF頁面上執行N-up操作。它建立一個名為nUppingPDF.pdf的PDF文件,並將其儲存到C:/itextExamples/路徑。
將此程式碼儲存在名為NUppingPDF.java的檔案中。
import com.itextpdf.kernel.geom.AffineTransform;
import com.itextpdf.kernel.geom.PageSize;
import com.itextpdf.kernel.geom.Rectangle;
import com.itextpdf.kernel.pdf.PdfDocument;
import com.itextpdf.kernel.pdf.PdfPage;
import com.itextpdf.kernel.pdf.PdfReader;
import com.itextpdf.kernel.pdf.PdfWriter;
import com.itextpdf.kernel.pdf.canvas.PdfCanvas;
import com.itextpdf.kernel.pdf.xobject.PdfFormXObject;
public class NUppingPDF {
public static void main(String args[]) throws Exception {
// Creating a PdfWriter object
String dest = "C:/itextExamples/nUppingPDF.pdf";
PdfWriter writer = new PdfWriter(dest);
// Creating a PdfReader
String src = "C:/itextExamples/pdfWithImage.pdf";
PdfReader reader = new PdfReader(src);
// Creating a PdfDocument objects
PdfDocument destpdf = new PdfDocument(writer);
PdfDocument srcPdf = new PdfDocument(reader);
// Opening a page from the existing PDF
PdfPage origPage = srcPdf.getPage(1);
Rectangle orig = origPage.getPageSize();
PdfFormXObject pageCopy = origPage.copyAsFormXObject(destpdf);
// N-up page
PageSize nUpPageSize = PageSize.A4.rotate();
PdfPage page = destpdf.addNewPage(nUpPageSize);
PdfCanvas canvas = new PdfCanvas(page);
// Scale page
AffineTransform transformationMatrix = AffineTransform.getScaleInstance(
nUpPageSize.getWidth() / orig.getWidth() /
2f, nUpPageSize.getHeight() / orig.getHeight() / 2f);
canvas.concatMatrix(transformationMatrix);
// Add pages to N-up page
canvas.addXObject(pageCopy, 0, orig.getHeight());
canvas.addXObject(pageCopy, orig.getWidth(), orig.getHeight());
canvas.addXObject(pageCopy, 0, 0);
canvas.addXObject(pageCopy, orig.getWidth(), 0);
// closing the documents
destpdf.close();
srcPdf.close();
System.out.println("PDF created successfully..");
}
}
使用以下命令從命令提示符編譯並執行儲存的 Java 檔案:
javac NUppingPDF.java java NUppingPDF
執行後,上述程式將建立一個顯示以下訊息的 PDF 文件。
PDF created successfully..
如果您驗證指定的路徑,則可以找到建立的 PDF 文件,如下所示。
