- HTML Canvas 教程
- HTML Canvas - 首頁
- HTML Canvas - 簡介
- 環境設定
- HTML Canvas - 第一個應用程式
- HTML Canvas - 繪製 2D 形狀
- HTML Canvas - 路徑元素
- 使用路徑元素繪製 2D 形狀
- HTML Canvas - 顏色
- HTML Canvas - 新增樣式
- HTML Canvas - 新增文字
- HTML Canvas - 新增影像
- HTML Canvas - Canvas 時鐘
- HTML Canvas - 變換
- 合成和剪輯
- HTML Canvas - 基本動畫
- 高階動畫
- HTML Canvas API 函式
- HTML Canvas - 元素
- HTML Canvas - 矩形
- HTML Canvas - 線
- HTML Canvas - 路徑
- HTML Canvas - 文字
- HTML Canvas - 顏色和樣式
- HTML Canvas - 影像
- HTML Canvas - 陰影和變換
- HTML Canvas 有用資源
- HTML Canvas - 快速指南
- HTML Canvas - 有用資源
- HTML Canvas - 討論
HTML Canvas - 過濾器屬性
HTML Canvas 的filter 屬性用於應用顏色和對比度效果(例如灰度、棕褐色等)到使用上下文物件繪製到畫布元素上的影像。
它的工作原理與 CSS filter 屬性完全相同,並採用相同的輸入值。它將提供的過濾器與確切的值應用於 Canvas 元素內的影像。
可能的輸入值
filter屬性接受“none”值,該值不返回任何內容。引數接受的值如下所示。
| 序號 | 值和描述 |
|---|---|
| 1 | url()
當需要 CSS URL 來訪問過濾器資料並將其應用於CanvasRenderingContext2D物件時,將給出此值。 |
| 2 | blur()
當此值作為物件過濾器給出時,物件會變得模糊。輸入值為整數,當給出零時,物件保持不變。 |
| 3 | brightness()
此內建方法用於使物件更亮或更暗。如果給定的值小於 100%,則物件變暗,如果值大於 100%,則物件變亮。 |
| 4 | contrast()
filter屬性的此值用於調整繪圖的對比度。它以百分比給出,0% 會在畫布上生成一個完全黑色的物件。 |
| 5 | drop-shadow()
它將陰影應用於物件。它需要四個值來執行此操作,即陰影與物件的距離、半徑和陰影的顏色。 |
| 6 | grayscale()
filter屬性的此值將物件轉換為灰度。它接受百分比值作為輸入。 |
| 7 | hue-rotate()
此值將色調旋轉應用於繪圖。它以度數給出,0deg 不會改變繪圖。 |
| 8 | invert()
此方法反轉畫布中的物件,並採用百分比值來執行操作。 |
| 9 | opacity()
要使繪圖透明,會呼叫此過濾器屬性的方法。它也採用百分比值作為輸入。 |
| 10 | saturation()
要使繪圖飽和,我們將此過濾器屬性應用於CanvasRenderingContext2D物件,方法是提供百分比值。 |
| 11 | sepia()
當透過傳遞表示過濾器需求的百分比值呼叫時,這會向繪圖新增棕褐色過濾器。 |
| 12 | none
不應用任何過濾器,繪圖保持不變。 |
示例
以下程式將“brightness”值應用於建立的上下文物件的 HTML Canvas filter 屬性。
<!DOCTYPE html>
<html lang="en">
<head>
   <title>Reference API</title>
   <style>
      body {
         margin: 10px;
         padding: 10px;
      }
   </style>
</head>
<body onload="Context();">
   <canvas id="canvas" width="500" height="200" style="border: 1px solid black;"></canvas>
   <script>
      function Context() {
         var canvas = document.getElementById('canvas');
         var context = canvas.getContext('2d');
         context.filter = 'brightness(150%)'
         context.fillStyle = 'cyan';
         context.fill();
         context.fillRect(50, 20, 150, 100);
         context.filter = 'brightness(50%)'
         context.fillStyle = 'cyan';
         context.fill();
         context.fillRect(250, 20, 150, 100);
      }
   </script>
</body>
</html>
輸出
上述程式碼在網頁上返回的輸出為:

示例
以下程式將模糊過濾器屬性應用於建立的上下文物件。
<!DOCTYPE html>
<html lang="en">
<head>
   <title>Reference API</title>
   <style>
      body {
         margin: 10px;
         padding: 10px;
      }
   </style>
</head>
<body onload="Context();">
   <canvas id="canvas" width="400" height="200" style="border: 1px solid black;"></canvas>
   <script>
      function Context() {
         var canvas = document.getElementById('canvas');
         var context = canvas.getContext('2d');
         context.filter = 'blur(3px)';
         var image = new Image();
         image.onload = function() {
            context.drawImage(image, 50, 50);
         };
         image.src = 'https://tutorialspoint.tw/html5/images/logo.png';
      }
   </script>
</body>
</html>
輸出
上述程式碼在網頁上返回的輸出為:
示例
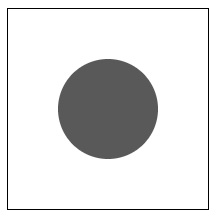
以下程式將對比度過濾器屬性應用於建立的上下文物件。
<!DOCTYPE html>
<html lang="en">
<head>
   <title>Reference API</title>
   <style>
      body {
         margin: 10px;
         padding: 10px;
      }
   </style>
</head>
<body onload="Context();">
   <canvas id="canvas" width="200" height="200" style="border: 1px solid black;"></canvas>
   <script>
      function Context() {
         var canvas = document.getElementById('canvas');
         var context = canvas.getContext('2d');
         context.filter = 'contrast(30%)';
         context.beginPath();
         context.arc(100, 100, 50, 1 * Math.PI, 5 * Math.PI);
         context.fill();
         context.closePath();
      }
   </script>
</body>
</html>
輸出
上述程式碼在網頁上返回的輸出為:
示例
以下程式將陰影過濾器屬性應用於建立的上下文物件。
<!DOCTYPE html>
<html lang="en">
<head>
   <title>Reference API</title>
   <style>
      body {
         margin: 10px;
         padding: 10px;
      }
   </style>
</head>
<body onload="Context();">
   <canvas id="canvas" width="400" height="200" style="border: 1px solid black;"></canvas>
   <script>
      function Context() {
         var canvas = document.getElementById('canvas');
         var context = canvas.getContext('2d');
         context.filter = 'drop-shadow(20px 10px grey)';
         var image = new Image();
         image.onload = function() {
            context.drawImage(image, 50, 50);
         };
         image.src = 'https://tutorialspoint.tw/html5/images/logo.png';
      }
   </script>
</body>
</html>
輸出
上述程式碼在網頁上返回的輸出為:

示例
以下程式將灰度過濾器屬性應用於建立的上下文物件。
<!DOCTYPE html>
<html lang="en">
<head>
   <title>Reference API</title>
   <style>
      body {
         margin: 10px;
         padding: 10px;
      }
   </style>
</head>
<body onload="Context();">
   <canvas id="canvas" width="400" height="200" style="border: 1px solid black;"></canvas>
   <script>
      function Context() {
         var canvas = document.getElementById('canvas');
         var context = canvas.getContext('2d');
         context.filter = 'grayscale(125%)';
         var image = new Image();
         image.onload = function() {
            context.drawImage(image, 50, 50);
         };
         image.src = 'https://tutorialspoint.tw/html5/images/logo.png';
      }
   </script>
</body>
</html>
輸出
上述程式碼在網頁上返回的輸出為:

示例
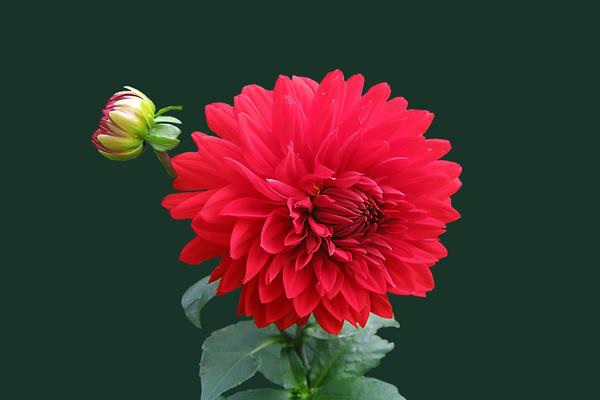
以下程式將色調旋轉過濾器屬性應用於建立的上下文物件。
<!DOCTYPE html>
<html lang="en">
<head>
   <title>Reference API</title>
   <style>
      body {
         margin: 10px;
         padding: 10px;
      }
   </style>
</head>
<body onload="Context();">
   <canvas id="canvas" width="625" height="425" style="border: 1px solid black;"></canvas>
   <script>
      function Context() {
         var canvas = document.getElementById('canvas');
         var context = canvas.getContext('2d');
         context.filter = 'hue-rotate(45deg)';
         var image = new Image();
         image.onload = function() {
            context.drawImage(image, 10, 10);
         };
         image.src = '../../images/image3.png';
      }
   </script>
</body>
</html>
輸出
此程式中使用的影像為:
上述程式碼在網頁上返回的輸出為:

示例
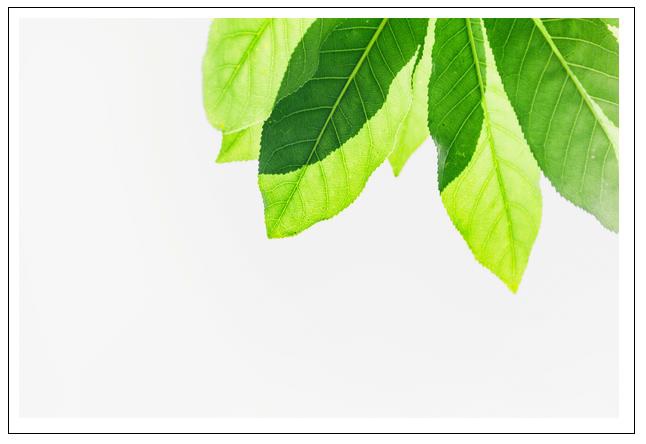
以下程式將反轉過濾器屬性應用於建立的上下文物件。
<!DOCTYPE html>
<html lang="en">
<head>
   <title>Reference API</title>
   <style>
      body {
         margin: 10px;
         padding: 10px;
      }
   </style>
</head>
<body onload="Context();">
   <canvas id="canvas" width="625" height="425" style="border: 1px solid black;"></canvas>
   <script>
      function Context() {
         var canvas = document.getElementById('canvas');
         var context = canvas.getContext('2d');
         context.filter = 'invert(100%)';
         var image = new Image();
         image.onload = function() {
            context.drawImage(image, 10, 10);
         };
         image.src = '../../images/image7.png';
      }
   </script>
</body>
</html>
輸出
此程式中使用的影像為:

上述程式碼在網頁上返回的輸出為:
示例
以下程式將不透明度過濾器屬性應用於建立的上下文物件。
<!DOCTYPE html>
<html lang="en">
<head>
   <title>Reference API</title>
   <style>
      body {
         margin: 10px;
         padding: 10px;
      }
   </style>
</head>
<body onload = "Context();">
   <canvas id="canvas" width="625" height="425" style="border: 1px solid black;"></canvas>
   <script>
      function Context(){
         var canvas=document.getElementById('canvas');
         var context=canvas.getContext('2d');
         context.filter = 'opacity(75%)';
         var image = new Image();
         image.onload = function() {
            context.drawImage(image, 10, 10);
         };
         image.src = '../../images/image33.png';
      }
   </script>
</body>
</html>
輸出
此程式中使用的影像為:
上述程式碼在網頁上返回的輸出為:

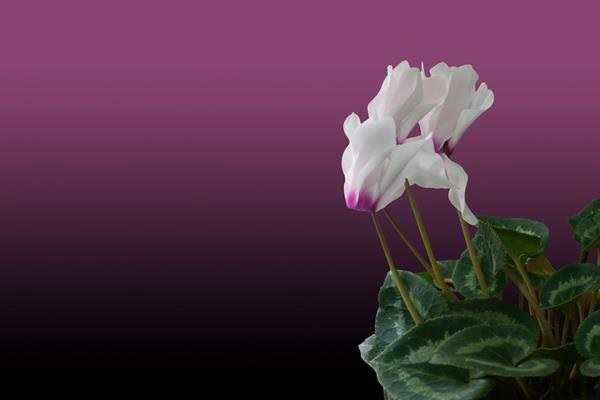
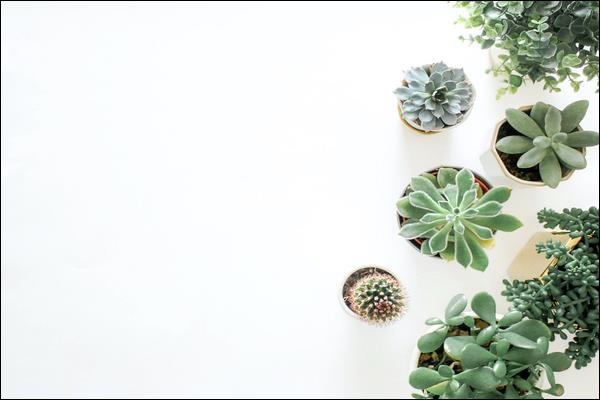
示例
以下程式將飽和度過濾器屬性應用於建立的上下文物件。
<!DOCTYPE html>
<html lang="en">
<head>
   <title>Reference API</title>
   <style>
      body {
         margin: 10px;
         padding: 10px;
      }
   </style>
</head>
<body onload = "Context();">
   <canvas id="canvas" width="625" height="425" style="border: 1px solid black;"></canvas>
   <script>
         function Context(){
            var canvas=document.getElementById('canvas');
            var context=canvas.getContext('2d');
            context.filter = 'saturate(250%)';
            var image = new Image();
            image.onload = function() {
               context.drawImage(image, 10, 10);
            };
            image.src = '../../images/image66.png';
         }
   </script>
</body>
</html>
輸出
此程式中使用的影像為

上述程式碼在網頁上返回的輸出為:
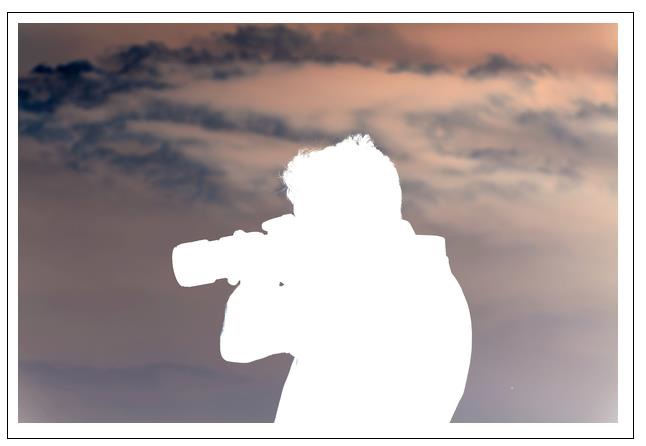
示例
以下程式將棕褐色過濾器屬性應用於建立的上下文物件。
<!DOCTYPE html>
<html lang="en">
<head>
   <title>Reference API</title>
   <style>
      body {
         margin: 10px;
         padding: 10px;
      }
   </style>
</head>
<body onload="Context();">
   <canvas id="canvas" width="625" height="425" style="border: 1px solid black;"></canvas>
   <script>
      function Context() {
         var canvas = document.getElementById('canvas');
         var context = canvas.getContext('2d');
         context.filter = 'sepia(95%)';
         var image = new Image();
         image.onload = function() {
            context.drawImage(image, 10, 10);
         };
         image.src = '../../images/image77.png';
      }
   </script>
</body>
</html>
輸出
此程式中使用的影像為:
上述程式碼在網頁上返回的輸出為:
