
 資料結構
資料結構 網路
網路 關係型資料庫管理系統
 作業系統
作業系統 Java
Java iOS
iOS HTML
HTML CSS
CSS Android
 Python
 C 程式設計
 C++
C++ C#
C# MongoDB
 MySQL
MySQL Javascript
 PHP
PHP如何在 OpenCV Python 中翻轉影像?
在OpenCV中,可以使用函式cv2.flip()翻轉影像。使用此函式,我們可以沿X軸、Y軸以及兩個軸翻轉影像。它接受一個標誌flipCode作為引數,以沿軸翻轉影像。
如果flipCode設定為0,則影像沿x軸翻轉;如果flipCode設定為正整數(例如1),則影像沿Y軸翻轉。如果flipCode設定為負整數(例如“-1”),則影像沿兩個軸翻轉。
步驟
要翻轉影像,可以按照以下步驟操作:
匯入所需的庫。在以下所有示例中,所需的 Python 庫是OpenCV。確保您已安裝它。
使用cv2.imread()方法讀取輸入影像。使用影像型別(即png或jpg)指定影像的完整路徑。
對輸入影像img應用cv2.flip()函式。傳遞引數flipCode以進行所需的翻轉。我們將flipCode設定為0以圍繞x軸翻轉。
img_v = cv2.flip(img, 0)
顯示翻轉後的輸出影像。
我們將在以下示例中使用此影像作為輸入檔案:

示例
在此 Python 程式中,我們沿x軸(垂直)翻轉輸入影像。
# import required library
import cv2

# read input image
img = cv2.imread('blue-car.jpg')

# flip the image by vertically
img_v = cv2.flip(img, 0)

# display the rotated image
cv2.imshow("Vertical Flip", img_v)
cv2.waitKey(0)
cv2.destroyAllWindows()
輸出
執行以上程式後,將生成以下輸出視窗:
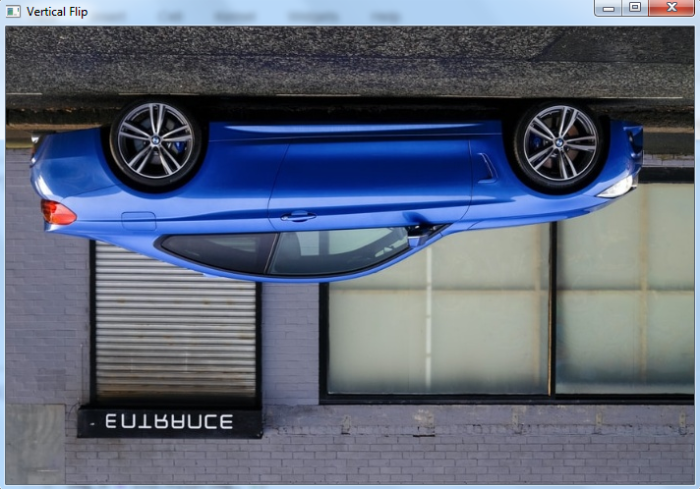
注意,輸出影像沿X軸翻轉。
示例
在此 Python 程式中,我們沿y軸(水平)翻轉輸入影像。
# import required library
import cv2

# read input image
img = cv2.imread('blue-car.jpg')

# flip the image by horizontally
img_h = cv2.flip(img, 1)

# display the rotated image
cv2.imshow("Horizontal Flip", img_h)
cv2.waitKey(0)
cv2.destroyAllWindows()
輸出
執行以上程式後,將生成以下輸出視窗:
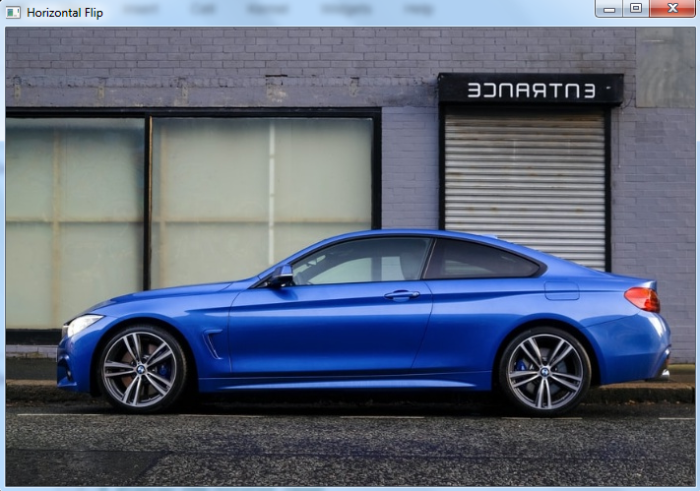
注意,輸出影像沿Y軸翻轉。
示例
在此 Python 程式中,我們沿兩個軸(垂直和水平)翻轉輸入影像。
# import required library
import cv2

# read input image
img = cv2.imread('blue-car.jpg')

# rotate the image both vertically and horizontally
img_vh = cv2.flip(img, -1)

# display the rotated image
cv2.imshow("Both vertical and horizontal flip", img_vh)
cv2.waitKey(0)
cv2.destroyAllWindows()
輸出
執行以上程式後,將生成以下輸出視窗:

注意,輸出影像沿X軸和Y軸翻轉。

更新於:2022年12月2日
17K+ 瀏覽量

廣告