
 資料結構
資料結構 網路
網路 關係型資料庫管理系統
 作業系統
作業系統 Java
Java iOS
iOS HTML
HTML CSS
CSS Android
 Python
 C 程式設計
 C++
C++ C#
C# MongoDB
 MySQL
MySQL Javascript
 PHP
PHP如何在 Python 中建立 Microsoft Word 段落並插入影像?
簡介...
作為一名資料工程專家,我經常收到測試人員在 Microsoft Word 中的測試結果。唉!他們把很多資訊都放在 Word 文件裡,從捕獲螢幕截圖到非常大的段落。
前幾天,測試團隊讓我幫忙編寫一個程式,用於插入工具生成的文字和影像(透過自動螢幕截圖獲取,本文未涉及)。
與其他文件不同,MS Word 文件沒有頁面的概念,因為它不幸地以段落為工作單位。因此,我們需要使用分隔符和節來正確劃分文件。
如何操作...
1. 繼續安裝 python-docx。
import docx

# create a new couments
WordDocx = docx.Document()

# My paragraph.
Paragraph = WordDocx.add_paragraph('1. Hello World, Some Sample Text Here...')
run = Paragraph.add_run()

# paragraph with a line break
run.add_break(docx.text.run.WD_BREAK.LINE)

# Add more
Paragraph.add_run('2. I have just written my 2nd line and I can write more..')

# Finally savind the document.
WordDocx.save('My_Amazing_WordDoc.docx')
2. 現在讓我們檢查內容是否一切正常。好吧,你是程式設計師,所以我們會以程式設計方式進行操作。
doc = docx.Document('My_Amazing_WordDoc.docx')
print(f"output \n *** Document has {len(doc.paragraphs)} - paragraphs")
for paragraph_number, paragraph in enumerate(doc.paragraphs):
if paragraph.text:
print(f"\n {paragraph.text}")
輸出
*** Document has 1 - paragraphs

1. Hello World, Some Sample Text Here...
2. I have just written my 2nd line and I can write more..
3. 現在我們將向文件中新增一個影像。因此,首先我們需要查詢一個影像。我從 unsplash.com 下載了一個影像,它沒有任何版權問題。請確保您從網際網路上下載的任何內容都需謹慎使用。
Unsplash 提供了我們可以用於任何目的的免費版權影像,感謝他們的工作。
好的,我下載了一個影像,並將其命名為 Tree.img,它將新增到我們的文件中。
import requests
from docx.shared import Cm

# Download the image from Github
response = requests.get("https://raw.githubusercontent.com/sasankac/TestDataSet/master/Tree.jpg")
image = open("Tree.jpg", "wb")
image.write(response.content)
image.close()

# add the image
image_to_add = doc.add_picture("Tree.jpg")
print(f"output \n *** MY Image has width = {image_to_add.width} and Height as - {image_to_add.height}")
輸出
*** MY Image has width = 43891200 and Height as - 65836800
4. 我們需要正確縮放影像,因為我的影像太大。我們可以使用 width 和 height 引數。
image_to_add.width = Cm(10)
image_to_add.height = Cm(10)
print(f" *** My New dimensions Image has width = {image_to_add.width} and Height as - {image_to_add.height}")

# finally save the document
doc.save('report.docx')
*** My New dimensions Image has width = 3600000 and Height as - 3600000
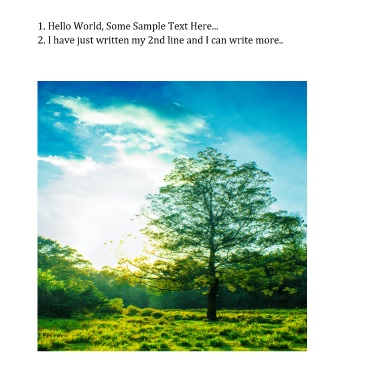
5. 開啟文件,您將看到已新增的影像和文字。
6. 將所有內容整合在一起。
示例
import requests
from docx.shared import Cm

# Download the image from Github
response = requests.get("https://raw.githubusercontent.com/sasankac/TestDataSet/master/Tree.jpg")
image = open("Tree.jpg", "wb")
image.write(response.content)
image.close()

# add the image
image_to_add = doc.add_picture("Tree.jpg")
print(f"output \n *** MY Image has width = {image_to_add.width} and Height as - {image_to_add.height}")

image_to_add.width = Cm(10)
image_to_add.height = Cm(10)
print(f" *** My New dimensions Image has width = {image_to_add.width} and Height as - {image_to_add.height}")

# finally save the document
doc.save('report.docx')
輸出
*** MY Image has width = 43891200 and Height as - 65836800
*** My New dimensions Image has width = 3600000 and Height as - 3600000

更新時間: 2020年11月10日
390 次檢視

廣告