- Django 基礎概念
- Django - 首頁
- Django - 基礎知識
- Django - 概述
- Django - 環境配置
- Django - 建立專案
- Django - 應用生命週期
- Django - 建立檢視
- Django - URL對映
- Django - 首頁
- Django - 模板系統
- Django - MVT
- Django - 新增主模板
- Django 管理後臺
- Django 管理後臺 - 介面
- Django 管理後臺 - 建立使用者
- Django 管理後臺 - 包含模型
- Django 管理後臺 - 設定顯示欄位
- Django 管理後臺 - 更新物件
- Django 模型
- Django - 模型
- Django - 插入資料
- Django - 更新資料
- Django - 刪除資料
- Django - 更新模型
- Django 靜態檔案
- Django - 新增靜態檔案
- Django - 新增 CSS 檔案
- Django 高階應用
- Django - 404 頁面未找到
- Django - 頁面重定向
- Django - 傳送郵件
- Django - 通用檢視
- Django - 表單處理
- Django - 檔案上傳
- Django - Apache 配置
- Django - Cookie 處理
- Django - Session
- Django - 快取
- Django - 評論
- Django - RSS
- Django - AJAX
- Django 有用資源
- Django - 快速指南
- Django - 有用資源
- Django - 討論
Django - 檔案上傳
對於一個 web 應用來說,能夠上傳檔案(例如:頭像、歌曲、pdf、文件……)通常非常有用。本章我們將討論如何在 Django 中上傳檔案。
上傳圖片
在開始處理圖片之前,請確保你已經安裝了 Python 影像庫 (PIL)。為了演示如何上傳圖片,讓我們在 `myapp/forms.py` 中建立一個使用者資料表單:
#-*- coding: utf-8 -*-
from django import forms

class ProfileForm(forms.Form):
   name = forms.CharField(max_length = 100)
   picture = forms.ImageFields()
如你所見,這裡主要的區別僅僅是使用了 `forms.ImageField`。`ImageField` 將確保上傳的檔案是圖片。如果不是,表單驗證將失敗。
現在讓我們建立一個 "Profile" 模型來儲存我們上傳的頭像。這在 `myapp/models.py` 中完成:
from django.db import models

class Profile(models.Model):
   name = models.CharField(max_length = 50)
   picture = models.ImageField(upload_to = 'pictures')

   class Meta:
      db_table = "profile"
如你所見,對於模型來說,`ImageField` 需要一個必需的引數:`upload_to`。這表示圖片將儲存到硬碟上的位置。請注意,此引數將新增到 `settings.py` 檔案中定義的 `MEDIA_ROOT` 選項。
現在我們有了表單和模型,讓我們在 `myapp/views.py` 中建立檢視:
#-*- coding: utf-8 -*-
from myapp.forms import ProfileForm
from myapp.models import Profile

def SaveProfile(request):
   saved = False

   if request.method == "POST":
      #Get the posted form
      MyProfileForm = ProfileForm(request.POST, request.FILES)

      if MyProfileForm.is_valid():
         profile = Profile()
         profile.name = MyProfileForm.cleaned_data["name"]
         profile.picture = MyProfileForm.cleaned_data["picture"]
         profile.save()
         saved = True
   else:
      MyProfileForm = Profileform()

   return render(request, 'saved.html', locals())
需要注意的是,在建立 `ProfileForm` 時有所改變,我們添加了第二個引數:`request.FILES`。如果沒有傳遞此引數,表單驗證將失敗,並顯示圖片為空的提示資訊。
現在,我們只需要 `saved.html` 模板和 `profile.html` 模板,用於表單和重定向頁面:
myapp/templates/saved.html:
<html>
   <body>

      {% if saved %}
         <strong>Your profile was saved.</strong>
      {% endif %}

      {% if not saved %}
         <strong>Your profile was not saved.</strong>
      {% endif %}

   </body>
</html>
myapp/templates/profile.html:
<html>
   <body>

      <form name = "form" enctype = "multipart/form-data"
         action = "{% url "myapp.views.SaveProfile" %}" method = "POST" >{% csrf_token %}

         <div style = "max-width:470px;">
            <center>
               <input type = "text" style = "margin-left:20%;"
               placeholder = "Name" name = "name" />
            </center>
         </div>

         <br>

         <div style = "max-width:470px;">
            <center>
               <input type = "file" style = "margin-left:20%;"
                  placeholder = "Picture" name = "picture" />
            </center>
         </div>

         <br>

         <div style = "max-width:470px;">
            <center>

               <button style = "border:0px;background-color:#4285F4; margin-top:8%;
                  height:35px; width:80%; margin-left:19%;" type = "submit" value = "Login" >
                  <strong>Login</strong>
               </button>

            </center>
         </div>

      </form>

   </body>
</html>
接下來,我們需要我們的 URL 對才能開始:`myapp/urls.py`
from django.conf.urls import patterns, url
from django.views.generic import TemplateView

urlpatterns = patterns(
   'myapp.views', url(r'^profile/',TemplateView.as_view(
      template_name = 'profile.html')), url(r'^saved/', 'SaveProfile', name = 'saved')
)
訪問 "/myapp/profile" 時,將渲染 `profile.html` 模板:

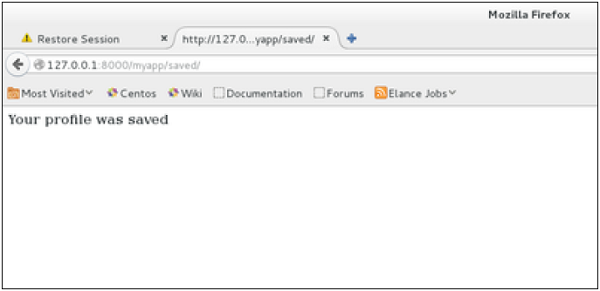
表單提交後,將渲染 `saved.html` 模板:
以上示例演示了圖片上傳,但如果你想上傳其他型別的檔案,而不是僅僅是圖片,只需將模型和表單中的 `ImageField` 替換為 `FileField` 即可。