- WebAssembly 教程
- WebAssembly - 主頁
- WebAssembly - 概覽
- WebAssembly - 簡介
- WebAssembly - WASM
- WebAssembly - 安裝
- WebAssembly - 用於編譯至 WASM 的工具
- WebAssembly - 程式結構
- WebAssembly - JavaScript
- WebAssembly - JavaScript API
- WebAssembly - 在 Firefox 中除錯 WASM
- WebAssembly - "Hello World"
- WebAssembly - 模組
- WebAssembly - 驗證
- WebAssembly - 文字格式
- WebAssembly - 將 WAT 轉換為 WASM
- WebAssembly - 動態連結
- WebAssembly - 安全性
- WebAssembly - 協同 C
- WebAssembly - 協同 C++
- WebAssembly - 協同 Rust
- WebAssembly - 協同 Go
- WebAssembly - 協同 Nodejs
- WebAssembly - 示例
- WebAssembly 有用的資源
- WebAssembly - 快速指南
- WebAssembly - 有用的資源
- WebAssembly - 討論
WebAssembly - 示例
本章討論了與 WebAssembly 有關的示例。
示例 1
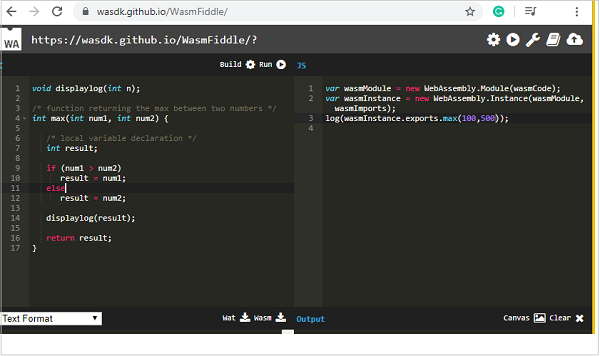
以下是獲取最大元素的 C 程式示例 −
void displaylog(int n);
/* function returning the max between two numbers */
int max(int num1, int num2) {
   /* local variable declaration */ int result;
   if (num1 > num2)
      result = num1;
   else result = num2;
      displaylog(result);
   return result;
}
在 wasm 中編譯程式碼,並下載 .wasm 和 .wat 程式碼。
Wat 程式碼
Wat 程式碼如下 −
(module
   (type $FUNCSIG$vi (func (param i32)))
   (import "env" "displaylog" (func $displaylog (param i32)))
   (table 0 anyfunc)
   (memory $0 1)
   (export "memory" (memory $0))
   (export "max" (func $max))
   (func $max (; 1 ;) (param $0 i32) (param $1 i32) (result i32)
      (call $displaylog
         (tee_local $0
            (select
               (get_local $0)
               (get_local $1)
               (i32.gt_s (get_local $0) (get_local $1))
            )
         )
      )
      (get_local $0)
   )
)
下載 .wasm 程式碼,並像下面所示在 .html 檔案中使用 −
<!DOCTYPE html>
<html>
   <head>
      <meta charset="UTF-8">
   </head>
   <body>
      <script>
         const importObj = {
            env: {
               displaylog: n => alert("The max of (400, 130) is " +n)
            }
         };
         fetch("testmax.wasm") .then(bytes => bytes.arrayBuffer())
            .then(module => WebAssembly.instantiate(module, importObj))
            .then(finalcode => {
            console.log(finalcode);
            console.log(finalcode.instance.exports.max(400,130));
         });
      </script>
   </body>
</html>
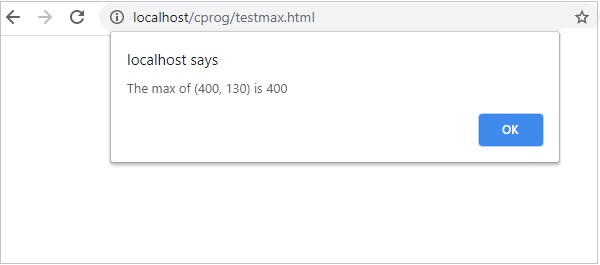
輸出
輸出如下 −
示例 2
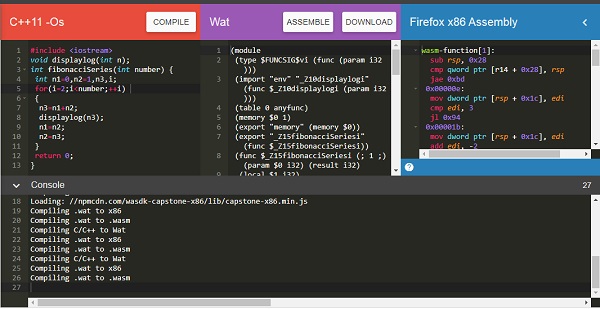
以下是獲取給定數字的斐波那契數列的 C++ 程式碼。
#include <iostream>>
void displaylog(int n);
int fibonacciSeries(int number) {
   int n1=0,n2=1,n3,i;
   for(i=2;i<number;++i) {
      n3=n1+n2; displaylog(n); n1=n2; n2=n3;
   }
   return 0;
}
我使用 wasm explorer 編譯程式碼。下載 Wat 和 Wasm,並在瀏覽器中測試它們。
您可以使用下面提到的程式碼 −
<!DOCTYPE html>
<html>
   <head>
      <meta charset="UTF-8">
   </head>
   <body>
      <script>
         const importObj = {
            env: { _Z10displaylogi: n => console.log(n) }
         };
         fetch("fib.wasm")
            .then(bytes => bytes.arrayBuffer())
            .then(module => WebAssembly.instantiate(module, importObj))
            .then(finalcode => {
            console.log(finalcode);
            console.log(finalcode.instance.exports._Z15fibonacciSeriesi(10));
         });
      </script>
   </body>
</html>
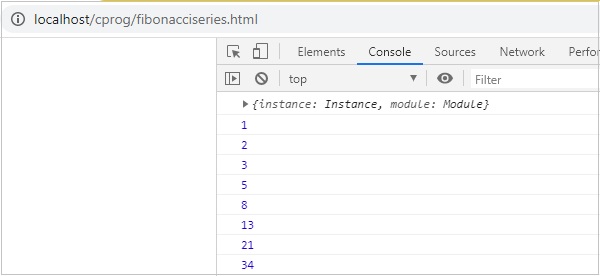
輸出
輸出如下 −
示例 3
以下是新增給定陣列中元素的 Rust 程式碼。
fn add_array(x: i32) -> i32 {
   let mut sum = 0;
   let mut numbers = [10,20,30]; for i in 0..3 {
      sum += numbers[i];
   }
   sum
}
我們將使用 WebAssembly Studio 將 RUST 編譯到 wasm。

構建程式碼,並下載 wasm 檔案,並在瀏覽器中執行相同的操作。
<!DOCTYPE html>
<html>
   <head>
      <meta charset="UTF-8">
   </head>
      <body>
      <script>
         const importObj = {
            env: {
            }
         };
         fetch("add_array.wasm") .then(bytes => bytes.arrayBuffer())
            .then(module => WebAssembly.instantiate(module, importObj))
            .then(finalcode => {
            console.log(finalcode);
            console.log(finalcode.instance.exports.add_array());
         });
      </script>
   </body>
</html>
輸出
輸出如下所示 −

廣告