- Spring WS 教程
- Spring WS - 主頁
- Spring WS - 概述
- Spring WS - 環境設定
- Spring WS - 第一個應用程式
- Spring WS - 靜態 WSDL
- Spring WS - 編寫伺服器
- Spring WS - 單元測試伺服器
- Spring WS - 編寫客戶端
- Spring WS - 單元測試客戶端
- Spring WS 有用資源
- Spring WS - 快速指南
- Spring WS - 有用資源
- Spring WS - 討論
Spring WS - 靜態 WSDL
在上一章 Spring -WS - 第一個應用程式,我們已使用 Spring WS 配置自動生成了 WSDL。在這種情況下,我們將展示如何使用 Spring WS 公開現有的 WSDL。
| 步驟 | 說明 |
|---|---|
| 1 | 按 Spring WS - 第一個應用程式一章中所述,建立一個名稱為 leaveService 的專案,該專案位於包 com.tutorialspoint 下: |
| 2 | 在 /WEB-INF/wsdl 子資料夾下建立一個 WSDL leave.wsdl。 |
| 3 | 更新 /WEB-INF 子資料夾下的 spring-ws-servlet.xml。現在,我們在該處使用 static-wsdl 標記,而不是 dynamic-wsdl。 |
| 4 | 最後一步是建立所有原始檔和配置檔案的內容,並將應用程式匯出,如下所述。 |
/WEB-INF/spring-ws-servlet.xml
<wsdl:definitions xmlns:wsdl = "http://schemas.xmlsoap.org/wsdl/"
   xmlns:soap = "http://schemas.xmlsoap.org/wsdl/soap/"
   xmlns:schema = "https://tutorialspoint.tw/hr/schemas"
   xmlns:tns = "https://tutorialspoint.tw/hr/definitions"
   targetNamespace = "https://tutorialspoint.tw/hr/definitions">

   <wsdl:types>
      <xsd:schema xmlns:xsd = "http://www.w3.org/2001/XMLSchema">
         <xsd:import namespace = "https://tutorialspoint.tw/hr/schemas"
            schemaLocation = "hr.xsd"/>
      </xsd:schema>
   </wsdl:types>

   <wsdl:message name = "LeaveRequest">
      <wsdl:part element = "schema:LeaveRequest" name = "LeaveRequest"/>
   </wsdl:message>

   <wsdl:portType name = "HumanResource">
      <wsdl:operation name = "Leave">
         <wsdl:input message = "tns:LeaveRequest" name = "LeaveRequest"/>
      </wsdl:operation>
   </wsdl:portType>

   <wsdl:binding name = "HumanResourceBinding" type = "tns:HumanResource">
      <soap:binding style = "document"
         transport = "http://schemas.xmlsoap.org/soap/http"/>
      <wsdl:operation name = "Leave">
         <soap:operation soapAction = "http://mycompany.com/RequestLeave"/>
         <wsdl:input name = "LeaveRequest">
            <soap:body use = "literal"/>
         </wsdl:input>
      </wsdl:operation>
   </wsdl:binding>

   <wsdl:service name = "HumanResourceService">
      <wsdl:port binding = "tns:HumanResourceBinding" name = "HumanResourcePort">
         <soap:address location = "https://:8080/leaveService/"/>
      </wsdl:port>
   </wsdl:service>
</wsdl:definitions>
/WEB-INF/spring-ws-servlet.xml
<beans xmlns = "http://www.springframework.org/schema/beans"
   xmlns:xsi = "http://www.w3.org/2001/XMLSchema-instance"
   xmlns:context = "http://www.springframework.org/schema/context"
   xmlns:sws = "http://www.springframework.org/schema/web-services"
   xsi:schemaLocation = "http://www.springframework.org/schema/beans

   http://www.springframework.org/schema/beans/spring-beans-3.0.xsd
   http://www.springframework.org/schema/web-services
   http://www.springframework.org/schema/web-services/web-services-2.0.xsd
   http://www.springframework.org/schema/context
   http://www.springframework.org/schema/context/spring-context-3.0.xsd">

   <context:component-scan base-package = "com.tutorialspoint.hr"/>
   <sws:annotation-driven/>
   <sws:static-wsdl id = "leave" location = "/WEB-INF/wsdl/leave.wsdl"/>
</beans>
執行專案
建立原始檔和配置檔案後,我們應該匯出應用程式。右鍵單擊應用程式,使用匯出 → WAR 檔案選項,並將 leaveService.war 檔案儲存在 Tomcat 的 webapps 資料夾中。
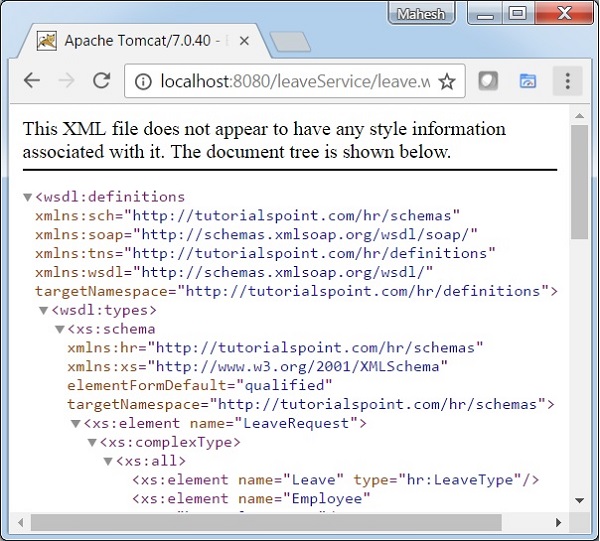
現在,啟動 Tomcat 伺服器並確保我們可以使用標準瀏覽器從 webapps 資料夾中訪問其他網頁。嘗試訪問 URL - https://:8080/leaveService/leave.wsdl,如果 Spring Web 應用程式一切正常,我們將看到以下螢幕。
廣告