
 資料結構
資料結構 網路
網路 關係資料庫管理系統
 作業系統
作業系統 Java
Java iOS
iOS HTML
HTML CSS
CSS Android
 Python
 C 程式設計
 C++
C++ C#
C# MongoDB
 MySQL
MySQL Javascript
 PHP
PHP使用 OpenCV Python 旋轉影像而不裁剪邊緣
旋轉影像是在影像編輯中最基本的操作。Python OpenCV 庫提供了 cv2.getRotationMatrix2D()、cv2.rotate() 等方法來非常輕鬆地完成此任務。
cv2.rotate() 僅將影像旋轉 0、90、180 或 270 度,而 Cv2.getRotationMatrix2D() 可以將影像旋轉到任何指定的角度。在下面的文章中,我們將使用 OpenCV Python 旋轉影像,同時不會裁剪或切掉邊緣。
要使用 cv2.getRotationMatrix2D() 方法旋轉影像,我們需要遵循以下三個步驟:
首先,我們需要獲取旋轉中心。
接下來,使用 getRotationMatrix2D() 方法,我們需要建立 2D 旋轉矩陣。
最後,透過使用 OpenCV 中的 warpAffine() 函式,我們需要將仿射變換應用於影像以校正影像的幾何失真或變形。
使用 Cv2.getRotationMatrix2D() 函式
該函式建立輸入影像陣列的變換矩陣,因此它將用於旋轉影像。如果角度引數的值為正,則影像將沿逆時針方向旋轉。如果要順時針旋轉影像,則角度需要為負。
語法
cv2.getRotationMatrix2D(center, angle, scale)
引數
center:輸入影像的旋轉中心。
angle:旋轉角度(度)。
scale:各向同性縮放因子。根據提供的值放大或縮小影像。
示例
讓我們舉個例子,並使用 math 模組的三角函式旋轉影像。
import cv2
import math

def rotate_image(array, angle):
   height, width = array.shape[:2]
   image_center = (width / 2, height / 2)

   rotation_mat = cv2.getRotationMatrix2D(image_center, angle, 1)

   radians = math.radians(angle)
   sin = math.sin(radians)
   cos = math.cos(radians)
   bound_w = int((height * abs(sin)) + (width * abs(cos)))
   bound_h = int((height * abs(cos)) + (width * abs(sin)))

   rotation_mat[0, 2] += ((bound_w / 2) - image_center[0])
   rotation_mat[1, 2] += ((bound_h / 2) - image_center[1])

   rotated_mat = cv2.warpAffine(array, rotation_mat, (bound_w, bound_h))
   return rotated_mat

img = cv2.imread('Images/car.jpg',1)
rotated_image = rotate_image(img, 256)

cv2.imshow('Rotated image', rotated_image)
cv2.waitKey(0)
cv2.destroyAllWindows()
輸入影像

輸出
旋轉後的輸出影像顯示如下。

輸入影像已成功旋轉到 256 度角。
示例
在這個例子中,我們將使用 cv2.getRotationMatrix2D() 和 Python 內建的 abs() 函式旋轉影像。
import cv2
def rotate_image(arr, angle):
height, width = arr.shape[:2]
# get the image centers
image_center = (width/2, height/2)
rotation_arr = cv2.getRotationMatrix2D(image_center, angle, 1)
abs_cos = abs(rotation_arr[0,0])
abs_sin = abs(rotation_arr[0,1])
bound_w = int(height * abs_sin + width * abs_cos)
bound_h = int(height * abs_cos + width * abs_sin)
rotation_arr[0, 2] += bound_w/2 - image_center[0]
rotation_arr[1, 2] += bound_h/2 - image_center[1]
rotated_mat = cv2.warpAffine(arr, rotation_arr, (bound_w, bound_h))
return rotated_arr
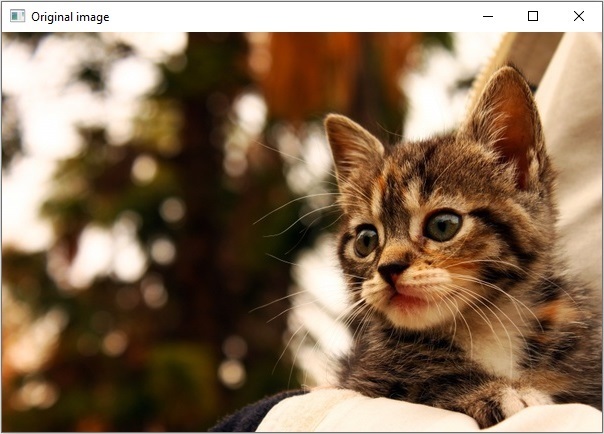
img = cv2.imread('Images/cat.jpg',1)
rotated_image = rotate_image(img, 197)
cv2.imshow('Original image', img)
cv2.imshow('Rotated image', rotated_image)
cv2.waitKey(0)
cv2.destroyAllWindows()
原始影像
旋轉後的影像
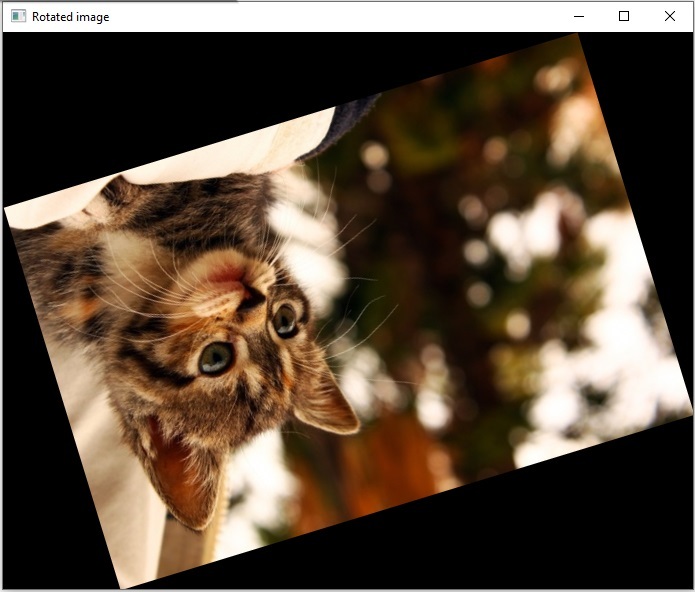
輸入影像已成功旋轉到 197 度角。
cv2.rotate()
cv2.rotate() 函式將影像幀旋轉 90 度的倍數(0、90、180 或 270 度)。該函式使用 rotateCode= 0 或 1 或 2 引數以三種不同的方式旋轉影像。
語法
cv2.cv.rotate( src, rotateCode[, dst] )
引數
src:輸入影像
rotateCode:指定如何旋轉影像。
dst:與輸入影像大小和深度相同的輸出影像。
返回值
它返回一個旋轉後的影像。
示例
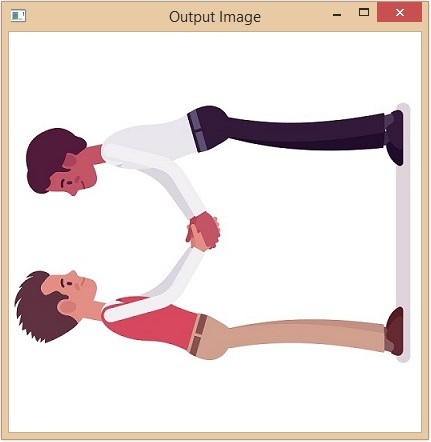
在這個例子中,輸入影像“Fruits.jpg”將逆時針旋轉 90 度。
import cv2
import numpy as np

img = cv2.imread('Images/logo.jpg',1)
rotated_image = cv2.rotate(img,rotateCode = 2)

cv2.imshow('Original image', img)
cv2.imshow('Rotated image', rotated_image)
cv2.waitKey(0)
cv2.destroyAllWindows()
原始影像

旋轉後的影像

使用 np.rot90() 函式
numpy.rot90() 方法用於將陣列旋轉 90 度。如果只需要將輸入旋轉約 90 度,則這是一種簡單易行的方法。
示例
在這個例子中,我們將採用一個尺寸為 850X315 的輸入矩形影像“car.jpg”。
import cv2
import numpy as np
img = cv2.imread('Images/car.jpg',1)
rotated_image = np.rot90(img)
cv2.imwrite('Rotated image.jpg', rotated_image)
cv2.imshow('InputImage', img)
cv2.waitKey(0)
原始影像

旋轉後的影像
該方法從第一個軸向第二個軸方向旋轉陣列。因此,給定影像將沿逆時針方向旋轉。

1K+ 次檢視
