
 資料結構
資料結構 網路
網路 關係資料庫管理系統 (RDBMS)
 作業系統
作業系統 Java
Java iOS
iOS HTML
HTML CSS
CSS Android
 Python
 C語言程式設計
 C++
C++ C#
C# MongoDB
 MySQL
MySQL Javascript
 PHP
PHP使用OpenCV Python在影像中繪製多個矩形
OpenCV是一個開源的Python計算機視覺庫。它提供許多函式來執行各種影像和影片處理操作。該庫使用Numpy模組將所有影片幀和影像表示為ndarray型別。它需要numpy庫,我們需要確保numpy模組也安裝在我們的python直譯器中。
在本文中,我們將看到使用OpenCV Python在影像中繪製多個矩形的方法。為了在影像上繪製矩形形狀,Python OpenCV模組提供了一個名為cv2.rectangle()的方法。
cv2.rectangle()函式
該方法將在影像上繪製矩形形狀。以下是此函式的語法:
cv.rectangle(img, pt1, pt2, color[, thickness[, lineType[, shift]]] )
引數
以下是此函式的引數:
img:繪製矩形的源影像。
pt1:包含矩形一個頂點(矩形的左上角)的x和y座標的元組。
pt2:包含矩形相對頂點(矩形的右下角)的x和y座標的元組,相對於前一個頂點。
color:指定矩形的顏色。
thickness:這是一個可選引數。它指定矩形的線粗細。預設粗細為1。
使用預定義尺寸
在這種方法中,我們將使用預定義的座標在影像中的多個物件周圍繪製矩形形狀。這意味著我們將手動定義pt1和pt2的值。
示例
在這個例子中,我們將使用列表的列表來定義影像中每個物件的座標,然後我們將圍繞這些物件繪製矩形形狀。
import cv2

# Load the image
img = cv2.imread("Images/Tajmahal.jpg")
cv2.imshow('Input Image', img)

# Define the dimensions and position of the rectangle using two points
img_obj_data = [[(60, 150), (90, 250)], [(120, 170), (155, 250)],
   [(200, 120), (400, 230)], [(450, 160), (480, 250)],
   [(500, 150), (555, 255)], [(330, 80), (550, 130)]]

# defining the color and thickness of the rectangle
thickness = 2
color = (0, 255, 0) # Green color

for dimensions in img_obj_data:
    cv2.rectangle(img, dimensions[0], dimensions[1], color, thickness)

# Display the image with the drawn rectangle
cv2.imshow("Image with multiple rectangles", img)

cv2.waitKey(0)
cv2.destroyAllWindows()
輸入影像

輸出影像
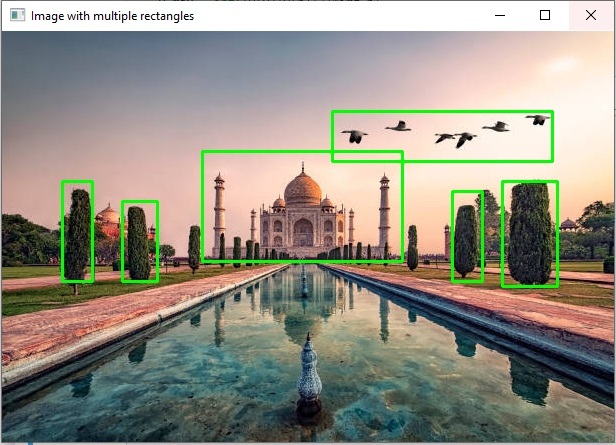
我們已經透過迭代列表物件中指定的預定義座標,成功地在影像中繪製了多個矩形。
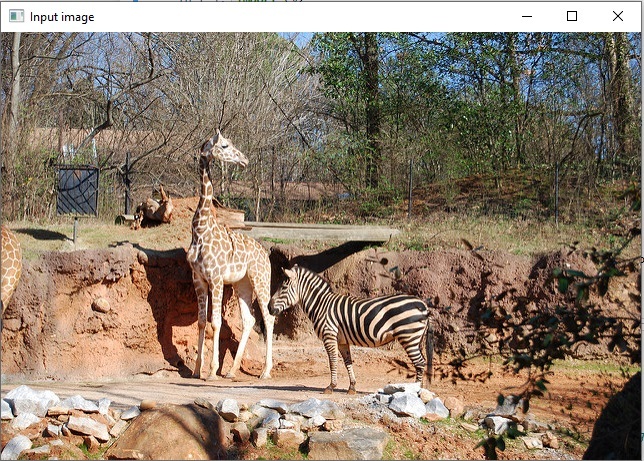
示例
在這個例子中,我們將使用預定義座標的字典來繪製矩形。
import cv2
from random import randint

img = cv2.imread('Images/Zoo.jpg')
cv2.imshow('Input image', img)
img_h, img_w = img.shape[:2]

img_obj_data = {'giraffe': {'center_x': 0.360333,'center_y': 0.532274,'height': 0.596343,'width': 0.144651},
   'zebra' : {'center_x': 0.545974,'center_y': 0.693267,'height': 0.301859,'width': 0.257102}}

for v in img_obj_data.values():
    x, y, h, w = v

    x_min = int((v[x]-v[w]/2)*img_w)
    y_min = int((v[y]-v[h]/2)*img_h)
    x_max = int((v[x]+v[w]/2)*img_w)
    y_max = int((v[y]+v[h]/2)*img_h)
    cv2.rectangle(img, (x_min, y_min), (x_max, y_max), color=[0, 250, 0], thickness=2)

cv2.imshow('Output image', img)
cv2.waitKey(0)
輸入影像
輸出影像
使用cv2.findContours()方法
python OpenCV模組中的cv2.findContours()方法用於檢測二值影像中的物件。以下是影像的語法:
cv2.findContours(image, mode, method[, contours[, hierarchy[, offset]]])
引數
image:一個8位單通道影像(二值影像)。
contours:檢測到的輪廓。
方法
我們將遵循以下步驟在影像中的物件周圍繪製多個矩形。
載入影像。
將影像轉換為灰度。
定義閾值。
查詢輪廓。
遍歷輪廓並使用輪廓面積進行過濾。
最後,圍繞每個輪廓繪製矩形。
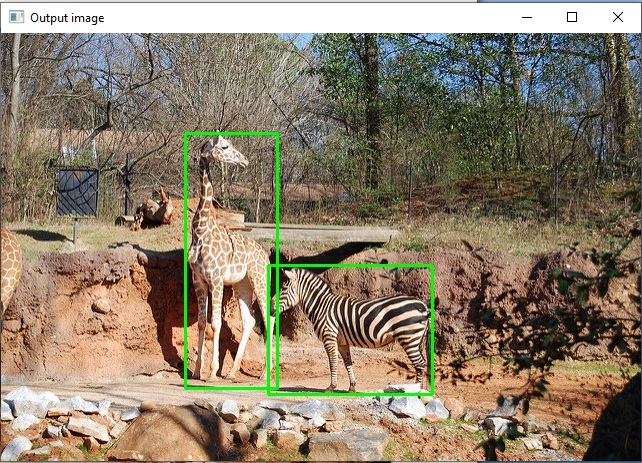
示例
讓我們舉個例子,這裡我們將使用cv2.findContours()和cv2.rectangle()方法在影像物件周圍繪製多個矩形。
import cv2
import numpy as np
# read image
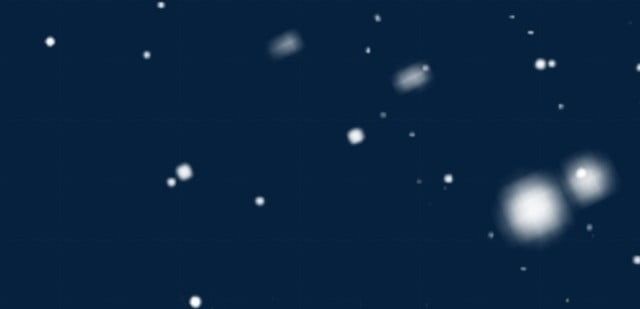
image = cv2.imread('Images/WhiteDots2.jpg')
# convert to grayscale
gray = cv2.cvtColor(image,cv2.COLOR_BGR2GRAY)
# set the thresholds
thresh = cv2.threshold(gray,128,255,cv2.THRESH_BINARY)[1]
# find contours
result = image.copy()
contours = cv2.findContours(thresh, cv2.RETR_EXTERNAL, cv2.CHAIN_APPROX_SIMPLE)
contours = contours[0] if len(contours) == 2 else contours[1]
for cntr in contours:
x,y,w,h = cv2.boundingRect(cntr)
cv2.rectangle(result, (x, y), (x+w, y+h), (0, 0, 255), 2)
# show thresh and result
cv2.imshow("bounding_box", result)
cv2.waitKey(0)
cv2.destroyAllWindows()
輸入影像
輸出影像
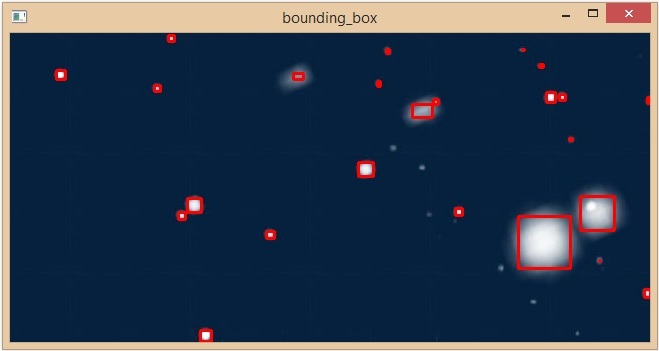
我們已經成功地在影像中的所有物件周圍繪製了多個矩形。
804 次瀏覽
