- Python 資料訪問教程
- Python 資料訪問 - 首頁
- Python MySQL
- Python MySQL - 簡介
- Python MySQL - 資料庫連線
- Python MySQL - 建立資料庫
- Python MySQL - 建立表
- Python MySQL - 插入資料
- Python MySQL - 查詢資料
- Python MySQL - Where 子句
- Python MySQL - Order By
- Python MySQL - 更新表
- Python MySQL - 刪除資料
- Python MySQL - 刪除表
- Python MySQL - Limit
- Python MySQL - Join
- Python MySQL - 遊標物件
- Python PostgreSQL
- Python PostgreSQL - 簡介
- Python PostgreSQL - 資料庫連線
- Python PostgreSQL - 建立資料庫
- Python PostgreSQL - 建立表
- Python PostgreSQL - 插入資料
- Python PostgreSQL - 查詢資料
- Python PostgreSQL - Where 子句
- Python PostgreSQL - Order By
- Python PostgreSQL - 更新表
- Python PostgreSQL - 刪除資料
- Python PostgreSQL - 刪除表
- Python PostgreSQL - Limit
- Python PostgreSQL - Join
- Python PostgreSQL - 遊標物件
- Python SQLite
- Python SQLite - 簡介
- Python SQLite - 建立連線
- Python SQLite - 建立表
- Python SQLite - 插入資料
- Python SQLite - 查詢資料
- Python SQLite - Where 子句
- Python SQLite - Order By
- Python SQLite - 更新表
- Python SQLite - 刪除資料
- Python SQLite - 刪除表
- Python SQLite - Limit
- Python SQLite - Join
- Python SQLite - 遊標物件
- Python MongoDB
- Python MongoDB - 簡介
- Python MongoDB - 建立資料庫
- Python MongoDB - 建立集合
- Python MongoDB - 插入文件
- Python MongoDB - 查詢
- Python MongoDB - 查詢
- Python MongoDB - 排序
- Python MongoDB - 刪除文件
- Python MongoDB - 刪除集合
- Python MongoDB - 更新
- Python MongoDB - Limit
- Python 資料訪問資源
- Python 資料訪問 - 快速指南
- Python 資料訪問 - 有用資源
- Python 資料訪問 - 討論
Python 資料訪問 - 快速指南
Python MySQL - 簡介
Python 資料庫介面的標準是 Python DB-API。大多數 Python 資料庫介面都遵循此標準。
您可以為您的應用程式選擇合適的資料庫。Python 資料庫 API 支援各種資料庫伺服器,例如:
- GadFly
- mSQL
- MySQL
- PostgreSQL
- Microsoft SQL Server 2000
- Informix
- Interbase
- Oracle
- Sybase
以下是可用的 Python 資料庫介面列表:Python 資料庫介面和 API。您必須為需要訪問的每個資料庫下載單獨的 DB API 模組。例如,如果您需要訪問 Oracle 資料庫和 MySQL 資料庫,則必須同時下載 Oracle 和 MySQL 資料庫模組。
什麼是 mysql-connector-python?
MySQL Python/Connector 是一個用於從 Python 連線到 MySQL 資料庫伺服器的介面。它實現了 Python 資料庫 API,並且構建在 MySQL 之上。
如何安裝 mysql-connector-python?
首先,您需要確保您的機器上已安裝 python。為此,請開啟命令提示符並在其中鍵入 python 並按 Enter。如果您的系統中已安裝 python,則此命令將顯示其版本,如下所示:
C:\Users\Tutorialspoint>python
Python 3.7.3 (v3.7.3:ef4ec6ed12, Mar 25 2019, 22:22:05) [MSC v.1916 64 bit (AMD64)] on win32
Type "help", "copyright", "credits" or "license" for more information.
>>>
現在按ctrl+z然後按 Enter 退出 python shell 並建立一個名為 Python_MySQL 的資料夾(您打算在其中安裝 Python-MySQL 聯結器)如下:
>>> ^Z
C:\Users\Tutorialspoint>d:
D:\>mkdir Python_MySQL
驗證 PIP
PIP 是 python 中的一個包管理器,您可以使用它在 Python 中安裝各種模組/包。因此,要安裝 Mysql-python mysql-connector-python,您需要確保您的計算機上已安裝 PIP 並且其位置已新增到路徑中。
您可以透過執行 pip 命令來做到這一點。如果您的系統中沒有 PIP,或者您沒有將其位置新增到Path環境變數中,您將收到一條錯誤訊息,如下所示:
D:\Python_MySQL>pip
'pip' is not recognized as an internal or external command,
operable program or batch file.
要安裝 PIP,請將get-pip.py下載到上面建立的資料夾中,然後從命令導航到該資料夾並按如下方式安裝 pip:
D:\>cd Python_MySQL
D:\Python_MySQL>python get-pip.py
Collecting pip
Downloading https://files.pythonhosted.org/packages/8d/07/f7d7ced2f97ca3098c16565efbe6b15fafcba53e8d9bdb431e09140514b0/pip-19.2.2-py2.py3-none-any.whl (1.4MB)
|████████████████████████████████| 1.4MB 1.3MB/s
Collecting wheel
Downloading https://files.pythonhosted.org/packages/00/83/b4a77d044e78ad1a45610eb88f745be2fd2c6d658f9798a15e384b7d57c9/wheel-0.33.6-py2.py3-none-any.whl
Installing collected packages: pip, wheel
Consider adding this directory to PATH or, if you prefer to suppress this warning, use --no-warn-script-location.
Successfully installed pip-19.2.2 wheel-0.33.6
安裝 mysql-connector-python
安裝 Python 和 PIP 後,開啟命令提示符並升級 pip(可選),如下所示:
C:\Users\Tutorialspoint>python -m pip install --upgrade pip
Collecting pip
Using cached https://files.pythonhosted.org/packages/8d/07/f7d7ced2f97ca3098c16565efbe6b15fafcba53e8d9bdb431e09140514b0/pip-19.2.2-py2.py3-none-any.whl
Python Data Access
4
Installing collected packages: pip
Found existing installation: pip 19.0.3
Uninstalling pip-19.0.3:
Successfully uninstalled pip-19.0.3
Successfully installed pip-19.2.2
然後以管理員模式開啟命令提示符並安裝 python MySQL 連線,如下所示:
C:\WINDOWS\system32>pip install mysql-connector-python
Collecting mysql-connector-python
Using cached https://files.pythonhosted.org/packages/99/74/f41182e6b7aadc62b038b6939dce784b7f9ec4f89e2ae14f9ba8190dc9ab/mysql_connector_python-8.0.17-py2.py3-none-any.whl
Collecting protobuf>=3.0.0 (from mysql-connector-python)
Using cached https://files.pythonhosted.org/packages/09/0e/614766ea191e649216b87d331a4179338c623e08c0cca291bcf8638730ce/protobuf-3.9.1-cp37-cp37m-win32.whl
Collecting six>=1.9 (from protobuf>=3.0.0->mysql-connector-python)
Using cached https://files.pythonhosted.org/packages/73/fb/00a976f728d0d1fecfe898238ce23f502a721c0ac0ecfedb80e0d88c64e9/six-1.12.0-py2.py3-none-any.whl
Requirement already satisfied: setuptools in c:\program files (x86)\python37-32\lib\site-packages (from protobuf>=3.0.0->mysql-connector-python) (40.8.0)
Installing collected packages: six, protobuf, mysql-connector-python
Successfully installed mysql-connector-python-8.0.17 protobuf-3.9.1 six-1.12.0
驗證
要驗證安裝是否成功,請建立一個包含以下行的示例 python 指令碼。
import mysql.connector
如果安裝成功,當您執行它時,您不應該收到任何錯誤:
D:\Python_MySQL>python test.py
D:\Python_MySQL>
從頭開始安裝 python
簡單來說,如果您需要從頭開始安裝 Python。請訪問Python 主頁。
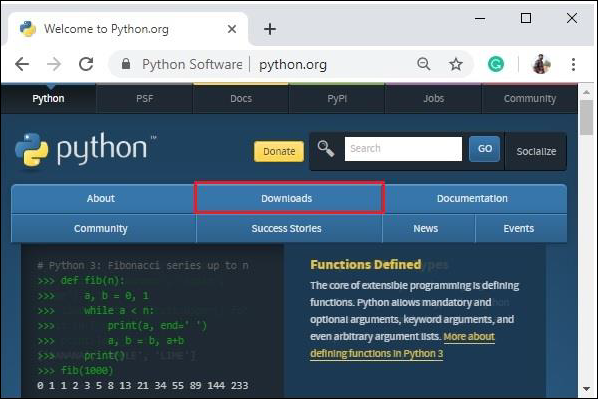
點選下載按鈕,您將被重定向到下載頁面,該頁面提供各種平臺上最新版 python 的連結,選擇一個並下載它。

例如,我們下載了 python-3.7.4.exe(適用於 Windows)。透過雙擊下載的.exe檔案啟動安裝過程。

選中“將 Python 3.7 新增到 PATH”選項,然後繼續安裝。此過程完成後,python 將安裝到您的系統中。

Python MySQL - 資料庫連線
要連線到 MySQL,(一種方法是)在您的系統中開啟 MySQL 命令提示符,如下所示:

它在此處要求輸入密碼;您需要鍵入在安裝時為預設使用者(root)設定的密碼。
然後與 MySQL 建立連線,顯示以下訊息:
Welcome to the MySQL monitor. Commands end with ; or \g.
Your MySQL connection id is 4
Server version: 5.7.12-log MySQL Community Server (GPL)

Copyright (c) 2000, 2016, Oracle and/or its affiliates. All rights reserved.

Oracle is a registered trademark of Oracle Corporation and/or its
affiliates. Other names may be trademarks of their respective
owners.

Type 'help;' or '\h' for help. Type '\c' to clear the current input statement.
您可以隨時使用 mysql> 提示符下的 exit 命令斷開與 MySQL 資料庫的連線。
mysql> exit
Bye
使用 python 建立與 MySQL 的連線
在使用 python 建立與 MySQL 資料庫的連線之前,假設:
我們已建立一個名為 mydb 的資料庫。
我們已建立一個名為 EMPLOYEE 的表,其中包含列 FIRST_NAME、LAST_NAME、AGE、SEX 和 INCOME。
我們用於連線 MySQL 的憑據是使用者名稱:root,密碼:password。
您可以使用connect()建構函式建立連線。它接受使用者名稱、密碼、主機和需要連線的資料庫名稱(可選),並返回 MySQLConnection 類的物件。
示例
以下是連線到 MySQL 資料庫“mydb”的示例。
import mysql.connector

#establishing the connection
conn = mysql.connector.connect(user='root', password='password', host='127.0.0.1', database='mydb')

#Creating a cursor object using the cursor() method
cursor = conn.cursor()

#Executing an MYSQL function using the execute() method
cursor.execute("SELECT DATABASE()")

# Fetch a single row using fetchone() method.
data = cursor.fetchone()
print("Connection established to: ",data)

#Closing the connection
conn.close()
輸出
執行此指令碼後,將產生以下輸出:
D:\Python_MySQL>python EstablishCon.py
Connection established to: ('mydb',)
您還可以透過將憑據(使用者名稱、密碼、主機名和資料庫名)傳遞給connection.MySQLConnection()來建立與 MySQL 的連線,如下所示:
from mysql.connector import (connection)

#establishing the connection
conn = connection.MySQLConnection(user='root', password='password', host='127.0.0.1', database='mydb')

#Closing the connection
conn.close()
Python MySQL - 建立資料庫
您可以使用 CREATE DATABASE 查詢在 MYSQL 中建立資料庫。
語法
以下是 CREATE DATABASE 查詢的語法:
CREATE DATABASE name_of_the_database
示例
以下語句在 MySQL 中建立一個名為 mydb 的資料庫:
mysql> CREATE DATABASE mydb;
Query OK, 1 row affected (0.04 sec)
如果您使用 SHOW DATABASES 語句觀察資料庫列表,您可以在其中觀察新建立的資料庫,如下所示:
mysql> SHOW DATABASES;
+--------------------+
| Database           |
+--------------------+
| information_schema |
| logging            |
| mydatabase         |
| mydb               |
| performance_schema |
| students           |
| sys                |
+--------------------+
26 rows in set (0.15 sec)
使用 python 在 MySQL 中建立資料庫
在與 MySQL 建立連線後,要對其進行資料操作,您需要連線到資料庫。您可以連線到現有資料庫或建立自己的資料庫。
您需要特殊的許可權才能建立或刪除 MySQL 資料庫。因此,如果您有權訪問 root 使用者,則可以建立任何資料庫。
示例
以下示例與 MYSQL 建立連線並在其中建立一個數據庫。
import mysql.connector

#establishing the connection
conn = mysql.connector.connect(user='root', password='password', host='127.0.0.1')

#Creating a cursor object using the cursor() method
cursor = conn.cursor()

#Doping database MYDATABASE if already exists.
cursor.execute("DROP database IF EXISTS MyDatabase")

#Preparing query to create a database
sql = "CREATE database MYDATABASE";

#Creating a database
cursor.execute(sql)

#Retrieving the list of databases
print("List of databases: ")
cursor.execute("SHOW DATABASES")
print(cursor.fetchall())

#Closing the connection
conn.close()
輸出
List of databases:
[('information_schema',), ('dbbug61332',), ('details',), ('exampledatabase',), ('mydatabase',), ('mydb',), ('mysql',), ('performance_schema',)]
Python MySQL - 建立表
CREATE TABLE 語句用於在 MYSQL 資料庫中建立表。在這裡,您需要指定表名以及每列的定義(名稱和資料型別)。
語法
以下是建立 MySQL 表的語法:
CREATE TABLE table_name(
   column1 datatype,
   column2 datatype,
   column3 datatype,
   .....
   columnN datatype,
);
示例
以下查詢在 MySQL 中建立一個名為 EMPLOYEE 的表,其中包含五個列,即 FIRST_NAME、LAST_NAME、AGE、SEX 和 INCOME。
mysql> CREATE TABLE EMPLOYEE(
   FIRST_NAME CHAR(20) NOT NULL,
   LAST_NAME CHAR(20),
   AGE INT,
   SEX CHAR(1),
   INCOME FLOAT
);
Query OK, 0 rows affected (0.42 sec)
DESC 語句為您提供指定表的描述。使用它,您可以驗證表是否已建立,如下所示:
mysql> Desc Employee;
+------------+----------+------+-----+---------+-------+
| Field      | Type     | Null | Key | Default | Extra |
+------------+----------+------+-----+---------+-------+
| FIRST_NAME | char(20) | NO   |     | NULL    |       |
| LAST_NAME  | char(20) | YES  |     | NULL    |       |
| AGE        | int(11)  | YES  |     | NULL    |       |
| SEX        | char(1)  | YES  |     | NULL    |       |
| INCOME     | float    | YES  |     | NULL    |       |
+------------+----------+------+-----+---------+-------+
5 rows in set (0.07 sec)
使用 python 在 MySQL 中建立表
名為execute()(在遊標物件上呼叫)的方法接受兩個變數:
表示要執行的查詢的字串值。
一個可選的 args 引數,它可以是元組或列表或字典,表示查詢的引數(佔位符的值)。
它返回一個整數值,表示查詢影響的行數。
建立資料庫連線後,您可以透過將 CREATE TABLE 查詢傳遞給execute()方法來建立表。
簡而言之,要使用 python 建立表:
匯入mysql.connector包。
使用mysql.connector.connect()方法建立一個連線物件,透過將使用者名稱、密碼、主機(可選,預設:localhost)和資料庫(可選)作為引數傳遞給它。
透過在上面建立的連線物件上呼叫cursor()方法建立一個遊標物件。
然後,透過將其作為引數傳遞給execute()方法來執行CREATE TABLE語句。
示例
以下示例在資料庫 mydb 中建立一個名為Employee的表。
import mysql.connector

#establishing the connection
conn = mysql.connector.connect(
   user='root', password='password', host='127.0.0.1', database='mydb'
)

#Creating a cursor object using the cursor() method
cursor = conn.cursor()

#Dropping EMPLOYEE table if already exists.
cursor.execute("DROP TABLE IF EXISTS EMPLOYEE")

#Creating table as per requirement
sql ='''CREATE TABLE EMPLOYEE(
   FIRST_NAME CHAR(20) NOT NULL,
   LAST_NAME CHAR(20),
   AGE INT,
   SEX CHAR(1),
   INCOME FLOAT
)'''
cursor.execute(sql)

#Closing the connection
conn.close()
Python MySQL - 插入資料
您可以使用INSERT INTO語句向 MySQL 的現有表中新增新行。在此,您需要指定表名、列名和值(與列名相同的順序)。
語法
以下是 MySQL INSERT INTO 語句的語法。
INSERT INTO TABLE_NAME (column1, column2,column3,...columnN)
VALUES (value1, value2, value3,...valueN);
示例
以下查詢將一條記錄插入名為 EMPLOYEE 的表中。
INSERT INTO EMPLOYEE(FIRST_NAME, LAST_NAME, AGE, SEX, INCOME) VALUES ('
   Mac', 'Mohan', 20, 'M', 2000
);
您可以使用 SELECT 語句驗證插入操作後的表記錄,如下所示:
mysql> select * from Employee;
+------------+-----------+------+------+--------+
| FIRST_NAME | LAST_NAME | AGE  | SEX  | INCOME |
+------------+-----------+------+------+--------+
| Mac        | Mohan     | 20   | M    | 2000   |
+------------+-----------+------+------+--------+
1 row in set (0.00 sec)
並非總是必須指定列名,如果您按照表列的相同順序傳遞記錄值,則可以如下所示執行 SELECT 語句而不使用列名:
INSERT INTO EMPLOYEE VALUES ('Mac', 'Mohan', 20, 'M', 2000);
使用 python 在 MySQL 表中插入資料
execute()方法(在遊標物件上呼叫)接受查詢作為引數並執行給定的查詢。要插入資料,您需要將 MySQL INSERT 語句作為引數傳遞給它。
cursor.execute("""INSERT INTO EMPLOYEE(FIRST_NAME, LAST_NAME, AGE, SEX, INCOME)
   VALUES ('Mac', 'Mohan', 20, 'M', 2000)""")
要在 MySQL 中使用 python 將資料插入表中:
匯入mysql.connector包。
使用mysql.connector.connect()方法建立一個連線物件,透過將使用者名稱、密碼、主機(可選,預設:localhost)和資料庫(可選)作為引數傳遞給它。
透過在上面建立的連線物件上呼叫cursor()方法建立一個遊標物件
然後,透過將其作為引數傳遞給execute()方法來執行INSERT語句。
示例
以下示例執行 SQL INSERT 語句以將記錄插入 EMPLOYEE 表中:
import mysql.connector

#establishing the connection
conn = mysql.connector.connect(
   user='root', password='password', host='127.0.0.1', database='mydb')

#Creating a cursor object using the cursor() method
cursor = conn.cursor()

# Preparing SQL query to INSERT a record into the database.
sql = """INSERT INTO EMPLOYEE(
   FIRST_NAME, LAST_NAME, AGE, SEX, INCOME)
   VALUES ('Mac', 'Mohan', 20, 'M', 2000)"""

try:
   # Executing the SQL command
   cursor.execute(sql)

   # Commit your changes in the database
   conn.commit()

except:
   # Rolling back in case of error
   conn.rollback()

# Closing the connection
conn.close()
動態插入值
您還可以使用“%s”代替 MySQL 的INSERT查詢中的值,並將值作為列表傳遞給它們,如下所示:
cursor.execute("""INSERT INTO EMPLOYEE VALUES ('Mac', 'Mohan', 20, 'M', 2000)""",
   ('Ramya', 'Ramapriya', 25, 'F', 5000))
示例
以下示例動態地將記錄插入 Employee 表中。
import mysql.connector

#establishing the connection
conn = mysql.connector.connect(
   user='root', password='password', host='127.0.0.1', database='mydb')

#Creating a cursor object using the cursor() method
cursor = conn.cursor()

# Preparing SQL query to INSERT a record into the database.
insert_stmt = (
   "INSERT INTO EMPLOYEE(FIRST_NAME, LAST_NAME, AGE, SEX, INCOME)"
   "VALUES (%s, %s, %s, %s, %s)"
)
data = ('Ramya', 'Ramapriya', 25, 'F', 5000)

try:
   # Executing the SQL command
   cursor.execute(insert_stmt, data)

   # Commit your changes in the database
   conn.commit()

except:
   # Rolling back in case of error
   conn.rollback()

print("Data inserted")

# Closing the connection
conn.close()
輸出
Data inserted
Python MySQL - 查詢資料
您可以使用 SELECT 查詢從 MySQL 中的表中檢索/獲取資料。此查詢/語句以表格形式返回指定表的內容,稱為結果集。
語法
以下是 SELECT 查詢的語法:
SELECT column1, column2, columnN FROM table_name;
示例
假設我們在 MySQL 中建立了一個名為 cricketers_data 的表,如下所示:
CREATE TABLE cricketers_data(
   First_Name VARCHAR(255),
   Last_Name VARCHAR(255),
   Date_Of_Birth date,
   Place_Of_Birth VARCHAR(255),
   Country VARCHAR(255)
);
如果我們使用 INSERT 語句向其中插入了 5 條記錄,如下所示:
insert into cricketers_data values(
   'Shikhar', 'Dhawan', DATE('1981-12-05'), 'Delhi', 'India');
insert into cricketers_data values(
   'Jonathan', 'Trott', DATE('1981-04-22'), 'CapeTown', 'SouthAfrica');
insert into cricketers_data values(
   'Kumara', 'Sangakkara', DATE('1977-10-27'), 'Matale', 'Srilanka');
insert into cricketers_data values(
   'Virat', 'Kohli', DATE('1988-11-05'), 'Delhi', 'India');
insert into cricketers_data values(
   'Rohit', 'Sharma', DATE('1987-04-30'), 'Nagpur', 'India');
以下查詢從表中檢索 FIRST_NAME 和 Country 值。
mysql> select FIRST_NAME, Country from cricketers_data;
+------------+-------------+
| FIRST_NAME | Country     |
+------------+-------------+
| Shikhar    | India       |
| Jonathan   | SouthAfrica |
| Kumara     | Srilanka    |
| Virat      | India       |
| Rohit      | India       |
+------------+-------------+
5 rows in set (0.00 sec)
您還可以使用 * 代替列名來檢索每條記錄的所有值,如下所示:
mysql> SELECT * from cricketers_data;
+------------+------------+---------------+----------------+-------------+
| First_Name | Last_Name  | Date_Of_Birth | Place_Of_Birth | Country     |
+------------+------------+---------------+----------------+-------------+
| Shikhar    | Dhawan     | 1981-12-05    | Delhi          | India       |
| Jonathan   | Trott      | 1981-04-22    | CapeTown       | SouthAfrica |
| Kumara     | Sangakkara | 1977-10-27    | Matale         | Srilanka    |
| Virat      | Kohli      | 1988-11-05    | Delhi          | India       |
| Rohit      | Sharma     | 1987-04-30    | Nagpur         | India       |
+------------+------------+---------------+----------------+-------------+
5 rows in set (0.00 sec)
使用 Python 從 MYSQL 表中讀取資料
對任何資料庫執行讀取操作都意味著從資料庫中獲取一些有用的資訊。您可以使用 mysql-connector-python 提供的 fetch() 方法從 MYSQL 中獲取資料。
cursor.MySQLCursor 類提供了三種方法,即 fetchall()、fetchmany() 和 fetchone(),其中:
fetchall() 方法檢索查詢結果集中的所有行,並將其作為元組列表返回。(如果我們在檢索了幾行後執行此操作,它將返回剩餘的行)。
fetchone() 方法獲取查詢結果中的下一行,並將其作為元組返回。
fetchmany() 方法類似於 fetchone(),但它檢索查詢結果集中的下一組行,而不是單個行。
注意 - 結果集是在使用遊標物件查詢表時返回的物件。
rowcount - 這是一個只讀屬性,返回受 execute() 方法影響的行數。
示例
以下示例使用 SELECT 查詢獲取 EMPLOYEE 表的所有行,並從獲得的結果集中首先使用 fetchone() 方法檢索第一行,然後使用 fetchall() 方法檢索剩餘的行。
import mysql.connector

#establishing the connection
conn = mysql.connector.connect(
   user='root', password='password', host='127.0.0.1', database='mydb')

#Creating a cursor object using the cursor() method
cursor = conn.cursor()

#Retrieving single row
sql = '''SELECT * from EMPLOYEE'''

#Executing the query
cursor.execute(sql)

#Fetching 1st row from the table
result = cursor.fetchone();
print(result)

#Fetching 1st row from the table
result = cursor.fetchall();
print(result)

#Closing the connection
conn.close()
輸出
('Krishna', 'Sharma', 19, 'M', 2000.0)
[('Raj', 'Kandukuri', 20, 'M', 7000.0), ('Ramya', 'Ramapriya', 25, 'M', 5000.0)]
以下示例使用 fetchmany() 方法檢索 EMPLOYEE 表的前兩行。
示例
import mysql.connector

#establishing the connection
conn = mysql.connector.connect(
   user='root', password='password', host='127.0.0.1', database='mydb')

#Creating a cursor object using the cursor() method
cursor = conn.cursor()

#Retrieving single row
sql = '''SELECT * from EMPLOYEE'''

#Executing the query
cursor.execute(sql)

#Fetching 1st row from the table
result = cursor.fetchmany(size =2);
print(result)

#Closing the connection
conn.close()
輸出
[('Krishna', 'Sharma', 19, 'M', 2000.0), ('Raj', 'Kandukuri', 20, 'M', 7000.0)]
Python MySQL - Where 子句
如果要獲取、刪除或更新 MySQL 表中的特定行,則需要使用 where 子句指定條件來過濾表的行以進行操作。
例如,如果您的 SELECT 語句帶有 where 子句,則只會檢索滿足指定條件的行。
語法
以下是 WHERE 子句的語法:
SELECT column1, column2, columnN
FROM table_name
WHERE [condition]
示例
假設我們在 MySQL 中建立了一個名為 EMPLOYEES 的表,如下所示:
mysql> CREATE TABLE EMPLOYEE(
   FIRST_NAME CHAR(20) NOT NULL,
   LAST_NAME CHAR(20),
   AGE INT,
   SEX CHAR(1),
   INCOME FLOAT
);
Query OK, 0 rows affected (0.36 sec)
如果我們使用 INSERT 語句向其中插入了 4 條記錄,如下所示:
mysql> INSERT INTO EMPLOYEE VALUES
   ('Krishna', 'Sharma', 19, 'M', 2000),
   ('Raj', 'Kandukuri', 20, 'M', 7000),
   ('Ramya', 'Ramapriya', 25, 'F', 5000),
   ('Mac', 'Mohan', 26, 'M', 2000);
以下 MySQL 語句檢索收入大於 4000 的員工的記錄。
mysql> SELECT * FROM EMPLOYEE WHERE INCOME > 4000;
+------------+-----------+------+------+--------+
| FIRST_NAME | LAST_NAME | AGE  | SEX  | INCOME |
+------------+-----------+------+------+--------+
| Raj        | Kandukuri | 20   | M    | 7000   |
| Ramya      | Ramapriya | 25   | F    | 5000   |
+------------+-----------+------+------+--------+
2 rows in set (0.00 sec)
使用 python 的 WHERE 子句
要使用 python 程式從表中獲取特定記錄:
匯入mysql.connector包。
使用mysql.connector.connect()方法建立一個連線物件,透過將使用者名稱、密碼、主機(可選,預設:localhost)和資料庫(可選)作為引數傳遞給它。
透過在上面建立的連線物件上呼叫cursor()方法建立一個遊標物件。
然後,透過將其作為引數傳遞給 execute() 方法,執行帶有 WHERE 子句的 SELECT 語句。
示例
以下示例建立一個名為 Employee 的表並填充它。然後使用 where 子句檢索年齡值小於 23 的記錄。
import mysql.connector

#establishing the connection
conn = mysql.connector.connect(
   user='root', password='password', host='127.0.0.1', database='mydb')

#Creating a cursor object using the cursor() method
cursor = conn.cursor()

#Doping EMPLOYEE table if already exists.
cursor.execute("DROP TABLE IF EXISTS EMPLOYEE")
sql = '''CREATE TABLE EMPLOYEE(
   FIRST_NAME CHAR(20) NOT NULL,
   LAST_NAME CHAR(20),
   AGE INT,
   SEX CHAR(1),
   INCOME FLOAT
)'''
cursor.execute(sql)

#Populating the table
insert_stmt = "INSERT INTO EMPLOYEE (FIRST_NAME, LAST_NAME, AGE, SEX, INCOME)
   VALUES (%s, %s, %s, %s, %s)"

data = [('Krishna', 'Sharma', 19, 'M', 2000), ('Raj', 'Kandukuri', 20, 'M', 7000),
('Ramya', 'Ramapriya', 25, 'F', 5000),('Mac', 'Mohan', 26, 'M', 2000)]
cursor.executemany(insert_stmt, data)
conn.commit()

#Retrieving specific records using the where clause
cursor.execute("SELECT * from EMPLOYEE WHERE AGE <23")
print(cursor.fetchall())

#Closing the connection
conn.close()
輸出
[('Krishna', 'Sharma', 19, 'M', 2000.0), ('Raj', 'Kandukuri', 20, 'M', 7000.0)]
Python MySQL - Order By
在使用 SELECT 查詢獲取資料時,您可以使用 OrderBy 子句按所需順序(升序或降序)對結果進行排序。預設情況下,此子句按升序對結果進行排序,如果需要按降序排列,則需要顯式使用“DESC”。
語法
以下是語法 SELECT column-list
FROM table_name
[WHERE condition]
[ORDER BY column1, column2,.. columnN] [ASC | DESC]; of the ORDER BY clause:
示例
假設我們在 MySQL 中建立了一個名為 EMPLOYEES 的表,如下所示:
mysql> CREATE TABLE EMPLOYEE(
   FIRST_NAME CHAR(20) NOT NULL,
   LAST_NAME CHAR(20),
   AGE INT,
   SEX CHAR(1),
   INCOME FLOAT
);
Query OK, 0 rows affected (0.36 sec)
如果我們使用 INSERT 語句向其中插入了 4 條記錄,如下所示:
mysql> INSERT INTO EMPLOYEE VALUES
   ('Krishna', 'Sharma', 19, 'M', 2000),
   ('Raj', 'Kandukuri', 20, 'M', 7000),
   ('Ramya', 'Ramapriya', 25, 'F', 5000),
   ('Mac', 'Mohan', 26, 'M', 2000);
以下語句按年齡的升序檢索 EMPLOYEE 表的內容。
mysql> SELECT * FROM EMPLOYEE ORDER BY AGE;
+------------+-----------+------+------+--------+
| FIRST_NAME | LAST_NAME | AGE  | SEX  | INCOME |
+------------+-----------+------+------+--------+
| Krishna    | Sharma    |   19 |    M |   2000 |
| Raj        | Kandukuri |   20 |    M |   7000 |
| Ramya      | Ramapriya |   25 |    F |   5000 |
| Mac        | Mohan     |   26 |    M |   2000 |
+------------+-----------+------+------+--------+
4 rows in set (0.04 sec)
您還可以使用 DESC 按降序檢索資料,如下所示:
mysql> SELECT * FROM EMPLOYEE ORDER BY FIRST_NAME, INCOME DESC;
+------------+-----------+------+------+--------+
| FIRST_NAME | LAST_NAME | AGE  | SEX  | INCOME |
+------------+-----------+------+------+--------+
| Krishna    | Sharma    |   19 |    M |   2000 |
| Mac        | Mohan     |   26 |    M |   2000 |
| Raj        | Kandukuri |   20 |    M |   7000 |
| Ramya      | Ramapriya |   25 |    F |   5000 |
+------------+-----------+------+------+--------+
4 rows in set (0.00 sec)
使用 python 的 ORDER BY 子句
要按特定順序檢索表的內容,請在遊標物件上呼叫 execute() 方法,並將 SELECT 語句以及 ORDER BY 子句作為引數傳遞給它。
示例
在以下示例中,我們正在建立一個名為 Employee 的表並填充它,並使用 ORDER BY 子句按其年齡的(升序)順序檢索其記錄。
import mysql.connector

#establishing the connection
conn = mysql.connector.connect(
   user='root', password='password', host='127.0.0.1', database='mydb')

#Creating a cursor object using the cursor() method
cursor = conn.cursor()

#Doping EMPLOYEE table if already exists.
cursor.execute("DROP TABLE IF EXISTS EMPLOYEE")
sql = '''CREATE TABLE EMPLOYEE(
   FIRST_NAME CHAR(20) NOT NULL,
   LAST_NAME CHAR(20),
   AGE INT,
   SEX CHAR(1),
   INCOME FLOAT
)'''
cursor.execute(sql)

#Populating the table
insert_stmt = "INSERT INTO EMPLOYEE (FIRST_NAME, LAST_NAME, AGE, SEX, INCOME)
   VALUES (%s, %s, %s, %s, %s)"

data = [('Krishna', 'Sharma', 26, 'M', 2000),
   ('Raj', 'Kandukuri', 20, 'M', 7000),
   ('Ramya', 'Ramapriya', 29, 'F', 5000),
   ('Mac', 'Mohan', 26, 'M', 2000)]
cursor.executemany(insert_stmt, data)
conn.commit()

#Retrieving specific records using the ORDER BY clause
cursor.execute("SELECT * from EMPLOYEE ORDER BY AGE")
print(cursor.fetchall())

#Closing the connection
conn.close()
輸出
[('Raj', 'Kandukuri', 20, 'M', 7000.0),
   ('Krishna', 'Sharma', 26, 'M', 2000.0),
   ('Mac', 'Mohan', 26, 'M', 2000.0),
   ('Ramya', 'Ramapriya', 29, 'F', 5000.0)
]
同樣,您可以使用 ORDER BY 子句按降序從表中檢索資料。
示例
import mysql.connector

#establishing the connection
conn = mysql.connector.connect(
   user='root', password='password', host='127.0.0.1', database='mydb')

#Creating a cursor object using the cursor() method
cursor = conn.cursor()

#Retrieving specific records using the ORDERBY clause
cursor.execute("SELECT * from EMPLOYEE ORDER BY INCOME DESC")
print(cursor.fetchall())

#Closing the connection
conn.close()
輸出
[('Raj', 'Kandukuri', 20, 'M', 7000.0),
   ('Ramya', 'Ramapriya', 29, 'F', 5000.0),
   ('Krishna', 'Sharma', 26, 'M', 2000.0),
   ('Mac', 'Mohan', 26, 'M', 2000.0)
]
Python MySQL - 更新表
對任何資料庫執行更新操作都會更新一個或多個數據庫中已存在的記錄。您可以使用 UPDATE 語句更新 MySQL 中現有記錄的值。要更新特定行,您需要與之一起使用 WHERE 子句。
語法
以下是 MySQL 中 UPDATE 語句的語法:
UPDATE table_name
SET column1 = value1, column2 = value2...., columnN = valueN
WHERE [condition];
您可以使用 AND 或 OR 運算子組合 N 個條件。
示例
假設我們在 MySQL 中建立了一個名為 EMPLOYEES 的表,如下所示:
mysql> CREATE TABLE EMPLOYEE(
   FIRST_NAME CHAR(20) NOT NULL,
   LAST_NAME CHAR(20),
   AGE INT,
   SEX CHAR(1),
   INCOME FLOAT
);
Query OK, 0 rows affected (0.36 sec)
如果我們使用 INSERT 語句向其中插入了 4 條記錄,如下所示:
mysql> INSERT INTO EMPLOYEE VALUES
   ('Krishna', 'Sharma', 19, 'M', 2000),
   ('Raj', 'Kandukuri', 20, 'M', 7000),
   ('Ramya', 'Ramapriya', 25, 'F', 5000),
   ('Mac', 'Mohan', 26, 'M', 2000);
以下 MySQL 語句將所有男性員工的年齡增加一年:
mysql> UPDATE EMPLOYEE SET AGE = AGE + 1 WHERE SEX = 'M';
Query OK, 3 rows affected (0.06 sec)
Rows matched: 3 Changed: 3 Warnings: 0
如果檢索表的內容,您可以看到更新後的值,如下所示:
mysql> select * from EMPLOYEE;
+------------+-----------+------+------+--------+
| FIRST_NAME | LAST_NAME | AGE  | SEX  | INCOME |
+------------+-----------+------+------+--------+
| Krishna    | Sharma    | 20   | M    | 2000   |
| Raj        | Kandukuri | 21   | M    | 7000   |
| Ramya      | Ramapriya | 25   | F    | 5000   |
| Mac        | Mohan     | 27   | M    | 2000   |
+------------+-----------+------+------+--------+
4 rows in set (0.00 sec)
使用 Python 更新表的內容
要在 MySQL 中使用 python 更新表中的記錄:
匯入mysql.connector包。
使用mysql.connector.connect()方法建立一個連線物件,透過將使用者名稱、密碼、主機(可選,預設:localhost)和資料庫(可選)作為引數傳遞給它。
透過在上面建立的連線物件上呼叫cursor()方法建立一個遊標物件。
然後,透過將其作為引數傳遞給 execute() 方法,執行 UPDATE 語句。
示例
以下示例將所有男性的年齡增加一年。
import mysql.connector

#establishing the connection
conn = mysql.connector.connect(
   user='root', password='password', host='127.0.0.1', database='mydb')

#Creating a cursor object using the cursor() method
cursor = conn.cursor()

#Preparing the query to update the records
sql = '''UPDATE EMPLOYEE SET AGE = AGE + 1 WHERE SEX = 'M' '''
try:
   # Execute the SQL command
   cursor.execute(sql)

   # Commit your changes in the database
   conn.commit()
except:
   # Rollback in case there is any error
   conn.rollback()

#Retrieving data
sql = '''SELECT * from EMPLOYEE'''

#Executing the query
cursor.execute(sql)

#Displaying the result
print(cursor.fetchall())

#Closing the connection
conn.close()
輸出
[('Krishna', 'Sharma', 22, 'M', 2000.0),
   ('Raj', 'Kandukuri', 23, 'M', 7000.0),
   ('Ramya', 'Ramapriya', 26, 'F', 5000.0)
]
Python MySQL - 刪除資料
要從 MySQL 表中刪除記錄,您需要使用 DELETE FROM 語句。要刪除特定記錄,您需要與之一起使用 WHERE 子句。
語法
以下是 MYSQL 中 DELETE 查詢的語法:
DELETE FROM table_name [WHERE Clause]
示例
假設我們在 MySQL 中建立了一個名為 EMPLOYEES 的表,如下所示:
mysql> CREATE TABLE EMPLOYEE(
   FIRST_NAME CHAR(20) NOT NULL,
   LAST_NAME CHAR(20),
   AGE INT,
   SEX CHAR(1),
   INCOME FLOAT
);
Query OK, 0 rows affected (0.36 sec)
如果我們使用 INSERT 語句向其中插入了 4 條記錄,如下所示:
mysql> INSERT INTO EMPLOYEE VALUES
   ('Krishna', 'Sharma', 19, 'M', 2000),
   ('Raj', 'Kandukuri', 20, 'M', 7000),
   ('Ramya', 'Ramapriya', 25, 'F', 5000),
   ('Mac', 'Mohan', 26, 'M', 2000);
以下 MySQL 語句刪除 FIRST_NAME 為“Mac”的員工的記錄。
mysql> DELETE FROM EMPLOYEE WHERE FIRST_NAME = 'Mac';
Query OK, 1 row affected (0.12 sec)
如果檢索表的內容,您只會看到 3 條記錄,因為我們刪除了一條。
mysql> select * from EMPLOYEE;
+------------+-----------+------+------+--------+
| FIRST_NAME | LAST_NAME | AGE  | SEX  | INCOME |
+------------+-----------+------+------+--------+
| Krishna    | Sharma    | 20   | M    | 2000   |
| Raj        | Kandukuri | 21   | M    | 7000   |
| Ramya      | Ramapriya | 25   | F    | 5000   |
+------------+-----------+------+------+--------+
3 rows in set (0.00 sec)
如果在沒有 WHERE 子句的情況下執行 DELETE 語句,則將刪除指定表中的所有記錄。
mysql> DELETE FROM EMPLOYEE;
Query OK, 3 rows affected (0.09 sec)
如果檢索表的內容,您將獲得一個空集,如下所示:
mysql> select * from EMPLOYEE;
Empty set (0.00 sec)
使用 python 刪除表中的記錄
當您要從資料庫中刪除某些記錄時,需要 DELETE 操作。
要刪除表中的記錄:
匯入mysql.connector包。
使用mysql.connector.connect()方法建立一個連線物件,透過將使用者名稱、密碼、主機(可選,預設:localhost)和資料庫(可選)作為引數傳遞給它。
透過在上面建立的連線物件上呼叫cursor()方法建立一個遊標物件。
然後,透過將其作為引數傳遞給 execute() 方法,執行 DELETE 語句。
示例
以下程式刪除 EMPLOYEE 中所有年齡超過 20 的記錄:
import mysql.connector

#establishing the connection
conn = mysql.connector.connect(
   user='root', password='password', host='127.0.0.1', database='mydb')

#Creating a cursor object using the cursor() method
cursor = conn.cursor()

#Retrieving single row
print("Contents of the table: ")
cursor.execute("SELECT * from EMPLOYEE")
print(cursor.fetchall())

#Preparing the query to delete records
sql = "DELETE FROM EMPLOYEE WHERE AGE > '%d'" % (25)

try:
   # Execute the SQL command
   cursor.execute(sql)

   # Commit your changes in the database
   conn.commit()
except:
   # Roll back in case there is any error
   conn.rollback()

#Retrieving data
print("Contents of the table after delete operation ")
cursor.execute("SELECT * from EMPLOYEE")
print(cursor.fetchall())

#Closing the connection
conn.close()
輸出
Contents of the table:
[('Krishna', 'Sharma', 22, 'M', 2000.0),
   ('Raj', 'Kandukuri', 23, 'M', 7000.0),
   ('Ramya', 'Ramapriya', 26, 'F', 5000.0),
   ('Mac', 'Mohan', 20, 'M', 2000.0),
   ('Ramya', 'Rama priya', 27, 'F', 9000.0)]

Contents of the table after delete operation:
[('Krishna', 'Sharma', 22, 'M', 2000.0),
   ('Raj', 'Kandukuri', 23, 'M', 7000.0),
   ('Mac', 'Mohan', 20, 'M', 2000.0)]
Python MySQL - 刪除表
您可以使用 DROP TABLE 語句刪除整個表。您只需要指定要刪除的表的名稱。
語法
以下是 MySQL 中 DROP TABLE 語句的語法:
DROP TABLE table_name;
示例
在刪除表之前,請使用 SHOW TABLES 語句獲取表的列表,如下所示:
mysql> SHOW TABLES;
+-----------------+
| Tables_in_mydb  |
+-----------------+
| contact         |
| cricketers_data |
| employee        |
| sample          |
| tutorials       |
+-----------------+
5 rows in set (0.00 sec)
以下語句完全刪除資料庫中名為 sample 的表:
mysql> DROP TABLE sample;
Query OK, 0 rows affected (0.29 sec)
由於我們已從 MySQL 中刪除了名為 sample 的表,因此如果您再次獲取表的列表,則在其中將找不到表名 sample。
mysql> SHOW TABLES;
+-----------------+
| Tables_in_mydb  |
+-----------------+
| contact         |
| cricketers_data |
| employee        |
| tutorials       |
+-----------------+
4 rows in set (0.00 sec)
使用 python 刪除表
您可以隨時使用 MYSQL 的 DROP 語句刪除表,但在刪除任何現有表時需要非常小心,因為刪除表後資料將無法恢復。
要使用 python 從 MYSQL 資料庫中刪除表,請在遊標物件上呼叫 execute() 方法,並將 drop 語句作為引數傳遞給它。
示例
以下表從資料庫中刪除名為 EMPLOYEE 的表。
import mysql.connector

#establishing the connection conn = mysql.connector.connect(
   user='root', password='password', host='127.0.0.1', database='mydb'
)

#Creating a cursor object using the cursor() method
cursor = conn.cursor()

#Retrieving the list of tables print("List of tables in the database: ")
   cursor.execute("SHOW Tables") print(cursor.fetchall())

#Doping EMPLOYEE table if already exists cursor.execute
   ("DROP TABLE EMPLOYEE") print("Table dropped... ")

#Retrieving the list of tables print(
   "List of tables after dropping the EMPLOYEE table: ")
   cursor.execute("SHOW Tables") print(cursor.fetchall())

#Closing the connection conn.close()
輸出
List of tables in the database:
[('employee',), ('employeedata',), ('sample',), ('tutorials',)]
Table dropped...
List of tables after dropping the EMPLOYEE table:
[('employeedata',), ('sample',), ('tutorials',)]
僅當存在時才刪除表
如果您嘗試刪除資料庫中不存在的表,則會發生錯誤,如下所示:
mysql.connector.errors.ProgrammingError: 1051 (42S02):
   Unknown table 'mydb.employee'
您可以透過在刪除之前驗證表是否存在來防止此錯誤,方法是在 DELETE 語句中新增 IF EXISTS。
import mysql.connector

#establishing the connection
conn = mysql.connector.connect(
   user='root', password='password', host='127.0.0.1', database='mydb')

#Creating a cursor object using the cursor() method
cursor = conn.cursor()

#Retrieving the list of tables
print("List of tables in the database: ")
cursor.execute("SHOW Tables")
print(cursor.fetchall())

#Doping EMPLOYEE table if already exists
cursor.execute("DROP TABLE IF EXISTS EMPLOYEE")
print("Table dropped... ")

#Retrieving the list of tables
print("List of tables after dropping the EMPLOYEE table: ")
cursor.execute("SHOW Tables")
print(cursor.fetchall())

#Closing the connection
conn.close()
輸出
List of tables in the database:
[('employeedata',), ('sample',), ('tutorials',)]
Table dropped...
List of tables after dropping the EMPLOYEE table:
[('employeedata',), ('sample',),
('tutorials',)]
Python MySQL - Limit
在獲取記錄時,如果要將它們限制為特定數量,則可以使用 MYSQL 的 LIMIT 子句。
示例
假設我們在 MySQL 中建立了一個名為 EMPLOYEES 的表,如下所示:
mysql> CREATE TABLE EMPLOYEE(
   FIRST_NAME CHAR(20) NOT NULL,
   LAST_NAME CHAR(20),
   AGE INT,
   SEX CHAR(1),
   INCOME FLOAT
);
Query OK, 0 rows affected (0.36 sec)
如果我們使用 INSERT 語句向其中插入了 4 條記錄,如下所示:
mysql> INSERT INTO EMPLOYEE VALUES
   ('Krishna', 'Sharma', 19, 'M', 2000),
   ('Raj', 'Kandukuri', 20, 'M', 7000),
   ('Ramya', 'Ramapriya', 25, 'F', 5000),
   ('Mac', 'Mohan', 26, 'M', 2000);
以下 SQL 語句使用 LIMIT 子句檢索 Employee 表的前兩條記錄。
SELECT * FROM EMPLOYEE LIMIT 2;
+------------+-----------+------+------+--------+
| FIRST_NAME | LAST_NAME | AGE  | SEX  | INCOME |
+------------+-----------+------+------+--------+
| Krishna    | Sharma    | 19   | M    | 2000   |
| Raj        | Kandukuri | 20   | M    | 7000   |
+------------+-----------+------+------+--------+
2 rows in set (0.00 sec)
使用 python 的 Limit 子句
如果透過將 SELECT 查詢以及 LIMIT 子句作為引數傳遞給遊標物件上的 execute() 方法,則可以檢索所需數量的記錄。
要使用 python 從 MYSQL 資料庫中刪除表,請在遊標物件上呼叫 execute() 方法,並將 drop 語句作為引數傳遞給它。
示例
以下 python 示例建立一個名為 EMPLOYEE 的表並填充它,並使用 LIMIT 子句獲取其前兩條記錄。
import mysql.connector

#establishing the connection
conn = mysql.connector.connect(
   user='root', password='password', host='127.0.0.1', database='mydb')

#Creating a cursor object using the cursor() method
cursor = conn.cursor()

#Retrieving single row
sql = '''SELECT * from EMPLOYEE LIMIT 2'''

#Executing the query
cursor.execute(sql)

#Fetching the data
result = cursor.fetchall();
print(result)

#Closing the connection
conn.close()
輸出
[('Krishna', 'Sharma', 26, 'M', 2000.0), ('Raj', 'Kandukuri', 20, 'M', 7000.0)]
帶 OFFSET 的 LIMIT
如果需要從第 n 條記錄(而不是第 1 條)開始限制記錄,則可以使用 OFFSET 以及 LIMIT。
import mysql.connector

#establishing the connection
conn = mysql.connector.connect(
   user='root', password='password', host='127.0.0.1', database='mydb')

#Creating a cursor object using the cursor() method
cursor = conn.cursor()

#Retrieving single row
sql = '''SELECT * from EMPLOYEE LIMIT 2 OFFSET 2'''

#Executing the query
cursor.execute(sql)

#Fetching the data
result = cursor.fetchall();
print(result)

#Closing the connection
conn.close()
輸出
[('Ramya', 'Ramapriya', 29, 'F', 5000.0), ('Mac', 'Mohan', 26, 'M', 2000.0)]
Python MySQL - Join
當您將資料分成兩個表時,您可以使用聯接從這兩個表中獲取組合的記錄。
示例
假設我們建立了一個名為 EMPLOYEE 的表,並向其中填充了資料,如下所示:
mysql> CREATE TABLE EMPLOYEE(
   FIRST_NAME CHAR(20) NOT NULL,
   LAST_NAME CHAR(20),
   AGE INT,
   SEX CHAR(1),
   INCOME FLOAT,
   CONTACT INT
);
Query OK, 0 rows affected (0.36 sec)
INSERT INTO Employee VALUES ('Ramya', 'Rama Priya', 27, 'F', 9000, 101),
   ('Vinay', 'Bhattacharya', 20, 'M', 6000, 102),
   ('Sharukh', 'Sheik', 25, 'M', 8300, 103),
   ('Sarmista', 'Sharma', 26, 'F', 10000, 104),
   ('Trupthi', 'Mishra', 24, 'F', 6000, 105);
Query OK, 5 rows affected (0.08 sec)
Records: 5 Duplicates: 0 Warnings: 0
然後,如果我們建立了另一個表並將其填充為:
CREATE TABLE CONTACT(
   ID INT NOT NULL,
   EMAIL CHAR(20) NOT NULL,
   PHONE LONG,
   CITY CHAR(20)
);
Query OK, 0 rows affected (0.49 sec)
INSERT INTO CONTACT (ID, EMAIL, CITY) VALUES
   (101, 'Krishna@mymail.com', 'Hyderabad'),
   (102, 'Raja@mymail.com', 'Vishakhapatnam'),
   (103, 'Krishna@mymail.com', 'Pune'),
   (104, 'Raja@mymail.com', 'Mumbai');
Query OK, 4 rows affected (0.10 sec)
Records: 4 Duplicates: 0 Warnings: 0
以下語句檢索這兩個表中值的組合資料:
mysql> SELECT * from EMPLOYEE INNER JOIN CONTACT ON EMPLOYEE.CONTACT = CONTACT.ID;
+------------+--------------+------+------+--------+---------+-----+--------------------+-------+----------------+
| FIRST_NAME | LAST_NAME    | AGE  | SEX  | INCOME | CONTACT | ID  | EMAIL              | PHONE | CITY           |
+------------+--------------+------+------+--------+---------+-----+--------------------+-------+----------------+
| Ramya      | Rama Priya   | 27   | F    | 9000   | 101     | 101 | Krishna@mymail.com | NULL  | Hyderabad      |
| Vinay      | Bhattacharya | 20   | M    | 6000   | 102     | 102 | Raja@mymail.com    | NULL  | Vishakhapatnam |
| Sharukh    | Sheik        | 25   | M    | 8300   | 103     | 103 | Krishna@mymail.com | NULL  | Pune           |
| Sarmista   | Sharma       | 26   | F    | 10000  | 104     | 104 | Raja@mymail.com    | NULL  | Mumbai         |
+------------+--------------+------+------+--------+---------+-----+--------------------+-------+----------------+
4 rows in set (0.00 sec)
使用 python 的 MYSQL JOIN
以下示例從上述兩個表中檢索資料,這兩個表透過 EMPLOYEE 表的 contact 列和 CONTACT 表的 ID 列組合。
import mysql.connector

#establishing the connection
conn = mysql.connector.connect(
   user='root', password='password', host='127.0.0.1', database='mydb'
)

#Creating a cursor object using the cursor() method
cursor = conn.cursor()

#Retrieving single row
sql = '''SELECT * from EMPLOYEE INNER JOIN CONTACT ON EMPLOYEE.CONTACT = CONTACT.ID'''

#Executing the query
cursor.execute(sql)

#Fetching 1st row from the table
result = cursor.fetchall();
print(result)

#Closing the connection
conn.close()
輸出
[('Krishna', 'Sharma', 26, 'M', 2000, 101, 101, 'Krishna@mymail.com', 9848022338, 'Hyderabad'),
   ('Raj', 'Kandukuri', 20, 'M', 7000, 102, 102, 'Raja@mymail.com', 9848022339, 'Vishakhapatnam'),
   ('Ramya', 'Ramapriya', 29, 'F', 5000, 103, 103, 'Krishna@mymail.com', 9848022337, 'Pune'),
   ('Mac', 'Mohan', 26, 'M', 2000, 104, 104, 'Raja@mymail.com', 9848022330, 'Mumbai')]
Python MySQL - 遊標物件
mysql-connector-python(以及類似庫)的 MySQLCursor 用於執行與 MySQL 資料庫通訊的語句。
使用它的方法,您可以執行 SQL 語句、從結果集中獲取資料、呼叫過程。
您可以使用 Connection 物件/類的 cursor() 方法建立 Cursor 物件。
示例
import mysql.connector

#establishing the connection
conn = mysql.connector.connect(
   user='root', password='password', host='127.0.0.1', database='mydb'
)
#Creating a cursor object using the cursor() method
cursor = conn.cursor()
方法
以下是 Cursor 類/物件提供的各種方法。
| 序號 | 方法和描述 |
|---|---|
| 1 | callproc() 此方法用於呼叫 MySQL 資料庫中現有的過程。 |
| 2 | close() 此方法用於關閉當前遊標物件。 |
| 3 | Info() 此方法提供有關上次查詢的資訊。 |
| 4 | executemany() 此方法接受一系列引數列表。準備一個 MySQL 查詢並使用所有引數執行它。 |
| 5 | execute() 此方法接受 MySQL 查詢作為引數並執行給定的查詢。 |
| 6 | fetchall() 此方法檢索查詢結果集中的所有行,並將其作為元組列表返回。(如果我們在檢索了幾行後執行此操作,它將返回剩餘的行) |
| 7 | fetchone() 此方法獲取查詢結果中的下一行,並將其作為元組返回。 |
| 8 | fetchmany() 此方法類似於 fetchone(),但它檢索查詢結果集中的下一組行,而不是單個行。 |
| 9 | etchwarnings() 此方法返回上次執行的查詢生成的警告。 |
屬性
以下是 Cursor 類的屬性:
| 序號 | 屬性和描述 |
|---|---|
| 1 | column_names 這是一個只讀屬性,它返回包含結果集列名的列表。 |
| 2 | description 這是一個只讀屬性,它返回包含結果集中列的描述的列表。 |
| 3 | lastrowid 這是一個只讀屬性,如果表中存在任何自動遞增列,則返回上次 INSERT 或 UPDATE 操作為此列生成的數值。 |
| 4 | 行數 (rowcount) 在 SELECT 和 UPDATE 操作的情況下,此屬性返回返回/更新的行數。 |
| 5 | 語句 (statement) 此屬性返回最後執行的語句。 |
Python PostgreSQL - 簡介
安裝
PostgreSQL 是一個功能強大的開源物件關係資料庫系統。它擁有超過 15 年的活躍開發階段,以及久經考驗的架構,使其贏得了可靠性、資料完整性和正確性方面的良好聲譽。
要使用 Python 與 PostgreSQL 通訊,您需要安裝 psycopg,這是一個為 Python 程式設計提供的介面卡,其當前版本為 psycog2。
psycopg2 的編寫目標是體積小、速度快且穩定可靠。它可以透過 PIP(Python 的包管理器)獲得。
使用 PIP 安裝 Psycog2
首先,確保 Python 和 PIP 已正確安裝在您的系統中,並且 PIP 已更新到最新版本。
要升級 PIP,請開啟命令提示符並執行以下命令:
C:\Users\Tutorialspoint>python -m pip install --upgrade pip
Collecting pip
Using cached https://files.pythonhosted.org/packages/8d/07/f7d7ced2f97ca3098c16565efbe6b15fafcba53e8d9bdb431e09140514b0/pip-19.2.2-py2.py3-none-any.whl
Installing collected packages: pip
Found existing installation: pip 19.0.3
Uninstalling pip-19.0.3:
Successfully uninstalled pip-19.0.3
Successfully installed pip-19.2.2
然後,以管理員模式開啟命令提示符並執行 pip install psycopg2-binary 命令,如下所示:
C:\WINDOWS\system32>pip install psycopg2-binary
Collecting psycopg2-binary
Using cached https://files.pythonhosted.org/packages/80/79/d0d13ce4c2f1addf4786f4a2ded802c2df66ddf3c1b1a982ed8d4cb9fc6d/psycopg2_binary-2.8.3-cp37-cp37m-win32.whl
Installing collected packages: psycopg2-binary
Successfully installed psycopg2-binary-2.8.3
驗證
要驗證安裝,請建立一個包含以下行的 Python 指令碼示例。
import mysql.connector
如果安裝成功,當您執行它時,您不應該收到任何錯誤:
D:\Python_PostgreSQL>import psycopg2
D:\Python_PostgreSQL>
Python PostgreSQL - 資料庫連線
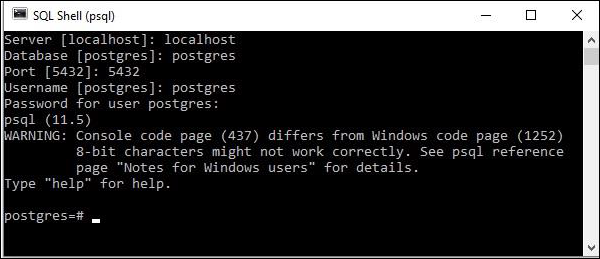
PostgreSQL 提供了自己的 Shell 來執行查詢。要建立與 PostgreSQL 資料庫的連線,請確保您已在系統中正確安裝了它。開啟 PostgreSQL Shell 提示符並傳遞伺服器、資料庫、使用者名稱和密碼等詳細資訊。如果您提供的詳細資訊都正確,則將與 PostgreSQL 資料庫建立連線。
傳遞詳細資訊時,您可以使用 Shell 建議的預設伺服器、資料庫、埠和使用者名稱。
使用 Python 建立連線
psycopg2 的 connection 類表示/處理連線例項。您可以使用 connect() 函式建立新的連線。它接受基本的連線引數,例如 dbname、user、password、host、port,並返回一個連線物件。使用此函式,您可以建立與 PostgreSQL 的連線。
示例
以下 Python 程式碼演示瞭如何連線到現有資料庫。如果資料庫不存在,則將建立它,最後返回一個數據庫物件。PostgreSQL 的預設資料庫名為 postrgre。因此,我們將其作為資料庫名稱提供。
import psycopg2

#establishing the connection
conn = psycopg2.connect(
   database="postgres", user='postgres', password='password', host='127.0.0.1', port= '5432'
)
#Creating a cursor object using the cursor() method
cursor = conn.cursor()

#Executing an MYSQL function using the execute() method
cursor.execute("select version()")

# Fetch a single row using fetchone() method.
data = cursor.fetchone()
print("Connection established to: ",data)

#Closing the connection
conn.close()
Connection established to: (
   'PostgreSQL 11.5, compiled by Visual C++ build 1914, 64-bit',
)
輸出
Connection established to: (
   'PostgreSQL 11.5, compiled by Visual C++ build 1914, 64-bit',
)
Python PostgreSQL - 建立資料庫
您可以使用 CREATE DATABASE 語句在 PostgreSQL 中建立資料庫。您可以在 PostgreSQL Shell 提示符下執行此語句,並在命令後指定要建立的資料庫的名稱。
語法
以下是 CREATE DATABASE 語句的語法。
CREATE DATABASE dbname;
示例
以下語句在 PostgreSQL 中建立一個名為 testdb 的資料庫。
postgres=# CREATE DATABASE testdb;
CREATE DATABASE
您可以使用 \l 命令列出 PostgreSQL 中的資料庫。如果您驗證資料庫列表,則可以找到新建立的資料庫,如下所示:
postgres=# \l
                                           List of databases
Name       | Owner    | Encoding | Collate                    | Ctype       |
-----------+----------+----------+----------------------------+-------------+
mydb       | postgres | UTF8     | English_United States.1252 | ........... |
postgres   | postgres | UTF8     | English_United States.1252 | ........... |
template0  | postgres | UTF8     | English_United States.1252 | ........... |
template1  | postgres | UTF8     | English_United States.1252 | ........... |
testdb     | postgres | UTF8     | English_United States.1252 | ........... |
(5 rows)
您也可以使用 createdb 命令(CREATE DATABASE SQL 語句的包裝器)從命令提示符在 PostgreSQL 中建立資料庫。
C:\Program Files\PostgreSQL\11\bin> createdb -h localhost -p 5432 -U postgres sampledb
Password:
使用 Python 建立資料庫
psycopg2 的 cursor 類提供了各種方法來執行各種 PostgreSQL 命令、獲取記錄和複製資料。您可以使用 Connection 類的 cursor() 方法建立遊標物件。
此類的 execute() 方法接受 PostgreSQL 查詢作為引數並執行它。
因此,要在 PostgreSQL 中建立資料庫,請使用此方法執行 CREATE DATABASE 查詢。
示例
以下 Python 示例在 PostgreSQL 資料庫中建立了一個名為 mydb 的資料庫。
import psycopg2

#establishing the connection
conn = psycopg2.connect(
   database="postgres", user='postgres', password='password', host='127.0.0.1', port= '5432'
)
conn.autocommit = True

#Creating a cursor object using the cursor() method
cursor = conn.cursor()

#Preparing query to create a database
sql = '''CREATE database mydb''';

#Creating a database
cursor.execute(sql)
print("Database created successfully........")

#Closing the connection
conn.close()
輸出
Database created successfully........
Python PostgreSQL - 建立表
您可以使用 CREATE TABLE 語句在 PostgreSQL 中的資料庫中建立新表。在執行此操作時,您需要指定表名、列名及其資料型別。
語法
以下是 PostgreSQL 中 CREATE TABLE 語句的語法。
CREATE TABLE table_name(
   column1 datatype,
   column2 datatype,
   column3 datatype,
   .....
   columnN datatype,
);
示例
以下示例在 PostgreSQL 中建立一個名為 CRICKETERS 的表。
postgres=# CREATE TABLE CRICKETERS (
   First_Name VARCHAR(255),
   Last_Name VARCHAR(255),
   Age INT,
   Place_Of_Birth VARCHAR(255),
   Country VARCHAR(255)
);
CREATE TABLE
postgres=#
您可以使用 \dt 命令獲取 PostgreSQL 中資料庫中的表列表。建立表後,如果您驗證表列表,則可以在其中觀察新建立的表,如下所示:
postgres=# \dt
            List of relations
Schema  | Name       | Type  | Owner
--------+------------+-------+----------
public  | cricketers | table | postgres
(1 row)
postgres=#
同樣,您可以使用 \d 獲取建立表的描述,如下所示:
postgres=# \d cricketers
               Table "public.cricketers"
Column          | Type                   | Collation | Nullable | Default
----------------+------------------------+-----------+----------+---------
first_name      | character varying(255) |           |          |
last_name       | character varying(255) |           |          |
age             | integer                |           |          |
place_of_birth  | character varying(255) |           |          |
country         | character varying(255) |           |          |
postgres=#
使用 Python 建立表
要使用 Python 建立表,您需要使用 pyscopg2 的 Cursor 的 execute() 方法執行 CREATE TABLE 語句。
示例
以下 Python 示例建立一個名為 employee 的表。
import psycopg2

#Establishing the connection
conn = psycopg2.connect(
   database="mydb", user='postgres', password='password', host='127.0.0.1', port= '5432'
)
#Creating a cursor object using the cursor() method
cursor = conn.cursor()

#Doping EMPLOYEE table if already exists.
cursor.execute("DROP TABLE IF EXISTS EMPLOYEE")

#Creating table as per requirement
sql ='''CREATE TABLE EMPLOYEE(
   FIRST_NAME CHAR(20) NOT NULL,
   LAST_NAME CHAR(20),
   AGE INT,
   SEX CHAR(1),
   INCOME FLOAT
)'''
cursor.execute(sql)
print("Table created successfully........")
conn.commit()
#Closing the connection
conn.close()
輸出
Table created successfully........
Python PostgreSQL - 插入資料
您可以使用 INSERT INTO 語句將記錄插入 PostgreSQL 中的現有表中。在執行此操作時,您需要指定表名以及其中列的值。
語法
以下是 INSERT 語句的推薦語法:
INSERT INTO TABLE_NAME (column1, column2, column3,...columnN)
VALUES (value1, value2, value3,...valueN);
其中,column1、column2、column3... 是表的列名,value1、value2、value3... 是您需要插入表中的值。
示例
假設我們已使用 CREATE TABLE 語句建立了一個名為 CRICKETERS 的表,如下所示:
postgres=# CREATE TABLE CRICKETERS (
   First_Name VARCHAR(255),
   Last_Name VARCHAR(255),
   Age INT,
   Place_Of_Birth VARCHAR(255),
   Country VARCHAR(255)
);
CREATE TABLE
postgres=#
以下 PostgreSQL 語句在上面建立的表中插入一行:
postgres=# insert into CRICKETERS (
   First_Name, Last_Name, Age, Place_Of_Birth, Country)
   values('Shikhar', 'Dhawan', 33, 'Delhi', 'India');
INSERT 0 1
postgres=#
使用 INSERT INTO 語句插入記錄時,如果您跳過任何列名,則將插入記錄,並在您跳過的列處留出空位。
postgres=# insert into CRICKETERS (First_Name, Last_Name, Country)
   values('Jonathan', 'Trott', 'SouthAfrica');
INSERT 0 1
如果傳遞的值的順序與表中各自的列名相同,則您也可以在不指定列名的情況下將記錄插入表中。
postgres=# insert into CRICKETERS values('Kumara', 'Sangakkara', 41, 'Matale', 'Srilanka');
INSERT 0 1
postgres=# insert into CRICKETERS values('Virat', 'Kohli', 30, 'Delhi', 'India');
INSERT 0 1
postgres=# insert into CRICKETERS values('Rohit', 'Sharma', 32, 'Nagpur', 'India');
INSERT 0 1
postgres=#
將記錄插入表後,您可以使用 SELECT 語句驗證其內容,如下所示:
postgres=# SELECT * from CRICKETERS;
first_name  | last_name  | age | place_of_birth | country
------------+------------+-----+----------------+-------------
Shikhar     | Dhawan     | 33  | Delhi          | India
Jonathan    | Trott      |     |                | SouthAfrica
Kumara      | Sangakkara | 41  | Matale         | Srilanka
Virat       | Kohli      | 30  | Delhi          | India
Rohit       | Sharma     | 32  | Nagpur         | India
(5 rows)
使用 Python 插入資料
psycopg2 的 cursor 類提供了一個名為 execute() 的方法。此方法接受查詢作為引數並執行它。
因此,要使用 Python 在 PostgreSQL 中將資料插入表中:
匯入 psycopg2 包。
使用 connect() 方法建立一個連線物件,將其使用者名稱、密碼、主機(可選,預設:localhost)和資料庫(可選)作為引數傳遞給它。
透過將 false 作為值設定為屬性 autocommit 來關閉自動提交模式。
psycopg2 庫的 Connection 類的 cursor() 方法返回一個遊標物件。使用此方法建立一個遊標物件。
然後,透過將其作為引數傳遞給 execute() 方法來執行 INSERT 語句。
示例
以下 Python 程式在 PostgreSQL 資料庫中建立一個名為 EMPLOYEE 的表,並使用 execute() 方法將記錄插入其中。
import psycopg2

#Establishing the connection
conn = psycopg2.connect(
   database="mydb", user='postgres', password='password', host='127.0.0.1', port= '5432'
)
#Setting auto commit false
conn.autocommit = True

#Creating a cursor object using the cursor() method
cursor = conn.cursor()

# Preparing SQL queries to INSERT a record into the database.
cursor.execute('''INSERT INTO EMPLOYEE(FIRST_NAME, LAST_NAME, AGE, SEX,
   INCOME) VALUES ('Ramya', 'Rama priya', 27, 'F', 9000)''')
cursor.execute('''INSERT INTO EMPLOYEE(FIRST_NAME, LAST_NAME, AGE, SEX,
   INCOME) VALUES ('Vinay', 'Battacharya', 20, 'M', 6000)''')
cursor.execute('''INSERT INTO EMPLOYEE(FIRST_NAME, LAST_NAME, AGE, SEX,
   INCOME) VALUES ('Sharukh', 'Sheik', 25, 'M', 8300)''')
cursor.execute('''INSERT INTO EMPLOYEE(FIRST_NAME, LAST_NAME, AGE, SEX,
   INCOME) VALUES ('Sarmista', 'Sharma', 26, 'F', 10000)''')
cursor.execute('''INSERT INTO EMPLOYEE(FIRST_NAME, LAST_NAME, AGE, SEX,
   INCOME) VALUES ('Tripthi', 'Mishra', 24, 'F', 6000)''')

# Commit your changes in the database
conn.commit()
print("Records inserted........")

# Closing the connection
conn.close()
輸出
Records inserted........
Python PostgreSQL - 查詢資料
您可以使用 SELECT 語句檢索 PostgreSQL 中現有表的內容。在此語句中,您需要指定表名,它將以表格格式返回其內容,這稱為結果集。
語法
以下是 PostgreSQL 中 SELECT 語句的語法:
SELECT column1, column2, columnN FROM table_name;
示例
假設我們已使用以下查詢建立了一個名為 CRICKETERS 的表:
postgres=# CREATE TABLE CRICKETERS (
   First_Name VARCHAR(255), Last_Name VARCHAR(255),
   Age int, Place_Of_Birth VARCHAR(255), Country VARCHAR(255)
);
CREATE TABLE
postgres=#
如果我們使用 INSERT 語句向其中插入了 5 條記錄,如下所示:
postgres=# insert into CRICKETERS values('Shikhar', 'Dhawan', 33, 'Delhi', 'India');
INSERT 0 1
postgres=# insert into CRICKETERS values('Jonathan', 'Trott', 38, 'CapeTown', 'SouthAfrica');
INSERT 0 1
postgres=# insert into CRICKETERS values('Kumara', 'Sangakkara', 41, 'Matale', 'Srilanka');
INSERT 0 1
postgres=# insert into CRICKETERS values('Virat', 'Kohli', 30, 'Delhi', 'India');
INSERT 0 1
postgres=# insert into CRICKETERS values('Rohit', 'Sharma', 32, 'Nagpur', 'India');
INSERT 0 1
以下 SELECT 查詢檢索 CRICKETERS 表中 FIRST_NAME、LAST_NAME 和 COUNTRY 列的值。
postgres=# SELECT FIRST_NAME, LAST_NAME, COUNTRY FROM CRICKETERS;
first_name  | last_name  | country
------------+------------+-------------
Shikhar     | Dhawan     | India
Jonathan    | Trott      | SouthAfrica
Kumara      | Sangakkara | Srilanka
Virat       | Kohli      | India
Rohit       | Sharma     | India
(5 rows)
如果要檢索每條記錄的所有列,則需要將列名替換為 "*",如下所示:
postgres=# SELECT * FROM CRICKETERS;
first_name  | last_name  | age | place_of_birth | country
------------+------------+-----+----------------+-------------
Shikhar     | Dhawan     | 33  | Delhi          | India
Jonathan    | Trott      | 38  | CapeTown       | SouthAfrica
Kumara      | Sangakkara | 41  | Matale         | Srilanka
Virat       | Kohli      | 30  | Delhi          | India
Rohit       | Sharma     | 32  | Nagpur         | India
(5 rows)
postgres=#
使用 Python 檢索資料
對任何資料庫執行讀取操作都意味著從資料庫中獲取一些有用的資訊。您可以使用 psycopg2 提供的 fetch() 方法從 PostgreSQL 中獲取資料。
Cursor 類提供三種方法,即 fetchall()、fetchmany() 和 fetchone(),其中:
fetchall() 方法檢索查詢結果集中的所有行,並將它們作為元組列表返回。(如果我們在檢索幾行後執行此操作,它將返回其餘行)。
fetchone() 方法獲取查詢結果中的下一行,並將其作為元組返回。
fetchmany() 方法類似於 fetchone(),但它檢索查詢結果集中的下一組行,而不是單個行。
注意 - 結果集是在使用遊標物件查詢表時返回的物件。
示例
以下 Python 程式連線到 PostgreSQL 的名為 mydb 的資料庫,並從名為 EMPLOYEE 的表中檢索所有記錄。
import psycopg2

#establishing the connection
conn = psycopg2.connect(
   database="mydb", user='postgres', password='password', host='127.0.0.1', port= '5432'
)

#Setting auto commit false
conn.autocommit = True

#Creating a cursor object using the cursor() method
cursor = conn.cursor()

#Retrieving data
cursor.execute('''SELECT * from EMPLOYEE''')

#Fetching 1st row from the table
result = cursor.fetchone();
print(result)

#Fetching 1st row from the table
result = cursor.fetchall();
print(result)

#Commit your changes in the database
conn.commit()

#Closing the connection
conn.close()
輸出
('Ramya', 'Rama priya', 27, 'F', 9000.0)
[('Vinay', 'Battacharya', 20, 'M', 6000.0),
('Sharukh', 'Sheik', 25, 'M', 8300.0),
('Sarmista', 'Sharma', 26, 'F', 10000.0),
('Tripthi', 'Mishra', 24, 'F', 6000.0)]
Python PostgreSQL - Where 子句
在執行 SELECT、UPDATE 或 DELETE 操作時,您可以使用 WHERE 子句指定條件來過濾記錄。該操作將對滿足給定條件的記錄執行。
語法
以下是 PostgreSQL 中 WHERE 子句的語法:
SELECT column1, column2, columnN
FROM table_name
WHERE [search_condition]
您可以使用比較或邏輯運算子指定 search_condition。例如 >、<、=、LIKE、NOT 等。以下示例將使此概念更加清晰。
示例
假設我們已使用以下查詢建立了一個名為 CRICKETERS 的表:
postgres=# CREATE TABLE CRICKETERS (
   First_Name VARCHAR(255), Last_Name VARCHAR(255),
   Age int, Place_Of_Birth VARCHAR(255), Country VARCHAR(255)
);
CREATE TABLE
postgres=#
如果我們使用 INSERT 語句向其中插入了 5 條記錄,如下所示:
postgres=# insert into CRICKETERS values('Shikhar', 'Dhawan', 33, 'Delhi', 'India');
INSERT 0 1
postgres=# insert into CRICKETERS values('Jonathan', 'Trott', 38, 'CapeTown', 'SouthAfrica');
INSERT 0 1
postgres=# insert into CRICKETERS values('Kumara', 'Sangakkara', 41, 'Matale', 'Srilanka');
INSERT 0 1
postgres=# insert into CRICKETERS values('Virat', 'Kohli', 30, 'Delhi', 'India');
INSERT 0 1
postgres=# insert into CRICKETERS values('Rohit', 'Sharma', 32, 'Nagpur', 'India');
INSERT 0 1
以下 SELECT 語句檢索年齡大於 35 的記錄:
postgres=# SELECT * FROM CRICKETERS WHERE AGE > 35;
first_name  | last_name  | age | place_of_birth | country
------------+------------+-----+----------------+-------------
Jonathan    | Trott      | 38  | CapeTown       | SouthAfrica
Kumara      | Sangakkara | 41  | Matale         | Srilanka
(2 rows)
postgres=#
使用 Python 的 WHERE 子句
要使用 Python 程式從表中獲取特定記錄,請執行帶有 WHERE 子句的 SELECT 語句,並將其作為引數傳遞給 execute() 方法。
示例
以下 Python 示例演示了使用 Python 的 WHERE 命令。
import psycopg2

#establishing the connection
conn = psycopg2.connect(
   database="mydb", user='postgres', password='password', host='127.0.0.1', port= '5432'
)

#Setting auto commit false
conn.autocommit = True

#Creating a cursor object using the cursor() method
cursor = conn.cursor()

#Doping EMPLOYEE table if already exists.
cursor.execute("DROP TABLE IF EXISTS EMPLOYEE")
sql = '''CREATE TABLE EMPLOYEE(
   FIRST_NAME CHAR(20) NOT NULL,
   LAST_NAME CHAR(20),
   AGE INT,
   SEX CHAR(1),
   INCOME FLOAT
)'''
cursor.execute(sql)

#Populating the table
insert_stmt = "INSERT INTO EMPLOYEE (FIRST_NAME, LAST_NAME, AGE, SEX, INCOME)
   VALUES (%s, %s, %s, %s, %s)"
data = [('Krishna', 'Sharma', 19, 'M', 2000),
   ('Raj', 'Kandukuri', 20, 'M', 7000),
   ('Ramya', 'Ramapriya', 25, 'M', 5000),
   ('Mac', 'Mohan', 26, 'M', 2000)]
cursor.executemany(insert_stmt, data)

#Retrieving specific records using the where clause
cursor.execute("SELECT * from EMPLOYEE WHERE AGE <23")
print(cursor.fetchall())

#Commit your changes in the database
conn.commit()

#Closing the connection
conn.close()
輸出
[('Krishna', 'Sharma', 19, 'M', 2000.0), ('Raj', 'Kandukuri', 20, 'M', 7000.0)]
Python PostgreSQL - Order By
通常,如果您嘗試從表中檢索資料,您將按照插入它們的順序獲得記錄。
使用 ORDER BY 子句,在檢索表的記錄時,您可以根據所需的列按升序或降序對結果記錄進行排序。
語法
以下是 PostgreSQL 中 ORDER BY 子句的語法。
SELECT column-list
FROM table_name
[WHERE condition]
[ORDER BY column1, column2, .. columnN] [ASC | DESC];
示例
假設我們已使用以下查詢建立了一個名為 CRICKETERS 的表:
postgres=# CREATE TABLE CRICKETERS (
   First_Name VARCHAR(255), Last_Name VARCHAR(255),
   Age int, Place_Of_Birth VARCHAR(255), Country VARCHAR(255)
);
CREATE TABLE
postgres=#
如果我們使用 INSERT 語句向其中插入了 5 條記錄,如下所示:
postgres=# insert into CRICKETERS values('Shikhar', 'Dhawan', 33, 'Delhi', 'India');
INSERT 0 1
postgres=# insert into CRICKETERS values('Jonathan', 'Trott', 38, 'CapeTown', 'SouthAfrica');
INSERT 0 1
postgres=# insert into CRICKETERS values('Kumara', 'Sangakkara', 41, 'Matale', 'Srilanka');
INSERT 0 1
postgres=# insert into CRICKETERS values('Virat', 'Kohli', 30, 'Delhi', 'India');
INSERT 0 1
postgres=# insert into CRICKETERS values('Rohit', 'Sharma', 32, 'Nagpur', 'India');
INSERT 0 1
以下 SELECT 語句按年齡的升序檢索 CRICKETERS 表的行:
postgres=# SELECT * FROM CRICKETERS ORDER BY AGE;
first_name  | last_name  | age | place_of_birth | country
------------+------------+-----+----------------+-------------
Virat       | Kohli      | 30  | Delhi          | India
Rohit       | Sharma     | 32  | Nagpur         | India
Shikhar     | Dhawan     | 33  | Delhi          | India
Jonathan    | Trott      | 38  | CapeTown       | SouthAfrica
Kumara      | Sangakkara | 41  | Matale         | Srilanka
(5 rows)es:
您可以使用多個列對錶的記錄進行排序。以下 SELECT 語句根據年齡和 FIRST_NAME 列對 CRICKETERS 表的記錄進行排序。
postgres=# SELECT * FROM CRICKETERS ORDER BY AGE, FIRST_NAME;
first_name  | last_name  | age | place_of_birth | country
------------+------------+-----+----------------+-------------
Virat       | Kohli      | 30  | Delhi          | India
Rohit       | Sharma     | 32  | Nagpur         | India
Shikhar     | Dhawan     | 33  | Delhi          | India
Jonathan    | Trott      | 38  | CapeTown       | SouthAfrica
Kumara      | Sangakkara | 41  | Matale         | Srilanka
(5 rows)
預設情況下,ORDER BY 子句按升序對錶的記錄進行排序。您可以使用 DESC 將結果排列為降序,如下所示:
postgres=# SELECT * FROM CRICKETERS ORDER BY AGE DESC;
first_name  | last_name  | age | place_of_birth | country
------------+------------+-----+----------------+-------------
Kumara      | Sangakkara | 41  | Matale         | Srilanka
Jonathan    | Trott      | 38  | CapeTown       | SouthAfrica
Shikhar     | Dhawan     | 33  | Delhi          | India
Rohit       | Sharma     | 32  | Nagpur         | India
Virat       | Kohli      | 30  | Delhi          | India
(5 rows)
使用 python 的 ORDER BY 子句
要按特定順序檢索表的內容,請在遊標物件上呼叫 execute() 方法,並將 SELECT 語句以及 ORDER BY 子句作為引數傳遞給它。
示例
在以下示例中,我們正在建立一個名為 Employee 的表,對其進行填充,並使用 ORDER BY 子句按其年齡的(升序)順序檢索其記錄。
import psycopg2

#establishing the connection
conn = psycopg2.connect(
   database="mydb", user='postgres', password='password', host='127.0.0.1', port= '5432'
)

#Setting auto commit false
conn.autocommit = True

#Creating a cursor object using the cursor() method
cursor = conn.cursor()

#Doping EMPLOYEE table if already exists.
cursor.execute("DROP TABLE IF EXISTS EMPLOYEE")

#Creating a table
sql = '''CREATE TABLE EMPLOYEE(
   FIRST_NAME CHAR(20) NOT NULL,
   LAST_NAME CHAR(20),
   AGE INT, SEX CHAR(1),
   INCOME INT,
   CONTACT INT
)'''
cursor.execute(sql)

#Populating the table
insert_stmt = "INSERT INTO EMPLOYEE (
   FIRST_NAME, LAST_NAME, AGE, SEX, INCOME, CONTACT) VALUES
   (%s, %s, %s, %s, %s, %s)"
data = [('Krishna', 'Sharma', 26, 'M', 2000, 101),
   ('Raj', 'Kandukuri', 20, 'M', 7000, 102),
   ('Ramya', 'Ramapriya', 29, 'F', 5000, 103),
   ('Mac', 'Mohan', 26, 'M', 2000, 104)]
cursor.executemany(insert_stmt, data)
conn.commit()

#Retrieving specific records using the ORDER BY clause
cursor.execute("SELECT * from EMPLOYEE ORDER BY AGE")
print(cursor.fetchall())

#Commit your changes in the database
conn.commit()

#Closing the connection
conn.close()
輸出
[('Sharukh', 'Sheik', 25, 'M', 8300.0), ('Sarmista', 'Sharma', 26, 'F', 10000.0)]
Python PostgreSQL - 更新表
您可以使用 UPDATE 語句修改 PostgreSQL 中現有表中現有記錄的內容。要更新特定行,您需要與之一起使用 WHERE 子句。
語法
以下是 PostgreSQL 中 UPDATE 語句的語法:
UPDATE table_name
SET column1 = value1, column2 = value2...., columnN = valueN
WHERE [condition];
示例
假設我們已使用以下查詢建立了一個名為 CRICKETERS 的表:
postgres=# CREATE TABLE CRICKETERS (
   First_Name VARCHAR(255), Last_Name VARCHAR(255),
   Age int, Place_Of_Birth VARCHAR(255), Country VARCHAR(255)
);
CREATE TABLE
postgres=#
如果我們使用 INSERT 語句向其中插入了 5 條記錄,如下所示:
postgres=# insert into CRICKETERS values('Shikhar', 'Dhawan', 33, 'Delhi', 'India');
INSERT 0 1
postgres=# insert into CRICKETERS values('Jonathan', 'Trott', 38, 'CapeTown', 'SouthAfrica');
INSERT 0 1
postgres=# insert into CRICKETERS values('Kumara', 'Sangakkara', 41, 'Matale', 'Srilanka');
INSERT 0 1
postgres=# insert into CRICKETERS values('Virat', 'Kohli', 30, 'Delhi', 'India');
INSERT 0 1
postgres=# insert into CRICKETERS values('Rohit', 'Sharma', 32, 'Nagpur', 'India');
INSERT 0 1
以下語句修改了名為 Shikhar 的板球運動員的年齡:
postgres=# UPDATE CRICKETERS SET AGE = 45 WHERE FIRST_NAME = 'Shikhar' ;
UPDATE 1
postgres=#
如果您檢索 FIRST_NAME 為 Shikhar 的記錄,您會發現年齡值已更改為 45:
postgres=# SELECT * FROM CRICKETERS WHERE FIRST_NAME = 'Shikhar';
first_name  | last_name | age | place_of_birth | country
------------+-----------+-----+----------------+---------
Shikhar     | Dhawan    | 45  | Delhi          | India
(1 row)
postgres=#
如果您未使用 WHERE 子句,則所有記錄的值都將更新。以下 UPDATE 語句將 CRICKETERS 表中所有記錄的年齡增加 1:
postgres=# UPDATE CRICKETERS SET AGE = AGE+1;
UPDATE 5
如果您使用 SELECT 命令檢索表的內容,則可以看到更新後的值,如下所示:
postgres=# SELECT * FROM CRICKETERS;
first_name  | last_name  | age | place_of_birth | country
------------+------------+-----+----------------+-------------
Jonathan    | Trott      | 39  | CapeTown       | SouthAfrica
Kumara      | Sangakkara | 42  | Matale         | Srilanka
Virat       | Kohli      | 31  | Delhi          | India
Rohit       | Sharma     | 33  | Nagpur         | India
Shikhar     | Dhawan     | 46  | Delhi          | India
(5 rows)
使用 Python 更新記錄
psycopg2 的 cursor 類提供了一個名為 execute() 的方法。此方法接受查詢作為引數並執行它。
因此,要使用 Python 在 PostgreSQL 中將資料插入表中:
匯入 psycopg2 包。
使用 connect() 方法建立一個連線物件,將其使用者名稱、密碼、主機(可選,預設:localhost)和資料庫(可選)作為引數傳遞給它。
透過將 false 作為值設定為屬性 autocommit 來關閉自動提交模式。
psycopg2 庫的 Connection 類的 cursor() 方法返回一個遊標物件。使用此方法建立一個遊標物件。
然後,透過將其作為引數傳遞給 execute() 方法來執行 UPDATE 語句。
示例
以下 Python 程式碼更新 Employee 表的內容並檢索結果:
import psycopg2

#establishing the connection
conn = psycopg2.connect(
   database="mydb", user='postgres', password='password', host='127.0.0.1', port= '5432'
)

#Setting auto commit false
conn.autocommit = True

#Creating a cursor object using the cursor() method
cursor = conn.cursor()

#Fetching all the rows before the update
print("Contents of the Employee table: ")
sql = '''SELECT * from EMPLOYEE'''
cursor.execute(sql)
print(cursor.fetchall())

#Updating the records
sql = "UPDATE EMPLOYEE SET AGE = AGE + 1 WHERE SEX = 'M'"
cursor.execute(sql)
print("Table updated...... ")

#Fetching all the rows after the update
print("Contents of the Employee table after the update operation: ")
sql = '''SELECT * from EMPLOYEE'''
cursor.execute(sql)
print(cursor.fetchall())

#Commit your changes in the database
conn.commit()

#Closing the connection
conn.close()
輸出
Contents of the Employee table:
[('Ramya', 'Rama priya', 27, 'F', 9000.0),
   ('Vinay', 'Battacharya', 20, 'M', 6000.0),
   ('Sharukh', 'Sheik', 25, 'M', 8300.0),
   ('Sarmista', 'Sharma', 26, 'F', 10000.0),
   ('Tripthi', 'Mishra', 24, 'F', 6000.0)]
Table updated......
Contents of the Employee table after the update operation:
[('Ramya', 'Rama priya', 27, 'F', 9000.0),
   ('Sarmista', 'Sharma', 26, 'F', 10000.0),
   ('Tripthi', 'Mishra', 24, 'F', 6000.0),
   ('Vinay', 'Battacharya', 21, 'M', 6000.0),
   ('Sharukh', 'Sheik', 26, 'M', 8300.0)]
Python PostgreSQL - 刪除資料
您可以使用 PostgreSQL 資料庫的 DELETE FROM 語句刪除現有表中的記錄。要刪除特定記錄,您需要與之一起使用 WHERE 子句。
語法
以下是 PostgreSQL 中 DELETE 查詢的語法:
DELETE FROM table_name [WHERE Clause]
示例
假設我們已使用以下查詢建立了一個名為 CRICKETERS 的表:
postgres=# CREATE TABLE CRICKETERS (
   First_Name VARCHAR(255), Last_Name VARCHAR(255),
   Age int, Place_Of_Birth VARCHAR(255), Country VARCHAR(255)
);
CREATE TABLE
postgres=#
如果我們使用 INSERT 語句向其中插入了 5 條記錄,如下所示:
postgres=# insert into CRICKETERS values ('Shikhar', 'Dhawan', 33, 'Delhi', 'India');
INSERT 0 1
postgres=# insert into CRICKETERS values ('Jonathan', 'Trott', 38, 'CapeTown', 'SouthAfrica');
INSERT 0 1
postgres=# insert into CRICKETERS values ('Kumara', 'Sangakkara', 41, 'Matale', 'Srilanka');
INSERT 0 1
postgres=# insert into CRICKETERS values ('Virat', 'Kohli', 30, 'Delhi', 'India');
INSERT 0 1
postgres=# insert into CRICKETERS values ('Rohit', 'Sharma', 32, 'Nagpur', 'India');
INSERT 0 1
以下語句刪除了姓氏為“Sangakkara”的板球運動員的記錄。−
postgres=# DELETE FROM CRICKETERS WHERE LAST_NAME = 'Sangakkara';
DELETE 1
如果您使用 SELECT 語句檢索表的內容,您只會看到 4 條記錄,因為我們刪除了一條。
postgres=# SELECT * FROM CRICKETERS;
first_name  | last_name | age | place_of_birth | country
------------+-----------+-----+----------------+-------------
Jonathan    | Trott     | 39  | CapeTown       | SouthAfrica
Virat       | Kohli     | 31  | Delhi          | India
Rohit       | Sharma    | 33  | Nagpur         | India
Shikhar     | Dhawan    | 46  | Delhi          | India
(4 rows)
如果您在沒有 WHERE 子句的情況下執行 DELETE FROM 語句,則指定表中的所有記錄都將被刪除。
postgres=# DELETE FROM CRICKETERS;
DELETE 4
由於您已刪除所有記錄,如果您嘗試使用 SELECT 語句檢索 CRICKETERS 表的內容,您將獲得一個空的結果集,如下所示 −
postgres=# SELECT * FROM CRICKETERS;
first_name  | last_name | age | place_of_birth | country
------------+-----------+-----+----------------+---------
(0 rows)
使用 Python 刪除資料
psycopg2 的 cursor 類提供了一個名為 execute() 的方法。此方法接受查詢作為引數並執行它。
因此,要使用 Python 在 PostgreSQL 中將資料插入表中:
匯入 psycopg2 包。
使用 connect() 方法建立一個連線物件,將其使用者名稱、密碼、主機(可選,預設:localhost)和資料庫(可選)作為引數傳遞給它。
透過將 false 作為值設定為屬性 autocommit 來關閉自動提交模式。
psycopg2 庫的 Connection 類的 cursor() 方法返回一個遊標物件。使用此方法建立遊標物件。
然後,透過將其作為引數傳遞給 execute() 方法來執行 UPDATE 語句。
示例
以下 Python 程式碼刪除 EMPLOYEE 表中年齡值大於 25 的記錄 −
import psycopg2

#establishing the connection
conn = psycopg2.connect(
   database="mydb", user='postgres', password='password', host='127.0.0.1', port= '5432'
)

#Setting auto commit false
conn.autocommit = True

#Creating a cursor object using the cursor() method
cursor = conn.cursor()

#Retrieving contents of the table
print("Contents of the table: ")
cursor.execute('''SELECT * from EMPLOYEE''')
print(cursor.fetchall())

#Deleting records
cursor.execute('''DELETE FROM EMPLOYEE WHERE AGE > 25''')

#Retrieving data after delete
print("Contents of the table after delete operation ")
cursor.execute("SELECT * from EMPLOYEE")
print(cursor.fetchall())

#Commit your changes in the database
conn.commit()

#Closing the connection
conn.close()
輸出
Contents of the table:
[('Ramya', 'Rama priya', 27, 'F', 9000.0),
   ('Sarmista', 'Sharma', 26, 'F', 10000.0),
   ('Tripthi', 'Mishra', 24, 'F', 6000.0),
   ('Vinay', 'Battacharya', 21, 'M', 6000.0),
   ('Sharukh', 'Sheik', 26, 'M', 8300.0)]
Contents of the table after delete operation:
[('Tripthi', 'Mishra', 24, 'F', 6000.0),
   ('Vinay', 'Battacharya', 21, 'M', 6000.0)]
Python PostgreSQL - 刪除表
您可以使用 DROP TABLE 語句從 PostgreSQL 資料庫中刪除表。
語法
以下是 PostgreSQL 中 DROP TABLE 語句的語法 −
DROP TABLE table_name;
示例
假設我們使用以下查詢建立了兩個名為 CRICKETERS 和 EMPLOYEES 的表 −
postgres=# CREATE TABLE CRICKETERS (
   First_Name VARCHAR(255), Last_Name VARCHAR(255), Age int,
   Place_Of_Birth VARCHAR(255), Country VARCHAR(255)
);
CREATE TABLE
postgres=#
postgres=# CREATE TABLE EMPLOYEE(
   FIRST_NAME CHAR(20) NOT NULL, LAST_NAME CHAR(20), AGE INT,
   SEX CHAR(1), INCOME FLOAT
);
CREATE TABLE
postgres=#
現在,如果您使用“\dt”命令驗證表列表,您可以看到上面建立的表,如下所示 −
postgres=# \dt;
List of relations
Schema  | Name       | Type  | Owner
--------+------------+-------+----------
public  | cricketers | table | postgres
public  | employee   | table | postgres
(2 rows)
postgres=#
以下語句刪除資料庫中名為 Employee 的表 −
postgres=# DROP table employee;
DROP TABLE
由於您已刪除 Employee 表,如果您再次檢索表列表,您會發現其中只有一個表。
postgres=# \dt;
List of relations
Schema  | Name       | Type  | Owner
--------+------------+-------+----------
public  | cricketers | table | postgres
(1 row)
postgres=#
如果您嘗試再次刪除 Employee 表,由於您已經刪除了它,您將收到一條錯誤訊息,提示“表不存在”,如下所示 −
postgres=# DROP table employee;
ERROR: table "employee" does not exist
postgres=#
要解決此問題,您可以將 IF EXISTS 子句與 DELTE 語句一起使用。如果表存在,則刪除該表,否則跳過 DLETE 操作。
postgres=# DROP table IF EXISTS employee;
NOTICE: table "employee" does not exist, skipping
DROP TABLE
postgres=#
使用 Python 刪除整個表
您可以根據需要使用 DROP 語句刪除表。但在刪除任何現有表時,您需要非常小心,因為刪除表後,丟失的資料將無法恢復。
import psycopg2

#establishing the connection
conn = psycopg2.connect(
   database="mydb", user='postgres', password='password', host='127.0.0.1', port= '5432'
)

#Setting auto commit false
conn.autocommit = True

#Creating a cursor object using the cursor() method
cursor = conn.cursor()

#Doping EMPLOYEE table if already exists
cursor.execute("DROP TABLE emp")
print("Table dropped... ")

#Commit your changes in the database
conn.commit()

#Closing the connection
conn.close()
輸出
#Table dropped...
Python PostgreSQL - Limit
在執行 PostgreSQL SELECT 語句時,您可以使用 LIMIT 子句限制其結果中的記錄數。
語法
以下是 PostgreSQL 中 LMIT 子句的語法 −
SELECT column1, column2, columnN
FROM table_name
LIMIT [no of rows]
示例
假設我們已使用以下查詢建立了一個名為 CRICKETERS 的表:
postgres=# CREATE TABLE CRICKETERS (
   First_Name VARCHAR(255), Last_Name VARCHAR(255), Age int,
   Place_Of_Birth VARCHAR(255), Country VARCHAR(255)
);
CREATE TABLE
postgres=#
如果我們使用 INSERT 語句向其中插入了 5 條記錄,如下所示:
postgres=# insert into CRICKETERS values ('Shikhar', 'Dhawan', 33, 'Delhi', 'India');
INSERT 0 1
postgres=# insert into CRICKETERS values ('Jonathan', 'Trott', 38, 'CapeTown', 'SouthAfrica');
INSERT 0 1
postgres=# insert into CRICKETERS values ('Kumara', 'Sangakkara', 41, 'Matale', 'Srilanka');
INSERT 0 1
postgres=# insert into CRICKETERS values ('Virat', 'Kohli', 30, 'Delhi', 'India');
INSERT 0 1
postgres=# insert into CRICKETERS values ('Rohit', 'Sharma', 32, 'Nagpur', 'India');
INSERT 0 1
以下語句使用 LIMIT 子句檢索 Cricketers 表的前 3 條記錄 −
postgres=# SELECT * FROM CRICKETERS LIMIT 3;
first_name  | last_name  | age | place_of_birth | country
------------+------------+-----+----------------+-------------
Shikhar     | Dhawan     | 33  | Delhi          | India
Jonathan    | Trott      | 38  | CapeTown       | SouthAfrica
Kumara      | Sangakkara | 41  | Matale         | Srilanka
(3 rows)
如果您想從特定記錄(偏移量)開始獲取記錄,您可以使用 OFFSET 子句與 LIMIT 一起執行此操作。
postgres=# SELECT * FROM CRICKETERS LIMIT 3 OFFSET 2;
first_name  | last_name  | age | place_of_birth | country
------------+------------+-----+----------------+----------
Kumara      | Sangakkara | 41  | Matale         | Srilanka
Virat       | Kohli      | 30  | Delhi          | India
Rohit       | Sharma     | 32  | Nagpur         | India
(3 rows)
postgres=#
使用 python 的 Limit 子句
以下 Python 示例檢索名為 EMPLOYEE 的表的內容,並將結果中的記錄數限制為 2 −
示例
import psycopg2

#establishing the connection
conn = psycopg2.connect(
   database="mydb", user='postgres', password='password', host='127.0.0.1', port= '5432'
)

#Setting auto commit false
conn.autocommit = True

#Creating a cursor object using the cursor() method
cursor = conn.cursor()

#Retrieving single row
sql = '''SELECT * from EMPLOYEE LIMIT 2 OFFSET 2'''

#Executing the query
cursor.execute(sql)

#Fetching the data
result = cursor.fetchall();
print(result)

#Commit your changes in the database
conn.commit()

#Closing the connection
conn.close()
輸出
[('Sharukh', 'Sheik', 25, 'M', 8300.0), ('Sarmista', 'Sharma', 26, 'F', 10000.0)]
Python PostgreSQL - Join
當您將資料分成兩個表時,您可以使用聯接從這兩個表中獲取組合的記錄。
示例
假設我們建立了一個名為 CRICKETERS 的表,並在其中插入了 5 條記錄,如下所示 −
postgres=# CREATE TABLE CRICKETERS (
   First_Name VARCHAR(255), Last_Name VARCHAR(255), Age int,
   Place_Of_Birth VARCHAR(255), Country VARCHAR(255)
);
postgres=# insert into CRICKETERS values (
   'Shikhar', 'Dhawan', 33, 'Delhi', 'India'
);
postgres=# insert into CRICKETERS values (
   'Jonathan', 'Trott', 38, 'CapeTown', 'SouthAfrica'
);
postgres=# insert into CRICKETERS values (
   'Kumara', 'Sangakkara', 41, 'Matale', 'Srilanka'
);
postgres=# insert into CRICKETERS values (
   'Virat', 'Kohli', 30, 'Delhi', 'India'
);
postgres=# insert into CRICKETERS values (
   'Rohit', 'Sharma', 32, 'Nagpur', 'India'
);
並且,如果我們建立了另一個名為 OdiStats 的表並在其中插入了 5 條記錄,如下所示 −
postgres=# CREATE TABLE ODIStats (
   First_Name VARCHAR(255), Matches INT, Runs INT, AVG FLOAT,
   Centuries INT, HalfCenturies INT
);
postgres=# insert into OdiStats values ('Shikhar', 133, 5518, 44.5, 17, 27);
postgres=# insert into OdiStats values ('Jonathan', 68, 2819, 51.25, 4, 22);
postgres=# insert into OdiStats values ('Kumara', 404, 14234, 41.99, 25, 93);
postgres=# insert into OdiStats values ('Virat', 239, 11520, 60.31, 43, 54);
postgres=# insert into OdiStats values ('Rohit', 218, 8686, 48.53, 24, 42);
以下語句檢索這兩個表中值的組合資料:
postgres=# SELECT
Cricketers.First_Name, Cricketers.Last_Name, Cricketers.Country,
OdiStats.matches, OdiStats.runs, OdiStats.centuries, OdiStats.halfcenturies
from Cricketers INNER JOIN OdiStats ON Cricketers.First_Name = OdiStats.First_Name;
first_name  | last_name  | country     | matches | runs  | centuries | halfcenturies
------------+------------+-------------+---------+-------+-----------+---------------
Shikhar     | Dhawan     | India       | 133     | 5518  | 17        | 27
Jonathan    | Trott      | SouthAfrica | 68      | 2819  | 4         | 22
Kumara      | Sangakkara | Srilanka    | 404     | 14234 | 25        | 93
Virat       | Kohli      | India       | 239     | 11520 | 43        | 54
Rohit       | Sharma     | India       | 218     | 8686  | 24        | 42
(5 rows)
postgres=#
使用 Python 連線
當您將資料分成兩個表時,您可以使用聯接從這兩個表中獲取組合的記錄。
示例
以下 Python 程式演示了 JOIN 子句的使用 −
import psycopg2

#establishing the connection
conn = psycopg2.connect(
   database="mydb", user='postgres', password='password', host='127.0.0.1', port= '5432'
)
#Setting auto commit false
conn.autocommit = True

#Creating a cursor object using the cursor() method
cursor = conn.cursor()

#Retrieving single row
sql = '''SELECT * from EMP INNER JOIN CONTACT ON EMP.CONTACT = CONTACT.ID'''

#Executing the query
cursor.execute(sql)

#Fetching 1st row from the table
result = cursor.fetchall();
print(result)

#Commit your changes in the database
conn.commit()

#Closing the connection
conn.close()
輸出
[('Ramya', 'Rama priya', 27, 'F', 9000.0, 101, 101, 'Krishna@mymail.com', 'Hyderabad'),
   ('Vinay', 'Battacharya', 20, 'M', 6000.0, 102, 102, 'Raja@mymail.com', 'Vishakhapatnam'),
   ('Sharukh', 'Sheik', 25, 'M', 8300.0, 103, 103, 'Krishna@mymail.com ', 'Pune'),
   ('Sarmista', 'Sharma', 26, 'F', 10000.0, 104, 104, 'Raja@mymail.com', 'Mumbai')]
Python PostgreSQL - 遊標物件
psycopg 庫的 Cursor 類提供方法,可以使用 Python 程式碼在資料庫中執行 PostgreSQL 命令。
使用它的方法,您可以執行 SQL 語句、從結果集中獲取資料、呼叫過程。
您可以使用 Connection 物件/類的 cursor() 方法建立 Cursor 物件。
示例
import psycopg2

#establishing the connection
conn = psycopg2.connect(
   database="mydb", user='postgres', password='password', host='127.0.0.1', port= '5432'
)

#Setting auto commit false
conn.autocommit = True

#Creating a cursor object using the cursor() method
cursor = conn.cursor()
方法
以下是 Cursor 類/物件提供的各種方法。
| 序號 | 方法和描述 |
|---|---|
| 1 | callproc() 此方法用於呼叫 PostgreSQL 資料庫中現有的過程。 |
| 2 | close() 此方法用於關閉當前遊標物件。 |
| 3 | executemany() 此方法接受一系列引數列表。準備一個 MySQL 查詢並使用所有引數執行它。 |
| 4 | execute() 此方法接受 MySQL 查詢作為引數並執行給定的查詢。 |
| 5 | fetchall() 此方法檢索查詢結果集中的所有行,並將其作為元組列表返回。(如果我們在檢索了幾行後執行此操作,它將返回剩餘的行) |
| 6 | fetchone() 此方法獲取查詢結果中的下一行,並將其作為元組返回。 |
| 7 | fetchmany() 此方法類似於 fetchone(),但它檢索查詢結果集中的下一組行,而不是單個行。 |
屬性
以下是 Cursor 類的屬性:
| 序號 | 屬性和描述 |
|---|---|
| 1 | description 這是一個只讀屬性,它返回包含結果集中列的描述的列表。 |
| 2 | astrowid 這是一個只讀屬性,如果表中存在任何自動遞增列,則返回上次 INSERT 或 UPDATE 操作為此列生成的數值。 |
| 3 | 行數 (rowcount) 在 SELECT 和 UPDATE 操作的情況下,此屬性返回返回/更新的行數。 |
| 4 | closed 此屬性指定遊標是否已關閉,如果是,則返回 true,否則返回 false。 |
| 5 | connection 這將返回對建立此遊標所使用的連線物件的引用。 |
| 6 | name 此屬性返回遊標的名稱。 |
| 7 | scrollable 此屬性指定特定遊標是否可滾動。 |
Python SQLite - 簡介
安裝
SQLite3 可以使用 sqlite3 模組與 Python 整合,該模組由 Gerhard Haring 編寫。它提供了一個符合 PEP 249 描述的 DB-API 2.0 規範的 SQL 介面。您無需單獨安裝此模組,因為它預設與 Python 2.5.x 及更高版本一起提供。
要使用 sqlite3 模組,您必須首先建立一個表示資料庫的連線物件,然後您可以選擇建立一個遊標物件,這將幫助您執行所有 SQL 語句。
Python sqlite3 模組 API
以下是重要的 sqlite3 模組例程,它們足以滿足您從 Python 程式中使用 SQLite 資料庫的要求。如果您正在尋找更復雜的應用程式,則可以檢視 Python sqlite3 模組的官方文件。
| 序號 | API 和說明 |
|---|---|
| 1 | sqlite3.connect(database [,timeout ,其他可選引數]) 此 API 開啟到 SQLite 資料庫檔案的連線。您可以使用“:memory:”開啟到駐留在 RAM 而不是磁碟上的資料庫的資料庫連線。如果資料庫成功開啟,它將返回一個連線物件。 |
| 2 | connection.cursor([cursorClass]) 此例程建立一個遊標,它將在您使用 Python 進行資料庫程式設計時使用。此方法接受一個可選引數 cursorClass。如果提供,則它必須是擴充套件 sqlite3.Cursor 的自定義遊標類。 |
| 3 | cursor.execute(sql [, 可選引數]) 此例程執行 SQL 語句。SQL 語句可以是引數化的(即使用佔位符而不是 SQL 字面量)。sqlite3 模組支援兩種佔位符:問號和命名佔位符(命名樣式)。 例如 − cursor.execute("insert into people values (?, ?)", (who, age)) |
| 4 | connection.execute(sql [, 可選引數]) 此例程是遊標物件提供的上述 execute 方法的快捷方式,它透過呼叫 cursor 方法建立一箇中間遊標物件,然後使用給定的引數呼叫遊標的 execute 方法。 |
| 5 | cursor.executemany(sql, seq_of_parameters) 此例程對序列 sql 中找到的所有引數序列或對映執行 SQL 命令。 |
| 6 | connection.executemany(sql[, parameters]) 此例程是一個快捷方式,它透過呼叫 cursor 方法建立一箇中間遊標物件,然後使用給定的引數呼叫 cursor.s executemany 方法。 |
| 7 | cursor.executescript(sql_script) 此例程一次執行以指令碼形式提供的多個 SQL 語句。它首先發出一個 COMMIT 語句,然後執行它作為引數獲得的 SQL 指令碼。所有 SQL 語句都應以分號 (;) 分隔。 |
| 8 | connection.executescript(sql_script) 此例程是一個快捷方式,它透過呼叫 cursor 方法建立一箇中間遊標物件,然後使用給定的引數呼叫遊標的 executescript 方法。 |
| 9 | connection.total_changes() 此例程返回自資料庫連線開啟以來已修改、插入或刪除的資料庫行的總數。 |
| 10 | connection.commit() 此方法提交當前事務。如果您不呼叫此方法,則自上次呼叫 commit() 以來所做的任何操作在其他資料庫連線中都不可見。 |
| 11 | connection.rollback() 此方法回滾自上次呼叫 commit() 以來對資料庫的任何更改。 |
| 12 | connection.close() 此方法關閉資料庫連線。請注意,這不會自動呼叫 commit()。如果您只是關閉資料庫連線而沒有先呼叫 commit(),則您的更改將丟失! |
| 13 | cursor.fetchone() 此方法獲取查詢結果集的下一行,返回單個序列,或者當沒有更多資料可用時返回 None。 |
| 14 | cursor.fetchmany([size = cursor.arraysize]) 此例程獲取查詢結果的下一組行,返回一個列表。當沒有更多行可用時,將返回一個空列表。該方法嘗試獲取與 size 引數指示的相同數量的行。 |
| 15 | cursor.fetchall() 此例程獲取查詢結果的所有(剩餘)行,返回一個列表。當沒有行可用時,將返回一個空列表。 |
Python SQLite - 建立連線
要與 SQLite 建立連線,請開啟命令提示符,瀏覽到您已安裝 SQLite 的位置,然後只需執行命令sqlite3,如下所示 −

使用 Python 建立連線
您可以使用 SQLite3 python 模組與 SQLite2 資料庫通訊。為此,首先需要建立連線(建立連線物件)。
要使用 python 與 SQLite3 資料庫建立連線,您需要 −
使用 import 語句匯入 sqlite3 模組。
connect() 方法接受您需要連線到的資料庫的名稱作為引數,並返回一個 Connection 物件。
示例
import sqlite3
conn = sqlite3.connect('example.db')
輸出
print("Connection established ..........")
Python SQLite - 建立表
使用 SQLite CREATE TABLE 語句,您可以在資料庫中建立表。
語法
以下是建立 SQLite 資料庫中表的語法 −
CREATE TABLE database_name.table_name(
   column1 datatype PRIMARY KEY(one or more columns),
   column2 datatype,
   column3 datatype,
   .....
   columnN datatype
);
示例
以下 SQLite 查詢/語句在 SQLite 資料庫中建立了一個名為CRICKETERS的表 −
sqlite> CREATE TABLE CRICKETERS (
   First_Name VARCHAR(255),
   Last_Name VARCHAR(255),
   Age int,
   Place_Of_Birth VARCHAR(255),
   Country VARCHAR(255)
);
sqlite>
讓我們再建立一個名為 OdiStats 的表,描述 CRICKETERS 表中每個球員的一日板球統計資料。
sqlite> CREATE TABLE ODIStats (
   First_Name VARCHAR(255),
   Matches INT,
   Runs INT,
   AVG FLOAT,
   Centuries INT,
   HalfCenturies INT
);
sqlite
您可以使用.tables命令獲取 SQLite 資料庫中表的列表。建立表後,如果您驗證表列表,您可以在其中看到新建立的表,如下所示 −
sqlite> . tables
CRICKETERS ODIStats
sqlite>
使用 Python 建立表
Cursor 物件包含執行查詢和獲取資料等的所有方法。connection 類的 cursor 方法返回一個遊標物件。
因此,要使用 python 在 SQLite 資料庫中建立表 −
使用 connect() 方法與資料庫建立連線。
透過在上面建立的連線物件上呼叫 cursor() 方法來建立遊標物件。
現在使用 Cursor 類的 execute() 方法執行 CREATE TABLE 語句。
示例
以下 Python 程式在 SQLite3 中建立了一個名為 Employee 的表 −
import sqlite3

#Connecting to sqlite
conn = sqlite3.connect('example.db')

#Creating a cursor object using the cursor() method
cursor = conn.cursor()

#Doping EMPLOYEE table if already exists.
cursor.execute("DROP TABLE IF EXISTS EMPLOYEE")

#Creating table as per requirement
sql ='''CREATE TABLE EMPLOYEE(
   FIRST_NAME CHAR(20) NOT NULL,
   LAST_NAME CHAR(20),
   AGE INT,
   SEX CHAR(1),
   INCOME FLOAT
)'''
cursor.execute(sql)
print("Table created successfully........")

# Commit your changes in the database
conn.commit()

#Closing the connection
conn.close()
輸出
Table created successfully........
Python SQLite - 插入資料
您可以使用 INSERT INTO 語句向 SQLite 的現有表中新增新行。在此,您需要指定表的名稱、列名和值(與列名相同的順序)。
語法
以下是 INSERT 語句的推薦語法:
INSERT INTO TABLE_NAME (column1, column2, column3,...columnN)
VALUES (value1, value2, value3,...valueN);
其中,column1、column2、column3、.. 是表的列名,value1、value2、value3、.. 是您需要插入表中的值。
示例
假設我們已使用 CREATE TABLE 語句建立了一個名為 CRICKETERS 的表,如下所示:
sqlite> CREATE TABLE CRICKETERS (
   First_Name VARCHAR(255),
   Last_Name VARCHAR(255),
   Age int,
   Place_Of_Birth VARCHAR(255),
   Country VARCHAR(255)
);
sqlite>
以下 PostgreSQL 語句在上面建立的表中插入一行。
sqlite> insert into CRICKETERS
   (First_Name, Last_Name, Age, Place_Of_Birth, Country) values
   ('Shikhar', 'Dhawan', 33, 'Delhi', 'India');
sqlite>
在使用 INSERT INTO 語句插入記錄時,如果您跳過任何列名,則此記錄將被插入,在您跳過的列處留下空白。
sqlite> insert into CRICKETERS
   (First_Name, Last_Name, Country) values
   ('Jonathan', 'Trott', 'SouthAfrica');
sqlite>
如果傳遞的值的順序與表中各自的列名相同,則您也可以在不指定列名的情況下將記錄插入表中。
sqlite> insert into CRICKETERS values('Kumara', 'Sangakkara', 41, 'Matale', 'Srilanka');
sqlite> insert into CRICKETERS values('Virat', 'Kohli', 30, 'Delhi', 'India');
sqlite> insert into CRICKETERS values('Rohit', 'Sharma', 32, 'Nagpur', 'India');
sqlite>
將記錄插入表後,您可以使用 SELECT 語句驗證其內容,如下所示:
sqlite> select * from cricketers;
Shikhar  | Dhawan     | 33 | Delhi  | India
Jonathan | Trott      |    |        | SouthAfrica
Kumara   | Sangakkara | 41 | Matale | Srilanka
Virat    | Kohli      | 30 | Delhi  | India
Rohit    | Sharma     | 32 | Nagpur | India
sqlite>
使用 Python 插入資料
要向 SQLite 資料庫中的現有表新增記錄 −
匯入 sqlite3 包。
使用 connect() 方法建立連線物件,並將資料庫的名稱作為引數傳遞給它。
cursor()方法返回一個遊標物件,您可以使用它與 SQLite3 通訊。透過在(上面建立的)Connection 物件上呼叫 cursor() 物件來建立遊標物件。
然後,在遊標物件上呼叫 execute() 方法,並將 INSERT 語句作為引數傳遞給它。
示例
以下 python 示例將記錄插入到名為 EMPLOYEE 的表中 −
import sqlite3

#Connecting to sqlite
conn = sqlite3.connect('example.db')

#Creating a cursor object using the cursor() method
cursor = conn.cursor()

# Preparing SQL queries to INSERT a record into the database.
cursor.execute('''INSERT INTO EMPLOYEE(
   FIRST_NAME, LAST_NAME, AGE, SEX, INCOME) VALUES
   ('Ramya', 'Rama Priya', 27, 'F', 9000)''')

cursor.execute('''INSERT INTO EMPLOYEE(
   FIRST_NAME, LAST_NAME, AGE, SEX, INCOME) VALUES
   ('Vinay', 'Battacharya', 20, 'M', 6000)''')

cursor.execute('''INSERT INTO EMPLOYEE(
   FIRST_NAME, LAST_NAME, AGE, SEX, INCOME) VALUES
   ('Sharukh', 'Sheik', 25, 'M', 8300)''')

cursor.execute('''INSERT INTO EMPLOYEE(
   FIRST_NAME, LAST_NAME, AGE, SEX, INCOME) VALUES
   ('Sarmista', 'Sharma', 26, 'F', 10000)''')

cursor.execute('''INSERT INTO EMPLOYEE(
   FIRST_NAME, LAST_NAME, AGE, SEX, INCOME) VALUES
   ('Tripthi', 'Mishra', 24, 'F', 6000)''')

# Commit your changes in the database
conn.commit()
print("Records inserted........")

# Closing the connection
conn.close()
輸出
Records inserted........
Python SQLite - 查詢資料
您可以使用 SELCT 查詢從 SQLite 表中檢索資料。此查詢/語句以表格形式返回指定關係(表)的內容,並稱為結果集。
語法
以下是 SQLite 中 SELECT 語句的語法 −
SELECT column1, column2, columnN FROM table_name;
示例
假設我們已使用以下查詢建立了一個名為 CRICKETERS 的表:
sqlite> CREATE TABLE CRICKETERS (
   First_Name VARCHAR(255),
   Last_Name VARCHAR(255),
   Age int,
   Place_Of_Birth VARCHAR(255),
   Country VARCHAR(255)
);
sqlite>
如果我們使用 INSERT 語句向其中插入了 5 條記錄,如下所示:
sqlite> insert into CRICKETERS values('Shikhar', 'Dhawan', 33, 'Delhi', 'India');
sqlite> insert into CRICKETERS values('Jonathan', 'Trott', 38, 'CapeTown', 'SouthAfrica');
sqlite> insert into CRICKETERS values('Kumara', 'Sangakkara', 41, 'Matale', 'Srilanka');
sqlite> insert into CRICKETERS values('Virat', 'Kohli', 30, 'Delhi', 'India');
sqlite> insert into CRICKETERS values('Rohit', 'Sharma', 32, 'Nagpur', 'India');
sqlite>
以下 SELECT 查詢檢索 CRICKETERS 表中 FIRST_NAME、LAST_NAME 和 COUNTRY 列的值。
sqlite> SELECT FIRST_NAME, LAST_NAME, COUNTRY FROM CRICKETERS;
Shikhar  |Dhawan     |India
Jonathan |Trott      |SouthAfrica
Kumara   |Sangakkara |Srilanka
Virat    |Kohli      |India
Rohit    |Sharma     |India
sqlite>
正如您所觀察到的,SQLite 資料庫的 SELECT 語句僅返回指定表的記錄。要獲得格式化的輸出,您需要在 SELECT 語句之前使用相應的命令設定header和mode,如下所示:
sqlite> .header on
sqlite> .mode column
sqlite> SELECT FIRST_NAME, LAST_NAME, COUNTRY FROM CRICKETERS;
First_Name Last_Name            Country
---------- -------------------- ----------
Shikhar    Dhawan               India
Jonathan   Trott                SouthAfric
Kumara     Sangakkara           Srilanka
Virat      Kohli                India
Rohit      Sharma               India
sqlite>
如果您想檢索每條記錄的所有列,則需要將列名替換為“*”,如下所示:
sqlite> .header on
sqlite> .mode column
sqlite> SELECT * FROM CRICKETERS;
First_Name Last_Name  Age        Place_Of_Birth Country
---------- ---------- ---------- -------------- ----------
Shikhar    Dhawan     33         Delhi          India
Jonathan   Trott      38         CapeTown       SouthAfric
Kumara     Sangakkara 41         Matale         Srilanka
Virat      Kohli      30         Delhi          India
Rohit      Sharma     32         Nagpur         India
sqlite>
在SQLite中,預設情況下,列的寬度為 10 個值,超過此寬度的值將被截斷(觀察上表中第 2 行的國家/地區列)。您可以使用.width命令在檢索表內容之前將每列的寬度設定為所需的值,如下所示:
sqlite> .width 10, 10, 4, 10, 13
sqlite> SELECT * FROM CRICKETERS;
First_Name Last_Name  Age  Place_Of_B Country
---------- ---------- ---- ---------- -------------
Shikhar    Dhawan     33   Delhi      India
Jonathan   Trott      38   CapeTown   SouthAfrica
Kumara     Sangakkara 41   Matale     Srilanka
Virat      Kohli      30   Delhi      India
Rohit      Sharma     32   Nagpur     India
sqlite>
使用 Python 檢索資料
對任何資料庫的讀取操作都意味著從資料庫中獲取一些有用的資訊。您可以使用 sqlite python 模組提供的 fetch() 方法從 MYSQL 中獲取資料。
sqlite3.Cursor 類提供了三種方法,即 fetchall()、fetchmany() 和 fetchone(),其中:
fetchall() 方法檢索查詢結果集中的所有行,並將它們作為元組列表返回。(如果我們在檢索幾行後執行此操作,它將返回剩餘的行)。
fetchone() 方法獲取查詢結果中的下一行,並將其作為元組返回。
fetchmany() 方法類似於 fetchone(),但它檢索查詢結果集中的下一組行,而不是單個行。
注意 - 結果集是在使用遊標物件查詢表時返回的物件。
示例
以下示例使用 SELECT 查詢獲取 EMPLOYEE 表的所有行,並從獲得的結果集中首先使用 fetchone() 方法檢索第一行,然後使用 fetchall() 方法檢索剩餘的行。
以下 Python 程式演示瞭如何從上面示例中建立的 COMPANY 表中獲取和顯示記錄。
import sqlite3

#Connecting to sqlite
conn = sqlite3.connect('example.db')

#Creating a cursor object using the cursor() method
cursor = conn.cursor()

#Retrieving data
cursor.execute('''SELECT * from EMPLOYEE''')

#Fetching 1st row from the table
result = cursor.fetchone();
print(result)

#Fetching 1st row from the table
result = cursor.fetchall();
print(result)

#Commit your changes in the database
conn.commit()

#Closing the connection
conn.close()
輸出
('Ramya', 'Rama priya', 27, 'F', 9000.0)
[('Vinay', 'Battacharya', 20, 'M', 6000.0),
   ('Sharukh', 'Sheik', 25, 'M', 8300.0),
   ('Sarmista', 'Sharma', 26, 'F', 10000.0),
   ('Tripthi', 'Mishra', 24, 'F', 6000.0)
]
Python SQLite - Where 子句
如果您想獲取、刪除或更新 SQLite 中表中的特定行,則需要使用 where 子句指定條件來過濾表的行以進行操作。
例如,如果您的 SELECT 語句帶有 where 子句,則只會檢索滿足指定條件的行。
語法
以下是 SQLite 中 WHERE 子句的語法:
SELECT column1, column2, columnN
FROM table_name
WHERE [search_condition]
您可以使用比較或邏輯運算子指定 search_condition。例如 >、<、=、LIKE、NOT 等。以下示例將使此概念更加清晰。
示例
假設我們已使用以下查詢建立了一個名為 CRICKETERS 的表:
sqlite> CREATE TABLE CRICKETERS (
   First_Name VARCHAR(255),
   Last_Name VARCHAR(255),
   Age int,
   Place_Of_Birth VARCHAR(255),
   Country VARCHAR(255)
);
sqlite>
如果我們使用 INSERT 語句向其中插入了 5 條記錄,如下所示:
sqlite> insert into CRICKETERS values('Shikhar', 'Dhawan', 33, 'Delhi', 'India');
sqlite> insert into CRICKETERS values('Jonathan', 'Trott', 38, 'CapeTown', 'SouthAfrica');
sqlite> insert into CRICKETERS values('Kumara', 'Sangakkara', 41, 'Matale', 'Srilanka');
sqlite> insert into CRICKETERS values('Virat', 'Kohli', 30, 'Delhi', 'India');
sqlite> insert into CRICKETERS values('Rohit', 'Sharma', 32, 'Nagpur', 'India');
sqlite>
以下 SELECT 語句檢索年齡大於 35 的記錄:
sqlite> SELECT * FROM CRICKETERS WHERE AGE > 35;
First_Name Last_Name  Age  Place_Of_B Country
---------- ---------- ---- ---------- -------------
Jonathan   Trott      38   CapeTown   SouthAfrica
Kumara     Sangakkara 41   Matale     Srilanka
sqlite>
使用 Python 的 WHERE 子句
Cursor 物件/類包含執行查詢和獲取資料等的所有方法。連線類的 cursor 方法返回一個遊標物件。
因此,要使用 python 在 SQLite 資料庫中建立表 −
使用 connect() 方法與資料庫建立連線。
透過在上面建立的連線物件上呼叫 cursor() 方法來建立遊標物件。
現在使用 Cursor 類的 execute() 方法執行 CREATE TABLE 語句。
示例
以下示例建立一個名為 Employee 的表並填充它。然後使用 where 子句檢索年齡值小於 23 的記錄。
import sqlite3

#Connecting to sqlite
conn = sqlite3.connect('example.db')

#Creating a cursor object using the cursor() method
cursor = conn.cursor()

#Doping EMPLOYEE table if already exists.
cursor.execute("DROP TABLE IF EXISTS EMPLOYEE")
sql = '''CREATE TABLE EMPLOYEE(
   FIRST_NAME CHAR(20) NOT NULL,
   LAST_NAME CHAR(20),
   AGE INT,
   SEX CHAR(1),
   INCOME FLOAT
)'''
cursor.execute(sql)

#Populating the table
cursor.execute('''INSERT INTO EMPLOYEE(
   FIRST_NAME, LAST_NAME, AGE, SEX, INCOME) VALUES
   ('Ramya', 'Rama priya', 27, 'F', 9000)''')

cursor.execute('''INSERT INTO EMPLOYEE
   (FIRST_NAME, LAST_NAME, AGE, SEX, INCOME) VALUES
   ('Vinay', 'Battacharya', 20, 'M', 6000)''')

cursor.execute('''INSERT INTO EMPLOYEE(
   FIRST_NAME, LAST_NAME, AGE, SEX, INCOME) VALUES
   ('Sharukh', 'Sheik', 25, 'M', 8300)''')

cursor.execute('''INSERT INTO EMPLOYEE(
   FIRST_NAME, LAST_NAME, AGE, SEX, INCOME) VALUES
   ('Sarmista', 'Sharma', 26, 'F', 10000)''')

cursor.execute('''INSERT INTO EMPLOYEE(
   FIRST_NAME, LAST_NAME, AGE, SEX, INCOME) VALUES
   ('Tripthi', 'Mishra', 24, 'F', 6000)''')

#Retrieving specific records using the where clause
cursor.execute("SELECT * from EMPLOYEE WHERE AGE <23")
print(cursor.fetchall())

#Commit your changes in the database
conn.commit()

#Closing the connection
conn.close()
輸出
[('Vinay', 'Battacharya', 20, 'M', 6000.0)]
Python SQLite - Order By
在使用 SELECT 查詢獲取資料時,您將按照插入它們的順序獲得記錄。
您可以使用Order By子句按所需順序(升序或降序)對結果進行排序。預設情況下,此子句按升序對結果進行排序,如果您需要按降序排列它們,則需要顯式使用“DESC”。
語法
以下是 SQLite 中 ORDER BY 子句的語法。
SELECT column-list
FROM table_name
[WHERE condition]
[ORDER BY column1, column2, .. columnN] [ASC | DESC];
示例
假設我們已使用以下查詢建立了一個名為 CRICKETERS 的表:
sqlite> CREATE TABLE CRICKETERS (
   First_Name VARCHAR(255),
   Last_Name VARCHAR(255),
   Age int,
   Place_Of_Birth VARCHAR(255),
   Country VARCHAR(255)
);
sqlite>
如果我們使用 INSERT 語句向其中插入了 5 條記錄,如下所示:
sqlite> insert into CRICKETERS values('Shikhar', 'Dhawan', 33, 'Delhi', 'India');
sqlite> insert into CRICKETERS values('Jonathan', 'Trott', 38, 'CapeTown', 'SouthAfrica');
sqlite> insert into CRICKETERS values('Kumara', 'Sangakkara', 41, 'Matale', 'Srilanka');
sqlite> insert into CRICKETERS values('Virat', 'Kohli', 30, 'Delhi', 'India');
sqlite> insert into CRICKETERS values('Rohit', 'Sharma', 32, 'Nagpur', 'India');
sqlite>
以下 SELECT 語句按年齡的升序檢索 CRICKETERS 表的行:
sqlite> SELECT * FROM CRICKETERS ORDER BY AGE;
First_Name Last_Name  Age  Place_Of_B Country
---------- ---------- ---- ---------- -------------
Virat      Kohli      30   Delhi      India
Rohit      Sharma     32   Nagpur     India
Shikhar    Dhawan     33   Delhi      India
Jonathan   Trott      38   CapeTown   SouthAfrica
Kumara     Sangakkara 41   Matale     Srilanka
sqlite>
您可以使用多個列對錶的記錄進行排序。以下 SELECT 語句根據AGE和FIRST_NAME列對 CRICKETERS 表的記錄進行排序。
sqlite> SELECT * FROM CRICKETERS ORDER BY AGE, FIRST_NAME;
First_Name Last_Name  Age  Place_Of_B Country
---------- ---------- ---- ---------- -------------
Virat      Kohli      30   Delhi      India
Rohit      Sharma     32   Nagpur     India
Shikhar    Dhawan     33   Delhi      India
Jonathan   Trott      38   CapeTown   SouthAfrica
Kumara     Sangakkara 41   Matale     Srilanka
sqlite>
預設情況下,ORDER BY子句按升序對錶的記錄進行排序,您可以使用 DESC 將結果排列為降序,如下所示:
sqlite> SELECT * FROM CRICKETERS ORDER BY AGE DESC;
First_Name Last_Name  Age  Place_Of_B Country
---------- ---------- ---- ---------- -------------
Kumara     Sangakkara 41   Matale     Srilanka
Jonathan   Trott      38   CapeTown   SouthAfrica
Shikhar    Dhawan     33   Delhi      India
Rohit      Sharma     32   Nagpur     India
Virat      Kohli      30   Delhi      India
sqlite>
使用 python 的 ORDER BY 子句
要按特定順序檢索表的內容,請在遊標物件上呼叫 execute() 方法,並將 SELECT 語句以及 ORDER BY 子句作為引數傳遞給它。
示例
在以下示例中,我們正在建立一個名為 Employee 的表並填充它,並使用 ORDER BY 子句按其年齡的(升序)順序檢索其記錄。
import psycopg2

#establishing the connection
conn = psycopg2.connect(
   database="mydb", user='postgres', password='password', host='127.0.0.1', port= '5432'
)
#Setting auto commit false
conn.autocommit = True

#Creating a cursor object using the cursor() method
cursor = conn.cursor()

#Doping EMPLOYEE table if already exists.
cursor.execute("DROP TABLE IF EXISTS EMPLOYEE")

#Creating a table
sql = '''CREATE TABLE EMPLOYEE(
FIRST_NAME CHAR(20) NOT NULL,
   LAST_NAME CHAR(20),
   AGE INT, SEX CHAR(1),
   INCOME INT,
   CONTACT INT
)'''
cursor.execute(sql)

#Populating the table
#Populating the table
cursor.execute('''INSERT INTO EMPLOYEE
   (FIRST_NAME, LAST_NAME, AGE, SEX, INCOME) VALUES
   ('Ramya', 'Rama priya', 27, 'F', 9000),
   ('Vinay', 'Battacharya', 20, 'M', 6000),
   ('Sharukh', 'Sheik', 25, 'M', 8300),
   ('Sarmista', 'Sharma', 26, 'F', 10000),
   ('Tripthi', 'Mishra', 24, 'F', 6000)''')
conn.commit()

#Retrieving specific records using the ORDER BY clause
cursor.execute("SELECT * from EMPLOYEE ORDER BY AGE")
print(cursor.fetchall())

#Commit your changes in the database
conn.commit()

#Closing the connection
conn.close()
輸出
[('Vinay', 'Battacharya', 20, 'M', 6000, None),
   ('Tripthi', 'Mishra', 24, 'F', 6000, None),
   ('Sharukh', 'Sheik', 25, 'M', 8300, None),
   ('Sarmista', 'Sharma', 26, 'F', 10000, None),
   ('Ramya', 'Rama priya', 27, 'F', 9000, None)]
Python SQLite - 更新表
對任何資料庫的更新操作都意味著修改表中一個或多個已存在於資料庫中的記錄的值。您可以使用 UPDATE 語句更新 SQLite 中現有記錄的值。
要更新特定行,您需要與之一起使用 WHERE 子句。
語法
以下是 SQLite 中 UPDATE 語句的語法:
UPDATE table_name
SET column1 = value1, column2 = value2...., columnN = valueN
WHERE [condition];
示例
假設我們已使用以下查詢建立了一個名為 CRICKETERS 的表:
sqlite> CREATE TABLE CRICKETERS (
   First_Name VARCHAR(255),
   Last_Name VARCHAR(255),
   Age int,
   Place_Of_Birth VARCHAR(255),
   Country VARCHAR(255)
);
sqlite>
如果我們使用 INSERT 語句向其中插入了 5 條記錄,如下所示:
sqlite> insert into CRICKETERS values('Shikhar', 'Dhawan', 33, 'Delhi', 'India');
sqlite> insert into CRICKETERS values('Jonathan', 'Trott', 38, 'CapeTown', 'SouthAfrica');
sqlite> insert into CRICKETERS values('Kumara', 'Sangakkara', 41, 'Matale', 'Srilanka');
sqlite> insert into CRICKETERS values('Virat', 'Kohli', 30, 'Delhi', 'India');
sqlite> insert into CRICKETERS values('Rohit', 'Sharma', 32, 'Nagpur', 'India');
sqlite>
以下語句修改了名為Shikhar的板球運動員的年齡:
sqlite> UPDATE CRICKETERS SET AGE = 45 WHERE FIRST_NAME = 'Shikhar' ;
sqlite>
如果您檢索 FIRST_NAME 為 Shikhar 的記錄,您會發現年齡值已更改為 45:
sqlite> SELECT * FROM CRICKETERS WHERE FIRST_NAME = 'Shikhar';
First_Name Last_Name  Age Place_Of_B  Country
---------- ---------- ---- ---------- -------------
Shikhar    Dhawan     45   Delhi      India
sqlite>
如果您沒有使用 WHERE 子句,所有記錄的值都將被更新。以下 UPDATE 語句將 CRICKETERS 表中所有記錄的年齡增加 1:
sqlite> UPDATE CRICKETERS SET AGE = AGE+1;
sqlite>
如果您使用 SELECT 命令檢索表的內容,則可以看到更新後的值,如下所示:
sqlite> SELECT * FROM CRICKETERS;
First_Name Last_Name  Age  Place_Of_B Country
---------- ---------- ---- ---------- -------------
Shikhar    Dhawan     46   Delhi      India
Jonathan   Trott      39   CapeTown   SouthAfrica
Kumara     Sangakkara 42   Matale     Srilanka
Virat      Kohli      31   Delhi      India
Rohit      Sharma     33   Nagpur     India
sqlite>
使用 python 更新現有記錄
要向 SQLite 資料庫中的現有表新增記錄 −
匯入 sqlite3 包。
使用connect()方法建立連線物件,並將資料庫名稱作為引數傳遞給它。
cursor()方法返回一個遊標物件,您可以使用它與 SQLite3 通訊。透過在(上面建立的)Connection 物件上呼叫 cursor() 物件來建立遊標物件。
然後,透過將 UPDATE 語句作為引數傳遞給它,在遊標物件上呼叫 execute() 方法。
示例
以下 Python 示例建立一個名為 EMPLOYEE 的表,向其中插入 5 條記錄,並將所有男性員工的年齡增加 1:
import sqlite3

#Connecting to sqlite
conn = sqlite3.connect('example.db')

#Creating a cursor object using the cursor() method
cursor = conn.cursor()

#Doping EMPLOYEE table if already exists.
cursor.execute("DROP TABLE IF EXISTS EMPLOYEE")

#Creating table as per requirement
sql ='''CREATE TABLE EMPLOYEE(
   FIRST_NAME CHAR(20) NOT NULL,
   LAST_NAME CHAR(20),
   AGE INT,
   SEX CHAR(1),
   INCOME FLOAT
)'''
cursor.execute(sql)

#Inserting data
cursor.execute('''INSERT INTO EMPLOYEE
   (FIRST_NAME, LAST_NAME, AGE, SEX, INCOME) VALUES
   ('Ramya', 'Rama priya', 27, 'F', 9000),
   ('Vinay', 'Battacharya', 20, 'M', 6000),
   ('Sharukh', 'Sheik', 25, 'M', 8300),
   ('Sarmista', 'Sharma', 26, 'F', 10000),
   ('Tripthi', 'Mishra', 24, 'F', 6000)''')
conn.commit()

#Fetching all the rows before the update
print("Contents of the Employee table: ")
cursor.execute('''SELECT * from EMPLOYEE''')
print(cursor.fetchall())

#Updating the records
sql = '''UPDATE EMPLOYEE SET AGE=AGE+1 WHERE SEX = 'M' '''
cursor.execute(sql)
print("Table updated...... ")

#Fetching all the rows after the update
print("Contents of the Employee table after the update operation: ")
cursor.execute('''SELECT * from EMPLOYEE''')
print(cursor.fetchall())

#Commit your changes in the database
conn.commit()

#Closing the connection
conn.close()
輸出
Contents of the Employee table:
[('Ramya', 'Rama priya', 27, 'F', 9000.0),
('Vinay', 'Battacharya', 20, 'M', 6000.0),
('Sharukh', 'Sheik', 25, 'M', 8300.0),
('Sarmista', 'Sharma', 26, 'F', 10000.0),
('Tripthi', 'Mishra', 24, 'F', 6000.0)]
Table updated......
Contents of the Employee table after the update operation:
[('Ramya', 'Rama priya', 27, 'F', 9000.0),
('Vinay', 'Battacharya', 21, 'M', 6000.0),
('Sharukh', 'Sheik', 26, 'M', 8300.0),
('Sarmista', 'Sharma', 26, 'F', 10000.0),
('Tripthi', 'Mishra', 24, 'F', 6000.0)]
Python SQLite - 刪除資料
要從 SQLite 表中刪除記錄,您需要使用 DELETE FROM 語句。要刪除特定記錄,您需要與之一起使用 WHERE 子句。
要更新特定行,您需要與之一起使用 WHERE 子句。
語法
以下是 SQLite 中 DELETE 查詢的語法:
DELETE FROM table_name [WHERE Clause]
示例
假設我們已使用以下查詢建立了一個名為 CRICKETERS 的表:
sqlite> CREATE TABLE CRICKETERS ( First_Name VARCHAR(255), Last_Name VARCHAR(255), Age int, Place_Of_Birth VARCHAR(255), Country VARCHAR(255) ); sqlite>
如果我們使用 INSERT 語句向其中插入了 5 條記錄,如下所示:
sqlite> insert into CRICKETERS values('Shikhar', 'Dhawan', 33, 'Delhi', 'India');
sqlite> insert into CRICKETERS values('Jonathan', 'Trott', 38, 'CapeTown', 'SouthAfrica');
sqlite> insert into CRICKETERS values('Kumara', 'Sangakkara', 41, 'Matale', 'Srilanka');
sqlite> insert into CRICKETERS values('Virat', 'Kohli', 30, 'Delhi', 'India');
sqlite> insert into CRICKETERS values('Rohit', 'Sharma', 32, 'Nagpur', 'India');
sqlite>
以下語句刪除姓氏為“Sangakkara”的板球運動員的記錄。
sqlite> DELETE FROM CRICKETERS WHERE LAST_NAME = 'Sangakkara'; sqlite>
如果您使用 SELECT 語句檢索表的內容,您只會看到 4 條記錄,因為我們刪除了一條。
sqlite> SELECT * FROM CRICKETERS; First_Name Last_Name Age Place_Of_B Country ---------- ---------- ---- ---------- ------------- Shikhar Dhawan 46 Delhi India Jonathan Trott 39 CapeTown SouthAfrica Virat Kohli 31 Delhi India Rohit Sharma 33 Nagpur India sqlite>
如果您在沒有 WHERE 子句的情況下執行 DELETE FROM 語句,則將刪除指定表中的所有記錄。
sqlite> DELETE FROM CRICKETERS; sqlite>
由於您已刪除所有記錄,如果您嘗試使用 SELECT 語句檢索 CRICKETERS 表的內容,您將獲得一個空的結果集,如下所示 −
sqlite> SELECT * FROM CRICKETERS; sqlite>
使用 Python 刪除資料
要向 SQLite 資料庫中的現有表新增記錄 −
匯入 sqlite3 包。
使用connect()方法建立連線物件,並將資料庫名稱作為引數傳遞給它。
cursor()方法返回一個遊標物件,您可以使用它與 SQLite3 通訊。透過在(上面建立的)Connection 物件上呼叫 cursor() 物件來建立遊標物件。
然後,透過將 DELETE 語句作為引數傳遞給它,在遊標物件上呼叫 execute() 方法。
示例
以下 python 示例從 EMPLOYEE 表中刪除年齡值大於 25 的記錄。
import sqlite3
#Connecting to sqlite
conn = sqlite3.connect('example.db')
#Creating a cursor object using the cursor() method
cursor = conn.cursor()
#Retrieving contents of the table
print("Contents of the table: ")
cursor.execute('''SELECT * from EMPLOYEE''')
print(cursor.fetchall())
#Deleting records
cursor.execute('''DELETE FROM EMPLOYEE WHERE AGE > 25''')
#Retrieving data after delete
print("Contents of the table after delete operation ")
cursor.execute("SELECT * from EMPLOYEE")
print(cursor.fetchall())
#Commit your changes in the database
conn.commit()
#Closing the connection
conn.close()
輸出
Contents of the table:
[('Ramya', 'Rama priya', 27, 'F', 9000.0),
('Vinay', 'Battacharya', 21, 'M', 6000.0),
('Sharukh', 'Sheik', 26, 'M', 8300.0),
('Sarmista', 'Sharma', 26, 'F', 10000.0),
('Tripthi', 'Mishra', 24, 'F', 6000.0)]
Contents of the table after delete operation
[('Vinay', 'Battacharya', 21, 'M', 6000.0),
('Tripthi', 'Mishra', 24, 'F', 6000.0)]
Python SQLite - 刪除表
您可以使用 DROP TABLE 語句刪除整個表。您只需要指定要刪除的表的名稱。
語法
以下是 PostgreSQL 中 DROP TABLE 語句的語法 −
DROP TABLE table_name;
示例
假設我們使用以下查詢建立了兩個名為 CRICKETERS 和 EMPLOYEES 的表 −
sqlite> CREATE TABLE CRICKETERS ( First_Name VARCHAR(255), Last_Name VARCHAR(255), Age int, Place_Of_Birth VARCHAR(255), Country VARCHAR(255) ); sqlite> CREATE TABLE EMPLOYEE( FIRST_NAME CHAR(20) NOT NULL, LAST_NAME CHAR(20), AGE INT, SEX CHAR(1), INCOME FLOAT ); sqlite>
現在,如果您使用.tables命令驗證表列表,您可以在其中看到上面建立的表(列表),如下所示:
sqlite> .tables CRICKETERS EMPLOYEE sqlite>
以下語句刪除資料庫中名為 Employee 的表 −
sqlite> DROP table employee; sqlite>
由於您已刪除 Employee 表,如果您再次檢索表列表,您會發現其中只有一個表。
sqlite> .tables CRICKETERS sqlite>
如果您嘗試再次刪除 Employee 表,因為您已經刪除了它,您將收到一個錯誤訊息,提示“沒有這樣的表”,如下所示:
sqlite> DROP table employee; Error: no such table: employee sqlite>
要解決此問題,您可以將 IF EXISTS 子句與 DELTE 語句一起使用。如果表存在,則刪除該表,否則跳過 DLETE 操作。
sqlite> DROP table IF EXISTS employee; sqlite>
使用 Python 刪除表
您可以隨時使用 MYSQL 的 DROP 語句刪除表,但在刪除任何現有表時需要非常小心,因為刪除表後資料將無法恢復。
示例
要使用 python 從 SQLite3 資料庫中刪除表,請在遊標物件上呼叫execute()方法,並將 drop 語句作為引數傳遞給它。
import sqlite3
#Connecting to sqlite
conn = sqlite3.connect('example.db')
#Creating a cursor object using the cursor() method
cursor = conn.cursor()
#Doping EMPLOYEE table if already exists
cursor.execute("DROP TABLE emp")
print("Table dropped... ")
#Commit your changes in the database
conn.commit()
#Closing the connection
conn.close()
輸出
Table dropped...
Python SQLite - Limit
在獲取記錄時,如果您想將它們限制在特定數量,則可以使用 SQLite 的 LIMIT 子句來實現。
語法
以下是 SQLite 中 LIMIT 子句的語法:
SELECT column1, column2, columnN FROM table_name LIMIT [no of rows]
示例
假設我們已使用以下查詢建立了一個名為 CRICKETERS 的表:
sqlite> CREATE TABLE CRICKETERS ( First_Name VARCHAR(255), Last_Name VARCHAR(255), Age int, Place_Of_Birth VARCHAR(255), Country VARCHAR(255) ); sqlite>
如果我們使用 INSERT 語句向其中插入了 5 條記錄,如下所示:
sqlite> insert into CRICKETERS values('Shikhar', 'Dhawan', 33, 'Delhi', 'India');
sqlite> insert into CRICKETERS values('Jonathan', 'Trott', 38, 'CapeTown', 'SouthAfrica');
sqlite> insert into CRICKETERS values('Kumara', 'Sangakkara', 41, 'Matale', 'Srilanka');
sqlite> insert into CRICKETERS values('Virat', 'Kohli', 30, 'Delhi', 'India');
sqlite> insert into CRICKETERS values('Rohit', 'Sharma', 32, 'Nagpur', 'India');
sqlite>
以下語句使用 LIMIT 子句檢索 Cricketers 表的前 3 條記錄 −
sqlite> SELECT * FROM CRICKETERS LIMIT 3; First_Name Last_Name Age Place_Of_B Country ---------- ---------- ---- ---------- ------------- Shikhar Dhawan 33 Delhi India Jonathan Trott 38 CapeTown SouthAfrica Kumara Sangakkara 41 Matale Srilanka sqlite>
如果您需要從第 n 條記錄(而不是第 1 條)開始限制記錄,則可以使用 OFFSET 以及 LIMIT 來實現。
sqlite> SELECT * FROM CRICKETERS LIMIT 3 OFFSET 2; First_Name Last_Name Age Place_Of_B Country ---------- ---------- ---- ---------- ------------- Kumara Sangakkara 41 Matale Srilanka Virat Kohli 30 Delhi India Rohit Sharma 32 Nagpur India sqlite>
使用 Python 的 LIMIT 子句
如果您透過將 SELECT 查詢以及 LIMIT 子句作為引數傳遞給它,在遊標物件上呼叫 execute() 方法,則可以檢索所需數量的記錄。
示例
以下 python 示例使用 LIMIT 子句檢索 EMPLOYEE 表的前兩條記錄。
import sqlite3
#Connecting to sqlite
conn = sqlite3.connect('example.db')
#Creating a cursor object using the cursor() method
cursor = conn.cursor()
#Retrieving single row
sql = '''SELECT * from EMPLOYEE LIMIT 3'''
#Executing the query
cursor.execute(sql)
#Fetching the data
result = cursor.fetchall();
print(result)
#Commit your changes in the database
conn.commit()
#Closing the connection
conn.close()
輸出
[('Ramya', 'Rama priya', 27, 'F', 9000.0),
('Vinay', 'Battacharya', 20, 'M', 6000.0),
('Sharukh', 'Sheik', 25, 'M', 8300.0)]
Python SQLite - Join
當您將資料分成兩個表時,您可以使用聯接從這兩個表中獲取組合的記錄。
示例
假設我們已使用以下查詢建立了一個名為 CRICKETERS 的表:
sqlite> CREATE TABLE CRICKETERS ( First_Name VARCHAR(255), Last_Name VARCHAR(255), Age int, Place_Of_Birth VARCHAR(255), Country VARCHAR(255) ); sqlite>
讓我們再建立一個名為 OdiStats 的表,描述 CRICKETERS 表中每個球員的一日板球統計資料。
sqlite> CREATE TABLE ODIStats ( First_Name VARCHAR(255), Matches INT, Runs INT, AVG FLOAT, Centuries INT, HalfCenturies INT ); sqlite>
以下語句檢索這兩個表中值的組合資料:
sqlite> SELECT Cricketers.First_Name, Cricketers.Last_Name, Cricketers.Country, OdiStats.matches, OdiStats.runs, OdiStats.centuries, OdiStats.halfcenturies from Cricketers INNER JOIN OdiStats ON Cricketers.First_Name = OdiStats.First_Name; First_Name Last_Name Country Matches Runs Centuries HalfCenturies ---------- ---------- ------- ---------- ------------- ---------- ---------- Shikhar Dhawan Indi 133 5518 17 27 Jonathan Trott Sout 68 2819 4 22 Kumara Sangakkara Sril 404 14234 25 93 Virat Kohli Indi 239 11520 43 54 Rohit Sharma Indi 218 8686 24 42 sqlite>
使用 python 的 Join 子句
以下 SQLite 示例演示了使用 python 的 JOIN 子句:
import sqlite3
#Connecting to sqlite
conn = sqlite3.connect('example.db')
#Creating a cursor object using the cursor() method
cursor = conn.cursor()
#Retrieving data
sql = '''SELECT * from EMP INNER JOIN CONTACT ON EMP.CONTACT = CONTACT.ID'''
#Executing the query
cursor.execute(sql)
#Fetching 1st row from the table
result = cursor.fetchall();
print(result)
#Commit your changes in the database
conn.commit()
#Closing the connection
conn.close()
輸出
[('Ramya', 'Rama priya', 27, 'F', 9000.0, 101, 101, 'Krishna@mymail.com', 'Hyderabad'),
('Vinay', 'Battacharya', 20, 'M', 6000.0, 102, 102,'Raja@mymail.com', 'Vishakhapatnam'),
('Sharukh', 'Sheik', 25, 'M', 8300.0, 103, 103, 'Krishna@mymail.com', 'Pune'),
('Sarmista', 'Sharma', 26, 'F', 10000.0, 104, 104, 'Raja@mymail.com', 'Mumbai')]
Python SQLite - 遊標物件
sqlite3.Cursor 類是一個例項,您可以使用它來呼叫執行 SQLite 語句、從查詢結果集中獲取資料的方法。您可以使用 Connection 物件/類的 cursor() 方法建立Cursor物件。
示例
import sqlite3
#Connecting to sqlite
conn = sqlite3.connect('example.db')
#Creating a cursor object using the cursor() method
cursor = conn.cursor()
方法
以下是 Cursor 類/物件提供的各種方法。
| 序號 | 方法和描述 |
|---|---|
| 1 | execute() 此例程執行 SQL 語句。SQL 語句可以是引數化的(即,使用佔位符而不是 SQL 字面量)。psycopg2 模組支援使用 %s 符號進行佔位符。 例如:cursor.execute("insert into people values (%s, %s)", (who, age)) |
| 2 | executemany() 此例程對序列 sql 中找到的所有引數序列或對映執行 SQL 命令。 |
| 3 | fetchone() 此方法獲取查詢結果集的下一行,返回單個序列,或者當沒有更多資料可用時返回 None。 |
| 4 | fetchmany() 此例程獲取查詢結果的下一組行,返回一個列表。當沒有更多行可用時,將返回一個空列表。該方法嘗試獲取與 size 引數指示的相同數量的行。 |
| 5 | fetchall() 此例程獲取查詢結果的所有(剩餘)行,返回一個列表。當沒有行可用時,將返回一個空列表。 |
屬性
以下是 Cursor 類的屬性:
| 序號 | 方法和描述 |
|---|---|
| 1 | arraySize 這是一個讀寫屬性,您可以設定 fetchmany() 方法返回的行數。 |
| 2 | description 這是一個只讀屬性,它返回包含結果集中列的描述的列表。 |
| 3 | lastrowid 這是一個只讀屬性,如果表中存在任何自動遞增列,則返回上次 INSERT 或 UPDATE 操作為此列生成的數值。 |
| 4 | 行數 (rowcount) 在 SELECT 和 UPDATE 操作的情況下,此屬性返回返回/更新的行數。 |
| 5 | connection 此只讀屬性提供 Cursor 物件使用的 SQLite 資料庫連線。 |
Python MongoDB - 簡介
Pymongo 是一個 python 發行版,它提供用於處理 MongoDB 的工具,它是從 python 與 MongoDB 資料庫通訊的首選方法。
安裝
要安裝 pymongo,首先確保您已正確安裝 python3(以及 PIP)和 MongoDB。然後執行以下命令。
C:\WINDOWS\system32>pip install pymongo Collecting pymongo Using cached https://files.pythonhosted.org/packages/cb/a6/b0ae3781b0ad75825e00e29dc5489b53512625e02328d73556e1ecdf12f8/pymongo-3.9.0-cp37-cp37m-win32.whl Installing collected packages: pymongo Successfully installed pymongo-3.9.0
驗證
安裝 pymongo 後,開啟一個新的文字文件,將以下行貼上到其中,並將其另存為 test.py。
import pymongo
如果您已正確安裝 pymongo,如果您按如下所示執行 test.py,則不應該出現任何問題。
D:\Python_MongoDB>test.py D:\Python_MongoDB>
Python MongoDB - 建立資料庫
與其他資料庫不同,MongoDB 沒有提供單獨的命令來建立資料庫。
通常,use 命令用於選擇/切換到特定的資料庫。此命令首先驗證我們指定的資料庫是否存在,如果存在,則連線到它。如果我們使用 use 命令指定的資料庫不存在,則將建立一個新資料庫。
因此,您可以使用Use命令在 MongoDB 中建立資料庫。
語法
use DATABASE語句的基本語法如下:
use DATABASE_NAME
示例
以下命令建立一個名為 mydb 的資料庫。
>use mydb switched to db mydb
您可以使用 db 命令驗證您的建立,這將顯示當前資料庫。
>db mydb
使用 python 建立資料庫
要使用 pymongo 連線到 MongoDB,您需要匯入並建立一個 MongoClient,然後您可以直接訪問您需要在屬性 passion 中建立的資料庫。
示例
以下示例在 MangoDB 中建立一個數據庫。
from pymongo import MongoClient
#Creating a pymongo client
client = MongoClient('localhost', 27017)
#Getting the database instance
db = client['mydb']
print("Database created........")
#Verification
print("List of databases after creating new one")
print(client.list_database_names())
輸出
Database created........ List of databases after creating new one: ['admin', 'config', 'local', 'mydb']
您還可以在建立 MongoClient 時指定埠和主機名,並以字典樣式訪問資料庫。
示例
from pymongo import MongoClient
#Creating a pymongo client
client = MongoClient('localhost', 27017)
#Getting the database instance
db = client['mydb']
print("Database created........")
輸出
Database created........
Python MongoDB - 建立集合
MongoDB 中的集合儲存一組文件,類似於關係資料庫中的表。
您可以使用createCollection()方法建立集合。此方法接受一個表示要建立的集合名稱的字串值和一個選項(可選)引數。
使用它,您可以指定以下內容:
- 集合的大小。
- 限制集合中允許的最大文件數。
- 我們建立的集合是否應該是限制集合(固定大小的集合)。
- 我們建立的集合是否應該是自動索引的。
語法
以下是建立 MongoDB 中集合的語法。
db.createCollection("CollectionName")
示例
以下方法建立一個名為 ExampleCollection 的集合。
> use mydb
switched to db mydb
> db.createCollection("ExampleCollection")
{ "ok" : 1 }
>
類似地,以下是一個使用 createCollection() 方法的選項建立集合的查詢。
>db.createCollection("mycol", { capped : true, autoIndexId : true, size :
6142800, max : 10000 } )
{ "ok" : 1 }
>
使用 python 建立集合
以下 python 示例連線到 MongoDB 中的資料庫(mydb),並在其中建立一個集合。
示例
from pymongo import MongoClient
#Creating a pymongo client
client = MongoClient('localhost', 27017)
#Getting the database instance
db = client['mydb']
#Creating a collection
collection = db['example']
print("Collection created........")
輸出
Collection created........
Python MongoDB - 插入文件
您可以使用insert()方法將文件儲存到 MongoDB 中。此方法接受 JSON 文件作為引數。
語法
以下是 insert 方法的語法。
>db.COLLECTION_NAME.insert(DOCUMENT_NAME)
示例
> use mydb
switched to db mydb
> db.createCollection("sample")
{ "ok" : 1 }
> doc1 = {"name": "Ram", "age": "26", "city": "Hyderabad"}
{ "name" : "Ram", "age" : "26", "city" : "Hyderabad" }
> db.sample.insert(doc1)
WriteResult({ "nInserted" : 1 })
>
類似地,您還可以使用insert()方法插入多個文件。
> use testDB
switched to db testDB
> db.createCollection("sample")
{ "ok" : 1 }
> data =
[
{
"_id": "1001",
"name": "Ram",
"age": "26",
"city": "Hyderabad"
},
{
"_id": "1002",
"name" : "Rahim",
"age" : 27,
"city" : "Bangalore"
},
{
"_id": "1003",
"name" : "Robert",
"age" : 28,
"city" : "Mumbai"
}
]
[
{
"_id" : "1001",
"name" : "Ram",
"age" : "26",
"city" : "Hyderabad"
},
{
"_id" : "1002",
"name" : "Rahim",
"age" : 27,
"city" : "Bangalore"
},
{
"_id" : "1003",
"name" : "Robert",
"age" : 28,
"city" : "Mumbai"
}
]
> db.sample.insert(data)
BulkWriteResult
({
"writeErrors" : [ ],
"writeConcernErrors" : [ ],
"nInserted" : 3,
"nUpserted" : 0,
"nMatched" : 0,
"nModified" : 0,
"nRemoved" : 0,
"upserted" : [ ]
})
>
使用 python 建立集合
Pymongo 提供了一個名為 insert_one() 的方法來在 MangoDB 中插入文件。對於此方法,我們需要以字典格式傳遞文件。
示例
以下示例在名為 example 的集合中插入一個文件。
from pymongo import MongoClient
#Creating a pymongo client
client = MongoClient('localhost', 27017)
#Getting the database instance
db = client['mydb']
#Creating a collection
coll = db['example']
#Inserting document into a collection
doc1 = {"name": "Ram", "age": "26", "city": "Hyderabad"}
coll.insert_one(doc1)
print(coll.find_one())
輸出
{
'_id': ObjectId('5d63ad6ce043e2a93885858b'),
'name': 'Ram',
'age': '26',
'city': 'Hyderabad'
}
要使用 pymongo 將多個文件插入 MongoDB,您需要呼叫 insert_many() 方法。
from pymongo import MongoClient
#Creating a pymongo client
client = MongoClient('localhost', 27017)
#Getting the database instance
db = client['mydb']
#Creating a collection
coll = db['example']
#Inserting document into a collection
data =
[
{
"_id": "101",
"name": "Ram",
"age": "26",
"city": "Hyderabad"
},
{
"_id": "102",
"name": "Rahim",
"age": "27",
"city": "Bangalore"
},
{
"_id": "103",
"name": "Robert",
"age": "28",
"city": "Mumbai"
}
]
res = coll.insert_many(data)
print("Data inserted ......")
print(res.inserted_ids)
輸出
Data inserted ...... ['101', '102', '103']
Python MongoDB - 查詢
您可以使用find()方法讀取/檢索儲存在 MongoDB 中的文件。此方法以非結構化的方式檢索並顯示 MongoDB 中的所有文件。
語法
以下是find()方法的語法。
>db.CollectionName.find()
示例
假設我們使用以下查詢將 3 個文件插入到名為 testDB 的資料庫中的名為 sample 的集合中:
> use testDB
> db.createCollection("sample")
> data = [
{"_id": "1001", "name" : "Ram", "age": "26", "city": "Hyderabad"},
{"_id": "1002", "name" : "Rahim", "age" : 27, "city" : "Bangalore" },
{"_id": "1003", "name" : "Robert", "age" : 28, "city" : "Mumbai" }
]
> db.sample.insert(data)
您可以使用 find() 方法檢索插入的文件,如下所示:
> use testDB
switched to db testDB
> db.sample.find()
{ "_id" : "1001", "name" : "Ram", "age" : "26", "city" : "Hyderabad" }
{ "_id" : "1002", "name" : "Rahim", "age" : 27, "city" : "Bangalore" }
{ "_id" : "1003", "name" : "Robert", "age" : 28, "city" : "Mumbai" }
>
您還可以使用 findOne() 方法檢索集合中的第一個文件,如下所示:
> db.sample.findOne()
{ "_id" : "1001", "name" : "Ram", "age" : "26", "city" : "Hyderabad" }
使用 python 檢索資料(find)
pymongo 的find_One()方法用於根據您的查詢檢索單個文件,如果沒有匹配項,此方法將不返回任何內容,如果您不使用任何查詢,它將返回集合的第一個文件。
當您只需要檢索一個結果文件或確定您的查詢僅返回一個文件時,此方法非常方便。
示例
以下 python 示例檢索集合的第一個文件:
from pymongo import MongoClient
#Creating a pymongo client
client = MongoClient('localhost', 27017)
#Getting the database instance
db = client['mydatabase']
#Creating a collection
coll = db['example']
#Inserting document into a collection
data = [
{"_id": "101", "name": "Ram", "age": "26", "city": "Hyderabad"},
{"_id": "102", "name": "Rahim", "age": "27", "city": "Bangalore"},
{"_id": "103", "name": "Robert", "age": "28", "city": "Mumbai"}
]
res = coll.insert_many(data)
print("Data inserted ......")
print(res.inserted_ids)
#Retrieving the first record using the find_one() method
print("First record of the collection: ")
print(coll.find_one())
#Retrieving a record with is 103 using the find_one() method
print("Record whose id is 103: ")
print(coll.find_one({"_id": "103"}))
輸出
Data inserted ......
['101', '102', '103']
First record of the collection:
{'_id': '101', 'name': 'Ram', 'age': '26', 'city': 'Hyderabad'}
Record whose id is 103:
{'_id': '103', 'name': 'Robert', 'age': '28', 'city': 'Mumbai'}
要在一個查詢中獲取多個文件(find 方法的單個呼叫),您可以使用 pymongo 的find()方法。如果沒有傳遞任何查詢,這將返回集合的所有文件,如果您已將查詢傳遞給此方法,它將返回所有匹配的文件。
示例
#Getting the database instance
db = client['myDB']
#Creating a collection
coll = db['example']
#Inserting document into a collection
data = [
{"_id": "101", "name": "Ram", "age": "26", "city": "Hyderabad"},
{"_id": "102", "name": "Rahim", "age": "27", "city": "Bangalore"},
{"_id": "103", "name": "Robert", "age": "28", "city": "Mumbai"}
]
res = coll.insert_many(data)
print("Data inserted ......")
#Retrieving all the records using the find() method
print("Records of the collection: ")
for doc1 in coll.find():
print(doc1)
#Retrieving records with age greater than 26 using the find() method
print("Record whose age is more than 26: ")
for doc2 in coll.find({"age":{"$gt":"26"}}):
print(doc2)
輸出
Data inserted ......
Records of the collection:
{'_id': '101', 'name': 'Ram', 'age': '26', 'city': 'Hyderabad'}
{'_id': '102', 'name': 'Rahim', 'age': '27', 'city': 'Bangalore'}
{'_id': '103', 'name': 'Robert', 'age': '28', 'city': 'Mumbai'}
Record whose age is more than 26:
{'_id': '102', 'name': 'Rahim', 'age': '27', 'city': 'Bangalore'}
{'_id': '103', 'name': 'Robert', 'age': '28', 'city': 'Mumbai'}
Python MongoDB - 查詢
在使用find()方法檢索時,您可以使用查詢物件過濾文件。您可以將指定所需文件條件的查詢作為引數傳遞給此方法。
運算子
以下是 MongoDB 中查詢中使用的運算子列表。
| 操作 | 語法 | 示例 |
|---|---|---|
| 相等 | {"key" : "value"} | db.mycol.find({"by":"tutorials point"}) |
| 小於 | {"key" :{$lt:"value"}} | db.mycol.find({"likes":{$lt:50}}) |
| 小於等於 | {"key" :{$lte:"value"}} | db.mycol.find({"likes":{$lte:50}}) |
| 大於 | {"key" :{$gt:"value"}} | db.mycol.find({"likes":{$gt:50}}) |
| 大於等於 | {"key" {$gte:"value"}} | db.mycol.find({"likes":{$gte:50}}) |
| 不等於 | {"key":{$ne: "value"}} | db.mycol.find({"likes":{$ne:50}}) |
示例 1
以下示例檢索集合中名為 sarmista 的文件。
from pymongo import MongoClient
#Creating a pymongo client
client = MongoClient('localhost', 27017)
#Getting the database instance
db = client['sdsegf']
#Creating a collection
coll = db['example']
#Inserting document into a collection
data = [
{"_id": "1001", "name": "Ram", "age": "26", "city": "Hyderabad"},
{"_id": "1002", "name": "Rahim", "age": "27", "city": "Bangalore"},
{"_id": "1003", "name": "Robert", "age": "28", "city": "Mumbai"},
{"_id": "1004", "name": "Romeo", "age": "25", "city": "Pune"},
{"_id": "1005", "name": "Sarmista", "age": "23", "city": "Delhi"},
{"_id": "1006", "name": "Rasajna", "age": "26", "city": "Chennai"}
]
res = coll.insert_many(data)
print("Data inserted ......")
#Retrieving data
print("Documents in the collection: ")
for doc1 in coll.find({"name":"Sarmista"}):
print(doc1)
輸出
Data inserted ......
Documents in the collection:
{'_id': '1005', 'name': 'Sarmista', 'age': '23', 'city': 'Delhi'}
示例 2
以下示例檢索集合中年齡值大於 26 的文件。
from pymongo import MongoClient
#Creating a pymongo client
client = MongoClient('localhost', 27017)
#Getting the database instance
db = client['ghhj']
#Creating a collection
coll = db['example']
#Inserting document into a collection
data = [
{"_id": "1001", "name": "Ram", "age": "26", "city": "Hyderabad"},
{"_id": "1002", "name": "Rahim", "age": "27", "city": "Bangalore"},
{"_id": "1003", "name": "Robert", "age": "28", "city": "Mumbai"},
{"_id": "1004", "name": "Romeo", "age": "25", "city": "Pune"},
{"_id": "1005", "name": "Sarmista", "age": "23", "city": "Delhi"},
{"_id": "1006", "name": "Rasajna", "age": "26", "city": "Chennai"}
]
res = coll.insert_many(data)
print("Data inserted ......")
#Retrieving data
print("Documents in the collection: ")
for doc in coll.find({"age":{"$gt":"26"}}):
print(doc)
輸出
Data inserted ......
Documents in the collection:
{'_id': '1002', 'name': 'Rahim', 'age': '27', 'city': 'Bangalore'}
{'_id': '1003', 'name': 'Robert', 'age': '28', 'city': 'Mumbai'}
Python MongoDB - 排序
在檢索集合的內容時,您可以使用sort()方法對它們進行排序並按升序或降序排列。
對於此方法,您可以傳遞欄位和排序順序,該順序為 1 或 -1。其中,1 表示升序,-1 表示降序。
語法
以下是sort()方法的語法。
>db.COLLECTION_NAME.find().sort({KEY:1})
示例
假設我們已經建立了一個集合並在其中插入了5個文件,如下所示:
> use testDB
switched to db testDB
> db.createCollection("myColl")
{ "ok" : 1 }
> data = [
... {"_id": "1001", "name": "Ram", "age": "26", "city": "Hyderabad"},
... {"_id": "1002", "name": "Rahim", "age": 27, "city": "Bangalore"},
... {"_id": "1003", "name": "Robert", "age": 28, "city": "Mumbai"},
... {"_id": "1004", "name": "Romeo", "age": 25, "city": "Pune"},
... {"_id": "1005", "name": "Sarmista", "age": 23, "city": "Delhi"},
... {"_id": "1006", "name": "Rasajna", "age": 26, "city": "Chennai"}
]
> db.sample.insert(data)
BulkWriteResult({
"writeErrors" : [ ],
"writeConcernErrors" : [ ],
"nInserted" : 6,
"nUpserted" : 0,
"nMatched" : 0,
"nModified" : 0,
"nRemoved" : 0,
"upserted" : [ ]
})
以下程式碼檢索集合中所有根據年齡按升序排序的文件。
> db.sample.find().sort({age:1})
{ "_id" : "1005", "name" : "Sarmista", "age" : 23, "city" : "Delhi" }
{ "_id" : "1004", "name" : "Romeo", "age" : 25, "city" : "Pune" }
{ "_id" : "1006", "name" : "Rasajna", "age" : 26, "city" : "Chennai" }
{ "_id" : "1002", "name" : "Rahim", "age" : 27, "city" : "Bangalore" }
{ "_id" : "1003", "name" : "Robert", "age" : 28, "city" : "Mumbai" }
{ "_id" : "1001", "name" : "Ram", "age" : "26", "city" : "Hyderabad" }
使用Python對文件進行排序
為了按升序或降序對查詢結果進行排序,pymongo提供了sort()方法。在此方法中,傳遞一個數字值,表示您需要結果中的文件數量。
預設情況下,此方法根據指定的欄位按升序對文件進行排序。如果您需要按降序排序,請將-1與欄位名稱一起傳遞:
coll.find().sort("age",-1)
示例
以下示例檢索集合中所有根據年齡值按升序排列的文件:
from pymongo import MongoClient
#Creating a pymongo client
client = MongoClient('localhost', 27017)
#Getting the database instance
db = client['b_mydb']
#Creating a collection
coll = db['myColl']
#Inserting document into a collection
data = [
{"_id": "1001", "name": "Ram", "age": "26", "city": "Hyderabad"},
{"_id": "1002", "name": "Rahim", "age": "27", "city": "Bangalore"},
{"_id": "1003", "name": "Robert", "age": "28", "city": "Mumbai"},
{"_id": "1004", "name": "Romeo", "age": 25, "city": "Pune"},
{"_id": "1005", "name": "Sarmista", "age": 23, "city": "Delhi"},
{"_id": "1006", "name": "Rasajna", "age": 26, "city": "Chennai"}
]
res = coll.insert_many(data)
print("Data inserted ......")
#Retrieving first 3 documents using the find() and limit() methods
print("List of documents (sorted in ascending order based on age): ")
for doc1 in coll.find().sort("age"):
print(doc1)
輸出
Data inserted ......
List of documents (sorted in ascending order based on age):
{'_id': '1005', 'name': 'Sarmista', 'age': 23, 'city': 'Delhi'}
{'_id': '1004', 'name': 'Romeo', 'age': 25, 'city': 'Pune'}
{'_id': '1006', 'name': 'Rasajna', 'age': 26, 'city': 'Chennai'}
{'_id': '1001', 'name': 'Ram', 'age': '26', 'city': 'Hyderabad'}
{'_id': '1002', 'name': 'Rahim', 'age': '27', 'city': 'Bangalore'}
{'_id': '1003', 'name': 'Robert', 'age': '28', 'city': 'Mumbai'}
Python MongoDB - 刪除文件
您可以使用MongoDB的remove()方法刪除集合中的文件。此方法接受兩個可選引數:
刪除條件,指定刪除文件的條件。
只有一個,如果您將true或1作為第二個引數傳遞,則只會刪除一個文件。
語法
以下是remove()方法的語法:
>db.COLLECTION_NAME.remove(DELLETION_CRITTERIA)
示例
假設我們已經建立了一個集合並在其中插入了5個文件,如下所示:
> use testDB
switched to db testDB
> db.createCollection("myColl")
{ "ok" : 1 }
> data = [
... {"_id": "1001", "name": "Ram", "age": "26", "city": "Hyderabad"},
... {"_id": "1002", "name": "Rahim", "age": 27, "city": "Bangalore"},
... {"_id": "1003", "name": "Robert", "age": 28, "city": "Mumbai"},
... {"_id": "1004", "name": "Romeo", "age": 25, "city": "Pune"},
... {"_id": "1005", "name": "Sarmista", "age": 23, "city": "Delhi"},
... {"_id": "1006", "name": "Rasajna", "age": 26, "city": "Chennai"}
]
> db.sample.insert(data)
BulkWriteResult({
"writeErrors" : [ ],
"writeConcernErrors" : [ ],
"nInserted" : 6,
"nUpserted" : 0,
"nMatched" : 0,
"nModified" : 0,
"nRemoved" : 0,
"upserted" : [ ]
})
以下查詢刪除集合中名稱值為Sarmista的文件。
> db.sample.remove({"name": "Sarmista"})
WriteResult({ "nRemoved" : 1 })
> db.sample.find()
{ "_id" : "1001", "name" : "Ram", "age" : "26", "city" : "Hyderabad" }
{ "_id" : "1002", "name" : "Rahim", "age" : 27, "city" : "Bangalore" }
{ "_id" : "1003", "name" : "Robert", "age" : 28, "city" : "Mumbai" }
{ "_id" : "1004", "name" : "Romeo", "age" : 25, "city" : "Pune" }
{ "_id" : "1006", "name" : "Rasajna", "age" : 26, "city" : "Chennai" }
如果您呼叫remove()方法而不傳遞刪除條件,則集合中的所有文件都將被刪除。
> db.sample.remove({})
WriteResult({ "nRemoved" : 5 })
> db.sample.find()
使用Python刪除文件
要從MangoDB的集合中刪除文件,您可以使用delete_one()和delete_many()方法從集合中刪除文件。
這些方法接受一個查詢物件,指定刪除文件的條件。
delete_one()方法刪除單個文件(如果匹配)。如果未指定查詢,則此方法將刪除集合中的第一個文件。
示例
以下Python示例刪除集合中id值為1006的文件。
from pymongo import MongoClient
#Creating a pymongo client
client = MongoClient('localhost', 27017)
#Getting the database instance
db = client['lpaksgf']
#Creating a collection
coll = db['example']
#Inserting document into a collection
data = [
{"_id": "1001", "name": "Ram", "age": "26", "city": "Hyderabad"},
{"_id": "1002", "name": "Rahim", "age": "27", "city": "Bangalore"},
{"_id": "1003", "name": "Robert", "age": "28", "city": "Mumbai"},
{"_id": "1004", "name": "Romeo", "age": 25, "city": "Pune"},
{"_id": "1005", "name": "Sarmista", "age": 23, "city": "Delhi"},
{"_id": "1006", "name": "Rasajna", "age": 26, "city": "Chennai"}
]
res = coll.insert_many(data)
print("Data inserted ......")
#Deleting one document
coll.delete_one({"_id" : "1006"})
#Retrieving all the records using the find() method
print("Documents in the collection after update operation: ")
for doc2 in coll.find():
print(doc2)
輸出
Data inserted ......
Documents in the collection after update operation:
{'_id': '1001', 'name': 'Ram', 'age': '26', 'city': 'Hyderabad'}
{'_id': '1002', 'name': 'Rahim', 'age': '27', 'city': 'Bangalore'}
{'_id': '1003', 'name': 'Robert', 'age': '28', 'city': 'Mumbai'}
{'_id': '1004', 'name': 'Romeo', 'age': 25, 'city': 'Pune'}
{'_id': '1005', 'name': 'Sarmista', 'age': 23, 'city': 'Delhi'}
類似地,pymongo的delete_many()方法刪除滿足指定條件的所有文件。
示例
以下示例刪除集合中所有年齡值大於26的文件:
from pymongo import MongoClient
#Creating a pymongo client
client = MongoClient('localhost', 27017)
#Getting the database instance
db = client['sampleDB']
#Creating a collection
coll = db['example']
#Inserting document into a collection
data = [
{"_id": "1001", "name": "Ram", "age": "26", "city": "Hyderabad"},
{"_id": "1002", "name": "Rahim", "age": "27", "city": "Bangalore"},
{"_id": "1003", "name": "Robert", "age": "28", "city": "Mumbai"},
{"_id": "1004", "name": "Romeo", "age": "25", "city": "Pune"},
{"_id": "1005", "name": "Sarmista", "age": "23", "city": "Delhi"},
{"_id": "1006", "name": "Rasajna", "age": "26", "city": "Chennai"}
]
res = coll.insert_many(data)
print("Data inserted ......")
#Deleting multiple documents
coll.delete_many({"age":{"$gt":"26"}})
#Retrieving all the records using the find() method
print("Documents in the collection after update operation: ")
for doc2 in coll.find():
print(doc2)
輸出
Data inserted ......
Documents in the collection after update operation:
{'_id': '1001', 'name': 'Ram', 'age': '26', 'city': 'Hyderabad'}
{'_id': '1004', 'name': 'Romeo', 'age': '25', 'city': 'Pune'}
{'_id': '1005', 'name': 'Sarmista', 'age': '23', 'city': 'Delhi'}
{'_id': '1006', 'name': 'Rasajna', 'age': '26', 'city': 'Chennai'}
如果您呼叫delete_many()方法而不傳遞任何查詢,則此方法將刪除集合中的所有文件。
coll.delete_many({})
Python MongoDB - 刪除集合
您可以使用MongoDB的drop()方法刪除集合。
語法
以下是drop()方法的語法:
db.COLLECTION_NAME.drop()
示例
以下示例刪除名為sample的集合:
> show collections myColl sample > db.sample.drop() true > show collections myColl
使用Python刪除集合
您可以透過呼叫drop()方法刪除當前資料庫中的集合。
示例
from pymongo import MongoClient
#Creating a pymongo client
client = MongoClient('localhost', 27017)
#Getting the database instance
db = client['example2']
#Creating a collection
col1 = db['collection']
col1.insert_one({"name": "Ram", "age": "26", "city": "Hyderabad"})
col2 = db['coll']
col2.insert_one({"name": "Rahim", "age": "27", "city": "Bangalore"})
col3 = db['myColl']
col3.insert_one({"name": "Robert", "age": "28", "city": "Mumbai"})
col4 = db['data']
col4.insert_one({"name": "Romeo", "age": "25", "city": "Pune"})
#List of collections
print("List of collections:")
collections = db.list_collection_names()
for coll in collections:
print(coll)
#Dropping a collection
col1.drop()
col4.drop()
print("List of collections after dropping two of them: ")
#List of collections
collections = db.list_collection_names()
for coll in collections:
print(coll)
輸出
List of collections: coll data collection myColl List of collections after dropping two of them: coll myColl
Python MongoDB - 更新
您可以使用update()方法或save()方法更新現有文件的內容。
update方法修改現有文件,而save方法用新文件替換現有文件。
語法
以下是MangoDB的update()和save()方法的語法:
>db.COLLECTION_NAME.update(SELECTION_CRITERIA, UPDATED_DATA)
Or,
db.COLLECTION_NAME.save({_id:ObjectId(),NEW_DATA})
示例
假設我們在資料庫中建立了一個集合並在其中插入了3條記錄,如下所示:
> use testdatabase
switched to db testdatabase
> data = [
... {"_id": "1001", "name": "Ram", "age": "26", "city": "Hyderabad"},
... {"_id": "1002", "name" : "Rahim", "age" : 27, "city" : "Bangalore" },
... {"_id": "1003", "name" : "Robert", "age" : 28, "city" : "Mumbai" }
]
[
{
"_id" : "1001",
"name" : "Ram",
"age" : "26",
"city" : "Hyderabad"
},
{
"_id" : "1002",
"name" : "Rahim",
"age" : 27,
"city" : "Bangalore"
},
{
"_id" : "1003",
"name" : "Robert",
"age" : 28,
"city" : "Mumbai"
}
]
> db.createCollection("sample")
{ "ok" : 1 }
> db.sample.insert(data)
以下方法更新id為1002的文件的城市值。
> db.sample.update({"_id":"1002"},{"$set":{"city":"Visakhapatnam"}})
WriteResult({ "nMatched" : 1, "nUpserted" : 0, "nModified" : 1 })
> db.sample.find()
{ "_id" : "1001", "name" : "Ram", "age" : "26", "city" : "Hyderabad" }
{ "_id" : "1002", "name" : "Rahim", "age" : 27, "city" : "Visakhapatnam" }
{ "_id" : "1003", "name" : "Robert", "age" : 28, "city" : "Mumbai" }
類似地,您可以使用save()方法儲存具有相同id的新資料來替換文件。
> db.sample.save(
{ "_id" : "1001", "name" : "Ram", "age" : "26", "city" : "Vijayawada" }
)
WriteResult({ "nMatched" : 1, "nUpserted" : 0, "nModified" : 1 })
> db.sample.find()
{ "_id" : "1001", "name" : "Ram", "age" : "26", "city" : "Vijayawada" }
{ "_id" : "1002", "name" : "Rahim", "age" : 27, "city" : "Visakhapatnam" }
{ "_id" : "1003", "name" : "Robert", "age" : 28, "city" : "Mumbai" }
使用Python更新文件
類似於檢索單個文件的find_one()方法,pymongo的update_one()方法更新單個文件。
此方法接受一個查詢,指定要更新的文件和更新操作。
示例
以下Python示例更新集合中某個文件的location值。
from pymongo import MongoClient
#Creating a pymongo client
client = MongoClient('localhost', 27017)
#Getting the database instance
db = client['myDB']
#Creating a collection
coll = db['example']
#Inserting document into a collection
data = [
{"_id": "101", "name": "Ram", "age": "26", "city": "Hyderabad"},
{"_id": "102", "name": "Rahim", "age": "27", "city": "Bangalore"},
{"_id": "103", "name": "Robert", "age": "28", "city": "Mumbai"}
]
res = coll.insert_many(data)
print("Data inserted ......")
#Retrieving all the records using the find() method
print("Documents in the collection: ")
for doc1 in coll.find():
print(doc1)
coll.update_one({"_id":"102"},{"$set":{"city":"Visakhapatnam"}})
#Retrieving all the records using the find() method
print("Documents in the collection after update operation: ")
for doc2 in coll.find():
print(doc2)
輸出
Data inserted ......
Documents in the collection:
{'_id': '101', 'name': 'Ram', 'age': '26', 'city': 'Hyderabad'}
{'_id': '102', 'name': 'Rahim', 'age': '27', 'city': 'Bangalore'}
{'_id': '103', 'name': 'Robert', 'age': '28', 'city': 'Mumbai'}
Documents in the collection after update operation:
{'_id': '101', 'name': 'Ram', 'age': '26', 'city': 'Hyderabad'}
{'_id': '102', 'name': 'Rahim', 'age': '27', 'city': 'Visakhapatnam'}
{'_id': '103', 'name': 'Robert', 'age': '28', 'city': 'Mumbai'}
類似地,pymongo的update_many()方法更新滿足指定條件的所有文件。
示例
以下示例更新集合中所有文件的location值(空條件):
from pymongo import MongoClient
#Creating a pymongo client
client = MongoClient('localhost', 27017)
#Getting the database instance
db = client['myDB']
#Creating a collection
coll = db['example']
#Inserting document into a collection
data = [
{"_id": "101", "name": "Ram", "age": "26", "city": "Hyderabad"},
{"_id": "102", "name": "Rahim", "age": "27", "city": "Bangalore"},
{"_id": "103", "name": "Robert", "age": "28", "city": "Mumbai"}
]
res = coll.insert_many(data)
print("Data inserted ......")
#Retrieving all the records using the find() method
print("Documents in the collection: ")
for doc1 in coll.find():
print(doc1)
coll.update_many({},{"$set":{"city":"Visakhapatnam"}})
#Retrieving all the records using the find() method
print("Documents in the collection after update operation: ")
for doc2 in coll.find():
print(doc2)
輸出
Data inserted ......
Documents in the collection:
{'_id': '101', 'name': 'Ram', 'age': '26', 'city': 'Hyderabad'}
{'_id': '102', 'name': 'Rahim', 'age': '27', 'city': 'Bangalore'}
{'_id': '103', 'name': 'Robert', 'age': '28', 'city': 'Mumbai'}
Documents in the collection after update operation:
{'_id': '101', 'name': 'Ram', 'age': '26', 'city': 'Visakhapatnam'}
{'_id': '102', 'name': 'Rahim', 'age': '27', 'city': 'Visakhapatnam'}
{'_id': '103', 'name': 'Robert', 'age': '28', 'city': 'Visakhapatnam'}
Python MongoDB - Limit
在檢索集合內容時,您可以使用limit()方法限制結果中的文件數量。此方法接受一個數字值,表示您希望結果中包含的文件數量。
語法
以下是limit()方法的語法:
>db.COLLECTION_NAME.find().limit(NUMBER)
示例
假設我們已經建立了一個集合並在其中插入了5個文件,如下所示:
> use testDB
switched to db testDB
> db.createCollection("sample")
{ "ok" : 1 }
> data = [
... {"_id": "1001", "name": "Ram", "age": "26", "city": "Hyderabad"},
... {"_id": "1002", "name": "Rahim", "age": 27, "city": "Bangalore"},
... {"_id": "1003", "name": "Robert", "age": 28, "city": "Mumbai"},
... {"_id": "1004", "name": "Romeo", "age": 25, "city": "Pune"},
... {"_id": "1005", "name": "Sarmista", "age": 23, "city": "Delhi"},
... {"_id": "1006", "name": "Rasajna", "age": 26, "city": "Chennai"}
]
> db.sample.insert(data)
BulkWriteResult({
"writeErrors" : [ ],
"writeConcernErrors" : [ ],
"nInserted" : 6,
"nUpserted" : 0,
"nMatched" : 0,
"nModified" : 0,
"nRemoved" : 0,
"upserted" : [ ]
})
以下程式碼檢索集合中的前3個文件。
> db.sample.find().limit(3)
{ "_id" : "1001", "name" : "Ram", "age" : "26", "city" : "Hyderabad" }
{ "_id" : "1002", "name" : "Rahim", "age" : 27, "city" : "Bangalore" }
{ "_id" : "1003", "name" : "Robert", "age" : 28, "city" : "Mumbai" }
使用Python限制文件
為了將查詢結果限制為特定數量的文件,pymongo提供了limit()方法。在此方法中,傳遞一個數字值,表示您需要結果中的文件數量。
示例
以下示例檢索集合中的前三個文件。
from pymongo import MongoClient
#Creating a pymongo client
client = MongoClient('localhost', 27017)
#Getting the database instance
db = client['l']
#Creating a collection
coll = db['myColl']
#Inserting document into a collection
data = [
{"_id": "1001", "name": "Ram", "age": "26", "city": "Hyderabad"},
{"_id": "1002", "name": "Rahim", "age": "27", "city": "Bangalore"},
{"_id": "1003", "name": "Robert", "age": "28", "city": "Mumbai"},
{"_id": "1004", "name": "Romeo", "age": 25, "city": "Pune"},
{"_id": "1005", "name": "Sarmista", "age": 23, "city": "Delhi"},
{"_id": "1006", "name": "Rasajna", "age": 26, "city": "Chennai"}
]
res = coll.insert_many(data)
print("Data inserted ......")
#Retrieving first 3 documents using the find() and limit() methods
print("First 3 documents in the collection: ")
for doc1 in coll.find().limit(3):
print(doc1)
輸出
Data inserted ......
First 3 documents in the collection:
{'_id': '1001', 'name': 'Ram', 'age': '26', 'city': 'Hyderabad'}
{'_id': '1002', 'name': 'Rahim', 'age': '27', 'city': 'Bangalore'}
{'_id': '1003', 'name': 'Robert', 'age': '28', 'city': 'Mumbai'}