- NHibernate 教程
- NHibernate - 首頁
- NHibernate - 概述
- NHibernate - 架構
- NHibernate - ORM
- NHibernate - 環境設定
- NHibernate - 入門
- NHibernate - 基本 ORM
- NHibernate - 基本 CRUD 操作
- NHibernate - Profiler
- 為對映檔案新增 IntelliSense
- NHibernate - 資料型別對映
- NHibernate - 配置
- NHibernate - 覆蓋配置
- NHibernate - 批處理大小
- NHibernate - 快取
- NHibernate - 對映元件
- NHibernate - 關係
- NHibernate - 集合對映
- NHibernate - 級聯操作
- NHibernate - 延遲載入
- NHibernate - 反向關係
- NHibernate - Load/Get
- NHibernate - LINQ
- NHibernate - 查詢語言
- NHibernate - Criteria 查詢
- NHibernate - QueryOver 查詢
- NHibernate - 原生 SQL
- NHibernate - Fluent Hibernate
- NHibernate 有用資源
- NHibernate - 快速指南
- NHibernate - 有用資源
- NHibernate - 討論
NHibernate - 資料型別對映
在本節中,我們將介紹資料型別對映。實體對映非常簡單,實體類始終使用<class>、<subclass>和<joined-subclass>對映元素對映到資料庫表。值型別需要更多內容,這就是需要對映型別的地方。
NHibernate 能夠對映各種資料型別。以下是支援的最常見資料型別列表。
| 對映型別 | .NET 型別 | System.Data.DbType |
|---|---|---|
| Int16 | System.Int16 | DbType.Int16 |
| Int32 | System.Int32 | DbType.Int32 |
| Int64 | System.Int64 | DbType.Int64 |
| Single | System.Single | DbType.Single |
| Double | System.Double | DbType.Double |
| Decimal | System.Decimal | DbType.Decimal |
| String | System.String | DbType.String |
| AnsiString | System.String | DbType.AnsiString |
| Byte | System.Byte | DbType.Byte |
| Char | System.Char | DbType.StringFixedLength — 一個字元 |
| AnsiChar | System.Char | DbType.AnsiStringFixedLength — 一個字元 |
| Boolean | System.Boolean | DbType.Boolean |
| Guid | System.Guid | DbType.Guid |
| PersistentEnum | System.Enum(列舉) | 底層值的 DbType |
| TrueFalse | System.Boolean | DbType.AnsiStringFixedLength — 'T' 或 'F' |
| YesNo | System.Boolean | DbType.AnsiStringFixedLength — 'Y' 或 'N' |
| DateTime | DateTime | DbType.DateTime — 忽略毫秒 |
| Ticks | System.DateTime | DbType.Int64 |
| TimeSpan | System.TimeSpan | DbType.Int64 |
| Timestamp | System.DateTime | DbType.DateTime — 根據資料庫支援的精度 |
| Binary | System.Byte[] | DbType.Binary |
| BinaryBlob | System.Byte[] | DbType.Binary |
| StringClob | System.String | DbType.String |
| Serializable | 標記有 SerializableAttribute 的任何 System.Object | DbType.Binary |
| CultureInfo | System.Globalization.CultureInfo | DbType.String — 用於文化的五個字元 |
| Type | System.Type | DbType.String 包含程式集限定名稱 |
上表詳細說明了以下要點。
從簡單的數字型別到字串,可以使用varchar、char等多種方式進行對映,以及字串 blob 和資料庫支援的所有型別的變化。
它還能夠對映布林值,既可以對映到使用零和一的欄位,也可以對映到包含 true、false 或 T 和 F 的字元欄位。
有多種方法可以定義如何將其對映到後端,資料庫中的布林值。
我們可以處理DateTime的對映,包括和不包括時區偏移量、夏令時等。
我們還可以對映列舉;我們可以將它們對映到字串或其底層數值。
讓我們來看一個簡單的示例,其中我們在資料庫和 Student 類中具有相同的屬性名稱。
現在讓我們將 Student 類中的 FirstMidName 更改為 FirstName,我們不會更改 FirstMidName 列,但我們將看到如何告訴 NHibernate 執行此轉換。以下是更新後的 Student 類。
using System;
using System.Collections.Generic;
using System.Linq;
using System.Text;
using System.Threading.Tasks;

namespace NHibernateDemoApp {

   class Student {
      public virtual int ID { get; set; }
      public virtual string LastName { get; set; }
      public virtual string FirstName { get; set; }
   }
}
以下是 NHibernate 對映檔案的實現。
<?xml version = "1.0" encoding = "utf-8" ?>
<hibernate-mapping xmlns = "urn:nhibernate-mapping-2.2" assembly = "NHibernateDemoApp"
   namespace = "NHibernateDemoApp">

   <class name = "Student">

      <id name = "ID">
         <generator class = "native"/>
      </id>

      <property name = "LastName"/>
      <property name = "FirstName" column = "FirstMidName" type = "String"/>
   </class>

</hibernate-mapping>
在此示例中,假設 FirstName 欄位是 .NET 字串,而 FirstMidName 列是SQL nvarchar。現在要告訴 NHibernate 如何執行此轉換,請將 name 設定為FirstName,將 column 設定為FirstMidName,並指定對映型別等於 String,這適用於此特定轉換。
以下是Program.cs檔案的實現。
using HibernatingRhinos.Profiler.Appender.NHibernate;
using NHibernate.Cfg;
using NHibernate.Dialect;
using NHibernate.Driver;

using System;
using System.Linq;
using System.Reflection;

namespace NHibernateDemoApp {

   class Program {

      static void Main(string[] args) {

         NHibernateProfiler.Initialize();
         var cfg = new Configuration();

         String Data Source = asia13797\\sqlexpress;
         String Initial Catalog = NHibernateDemoDB;
         String Integrated Security = True;
         String Connect Timeout = 15;
         String Encrypt = False;
         String TrustServerCertificate = False;
         String ApplicationIntent = ReadWrite;
         String MultiSubnetFailover = False;

         cfg.DataBaseIntegration(x = > { x.ConnectionString = "Data Source +
            Initial Catalog + Integrated Security + Connect Timeout + Encrypt +
            TrustServerCertificate + ApplicationIntent + MultiSubnetFailover";

            x.Driver<SqlClientDriver>();
            x.Dialect<MsSql2008Dialect>();
            x.LogSqlInConsole = true;
         });

         cfg.AddAssembly(Assembly.GetExecutingAssembly());
         var sefact = cfg.BuildSessionFactory();

         using (var session = sefact.OpenSession()) {

            using (var tx = session.BeginTransaction()) {
               var students = session.CreateCriteria<Student>().List<Student>();
               Console.WriteLine("\nFetch the complete list again\n");

               foreach (var student in students) {
                  Console.WriteLine("{0} \t{1} \t{2}", student.ID, student.FirstName,
                     student.LastName);
               }

               tx.Commit();
            }

            Console.ReadLine();
         }
      }
   }
}
現在執行應用程式時,您將看到以下輸出。
NHibernate: SELECT this_.ID as ID0_0_, this_.LastName as LastName0_0_,
   this_.FirstMidName as FirstMid3_0_0_ FROM Student this_

Fetch the complete list again
3 Allan Bommer
4 Jerry Lewis
如您所見,它已將不同的屬性名稱對映到資料庫中的列名稱。
讓我們來看另一個示例,其中我們將在 Student 類中新增另一個列舉型別的屬性。以下是 Student 類的實現。
using System;
using System.Collections.Generic;
using System.Linq; using System.Text;
using System.Threading.Tasks;

namespace NHibernateDemoApp {

   class Student {
      public virtual int ID { get; set; }
      public virtual string LastName { get; set; }
      public virtual string FirstName { get; set; }
      public virtual StudentAcademicStanding AcademicStanding { get; set; }
   }

   public enum StudentAcademicStanding {
      Excellent,
      Good,
      Fair,
      Poor,
      Terrible
   }
}
如您所見,列舉可以有多種不同的值,例如 Excellent、Good、Fair、Poor 和 Terrible。
跳到對映檔案,您會看到這些屬性中的每一個都在對映檔案中列出,包括新新增的AcademicStanding屬性。
<?xml version = "1.0" encoding = "utf-8" ?>
<hibernate-mapping xmlns = "urn:nhibernate-mapping-2.2"
   assembly = "NHibernateDemoApp" namespace = "NHibernateDemoApp">

   <class name = "Student">

      <id name = "ID">
         <generator class = "native"/>
      </id>

      <property name = "LastName"/>
      <property name = "FirstName" column = "FirstMidName" type = "String"/>
      <property name = "AcademicStanding"/>
   </class>

</hibernate-mapping>
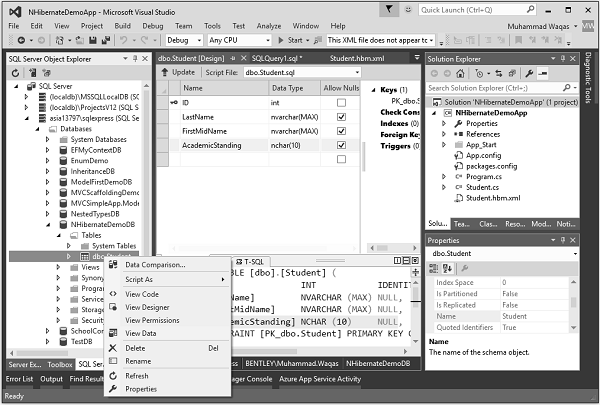
現在我們還需要更改資料庫,因此轉到 SQL Server 物件資源管理器,右鍵單擊資料庫並選擇“新建查詢…”選項。
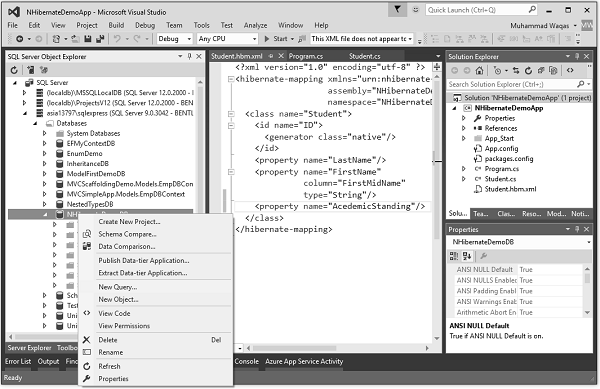
它將開啟查詢編輯器,然後指定以下查詢。
DROP TABLE [dbo].[Student]

CREATE TABLE [dbo].[Student] (
   [ID] INT IDENTITY (1, 1) NOT NULL,
   [LastName] NVARCHAR (MAX) NULL,
   [FirstMidName] NVARCHAR (MAX) NULL,
   [AcademicStanding] NCHAR(10) NULL,
   CONSTRAINT [PK_dbo.Student] PRIMARY KEY CLUSTERED ([ID] ASC)
);
此查詢將首先刪除現有的 student 表,然後建立一個新表。
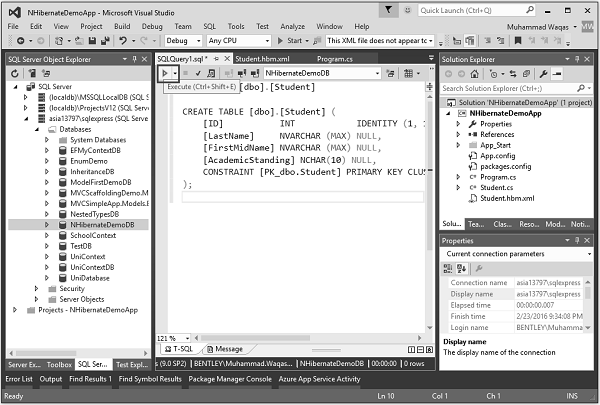
單擊上面顯示的“執行”圖示。查詢成功執行後,您將看到一條訊息。
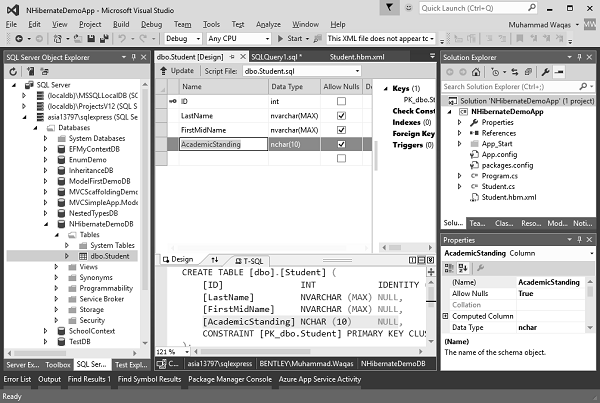
展開資料庫和表下拉列表,然後右鍵單擊 Student 表並選擇“檢視設計器”。
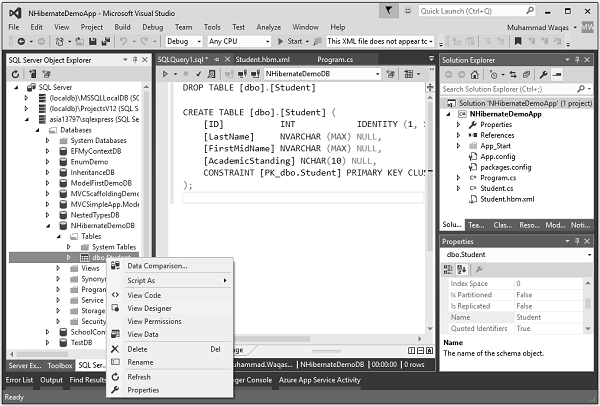
現在,您將看到新建立的表,該表也具有新屬性 AcademicStanding。
讓我們新增兩條記錄,如下面的Program.cs檔案所示。
using HibernatingRhinos.Profiler.Appender.NHibernate;
using NHibernate.Cfg;
using NHibernate.Dialect;
using NHibernate.Driver;

using System;
using System.Linq;
using System.Reflection;

namespace NHibernateDemoApp {

   class Program {

      static void Main(string[] args) {

         NHibernateProfiler.Initialize();
         var cfg = new Configuration();

         String Data Source = asia13797\\sqlexpress;
         String Initial Catalog = NHibernateDemoDB;
         String Integrated Security = True;
         String Connect Timeout = 15;
         String Encrypt = False;
         String TrustServerCertificate = False;
         String ApplicationIntent = ReadWrite;
         String MultiSubnetFailover = False;

         cfg.DataBaseIntegration(x = > { x.ConnectionString = "Data Source +
            Initial Catalog + Integrated Security + Connect Timeout + Encrypt +
            TrustServerCertificate + ApplicationIntent + MultiSubnetFailover";

            x.Driver<SqlClientDriver>();
            x.Dialect<MsSql2008Dialect>();
         });

         cfg.AddAssembly(Assembly.GetExecutingAssembly());
         var sefact = cfg.BuildSessionFactory();

         using (var session = sefact.OpenSession()) {
            using (var tx = session.BeginTransaction()) {

               var student1 = new Student {
                  ID = 1,
                  FirstName = "Allan",
                  LastName = "Bommer",
                  AcademicStanding = StudentAcademicStanding.Excellent
               };

               var student2 = new Student {
                  ID = 2,
                  FirstName = "Jerry",
                  LastName = "Lewis",
                  AcademicStanding = StudentAcademicStanding.Good
               };

               session.Save(student1);
               session.Save(student2);
               var students = session.CreateCriteria<Student>().List<Student>();
               Console.WriteLine("\nFetch the complete list again\n");

               foreach (var student in students) {
                  Console.WriteLine("{0} \t{1} \t{2} \t{3}", student.ID,
                     student.FirstName, student.LastName, student.AcademicStanding);
               }

               tx.Commit();
            }

            Console.ReadLine();
         }
      }
   }
}
現在讓我們執行您的應用程式,您將在控制檯視窗中看到以下輸出。
Fetch the complete list again

1 Allan Bommer Excellent
2 Jerry Lewis Good
現在讓我們透過右鍵單擊 Student 表來檢視資料庫。
選擇“檢視資料”,您將在 student 表中看到兩條記錄,如下面的螢幕截圖所示。
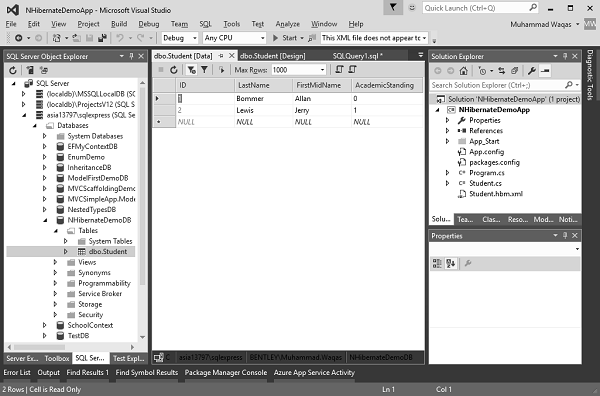
您可以看到添加了兩條記錄,Allan 的 AcademicStanding 為 0,Jerry 的 AcademicStanding 為 1。這是因為在 .Net 中,第一個列舉值預設為 0,如果檢視StudentAcademicStanding,則為 Excellent。而,在 Student.cs 檔案中,Good 是第二個,因此其值為 1。