- MVC 框架教程
- MVC 框架 - 首頁
- MVC 框架 - 簡介
- MVC 框架 - 架構
- MVC 框架 - ASP.NET 表單
- MVC 框架 - 第一個應用程式
- MVC 框架 - 資料夾
- MVC 框架 - 模型
- MVC 框架 - 控制器
- MVC 框架 - 檢視
- MVC 框架 - 佈局
- MVC 框架 - 路由引擎
- MVC 框架 - 操作過濾器
- 高階示例
- MVC 框架 - Ajax 支援
- MVC 框架 - 打包
- 異常處理
- MVC 框架有用資源
- 問答
- MVC 框架 - 快速指南
- MVC 框架 - 資源
- MVC 框架 - 討論
MVC 框架 - 佈局
佈局用於在 MVC 中為應用程式的所有頁面提供一致的外觀和感覺。它與定義主頁面相同,但 MVC 提供了一些額外的功能。
建立 MVC 佈局
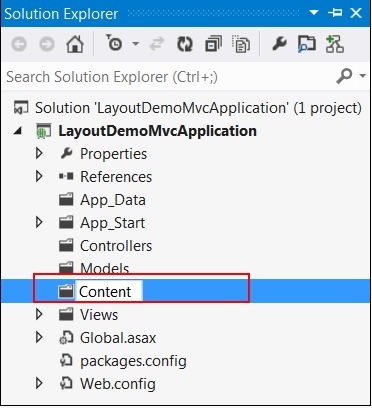
步驟 1 - 使用“Internet 應用程式”作為模板建立一個示例 MVC 應用程式,並在 Web 應用程式的根目錄中建立一個 Content 資料夾。
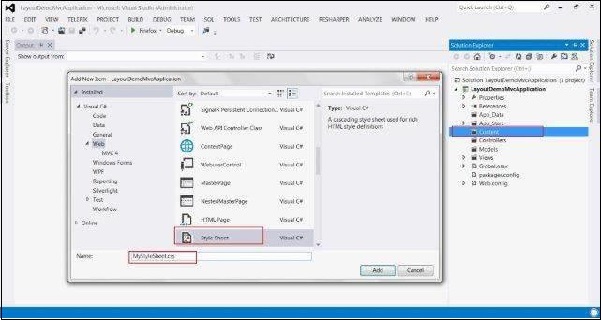
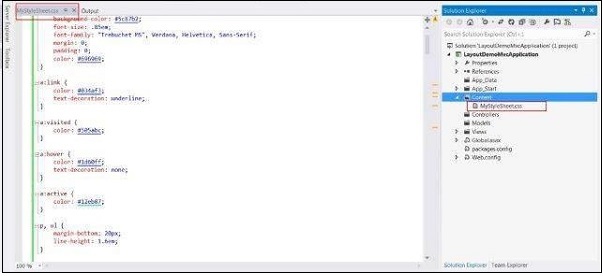
步驟 2 - 在 CONTENT 資料夾下建立一個名為 MyStyleSheet.css 的樣式表文件。此 CSS 檔案將包含所有必要的 CSS 類,以確保 Web 應用程式頁面設計的一致性。
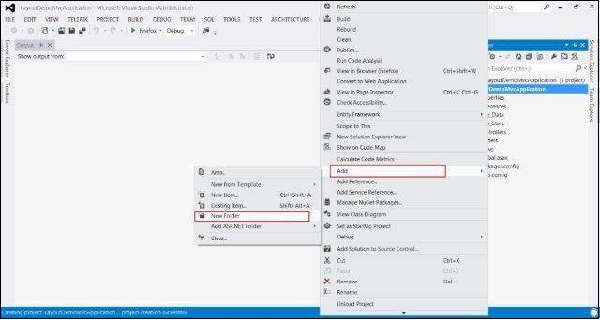
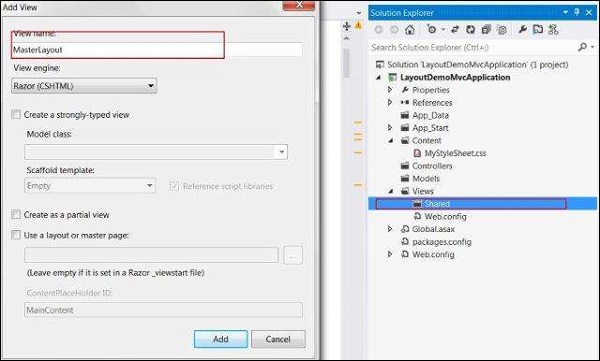
步驟 3 - 在 View 資料夾下建立一個 Shared 資料夾。


步驟 4 - 在 Shared 資料夾下建立一個 MasterLayout.cshtml 檔案。MasterLayout.cshtml 檔案表示應用程式中每個頁面的佈局。在解決方案資源管理器中右鍵單擊 Shared 資料夾,然後轉到“新增項”並單擊“檢視”。複製以下佈局程式碼。
佈局程式碼
<!DOCTYPE html>
<html lang = "en">
<head>
<meta charset = "utf-8" />
<title>@ViewBag.Title - Tutorial Point</title>
<link href = "~/favicon.ico" rel = "shortcut icon" type = "image/x-icon" />
<link rel = "stylesheet" href = "@Url.Content("~/Content/MyStyleSheet.css")" />
</head>
<body>
<header>
<div class = "content-wrapper">
<div class = "float-left">
<p class = "site-title">
@Html.ActionLink("Tutorial Point", "Index", "Home")
</p>
</div>
<div class = "float-right">
<nav>
<ul id = "menu">
<li>@Html.ActionLink("Home", "Index", "Home")</li>
<li>@Html.ActionLink("About", "About", "Home")</li>
</ul>
</nav>
</div>
</div>
</header>
<div id = "body">
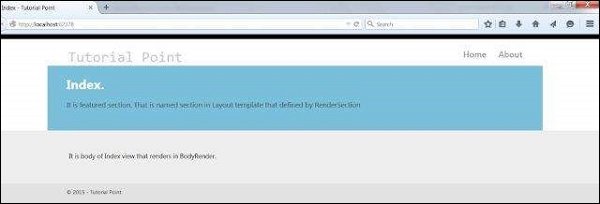
@RenderSection("featured", required: false)
<section class = "content-wrapper main-content clear-fix">
@RenderBody()
</section>
</div>
<footer>
<div class = "content-wrapper">
<div class = "float-left">
<p>© @DateTime.Now.Year - Tutorial Point</p>
</div>
</div>
</footer>
</body>
</html>
在此佈局中,我們使用了 HTML 幫助器方法和其他一些系統定義的方法,因此讓我們逐一檢視這些方法。
Url.Content() - 此方法指定我們在檢視程式碼中使用的任何檔案的路徑。它以虛擬路徑作為輸入並返回絕對路徑。
Html.ActionLink() - 此方法呈現 HTML 連結,這些連結連結到某個控制器的操作。第一個引數指定顯示名稱,第二個引數指定操作名稱,第三個引數指定控制器名稱。
RenderSection() - 指定我們想要在模板中該位置顯示的部分的名稱。
RenderBody() - 呈現關聯檢視的實際主體。
步驟 5 - 最後,開啟 Views 資料夾內的 _ViewStart.cshtml 檔案並新增以下程式碼 -
@{
   Layout = "~/Views/Shared/_Layout.cshtml";
}
如果該檔案不存在,您可以使用此名稱建立該檔案。
步驟 6 - 現在執行應用程式以檢視修改後的主頁。