
 資料結構
資料結構 網路
網路 關係型資料庫管理系統
 作業系統
作業系統 Java
Java iOS
iOS HTML
HTML CSS
CSS Android
 Python
 C 程式設計
 C++
C++ C#
C# MongoDB
 MySQL
MySQL Javascript
 PHP
PHP在 Python 中使用 Tkinter 載入 Pygame Surface 中的影像
結合 Pygame 的圖形渲染能力和 Tkinter 的 GUI 建立功能,可以建立具有吸引人視覺元素的強大應用程式。在本教程中,我們將探討將 Pygame 表面整合到 Tkinter 應用程式中的方法,重點介紹載入影像,特別是使用 Pygame 圓形演示該過程。
什麼是 Pygame?
Pygame 是一套用於編寫影片遊戲的 Python 模組。它提供了處理圖形、使用者輸入、聲音等功能。另一方面,Tkinter 是 Python 的標準 GUI(圖形使用者介面)工具包。透過結合 Pygame 和 Tkinter,開發人員可以利用這兩個庫的優勢來建立互動式且視覺上吸引人的應用程式。
在繼續之前,請確保已安裝 Pygame 和 Pillow (PIL)。您可以使用以下命令安裝它們:
pip install pygame Pillow
現在,讓我們深入瞭解分步過程。
步驟 1:初始化 Pygame
第一步是初始化 Pygame。這將設定 Pygame 模組併為圖形操作準備環境。
import pygame

# Initialize Pygame
pygame.init()
步驟 2:建立 Pygame Surface
接下來,我們建立一個 Pygame Surface,我們將在其中繪製圖形。在本例中,我們將在 Surface 上繪製一個藍色圓形。如有需要,請確保將此程式碼替換為您自己的 Surface 建立邏輯。
width, height = 300, 200

# Create a Pygame surface with an alpha channel
pygame_surface = pygame.Surface((width, height), pygame.SRCALPHA)

# Draw a blue circle on the surface
pygame.draw.circle(pygame_surface, (0, 0, 255), (150, 100), 50)
在上面的程式碼中,pygame.Surface 用於建立具有 alpha 通道 (pygame.SRCALPHA) 的 Surface。alpha 通道允許影像透明。然後使用 pygame.draw.circle 函式在此 Surface 上繪製一個藍色圓形。
步驟 3:初始化 Tkinter
我們需要建立一個 Tkinter 視窗,在其中顯示我們的 Pygame Surface。
import tkinter as tk

# Create a Tkinter window
root = tk.Tk()
root.title("Loading Image in Tkinter from Pygame Surface")
root.geometry("720x250")
步驟 4:將 Pygame Surface 轉換為 PIL Image
要在 Tkinter 中顯示 Pygame Surface,我們需要將其轉換為 Tkinter 能夠理解的格式。我們將使用 Pillow 庫 (PIL) 將 Pygame Surface 轉換為 PIL Image。
from PIL import Image

# Convert Pygame surface to PIL Image
pygame_image = pygame.image.tostring(pygame_surface, 'RGBA')
pil_image = Image.frombytes('RGBA', (width, height), pygame_image)
這裡,pygame.image.tostring 將 Pygame Surface 轉換為畫素資料的字串,Image.frombytes 從此畫素資料建立 PIL Image。
步驟 5:將 PIL Image 轉換為 Tkinter PhotoImage
現在我們有了 PIL Image,我們可以使用 ImageTk 模組將其轉換為 Tkinter PhotoImage。
from PIL import ImageTk

# Convert PIL Image to Tkinter PhotoImage
tk_image = ImageTk.PhotoImage(pil_image)
步驟 6:建立 Tkinter Label 並顯示影像
最後一步是建立一個 Tkinter Label 並將其上顯示轉換後的影像。
# Create a Tkinter label to display the image
label = tk.Label(root, image=tk_image)
label.pack()
步驟 7:執行 Tkinter 主迴圈
為了使 Tkinter 視窗保持開啟並響應,我們需要執行 Tkinter 主迴圈。
# Run the Tkinter main loop
root.mainloop()
將所有步驟整合在一起
讓我們將所有這些步驟整合在一起並檢查輸出:
示例
import pygame
from PIL import Image, ImageTk
import tkinter as tk

# Initialize Pygame
pygame.init()

# Create a Pygame Surface
width, height = 400, 300
pygame_surface = pygame.Surface((width, height), pygame.SRCALPHA)
pygame.draw.circle(pygame_surface, (0, 0, 255), (150, 100), 50)

# Initialize Tkinter
root = tk.Tk()
root.title("Loading Image in Tkinter from Pygame Surface")
root.geometry("720x250")

# Convert Pygame Surface to PIL Image
pygame_image = pygame.image.tostring(pygame_surface, 'RGBA')
pil_image = Image.frombytes('RGBA', (width, height), pygame_image)

# Convert PIL Image to Tkinter PhotoImage
tk_image = ImageTk.PhotoImage(pil_image)

# Create a Tkinter Label and Display the Image
label = tk.Label(root, image=tk_image)
label.pack()

# Run the Tkinter Main Loop
root.mainloop()

# Quit Pygame
pygame.quit()
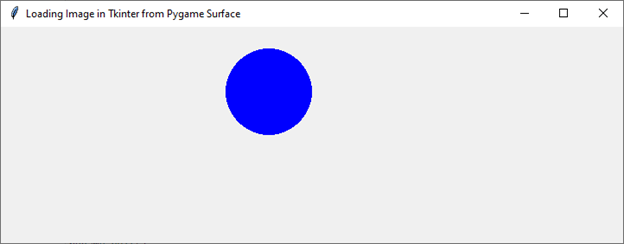
輸出
上面的指令碼初始化 Pygame,建立一個帶有藍色圓形的 Pygame Surface,使用 Pillow 將其轉換為 Tkinter 相容格式,然後在 Tkinter 視窗中顯示它。
結論
在本教程中,我們探討了將 Pygame Surface 整合到 Tkinter 應用程式中的過程。透過結合這兩個庫的優勢,開發人員可以建立視覺上吸引人且互動式的應用程式。提供的示例演示瞭如何在 Surface 上繪製 Pygame 圓形,將其轉換為 Tkinter 相容格式,並在 Tkinter 視窗中顯示它。

209 次瀏覽
