- JBoss Fuse 教程
- JBoss Fuse – 主頁
- JBoss Fuse - ESB 簡介
- 什麼是 Fuse?
- JBoss Fuse – Apache Karaf
- JBoss Fuse – Apache Camel
- JBoss Fuse – Camel 概念
- JBoss Fuse – Apache CXF
- JBoss Fuse – REST Web 服務
- JBoss Fuse – Apache AMQ
- JBoss Fuse – 使用 Camel 的 AMQ
- JBoss Fuse – Fabric
- JBoss Fuse – 子容器
- JBoss Fuse – 問題和解決方案
- JBoss Fuse 有用資源
- JBoss Fuse - 快速指南
- JBoss Fuse - 有用資源
- JBoss Fuse - 討論
JBoss Fuse - Apache Camel
在本章中,我們將討論什麼是 Apache Camel 以及它如何有效地在端點之間路由資料,並附帶一些示例。
什麼是 Apache Camel?
Apache Camel 是一個開源的整合框架,始於 2007 年初。
它是一種基於 EIP(企業整合模式)的方法,提供了許多開箱即用的模式實現,可用於解決企業整合問題。EIP 不過是針對企業整合中已記錄且反覆出現的問題的成熟解決方案。
Camel 也被稱為路由和中介引擎,因為它可以有效地在端點之間路由資料,同時處理繁重的任務,例如資料格式轉換、端點連線等等。
基本示例
使用 Apache Camel 的先決條件是:
- Java
- Maven
- Redhat JBoss Fuse 6.1-GA-379
建立應用程式的基本框架
mvn:archetype generate
–DgroupId = com.tutorialpoint.app
–DartifactId = camel-first-app
–DarchetypeGroupId = org.apache.camel.archetypes
–DarchetypeArtifactId = camel-archetype-spring
–DinteractiveMode = false -X
這應該會生成以下目錄結構。
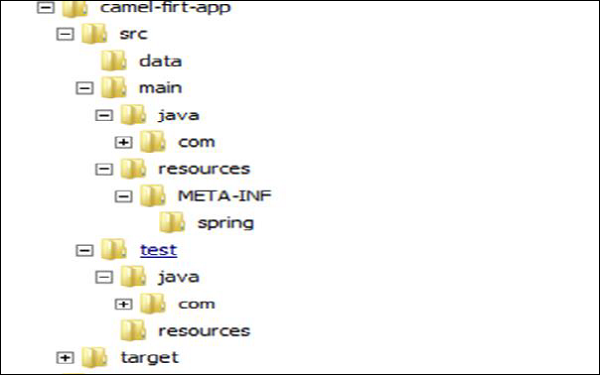
這是我們生成的 Camel 應用程式的基本框架。
編輯 camel-context.xml
編輯 **camel-first-app → src → main → resources → META-INF\spring\camel-context**.xml 以匹配如下內容
<?xml version = "1.0" encoding = "UTF-8"?>
<!-- Configures the Camel Context-->
<beans xmlns = "http://www.springframework.org/schema/beans"
   xmlns:xsi = "http://www.w3.org/2001/XMLSchema-instance"
   xsi:schemaLocation = "http://www.springframework.org/schema/beans
   http://www.springframework.org/schema/beans/spring-beans.xsd
   http://camel.apache.org/schema/spring
   http://camel.apache.org/schema/spring/camel-spring.xsd">

   <camelContext xmlns = "http://camel.apache.org/schema/spring">
      <!-- here is a sample which processes the input file
         (leaving them in place - see the 'noop' flag)
         then performs content based routing on the message using XPath -->

      <route>
         <from uri = "file:///d:/src/data?noop=false"/>
         <choice>
            <when>
               <xpath>/person/city = 'London'</xpath>
               <log message = "UK message"/>
               <to uri = "file:///d:/target/messages/uk"/>
            </when>

            <otherwise>
               <log message = "Other message"/>
               <to uri = "file:///d:/target/messages/others"/>
            </otherwise>

         </choice>

      </route>
   </camelContext>
</beans>
編輯 pom.xml
在 <plugins></plugins> 內新增以下程式碼:
<plugin>
   <groupId>org.apache.felix</groupId>
   <artifactId>maven-bundle-plugin</artifactId>
   <version>2.3.4</version>
   <extensions>true</extensions>

   <configuration>
      <instructions>
         <Bundle-SymbolicName>
            ${project.artifactId}
         </Bundle-SymbolicName>
         <Import-Package>*</Import-Package>
      </instructions>
   </configuration>

</plugin>
將打包型別從 **jar → bundle** 更改。
<packaging>bundle</packaging>
使用以下命令構建專案:
mvn clean install
將專案安裝到 Fuse 中
使用 **Fuse.bat/start.bat** 啟動 Fuse。如果使用 **start.bat** 啟動 Fuse,則使用 **client.bat** 連線到 Fuse。您應該會看到如下所示的 UI。
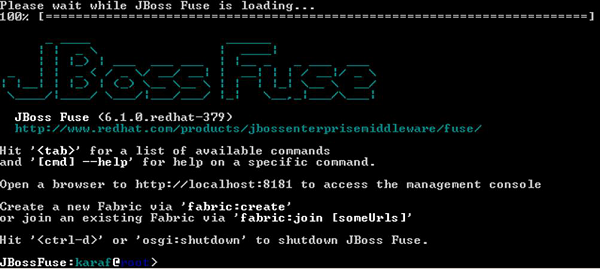
這是用於訪問 Karaf 和 Fuse 命令的 CLI。
install –s mvn:com.tutorialpoint.app/camel-firt-app/1.0-SNAPSHOT
測試您的專案是否正在執行
現在您的應用程式應該已安裝在 Fuse 中。複製 **camel-first-app** 內部的 data 目錄並將其放置在 **D:/src/** 中,它應該將城市為 London 的訊息複製到 **D:/target/merssages/uk** 中。
將輸入檔案放在 **D:/src/data** 中
輸入
Message1.xml
<?xml version = "1.0" encoding = "UTF-8"?>
<person user = "james">
   <firstName>James</firstName>
   <lastName>Strachan</lastName>
   <city>London</city>
</person>
Message2.xml
<?xml version = "1.0" encoding = "UTF-8"?>
<person user = "hiram">
   <firstName>Hiram</firstName>
   <lastName>Chirino</lastName>
   <city>Tampa</city>
</person>
輸出
在 D:/target/messages/uk 中
<?xml version = "1.0" encoding = "UTF-8"?>
<person user = "james">
   <firstName>James</firstName>
   <lastName>Strachan</lastName>
   <city>London</city>
</person>
在 D:/target/messages/others 中
<?xml version = "1.0" encoding = "UTF-8"?>
<person user = "hiram">
   <firstName>Hiram</firstName>
   <lastName>Chirino</lastName>
   <city>Tampa</city>
</person>