
 資料結構
資料結構 網路
網路 關係資料庫管理系統
 作業系統
作業系統 Java
Java iOS
iOS HTML
HTML CSS
CSS Android
 Python
 C 語言程式設計
 C++
C++ C#
C# MongoDB
 MySQL
MySQL Javascript
 PHP
PHP如何使用 OpenCV Python 對影像應用自定義濾波器(二維卷積)?
在本教程中,我們將瞭解如何應用兩種不同的低通濾波器來平滑(去除影像噪聲)。這兩種濾波器是filter2D和boxFilter。這些濾波器是空間中的二維濾波器。
對影像應用二維濾波器也稱為“二維卷積運算”。這些濾波器通常被稱為平均濾波器。
這些濾波器的主要缺點是它們還會平滑影像中的邊緣。如果您不想平滑邊緣,則可以應用“雙邊濾波器”。雙邊濾波器操作可以保留邊緣。
語法
以下是 Filter2D 和 BoxFilter 的語法
cv2.filter2D(img, ddepth, kernel)
cv2.boxFilter(img, ddepth, ksize)
引數
img - 應用濾波器操作的輸入影像。
ddepth - 輸出影像所需的深度。如果“depth = -1”,則返回與輸入影像具有相同深度的輸出影像。
kernel - 卷積核。在 filter2D 中,我們將核作為 NumPy 陣列傳遞。
ksize - 核大小。在 boxFilter 中,我們僅將核大小作為元組傳遞。
步驟
要執行雙邊濾波器操作,您可以按照以下步驟操作:
匯入所需的庫。在以下所有 Python 示例中,所需的 Python 庫是OpenCV。確保您已安裝它。
import cv2
讀取輸入影像並將其轉換為灰度影像
img = cv2.imread('vehicle.jpg')
img = cv2.cvtColor(img, cv2.COLOR_BGR2GRAY)
定義核以應用 filter2D。
Define kernel in case to apply filter2D.
kernel = np.ones((5,5),np.float32)/25
對輸入影像應用filter2D或boxFilter濾波。我們將 ddepth、kernel 或 ksize 作為引數傳遞給濾波器函式。
result = cv2.filter2D(img,-1,kernel)
result = cv2.boxFilter(img,-1,(5,5))
顯示濾波後的影像。
cv2.imshow('Filter 2D Image', result)
cv2.waitKey(0)
cv2.destroyAllWindows())
讓我們看看對輸入影像執行filter2D和boxFilter操作的示例。
在以下所有示例中,我們將使用以下影像作為輸入檔案。

示例 1
在此 Python 程式中,我們使用 5×5 核對輸入影像應用filter2D。
# import required libraries
import cv2
import numpy as np

# read the input image
img = cv2.imread('vehicle.jpg')

# convert the image to grayscale
img = cv2.cvtColor(img, cv2.COLOR_BGR2GRAY)

# define a 5x5 kernel
kernel = np.ones((5,5),np.float32)/25

# Apply the averaging filter
result = cv2.filter2D(img,-1,kernel)

# Display the output image
cv2.imshow("Filter 2D Image ", result)
cv2.waitKey(0)
cv2.destroyAllWindows()
輸出
執行上述程式碼時,將生成以下輸出視窗:
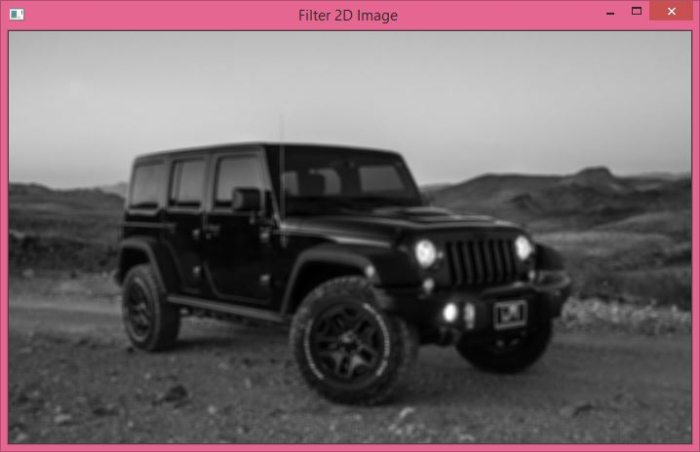
使用cv2.filter2D()應用平均濾波器後,獲得上述輸出影像。
示例 2
在下面的 Python 示例中,我們使用 5×5 核對輸入影像應用boxFilter操作。
# Import required library
import cv2

# Read the input image
img = cv2.imread('vehicle.jpg')

# convert the image to grayscale
img = cv2.cvtColor(img, cv2.COLOR_BGR2GRAY)

# apply boxFilter to the input image
result = cv2.boxFilter(img,-1,(5,5))

# display the image after filter operation
cv2.imshow("Box Filter Image", result)
cv2.waitKey(0)
cv2.destroyAllWindows()
輸出
執行上述程式碼時,將生成以下輸出視窗:

使用 cv2.boxFilter() 應用平均濾波器後,獲得上述輸出影像。

2K+ 次瀏覽
