- Gensim 教程
- Gensim - 首頁
- Gensim - 簡介
- Gensim - 入門
- Gensim - 文件與語料庫
- Gensim - 向量與模型
- Gensim - 建立字典
- 建立詞袋 (BoW) 語料庫
- Gensim - 變換
- Gensim - 建立 TF-IDF 矩陣
- Gensim - 主題建模
- Gensim - 建立 LDA 主題模型
- Gensim - 使用 LDA 主題模型
- Gensim - 建立 LDA Mallet 模型
- Gensim - 文件與 LDA 模型
- Gensim - 建立 LSI 和 HDP 主題模型
- Gensim - 開發詞嵌入
- Gensim - Doc2Vec 模型
- Gensim 有用資源
- Gensim 快速指南
- Gensim - 有用資源
- Gensim - 討論
Gensim 快速指南
Gensim - 簡介
本章將幫助您瞭解 Gensim 的歷史和特性,以及它的用途和優勢。
什麼是 Gensim?
Gensim = “Generate Similar” 是一個流行的開源自然語言處理 (NLP) 庫,用於無監督主題建模。它使用頂尖的學術模型和現代統計機器學習來執行各種複雜的任務,例如:
- 構建文件或詞向量
- 語料庫
- 執行主題識別
- 執行文件比較(檢索語義相似的文件)
- 分析純文字文件的語義結構
除了執行上述複雜任務外,Gensim 使用 Python 和 Cython 實現,旨在使用資料流和增量線上演算法處理大型文字集合。這使其區別於那些僅針對記憶體處理的機器學習軟體包。
歷史
2008 年,Gensim 最初是一組用於捷克數字數學的各種 Python 指令碼的集合。在那裡,它用於生成與特定給定文章最相似的文章的簡短列表。但在 2009 年,RARE Technologies Ltd. 釋出了其初始版本。然後,在 2019 年 7 月,我們獲得了它的穩定版本 (3.8.0)。
各種特性
以下是 Gensim 提供的一些特性和功能:
可擴充套件性
Gensim 可以透過使用其增量線上訓練演算法輕鬆處理大型和 Web 規模的語料庫。它本質上是可擴充套件的,因為不需要在任何時間點將整個輸入語料庫完全駐留在隨機存取儲存器 (RAM) 中。換句話說,其所有演算法在語料庫大小方面都是記憶體無關的。
健壯性
Gensim 本質上是健壯的,並且已經在各種系統中被各種人員和組織使用了四年多。我們可以輕鬆插入我們自己的輸入語料庫或資料流。也很容易擴充套件到其他向量空間演算法。
平臺無關性
眾所周知,Python 是一種非常通用的語言,作為純 Python 的 Gensim 可以在所有支援 Python 和 NumPy 的平臺(如 Windows、Mac OS、Linux)上執行。
高效的多核實現
為了加快機器叢集上的處理和檢索速度,Gensim 提供了各種流行演算法的高效多核實現,例如 潛在語義分析 (LSA)、潛在狄利克雷分配 (LDA)、隨機投影 (RP)、分層狄利克雷過程 (HDP)。
開源和豐富的社群支援
Gensim 採用 OSI 批准的 GNU LGPL 許可證授權,允許免費用於個人和商業用途。對 Gensim 做出的任何修改都會開源,並且擁有豐富的社群支援。
Gensim 的用途
Gensim 已被用於並被引用於超過一千個商業和學術應用中。它也被各種研究論文和學生論文引用。它包括以下內容的流式並行實現:
fastText
fastText 使用神經網路進行詞嵌入,是一個用於學習詞嵌入和文字分類的庫。它由 Facebook 的 AI 研究 (FAIR) 實驗室建立。該模型基本上允許我們建立一個有監督或無監督演算法來獲得單詞的向量表示。
Word2vec
Word2vec 用於生成詞嵌入,是一組淺層和兩層神經網路模型。這些模型基本上經過訓練以重建單詞的語言上下文。
LSA(潛在語義分析)
它是 NLP(自然語言處理)中的一種技術,允許我們分析一組文件及其包含的術語之間的關係。這是透過生成與文件和術語相關的概念集來完成的。
LDA(潛在狄利克雷分配)
它是 NLP 中的一種技術,允許透過未觀察到的組來解釋觀測值的集合。這些未觀察到的組解釋了為什麼資料的一些部分是相似的。這就是為什麼它是一個生成式統計模型的原因。
tf-idf(詞頻-逆文件頻率)
tf-idf,資訊檢索中的一個數值統計量,反映了一個詞在一個語料庫中的文件中的重要程度。搜尋引擎經常使用它來根據使用者查詢對文件的相關性進行評分和排名。它還可以用於文字摘要和分類中的停用詞過濾。
所有這些都將在接下來的章節中詳細解釋。
優勢
Gensim 是一個進行主題建模的 NLP 包。Gensim 的重要優勢如下:
我們可以在其他包(如 ‘scikit-learn’ 和 ‘R’)中獲得主題建模和詞嵌入的功能,但 Gensim 提供的構建主題模型和詞嵌入的功能是無與倫比的。它還為文字處理提供了更便捷的功能。
Gensim 的另一個最重要的優點是,它允許我們處理大型文字檔案,即使不將整個檔案載入到記憶體中。
Gensim 不需要代價高昂的註釋或文件的手工標記,因為它使用無監督模型。
Gensim - 入門
本章闡明瞭安裝 Gensim 的先決條件,其核心依賴項以及有關其當前版本的資訊。
先決條件
為了安裝 Gensim,我們必須在計算機上安裝 Python。您可以訪問連結 www.python.org/downloads/ 併為您的作業系統(即 Windows 和 Linux/Unix)選擇最新版本。您可以參考連結 www.tutorialspoint.com/python3/index.htm 獲取關於 Python 的基本教程。Gensim 支援 Linux、Windows 和 Mac OS X。
程式碼依賴項
Gensim 應該在支援 Python 2.7 或 3.5+ 和 NumPy 的任何平臺上執行。它實際上依賴於以下軟體:
Python
Gensim 已在 Python 2.7、3.5、3.6 和 3.7 版本上進行了測試。
Numpy
眾所周知,NumPy 是一個用於 Python 科學計算的包。它也可以用作通用資料的有效多維容器。Gensim 依賴於 NumPy 包進行數值計算。有關 Python 的基本教程,您可以參考連結 www.tutorialspoint.com/numpy/index.htm。
smart_open
smart_open,一個 Python 2 和 Python 3 庫,用於高效地流式傳輸非常大的檔案。它支援從/到 S3、HDFS、WebHDFS、HTTP、HTTPS、SFTP 或本地檔案系統等儲存的流式傳輸。Gensim 依賴於 smart_open Python 庫來透明地開啟遠端儲存上的檔案以及壓縮檔案。
當前版本
Gensim 的當前版本為 3.8.0,於 2019 年 7 月釋出。
使用終端安裝
安裝 Gensim 的最簡單方法之一是在終端中執行以下命令:
pip install --upgrade gensim
使用Conda環境安裝
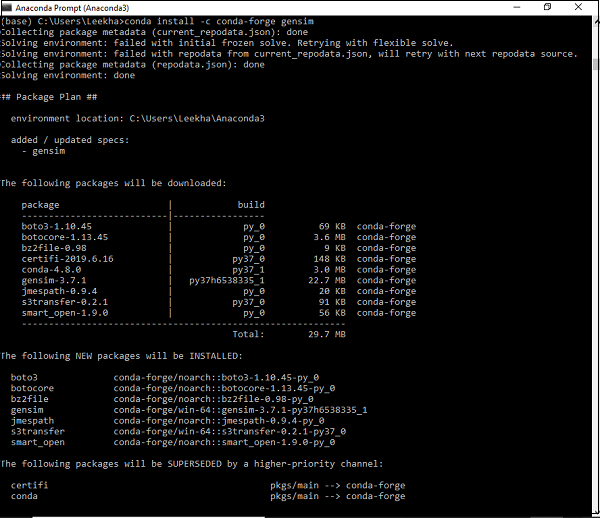
下載 Gensim 的另一種方法是使用 conda 環境。在您的 conda 終端中執行以下命令:
conda install –c conda-forge gensim
使用原始碼包安裝
假設您已下載並解壓縮了原始碼包,則需要執行以下命令:
python setup.py test
python setup.py install
Gensim - 文件與語料庫
在這裡,我們將學習 Gensim 的核心概念,重點關注文件和語料庫。
Gensim 的核心概念
以下是理解和使用 Gensim 所需的核心概念和術語:
文件 - 指的是一些文字。
語料庫 - 指的是文件的集合。
向量 - 文件的數學表示稱為向量。
模型 - 指的是用於將向量從一種表示轉換為另一種表示的演算法。
什麼是文件?
如上所述,它指的是一些文字。如果我們詳細介紹一下,它是一個文字序列型別的物件,在 Python 3 中稱為 ‘str’。例如,在 Gensim 中,文件可以是任何東西,例如:
- 140 個字元的簡短推文
- 單個段落,即文章或研究論文摘要
- 新聞文章
- 書籍
- 小說
- 論文
文字序列
文字序列型別在 Python 3 中通常稱為 ‘str’。眾所周知,在 Python 中,文字資料使用字串或更具體地說 ‘str’ 物件進行處理。字串基本上是 Unicode 程式碼點的不可變序列,可以用以下方式編寫:
單引號 - 例如,‘你好!你好嗎?’。它也允許我們嵌入雙引號。例如,‘你好!“你好”嗎?’
雙引號 - 例如,"你好!你好嗎?"。它也允許我們嵌入單引號。例如,"你好!'你好'嗎?"
三引號 - 它可以是三個單引號,例如,'''你好!你好嗎?'''。或三個雙引號,例如,"""你好!'你好'嗎?"""
所有空格都將包含在字串文字中。
示例
以下是 Gensim 中文件的一個示例:
Document = “Tutorialspoint.com is the biggest online tutorials library and it’s all free also”
什麼是語料庫?
語料庫可以定義為在自然交流環境中產生的大型結構化機器可讀文字集。在 Gensim 中,文件物件的集合稱為語料庫。語料庫的複數是 corpora。
語料庫在 Gensim 中的作用
Gensim 中的語料庫扮演以下兩個角色:
用作訓練模型的輸入
語料庫在 Gensim 中扮演的第一個也是最重要的角色是作為訓練模型的輸入。為了初始化模型的內部引數,在訓練期間,模型會從訓練語料庫中尋找一些共同的主題和主題。如上所述,Gensim 側重於無監督模型,因此它不需要任何人工干預。
用作主題提取器
一旦模型訓練完成,它就可以用於從新文件中提取主題。這裡,新文件是在訓練階段未使用的文件。
示例
語料庫可以包含特定人員的所有推文、報紙的所有文章列表或特定主題的所有研究論文等。
收集語料庫
以下是一個小型語料庫的示例,其中包含 5 個文件。這裡,每個文件都是由單個句子組成的字串。
t_corpus = [
   "A survey of user opinion of computer system response time",
   "Relation of user perceived response time to error measurement",
   "The generation of random binary unordered trees",
   "The intersection graph of paths in trees",
   "Graph minors IV Widths of trees and well quasi ordering",
]
預處理收集語料庫
收集語料庫後,應執行一些預處理步驟以簡化語料庫。我們可以簡單地移除一些常用的英語單詞,例如“the”。我們還可以移除語料庫中只出現一次的單詞。
例如,以下 Python 指令碼用於將每個文件小寫化,按空格分割,並過濾掉停用詞:
示例
import pprint
t_corpus = [
   "A survey of user opinion of computer system response time",
   "Relation of user perceived response time to error measurement",
   "The generation of random binary unordered trees",
   "The intersection graph of paths in trees",
   "Graph minors IV Widths of trees and well quasi ordering",
]
stoplist = set('for a of the and to in'.split(' '))
processed_corpus = [[word for word in document.lower().split() if word not in stoplist]
   for document in t_corpus]

pprint.pprint(processed_corpus)
]
輸出
[['survey', 'user', 'opinion', 'computer', 'system', 'response', 'time'],
['relation', 'user', 'perceived', 'response', 'time', 'error', 'measurement'],
['generation', 'random', 'binary', 'unordered', 'trees'],
['intersection', 'graph', 'paths', 'trees'],
['graph', 'minors', 'iv', 'widths', 'trees', 'well', 'quasi', 'ordering']]
有效的預處理
Gensim 還提供更有效的語料庫預處理函式。在這種預處理中,我們可以將文件轉換為小寫標記列表。我們還可以忽略過短或過長的標記。此函式為gensim.utils.simple_preprocess(doc, deacc=False, min_len=2, max_len=15)。
gensim.utils.simple_preprocess() 函式
Gensim 提供此函式,用於將文件轉換為小寫標記列表,以及忽略過短或過長的標記。它具有以下引數:
doc(str)
它指的是應該應用預處理的輸入文件。
deacc(bool, 可選)
此引數用於從標記中刪除重音符號。它使用deaccent() 來執行此操作。
min_len(int, 可選)
藉助此引數,我們可以設定標記的最小長度。長度短於定義長度的標記將被丟棄。
max_len(int, 可選)
藉助此引數,我們可以設定標記的最大長度。長度長於定義長度的標記將被丟棄。
此函式的輸出將是從輸入文件中提取的標記。
Gensim - 向量與模型
在這裡,我們將學習 Gensim 的核心概念,主要關注向量和模型。
什麼是向量?
如果我們想推斷語料庫中的潛在結構怎麼辦?為此,我們需要以一種可以進行數學運算的方式來表示文件。一種流行的表示方式是將語料庫的每個文件表示為特徵向量。這就是為什麼我們可以說向量是文件的一種數學上的便捷表示。
舉個例子,讓我們將上述語料庫的單個特徵表示為問答對:
問 - 單詞Hello 在文件中出現了多少次?
答 - 零 (0)。
問 - 文件中有多少個段落?
答 - 兩個 (2)
問題通常由其整數 ID 表示,因此此文件的表示是一系列類似 (1, 0.0), (2, 2.0) 的對。這種向量表示稱為稠密向量。為什麼是稠密的?因為它包含了對上述所有問題的明確答案。
如果我們預先知道所有問題,則表示可以簡單地表示為 (0, 2)。這種答案序列(當然,如果問題預先已知)就是我們文件的向量。
另一種流行的表示方式是詞袋 (BoW) 模型。在這種方法中,每個文件基本上都由一個向量表示,該向量包含字典中每個單詞的頻率計數。
舉個例子,假設我們有一個包含單詞 [‘Hello’, ‘How’, ‘are’, ‘you’] 的字典。包含字串“How are you how”的文件將由向量 [0, 2, 1, 1] 表示。這裡,向量的條目按“Hello”、“How”、“are”和“you”出現的順序排列。
向量與文件
從上述向量解釋中,文件和向量之間的區別幾乎可以理解。但是,為了更清楚起見,文件是文字,向量是該文字的數學上的便捷表示。不幸的是,有時許多人會互換使用這些術語。
例如,假設我們有一些任意文件 A,那麼他們通常會說“文件 A 對應的向量”,而不是說“與文件 A 對應的向量”。這會導致很大的歧義。這裡需要注意的另一重要事項是,兩篇不同的文件可能具有相同的向量表示。
將語料庫轉換為向量列表
在進行將語料庫轉換為向量列表的實現示例之前,我們需要將語料庫中的每個單詞與唯一的整數 ID 關聯起來。為此,我們將擴充套件上一章中使用的示例。
示例
from gensim import corpora
dictionary = corpora.Dictionary(processed_corpus)
print(dictionary)
輸出
Dictionary(25 unique tokens: ['computer', 'opinion', 'response', 'survey', 'system']...)
它表明,在我們的語料庫中,這個gensim.corpora.Dictionary中有 25 個不同的標記。
實現示例
我們可以使用字典將標記化的文件轉換為這些 5 維向量,如下所示:
pprint.pprint(dictionary.token2id)
輸出
{
   'binary': 11,
   'computer': 0,
   'error': 7,
   'generation': 12,
   'graph': 16,
   'intersection': 17,
   'iv': 19,
   'measurement': 8,
   'minors': 20,
   'opinion': 1,
   'ordering': 21,
   'paths': 18,
   'perceived': 9,
   'quasi': 22,
   'random': 13,
   'relation': 10,
   'response': 2,
   'survey': 3,
   'system': 4,
   'time': 5,
   'trees': 14,
   'unordered': 15,
   'user': 6,
   'well': 23,
   'widths': 24
}
同樣,我們可以為文件建立詞袋錶示,如下所示:
BoW_corpus = [dictionary.doc2bow(text) for text in processed_corpus]
pprint.pprint(BoW_corpus)
輸出
[
   [(0, 1), (1, 1), (2, 1), (3, 1), (4, 1), (5, 1), (6, 1)],
   [(2, 1), (5, 1), (6, 1), (7, 1), (8, 1), (9, 1), (10, 1)],
   [(11, 1), (12, 1), (13, 1), (14, 1), (15, 1)],
   [(14, 1), (16, 1), (17, 1), (18, 1)],
   [(14, 1), (16, 1), (19, 1), (20, 1), (21, 1), (22, 1), (23, 1), (24, 1)]
]
什麼是模型?
一旦我們對語料庫進行了向量化,接下來該怎麼做?現在,我們可以使用模型對其進行轉換。模型可以指用於將一種文件表示轉換為另一種的演算法。
正如我們所討論的,在 Gensim 中,文件表示為向量,因此,我們可以將模型視為兩個向量空間之間的轉換。總會有一個訓練階段,模型在該階段學習這種轉換的細節。模型在訓練階段讀取訓練語料庫。
初始化模型
讓我們初始化tf-idf模型。此模型將向量從 BoW(詞袋)表示轉換為另一個向量空間,其中頻率計數根據語料庫中每個單詞的相對稀有度進行加權。
實現示例
在下面的示例中,我們將初始化tf-idf模型。我們將在語料庫上對其進行訓練,然後轉換字串“trees graph”。
示例
from gensim import models
tfidf = models.TfidfModel(BoW_corpus)
words = "trees graph".lower().split()
print(tfidf[dictionary.doc2bow(words)])
輸出
[(3, 0.4869354917707381), (4, 0.8734379353188121)]
現在,一旦我們建立了模型,我們就可以透過 tfidf 轉換整個語料庫並對其進行索引,以及查詢我們的查詢文件(我們提供了查詢文件“trees system”)與語料庫中每個文件的相似度:
示例
from gensim import similarities
index = similarities.SparseMatrixSimilarity(tfidf[BoW_corpus],num_features=5)
query_document = 'trees system'.split()
query_bow = dictionary.doc2bow(query_document)
simils = index[tfidf[query_bow]]
print(list(enumerate(simils)))
輸出
[(0, 0.0), (1, 0.0), (2, 1.0), (3, 0.4869355), (4, 0.4869355)]
從上面的輸出可以看出,文件 4 和文件 5 的相似度得分約為 49%。
此外,我們還可以對輸出進行排序以提高可讀性,如下所示:
示例
for doc_number, score in sorted(enumerate(sims), key=lambda x: x[1], reverse=True):
   print(doc_number, score)
輸出
2 1.0
3 0.4869355
4 0.4869355
0 0.0
1 0.0
Gensim - 建立字典
在上一章中,我們討論了向量和模型,您瞭解了字典。在這裡,我們將更詳細地討論字典物件。
什麼是字典?
在深入瞭解字典的概念之前,讓我們瞭解一些簡單的 NLP 概念:
標記 - 標記表示一個“單詞”。
文件 - 文件指的是句子或段落。
語料庫 - 它指的是作為詞袋 (BoW) 的文件集合。
對於所有文件,語料庫始終包含每個單詞的標記 ID 以及其在文件中的頻率計數。
讓我們轉到 Gensim 中的字典概念。為了處理文字文件,Gensim 還需要將單詞(即標記)轉換為其唯一 ID。為了實現這一點,它為我們提供了字典物件的功能,該物件將每個單詞對映到其唯一的整數 ID。它透過將輸入文字轉換為單詞列表,然後將其傳遞給corpora.Dictionary()物件來實現。
字典的需求
現在問題出現了,字典物件的實際需求是什麼,以及在哪裡可以使用它?在 Gensim 中,字典物件用於建立詞袋 (BoW) 語料庫,該語料庫進一步用作主題建模和其他模型的輸入。
文字輸入的形式
我們可以向 Gensim 提供三種不同的輸入文字形式:
作為儲存在 Python 原生列表物件中的句子(在 Python 3 中稱為str)
作為單個文字檔案(可以是小檔案或大檔案)
多個文字檔案
使用 Gensim 建立字典
如前所述,在 Gensim 中,字典包含所有單詞(即標記)及其唯一整數 ID 的對映。我們可以從句子列表、一個或多個文字檔案(包含多行文字的文字檔案)建立字典。因此,首先讓我們從建立使用句子列表的字典開始。
從句子列表
在下面的示例中,我們將從句子列表建立字典。當我們有句子列表或可以說是多個句子時,我們必須將每個句子轉換為單詞列表,而列表推導式是執行此操作的非常常見的方法之一。
實現示例
首先,匯入所需的包,如下所示:
import gensim
from gensim import corpora
from pprint import pprint
接下來,從句子/文件列表建立列表推導式,以將其用於建立字典:
doc = [
   "CNTK formerly known as Computational Network Toolkit",
   "is a free easy-to-use open-source commercial-grade toolkit",
   "that enable us to train deep learning algorithms to learn like the human brain."
]
接下來,我們需要將句子拆分為單詞。這稱為標記化。
text_tokens = [[text for text in doc.split()] for doc in doc]
現在,藉助以下指令碼,我們可以建立字典:
dict_LoS = corpora.Dictionary(text_tokens)
現在讓我們獲取更多資訊,例如字典中的標記數量:
print(dict_LoS)
輸出
Dictionary(27 unique tokens: ['CNTK', 'Computational', 'Network', 'Toolkit', 'as']...)
我們還可以看到單詞到唯一整數的對映,如下所示:
print(dict_LoS.token2id)
輸出
{
   'CNTK': 0, 'Computational': 1, 'Network': 2, 'Toolkit': 3, 'as': 4,
   'formerly': 5, 'known': 6, 'a': 7, 'commercial-grade': 8, 'easy-to-use': 9,
   'free': 10, 'is': 11, 'open-source': 12, 'toolkit': 13, 'algorithms': 14,
   'brain.': 15, 'deep': 16, 'enable': 17, 'human': 18, 'learn': 19, 'learning': 20,
   'like': 21, 'that': 22, 'the': 23, 'to': 24, 'train': 25, 'us': 26
}
完整的實現示例
import gensim
from gensim import corpora
from pprint import pprint
doc = [
   "CNTK formerly known as Computational Network Toolkit",
   "is a free easy-to-use open-source commercial-grade toolkit",
   "that enable us to train deep learning algorithms to learn like the human brain."
]
text_tokens = [[text for text in doc.split()] for doc in doc]
dict_LoS = corpora.Dictionary(text_tokens)
print(dict_LoS.token2id)
從單個文字檔案
在下面的示例中,我們將從單個文字檔案建立字典。同樣,我們也可以從多個文字檔案(即檔案目錄)建立字典。
為此,我們將前面示例中使用的文件儲存在名為doc.txt的文字檔案中。Gensim 將逐行讀取檔案,並使用simple_preprocess一次處理一行。這樣,它不需要一次將整個檔案載入到記憶體中。
實現示例
首先,匯入所需的包,如下所示:
import gensim
from gensim import corpora
from pprint import pprint
from gensim.utils import simple_preprocess
from smart_open import smart_open
import os
接下來的程式碼行將使用名為 doc.txt 的單個文字檔案建立 gensim 字典:
dict_STF = corpora.Dictionary(
   simple_preprocess(line, deacc =True) for line in open(‘doc.txt’, encoding=’utf-8’)
)
現在讓我們獲取更多資訊,例如字典中的標記數量:
print(dict_STF)
輸出
Dictionary(27 unique tokens: ['CNTK', 'Computational', 'Network', 'Toolkit', 'as']...)
我們還可以看到單詞到唯一整數的對映,如下所示:
print(dict_STF.token2id)
輸出
{
   'CNTK': 0, 'Computational': 1, 'Network': 2, 'Toolkit': 3, 'as': 4,
   'formerly': 5, 'known': 6, 'a': 7, 'commercial-grade': 8, 'easy-to-use': 9,
   'free': 10, 'is': 11, 'open-source': 12, 'toolkit': 13, 'algorithms': 14,
   'brain.': 15, 'deep': 16, 'enable': 17, 'human': 18, 'learn': 19,
   'learning': 20, 'like': 21, 'that': 22, 'the': 23, 'to': 24, 'train': 25, 'us': 26
}
完整的實現示例
import gensim
from gensim import corpora
from pprint import pprint
from gensim.utils import simple_preprocess
from smart_open import smart_open
import os
dict_STF = corpora.Dictionary(
   simple_preprocess(line, deacc =True) for line in open(‘doc.txt’, encoding=’utf-8’)
)
dict_STF = corpora.Dictionary(text_tokens)
print(dict_STF.token2id)
從多個文字檔案
現在讓我們從多個檔案(即儲存在同一目錄中的多個文字檔案)建立字典。對於此示例,我們建立了三個不同的文字檔案,名為first.txt、second.txt和third.txt,其中包含我們之前示例中使用的文字檔案 (doc.txt) 的三行。這三個文字檔案都儲存在名為ABC的目錄下。
實現示例
為了實現這一點,我們需要定義一個類,其中包含一個方法,該方法可以迭代目錄 (ABC) 中的所有三個文字檔案 (First、Second 和 Third.txt) 並生成已處理的單詞標記列表。
讓我們定義名為Read_files的類,其中包含名為__iteration__()的方法,如下所示:
class Read_files(object):
   def __init__(self, directoryname):
      elf.directoryname = directoryname
   def __iter__(self):
      for fname in os.listdir(self.directoryname):
         for line in open(os.path.join(self.directoryname, fname), encoding='latin'):
   yield simple_preprocess(line)
接下來,我們需要提供目錄的路徑,如下所示:
path = "ABC"
# 請根據您儲存目錄的計算機系統提供路徑.
接下來的步驟與我們在前面示例中所做的類似。接下來的程式碼行將使用包含三個文字檔案的目錄建立 Gensim 字典:
dict_MUL = corpora.Dictionary(Read_files(path))
輸出
Dictionary(27 unique tokens: ['CNTK', 'Computational', 'Network', 'Toolkit', 'as']...)
現在我們還可以看到單詞到唯一整數的對映,如下所示:
print(dict_MUL.token2id)
輸出
{
   'CNTK': 0, 'Computational': 1, 'Network': 2, 'Toolkit': 3, 'as': 4,
   'formerly': 5, 'known': 6, 'a': 7, 'commercial-grade': 8, 'easy-to-use': 9,
   'free': 10, 'is': 11, 'open-source': 12, 'toolkit': 13, 'algorithms': 14,
   'brain.': 15, 'deep': 16, 'enable': 17, 'human': 18, 'learn': 19,
   'learning': 20, 'like': 21, 'that': 22, 'the': 23, 'to': 24, 'train': 25, 'us': 26
}
儲存和載入 Gensim 字典
Gensim 支援其自身原生的 save() 方法將字典儲存到磁碟,以及 load() 方法從磁碟載入回字典。
例如,我們可以使用以下指令碼儲存字典:
Gensim.corpora.dictionary.save(filename)
# 指定要儲存字典的路徑.
類似地,我們可以使用 load() 方法載入已儲存的字典。以下指令碼可以實現此功能:
Gensim.corpora.dictionary.load(filename)
# 指定已儲存字典的路徑。
Gensim - 建立詞袋 (BoW) 語料庫
我們已經瞭解瞭如何從文件列表和文字檔案(一個或多個)建立字典。在本節中,我們將建立一個詞袋 (BoW) 語料庫。對於使用 Gensim,這是我們需要熟悉的最重要的物件之一。基本上,它是包含每個文件中單詞 ID 及其頻率的語料庫。
建立 BoW 語料庫
如前所述,在 Gensim 中,語料庫包含每個文件中單詞 ID 及其頻率。我們可以從簡單的文件列表和文字檔案建立 BoW 語料庫。我們需要做的就是將標記化的單詞列表傳遞給名為 Dictionary.doc2bow() 的物件。所以首先,讓我們從使用簡單的文件列表建立 BoW 語料庫開始。
從簡單的句子列表
在下面的示例中,我們將從包含三個句子的簡單列表建立 BoW 語料庫。
首先,我們需要匯入所有必要的包,如下所示:
import gensim
import pprint
from gensim import corpora
from gensim.utils import simple_preprocess
現在提供包含句子的列表。我們的列表中有三個句子:
doc_list = [
   "Hello, how are you?", "How do you do?",
   "Hey what are you doing? yes you What are you doing?"
]
接下來,對句子進行標記化,如下所示:
doc_tokenized = [simple_preprocess(doc) for doc in doc_list]
建立 corpora.Dictionary() 物件,如下所示:
dictionary = corpora.Dictionary()
現在將這些標記化的句子傳遞給 dictionary.doc2bow() 物件,如下所示:
BoW_corpus = [dictionary.doc2bow(doc, allow_update=True) for doc in doc_tokenized]
最後,我們可以列印詞袋語料庫:
print(BoW_corpus)
輸出
[
   [(0, 1), (1, 1), (2, 1), (3, 1)],
   [(2, 1), (3, 1), (4, 2)], [(0, 2), (3, 3), (5, 2), (6, 1), (7, 2), (8, 1)]
]
上述輸出顯示,ID 為 0 的單詞在第一個文件中出現一次(因為我們在輸出中得到了 (0,1)),以此類推。
上述輸出對於人類來說難以閱讀。我們也可以將這些 ID 轉換為單詞,為此我們需要使用字典進行轉換,如下所示:
id_words = [[(dictionary[id], count) for id, count in line] for line in BoW_corpus]
print(id_words)
輸出
[
   [('are', 1), ('hello', 1), ('how', 1), ('you', 1)],
   [('how', 1), ('you', 1), ('do', 2)],
   [('are', 2), ('you', 3), ('doing', 2), ('hey', 1), ('what', 2), ('yes', 1)]
]
現在上述輸出對人類來說比較易讀。
完整的實現示例
import gensim
import pprint
from gensim import corpora
from gensim.utils import simple_preprocess
doc_list = [
   "Hello, how are you?", "How do you do?",
   "Hey what are you doing? yes you What are you doing?"
]
doc_tokenized = [simple_preprocess(doc) for doc in doc_list]
dictionary = corpora.Dictionary()
BoW_corpus = [dictionary.doc2bow(doc, allow_update=True) for doc in doc_tokenized]
print(BoW_corpus)
id_words = [[(dictionary[id], count) for id, count in line] for line in BoW_corpus]
print(id_words)
從文字檔案
在下面的示例中,我們將從文字檔案建立 BoW 語料庫。為此,我們將前面示例中使用的文件儲存在名為 doc.txt 的文字檔案中。
Gensim 將逐行讀取檔案,並使用 simple_preprocess 一次處理一行。這樣,它不需要一次將整個檔案載入到記憶體中。
實現示例
首先,匯入所需的包,如下所示:
import gensim
from gensim import corpora
from pprint import pprint
from gensim.utils import simple_preprocess
from smart_open import smart_open
import os
接下來,以下程式碼行將讀取 doc.txt 中的文件並對其進行標記化:
doc_tokenized = [
   simple_preprocess(line, deacc =True) for line in open(‘doc.txt’, encoding=’utf-8’)
]
dictionary = corpora.Dictionary()
現在我們需要將這些標記化的單詞傳遞給 dictionary.doc2bow() 物件(如前一個示例中所做的那樣)。
BoW_corpus = [
   dictionary.doc2bow(doc, allow_update=True) for doc in doc_tokenized
]
print(BoW_corpus)
輸出
[
   [(9, 1), (10, 1), (11, 1), (12, 1), (13, 1), (14, 1), (15, 1)],
   [
      (15, 1), (16, 1), (17, 1), (18, 1), (19, 1), (20, 1), (21, 1),
      (22, 1), (23, 1), (24, 1)
   ],
   [
      (23, 2), (25, 1), (26, 1), (27, 1), (28, 1), (29, 1),
      (30, 1), (31, 1), (32, 1), (33, 1), (34, 1), (35, 1), (36, 1)
   ],
   [(3, 1), (18, 1), (37, 1), (38, 1), (39, 1), (40, 1), (41, 1), (42, 1), (43, 1)],
   [
      (18, 1), (27, 1), (31, 2), (32, 1), (38, 1), (41, 1), (43, 1),
      (44, 1), (45, 1), (46, 1), (47, 1), (48, 1), (49, 1), (50, 1), (51, 1), (52, 1)
   ]
]
doc.txt 檔案的內容如下:
CNTK,以前稱為計算網路工具包,是一個免費的、易於使用的、開源的、商用級的工具包,它使我們能夠訓練深度學習演算法,使其像人腦一樣學習。
您可以在 tutorialspoint.com 上找到它的免費教程,該網站還免費提供關於人工智慧、深度學習、機器學習等技術的最佳技術教程。
完整的實現示例
import gensim
from gensim import corpora
from pprint import pprint
from gensim.utils import simple_preprocess
from smart_open import smart_open
import os
doc_tokenized = [
   simple_preprocess(line, deacc =True) for line in open(‘doc.txt’, encoding=’utf-8’)
]
dictionary = corpora.Dictionary()
BoW_corpus = [dictionary.doc2bow(doc, allow_update=True) for doc in doc_tokenized]
print(BoW_corpus)
儲存和載入 Gensim 語料庫
我們可以使用以下指令碼儲存語料庫:
corpora.MmCorpus.serialize(‘/Users/Desktop/BoW_corpus.mm’, bow_corpus)
# 提供語料庫的路徑和名稱。語料庫的名稱為 BoW_corpus,我們將其儲存為 Matrix Market 格式。
類似地,我們可以使用以下指令碼載入已儲存的語料庫:
corpus_load = corpora.MmCorpus(‘/Users/Desktop/BoW_corpus.mm’)
for line in corpus_load:
print(line)
Gensim - 變換
本章將幫助您瞭解 Gensim 中的各種轉換。讓我們從瞭解文件轉換開始。
轉換文件
轉換文件意味著以一種可以進行數學運算的方式來表示文件。除了推斷語料庫的潛在結構外,轉換文件還將實現以下目標:
它發現單詞之間的關係。
它揭示了語料庫中隱藏的結構。
它以一種新的、更語義的方式描述文件。
它使文件的表示更緊湊。
它提高了效率,因為新的表示消耗更少的資源。
它提高了功效,因為在新表示中忽略了邊際資料趨勢。
在新文件表示中也減少了噪聲。
讓我們看看將文件從一種向量空間表示轉換為另一種向量空間表示的實現步驟。
實施步驟
為了轉換文件,我們必須遵循以下步驟:
步驟 1:建立語料庫
第一步也是最基本的一步是從文件中建立語料庫。我們已經在前面的示例中建立了語料庫。讓我們再建立一個,並進行一些增強(去除常用詞和只出現一次的詞):
import gensim
import pprint
from collections import defaultdict
from gensim import corpora
現在提供用於建立語料庫的文件:
t_corpus = ["CNTK formerly known as Computational Network Toolkit", "is a free easy-to-use open-source commercial-grade toolkit", "that enable us to train deep learning algorithms to learn like the human brain.", "You can find its free tutorial on tutorialspoint.com", "Tutorialspoint.com also provide best technical tutorials on technologies like AI deep learning machine learning for free"]
接下來,我們需要進行標記化,同時還要去除常用詞:
stoplist = set('for a of the and to in'.split(' '))
processed_corpus = [
   [
      word for word in document.lower().split() if word not in stoplist
   ]
	for document in t_corpus
]
以下指令碼將刪除只出現一次的單詞:
frequency = defaultdict(int)
for text in processed_corpus:
   for token in text:
      frequency[token] += 1
   processed_corpus = [
      [token for token in text if frequency[token] > 1]
      for text in processed_corpus
   ]
pprint.pprint(processed_corpus)
輸出
[
   ['toolkit'],
   ['free', 'toolkit'],
   ['deep', 'learning', 'like'],
   ['free', 'on', 'tutorialspoint.com'],
   ['tutorialspoint.com', 'on', 'like', 'deep', 'learning', 'learning', 'free']
]
現在將其傳遞給 corpora.dictionary() 物件以獲取語料庫中的唯一物件:
dictionary = corpora.Dictionary(processed_corpus)
print(dictionary)
輸出
Dictionary(7 unique tokens: ['toolkit', 'free', 'deep', 'learning', 'like']...)
接下來,以下程式碼行將為我們的語料庫建立詞袋模型:
BoW_corpus = [dictionary.doc2bow(text) for text in processed_corpus]
pprint.pprint(BoW_corpus)
輸出
[
   [(0, 1)],
   [(0, 1), (1, 1)],
   [(2, 1), (3, 1), (4, 1)],
   [(1, 1), (5, 1), (6, 1)],
   [(1, 1), (2, 1), (3, 2), (4, 1), (5, 1), (6, 1)]
]
步驟 2:建立轉換
轉換是一些標準的 Python 物件。我們可以使用經過訓練的語料庫來初始化這些轉換,即 Python 物件。這裡我們將使用 tf-idf 模型來建立我們訓練過的語料庫 BoW_corpus 的轉換。
首先,我們需要從 gensim 匯入 models 包。
from gensim import models
現在,我們需要初始化模型,如下所示:
tfidf = models.TfidfModel(BoW_corpus)
步驟 3:轉換向量
現在,在最後一步中,向量將從舊錶示轉換為新表示。由於我們在上述步驟中初始化了 tfidf 模型,因此 tfidf 現在將被視為只讀物件。在這裡,我們將使用這個 tfidf 物件將我們的向量從詞袋錶示(舊錶示)轉換為 Tfidf 實值權重(新表示)。
doc_BoW = [(1,1),(3,1)]
print(tfidf[doc_BoW]
輸出
[(1, 0.4869354917707381), (3, 0.8734379353188121)]
我們將轉換應用於語料庫的兩個值,但我們也可以將其應用於整個語料庫,如下所示:
corpus_tfidf = tfidf[BoW_corpus]
for doc in corpus_tfidf:
   print(doc)
輸出
[(0, 1.0)]
[(0, 0.8734379353188121), (1, 0.4869354917707381)]
[(2, 0.5773502691896257), (3, 0.5773502691896257), (4, 0.5773502691896257)]
[(1, 0.3667400603126873), (5, 0.657838022678017), (6, 0.657838022678017)]
[
   (1, 0.19338287240886842), (2, 0.34687949360312714), (3, 0.6937589872062543),
   (4, 0.34687949360312714), (5, 0.34687949360312714), (6, 0.34687949360312714)
]
完整的實現示例
import gensim
import pprint
from collections import defaultdict
from gensim import corpora
t_corpus = [
   "CNTK formerly known as Computational Network Toolkit",
   "is a free easy-to-use open-source commercial-grade toolkit",
   "that enable us to train deep learning algorithms to learn like the human brain.",
   "You can find its free tutorial on tutorialspoint.com",
   "Tutorialspoint.com also provide best technical tutorials on
   technologies like AI deep learning machine learning for free"
]
stoplist = set('for a of the and to in'.split(' '))
processed_corpus = [
   [word for word in document.lower().split() if word not in stoplist]
   for document in t_corpus
]
frequency = defaultdict(int)
for text in processed_corpus:
   for token in text:
      frequency[token] += 1
   processed_corpus = [
      [token for token in text if frequency[token] > 1]
      for text in processed_corpus
   ]
pprint.pprint(processed_corpus)
dictionary = corpora.Dictionary(processed_corpus)
print(dictionary)
BoW_corpus = [dictionary.doc2bow(text) for text in processed_corpus]
pprint.pprint(BoW_corpus)
   from gensim import models
   tfidf = models.TfidfModel(BoW_corpus)
   doc_BoW = [(1,1),(3,1)]
   print(tfidf[doc_BoW])
   corpus_tfidf = tfidf[BoW_corpus]
   for doc in corpus_tfidf:
print(doc)
Gensim 中的各種轉換
使用 Gensim,我們可以實現各種流行的轉換,即向量空間模型演算法。其中一些如下:
Tf-Idf(詞頻-逆文件頻率)
在初始化期間,此 tf-idf 模型演算法期望一個具有整數值的訓練語料庫(例如詞袋模型)。然後,在轉換時,它採用向量表示並返回另一個向量表示。
輸出向量將具有相同的維度,但稀有特徵的值(在訓練時)將增加。它基本上將整數值向量轉換為實值向量。以下是 Tf-idf 轉換的語法:
Model=models.TfidfModel(corpus, normalize=True)
LSI(潛在語義索引)
LSI 模型演算法可以將文件從整數值向量模型(例如詞袋模型)或 Tf-Idf 加權空間轉換為潛在空間。輸出向量的維度將更低。以下是 LSI 轉換的語法:
Model=models.LsiModel(tfidf_corpus, id2word=dictionary, num_topics=300)
LDA(潛在狄利克雷分配)
LDA 模型演算法是另一種將文件從詞袋模型空間轉換為主題空間的演算法。輸出向量的維度將更低。以下是 LSI 轉換的語法:
Model=models.LdaModel(corpus, id2word=dictionary, num_topics=100)
隨機投影 (RP)
RP 是一種非常有效的方法,旨在降低向量空間的維度。這種方法基本上近似於文件之間的 Tf-Idf 距離。它透過引入一些隨機性來實現這一點。
Model=models.RpModel(tfidf_corpus, num_topics=500)
分層狄利克雷過程 (HDP)
HDP 是一種非引數貝葉斯方法,是 Gensim 的新增功能。使用它時需要注意。
Model=models.HdpModel(corpus, id2word=dictionary
Gensim - 建立 TF-IDF 矩陣
在這裡,我們將學習如何使用 Gensim 建立詞頻-逆文件頻率 (TF-IDF) 矩陣。
什麼是 TF-IDF?
它是詞頻-逆文件頻率模型,也是一種詞袋模型。它與常規語料庫不同,因為它降低了跨文件頻繁出現的標記(即單詞)的權重。在初始化期間,此 tf-idf 模型演算法期望一個具有整數值的訓練語料庫(例如詞袋模型)。
然後,在轉換時,它採用向量表示並返回另一個向量表示。輸出向量將具有相同的維度,但稀有特徵的值(在訓練時)將增加。它基本上將整數值向量轉換為實值向量。
它是如何計算的?
TF-IDF 模型使用以下兩個簡單步驟計算 tfidf:
步驟 1:將區域性元件和全域性元件相乘
在第一步中,模型將區域性元件(如 TF(詞頻))與全域性元件(如 IDF(逆文件頻率))相乘。
步驟 2:標準化結果
完成乘法後,在下一步中,TFIDF 模型將結果標準化為單位長度。
由於上述兩個步驟,跨文件頻繁出現的單詞將被降低權重。
如何獲得 TF-IDF 權重?
在這裡,我們將實現一個示例,以瞭解如何獲得 TF-IDF 權重。基本上,為了獲得 TF-IDF 權重,首先我們需要訓練語料庫,然後將該語料庫應用於 tfidf 模型。
訓練語料庫
如上所述,要獲得 TF-IDF,我們首先需要訓練我們的語料庫。首先,我們需要匯入所有必要的包,如下所示:
import gensim
import pprint
from gensim import corpora
from gensim.utils import simple_preprocess
現在提供包含句子的列表。我們的列表中有三個句子:
doc_list = [
   "Hello, how are you?", "How do you do?",
   "Hey what are you doing? yes you What are you doing?"
]
接下來,對句子進行標記化,如下所示:
doc_tokenized = [simple_preprocess(doc) for doc in doc_list]
建立 corpora.Dictionary() 物件,如下所示:
dictionary = corpora.Dictionary()
現在將這些標記化的句子傳遞給 dictionary.doc2bow() 物件,如下所示:
BoW_corpus = [dictionary.doc2bow(doc, allow_update=True) for doc in doc_tokenized]
接下來,我們將獲得文件中單詞 ID 及其頻率。
for doc in BoW_corpus:
   print([[dictionary[id], freq] for id, freq in doc])
輸出
[['are', 1], ['hello', 1], ['how', 1], ['you', 1]]
[['how', 1], ['you', 1], ['do', 2]]
[['are', 2], ['you', 3], ['doing', 2], ['hey', 1], ['what', 2], ['yes', 1]]
這樣我們就訓練了我們的語料庫(詞袋語料庫)。
接下來,我們需要將這個訓練過的語料庫應用於 tfidf 模型 models.TfidfModel()。
首先匯入 numpay 包:
import numpy as np
現在將我們訓練過的語料庫 (BoW_corpus) 應用於 models.TfidfModel() 的方括號中。
tfidf = models.TfidfModel(BoW_corpus, smartirs='ntc')
接下來,我們將獲得 tfidf 模型化語料庫中單詞 ID 及其頻率:
for doc in tfidf[BoW_corpus]:
   print([[dictionary[id], np.around(freq,decomal=2)] for id, freq in doc])
輸出
[['are', 0.33], ['hello', 0.89], ['how', 0.33]]
[['how', 0.18], ['do', 0.98]]
[['are', 0.23], ['doing', 0.62], ['hey', 0.31], ['what', 0.62], ['yes', 0.31]]

[['are', 1], ['hello', 1], ['how', 1], ['you', 1]]
[['how', 1], ['you', 1], ['do', 2]]
[['are', 2], ['you', 3], ['doing', 2], ['hey', 1], ['what', 2], ['yes', 1]]

[['are', 0.33], ['hello', 0.89], ['how', 0.33]]
[['how', 0.18], ['do', 0.98]]
[['are', 0.23], ['doing', 0.62], ['hey', 0.31], ['what', 0.62], ['yes', 0.31]]
從上述輸出中,我們可以看到文件中單詞頻率的差異。
完整的實現示例
import gensim
import pprint
from gensim import corpora
from gensim.utils import simple_preprocess
doc_list = [
   "Hello, how are you?", "How do you do?",
   "Hey what are you doing? yes you What are you doing?"
]
doc_tokenized = [simple_preprocess(doc) for doc in doc_list]
dictionary = corpora.Dictionary()
BoW_corpus = [dictionary.doc2bow(doc, allow_update=True) for doc in doc_tokenized]
for doc in BoW_corpus:
   print([[dictionary[id], freq] for id, freq in doc])
import numpy as np
tfidf = models.TfidfModel(BoW_corpus, smartirs='ntc')
for doc in tfidf[BoW_corpus]:
   print([[dictionary[id], np.around(freq,decomal=2)] for id, freq in doc])
單詞權重的差異
如上所述,在文件中更頻繁出現的單詞將獲得更小的權重。讓我們從上述兩個輸出中瞭解單詞權重的差異。“are”這個詞出現在兩個文件中,並且權重被降低了。類似地,“you”這個詞出現在所有文件中,並且被完全刪除了。
Gensim - 主題建模
本章討論了關於 Gensim 的主題建模。
為了標註我們的資料並理解句子結構,最好的方法之一是使用計算語言學演算法。毫無疑問,藉助這些計算語言學演算法,我們可以理解資料的一些細微之處,但是,
我們能否知道哪些詞在語料庫中出現的頻率高於其他詞?
我們能否對資料進行分組?
我們能否找出資料中潛在的主題?
藉助主題建模,我們可以實現所有這些目標。所以讓我們深入探討主題模型的概念。
什麼是主題模型?
主題模型可以定義為包含文字中主題資訊的機率模型。但是,這裡出現了兩個重要的問題:
首先,什麼是主題?
顧名思義,主題是文字中表達的潛在思想或主題。舉個例子,包含報紙文章的語料庫將包含與金融、天氣、政治、體育、各州新聞等相關的主題。
其次,主題模型在文字處理中的重要性是什麼?
我們知道,為了識別文字中的相似性,我們可以使用詞語進行資訊檢索和搜尋。但是,藉助主題模型,我們現在可以使用主題而不是詞語來搜尋和組織我們的文字檔案。
從這個意義上說,我們可以說主題是詞語的機率分佈。這就是為什麼使用主題模型,我們可以將文件描述為主題的機率分佈。
主題模型的目標
如上所述,主題建模的重點是潛在的思想和主題。其主要目標如下:
主題模型可用於文字摘要。
它們可用於組織文件。例如,我們可以使用主題建模將新聞文章分組到一個組織的/相互關聯的部分中,例如組織所有與板球相關的新聞文章。
它們可以改善搜尋結果。如何?對於搜尋查詢,我們可以使用主題模型來顯示包含不同關鍵詞組合但主題相同的文件。
推薦的概念對於營銷非常有用。它被各種線上購物網站、新聞網站等等使用。主題模型有助於推薦購買什麼、接下來閱讀什麼等等。它們透過查詢列表中具有共同主題的材料來實現。
Gensim中的主題建模演算法
毫無疑問,Gensim是最流行的主題建模工具包。它的免費可用性和Python語言使其更受歡迎。在本節中,我們將討論一些最流行的主題建模演算法。在這裡,我們將關注“是什麼”而不是“如何”,因為Gensim 為我們很好地抽象了它們。
潛在狄利克雷分配 (LDA)
潛在狄利克雷分配 (LDA) 是目前使用最普遍和流行的主題建模技術。它是 Facebook 研究人員在 2013 年發表的研究論文中使用的一種技術。它最初由 David Blei、Andrew Ng 和 Michael Jordan 於 2003 年提出。他們在題為潛在狄利克雷分配的論文中提出了 LDA。
LDA 的特點
讓我們透過其特點來了解這種精彩的技術:
機率主題建模技術
LDA 是一種機率主題建模技術。如上所述,在主題建模中,我們假設在任何相互關聯的文件集合中(可以是學術論文、報紙文章、Facebook 帖子、推文、電子郵件等等),每個文件中都包含一些主題組合。
機率主題建模的主要目標是發現相互關聯的文件集合的隱藏主題結構。主題結構通常包括以下三點:
主題
文件中主題的統計分佈
構成主題的文件中的詞語
以無監督的方式工作
LDA 以無監督的方式工作。這是因為 LDA 使用條件機率來發現隱藏的主題結構。它假設主題在相互關聯的文件集合中分佈不均。
在 Gensim 中非常易於建立
在 Gensim 中,建立 LDA 模型非常容易。我們只需要指定語料庫、字典對映以及我們希望在模型中使用的主題數量。
Model=models.LdaModel(corpus, id2word=dictionary, num_topics=100)
可能會面臨計算上棘手的問題
計算每種可能的主題結構的機率是 LDA 面臨的一個計算挑戰。之所以具有挑戰性,是因為它需要計算每種可能的主題結構下每個觀察到的詞的機率。如果我們有大量的主題和詞語,LDA 可能會面臨計算上棘手的問題。
潛在語義索引 (LSI)
第一個在 Gensim 中實現的主題建模演算法是潛在狄利克雷分配 (LDA),另一個是潛在語義索引 (LSI)。它也稱為潛在語義分析 (LSA)。
它於 1988 年由 Scott Deerwester、Susan Dumais、George Furnas、Richard Harshman、Thomas Landaur、Karen Lochbaum 和 Lynn Streeter 獲得專利。在本節中,我們將設定我們的 LSI 模型。這可以透過與設定 LDA 模型相同的方式完成。我們需要從gensim.models匯入 LSI 模型。
LSI 的作用
實際上,LSI 是一種 NLP 技術,尤其是在分散式語義中。它分析文件集與其包含的術語之間的關係。如果我們談論它的工作原理,那麼它會構建一個矩陣,該矩陣包含大型文字中每個文件的詞語計數。
構建完成後,為了減少行數,LSI 模型使用一種稱為奇異值分解 (SVD) 的數學技術。除了減少行數外,它還保留列之間的相似性結構。在矩陣中,行代表唯一的詞語,列代表每個文件。它基於分散式假設,即它假設含義相近的詞語會出現在相同型別的文字中。
Model=models.LsiModel(corpus, id2word=dictionary, num_topics=100)
分層狄利克雷過程 (HDP)
LDA 和 LSI 等主題模型有助於總結和組織無法人工分析的大型文字檔案。除了 LDA 和 LSI 之外,Gensim 中另一個強大的主題模型是 HDP(分層狄利克雷過程)。它基本上是一個用於對分組資料進行無監督分析的混合成員模型。與 LDA(它的有限對應物)不同,HDP 從資料中推斷主題的數量。
Model=models.HdpModel(corpus, id2word=dictionary
Gensim - 建立 LDA 主題模型
本章將幫助您學習如何在 Gensim 中建立潛在狄利克雷分配 (LDA) 主題模型。
自動從大量文字中提取有關主題的資訊是自然語言處理 (NLP) 的主要應用之一。大量文字可能是酒店評論、推文、Facebook 帖子、任何其他社交媒體渠道的 feed、電影評論、新聞報道、使用者反饋、電子郵件等的 feed。
在這個數字時代,瞭解人們/客戶在談論什麼、瞭解他們的意見和問題,對企業、政治活動和管理人員來說可能非常有價值。但是,是否可以手動閱讀如此大量的文字,然後從主題中提取資訊?
不可以。這需要一個可以自動閱讀這些大量文字文件並自動提取從中討論的所需資訊/主題的演算法。
LDA 的作用
LDA 對主題建模的方法是將文件中的文字分類到特定主題。LDA 以狄利克雷分佈為模型,構建:
- 每個文件的主題模型和
- 每個主題的詞語模型
提供 LDA 主題模型演算法後,為了獲得良好的主題關鍵詞分佈組合,它會重新排列:
- 文件內的主題分佈和
- 主題內的關鍵詞分佈
在處理過程中,LDA 做出的一些假設是:
- 每個文件都被建模為主題的多項分佈。
- 每個主題都被建模為詞語的多項分佈。
- 我們必須選擇正確的資料語料庫,因為 LDA 假設每個文字塊都包含相關的詞語。
- LDA 還假設文件是由主題混合產生的。
使用 Gensim 實現
在這裡,我們將使用 LDA(潛在狄利克雷分配)從資料集中提取自然討論的主題。
載入資料集
我們將使用的資料集是“20 個新聞組”的資料集,其中包含來自新聞報道各個部分的數千篇新聞文章。它可在Sklearn資料集下找到。我們可以輕鬆地使用以下 Python 指令碼來下載:
from sklearn.datasets import fetch_20newsgroups
newsgroups_train = fetch_20newsgroups(subset='train')
讓我們藉助以下指令碼來檢視一些示例新聞:
newsgroups_train.data[:4]
["From: lerxst@wam.umd.edu (where's my thing)\nSubject:
WHAT car is this!?\nNntp-Posting-Host: rac3.wam.umd.edu\nOrganization:
University of Maryland, College Park\nLines:
15\n\n I was wondering if anyone out there could enlighten me on this car
I saw\nthe other day. It was a 2-door sports car, looked to be from the
late 60s/\nearly 70s. It was called a Bricklin. The doors were really small.
In addition,\nthe front bumper was separate from the rest of the body.
This is \nall I know. If anyone can tellme a model name,
engine specs, years\nof production, where this car is made, history, or
whatever info you\nhave on this funky looking car, please e-mail.\n\nThanks,
\n- IL\n ---- brought to you by your neighborhood Lerxst ----\n\n\n\n\n",

"From: guykuo@carson.u.washington.edu (Guy Kuo)\nSubject: SI Clock Poll - Final
Call\nSummary: Final call for SI clock reports\nKeywords:
SI,acceleration,clock,upgrade\nArticle-I.D.: shelley.1qvfo9INNc3s\nOrganization:
University of Washington\nLines: 11\nNNTP-Posting-Host: carson.u.washington.edu\n\nA
fair number of brave souls who upgraded their SI clock oscillator have\nshared their
experiences for this poll. Please send a brief message detailing\nyour experiences with
the procedure. Top speed attained, CPU rated speed,\nadd on cards and adapters, heat
sinks, hour of usage per day, floppy disk\nfunctionality with 800 and 1.4 m floppies
are especially requested.\n\nI will be summarizing in the next two days, so please add
to the network\nknowledge base if you have done the clock upgrade and haven't answered
this\npoll. Thanks.\n\nGuy Kuo <;guykuo@u.washington.edu>\n",

'From: twillis@ec.ecn.purdue.edu (Thomas E Willis)\nSubject:
PB questions...\nOrganization: Purdue University Engineering
Computer Network\nDistribution: usa\nLines: 36\n\nwell folks,
my mac plus finally gave up the ghost this weekend after\nstarting
life as a 512k way back in 1985. sooo, i\'m in the market for
a\nnew machine a bit sooner than i intended to be...\n\ni\'m looking
into picking up a powerbook 160 or maybe 180 and have a bunch\nof
questions that (hopefully) somebody can answer:\n\n* does anybody
know any dirt on when the next round of powerbook\nintroductions
are expected? i\'d heard the 185c was supposed to make an\nappearence
"this summer" but haven\'t heard anymore on it - and since i\ndon\'t
have access to macleak, i was wondering if anybody out there had\nmore
info...\n\n* has anybody heard rumors about price drops to the powerbook
line like the\nones the duo\'s just went through recently?\n\n* what\'s
the impression of the display on the 180? i could probably swing\na 180
if i got the 80Mb disk rather than the 120, but i don\'t really have\na
feel for how much "better" the display is (yea, it looks great in the\nstore,
but is that all "wow" or is it really that good?). could i solicit\nsome
opinions of people who use the 160 and 180 day-to-day on if its
worth\ntaking the disk size and money hit to get the active display?
(i realize\nthis is a real subjective question, but i\'ve only played around
with the\nmachines in a computer store breifly and figured the opinions
of somebody\nwho actually uses the machine daily might prove helpful).\n\n*
how well does hellcats perform? ;)\n\nthanks a bunch in advance for any info -
if you could email, i\'ll post a\nsummary (news reading time is at a premium
with finals just around the\ncorner... :
( )\n--\nTom Willis \\ twillis@ecn.purdue.edu \\ Purdue Electrical
Engineering\n---------------------------------------------------------------------------\
n"Convictions are more dangerous enemies of truth than lies." - F. W.\nNietzsche\n',

'From: jgreen@amber (Joe Green)\nSubject: Re: Weitek P9000 ?\nOrganization:
Harris Computer Systems Division\nLines: 14\nDistribution: world\nNNTP-Posting-Host:
amber.ssd.csd.harris.com\nX-Newsreader: TIN [version 1.1 PL9]\n\nRobert
J.C. Kyanko (rob@rjck.UUCP) wrote:\n >abraxis@iastate.edu writes in article
<abraxis.734340159@class1.iastate.edu >:\n> > Anyone know about the
Weitek P9000 graphics chip?\n > As far as the low-level stuff goes, it looks
pretty nice. It\'s got this\n> quadrilateral fill command that requires just
the four points.\n\nDo you have Weitek\'s address/phone number? I\'d like to get
some information\nabout this chip.\n\n--\nJoe Green\t\t\t\tHarris
Corporation\njgreen@csd.harris.com\t\t\tComputer Systems Division\n"The only
thing that really scares me is a person with no sense of humor.
"\n\t\t\t\t\t\t-- Jonathan Winters\n']
先決條件
我們需要來自 NLTK 的停用詞和來自 Scapy 的英語模型。兩者都可以按如下方式下載:
import nltk;
nltk.download('stopwords')
nlp = spacy.load('en_core_web_md', disable=['parser', 'ner'])
匯入必要的包
為了構建 LDA 模型,我們需要匯入以下必要的包:
import re
import numpy as np
import pandas as pd
from pprint import pprint
import gensim
import gensim.corpora as corpora
from gensim.utils import simple_preprocess
from gensim.models import CoherenceModel
import spacy
import pyLDAvis
import pyLDAvis.gensim
import matplotlib.pyplot as plt
準備停用詞
現在,我們需要匯入停用詞並使用它們:
from nltk.corpus import stopwords
stop_words = stopwords.words('english')
stop_words.extend(['from', 'subject', 're', 'edu', 'use'])
清理文字
現在,藉助 Gensim 的simple_preprocess(),我們需要將每個句子標記化為詞語列表。我們還應該刪除標點符號和不必要的字元。為此,我們將建立一個名為sent_to_words()的函式:
def sent_to_words(sentences):
   for sentence in sentences:
      yield(gensim.utils.simple_preprocess(str(sentence), deacc=True))
data_words = list(sent_to_words(data))
構建二元組和三元組模型
眾所周知,二元組是文件中經常一起出現的兩個詞,三元組是文件中經常一起出現的三個詞。藉助 Gensim 的Phrases模型,我們可以做到這一點:
bigram = gensim.models.Phrases(data_words, min_count=5, threshold=100)
trigram = gensim.models.Phrases(bigram[data_words], threshold=100)
bigram_mod = gensim.models.phrases.Phraser(bigram)
trigram_mod = gensim.models.phrases.Phraser(trigram)
過濾掉停用詞
接下來,我們需要過濾掉停用詞。除此之外,我們還將建立用於建立二元組、三元組和詞形還原的函式:
def remove_stopwords(texts):
   return [[word for word in simple_preprocess(str(doc))
if word not in stop_words] for doc in texts]
def make_bigrams(texts):
   return [bigram_mod[doc] for doc in texts]
def make_trigrams(texts):
   return [trigram_mod[bigram_mod[doc]] for doc in texts]
def lemmatization(texts, allowed_postags=['NOUN', 'ADJ', 'VERB', 'ADV']):
   texts_out = []
   for sent in texts:
     doc = nlp(" ".join(sent))
     texts_out.append([token.lemma_ for token in doc if token.pos_ in allowed_postags])
   return texts_out
為主題模型構建字典和語料庫
我們現在需要構建字典和語料庫。我們之前也做過:
id2word = corpora.Dictionary(data_lemmatized)
texts = data_lemmatized
corpus = [id2word.doc2bow(text) for text in texts]
構建 LDA 主題模型
我們已經實現了訓練 LDA 模型所需的一切。現在是構建 LDA 主題模型的時候了。對於我們的實現示例,可以使用以下幾行程式碼來完成:
lda_model = gensim.models.ldamodel.LdaModel(
   corpus=corpus, id2word=id2word, num_topics=20, random_state=100,
   update_every=1, chunksize=100, passes=10, alpha='auto', per_word_topics=True
)
實現示例
讓我們看看構建 LDA 主題模型的完整實現示例:
import re
import numpy as np
import pandas as pd
from pprint import pprint
import gensim
import gensim.corpora as corpora
from gensim.utils import simple_preprocess
from gensim.models import CoherenceModel
import spacy
import pyLDAvis
import pyLDAvis.gensim
import matplotlib.pyplot as plt
from nltk.corpus import stopwords
stop_words = stopwords.words('english')
stop_words.extend(['from', 'subject', 're', 'edu', 'use'])
from sklearn.datasets import fetch_20newsgroups
newsgroups_train = fetch_20newsgroups(subset='train')
data = newsgroups_train.data
data = [re.sub('\S*@\S*\s?', '', sent) for sent in data]
data = [re.sub('\s+', ' ', sent) for sent in data]
data = [re.sub("\'", "", sent) for sent in data]
print(data_words[:4]) #it will print the data after prepared for stopwords
bigram = gensim.models.Phrases(data_words, min_count=5, threshold=100)
trigram = gensim.models.Phrases(bigram[data_words], threshold=100)
bigram_mod = gensim.models.phrases.Phraser(bigram)
trigram_mod = gensim.models.phrases.Phraser(trigram)
def remove_stopwords(texts):
   return [[word for word in simple_preprocess(str(doc))
   if word not in stop_words] for doc in texts]
def make_bigrams(texts):
   return [bigram_mod[doc] for doc in texts]
def make_trigrams(texts):
   [trigram_mod[bigram_mod[doc]] for doc in texts]
def lemmatization(texts, allowed_postags=['NOUN', 'ADJ', 'VERB', 'ADV']):
   texts_out = []
   for sent in texts:
      doc = nlp(" ".join(sent))
      texts_out.append([token.lemma_ for token in doc if token.pos_ in allowed_postags])
   return texts_out
data_words_nostops = remove_stopwords(data_words)
data_words_bigrams = make_bigrams(data_words_nostops)
nlp = spacy.load('en_core_web_md', disable=['parser', 'ner'])
data_lemmatized = lemmatization(data_words_bigrams, allowed_postags=[
   'NOUN', 'ADJ', 'VERB', 'ADV'
])
print(data_lemmatized[:4]) #it will print the lemmatized data.
id2word = corpora.Dictionary(data_lemmatized)
texts = data_lemmatized
corpus = [id2word.doc2bow(text) for text in texts]
print(corpus[:4]) #it will print the corpus we created above.
[[(id2word[id], freq) for id, freq in cp] for cp in corpus[:4]]
#it will print the words with their frequencies.
lda_model = gensim.models.ldamodel.LdaModel(
   corpus=corpus, id2word=id2word, num_topics=20, random_state=100,
   update_every=1, chunksize=100, passes=10, alpha='auto', per_word_topics=True
)
我們現在可以使用上面建立的 LDA 模型來獲取主題,並計算模型困惑度。
Gensim - 使用 LDA 主題模型
在本章中,我們將瞭解如何使用潛在狄利克雷分配 (LDA) 主題模型。
檢視 LDA 模型中的主題
我們上面建立的 LDA 模型 (lda_model) 可用於檢視文件中的主題。這可以使用以下指令碼來完成:
pprint(lda_model.print_topics())
doc_lda = lda_model[corpus]
輸出
[
   (0,
   '0.036*"go" + 0.027*"get" + 0.021*"time" + 0.017*"back" + 0.015*"good" + '
   '0.014*"much" + 0.014*"be" + 0.013*"car" + 0.013*"well" + 0.013*"year"'),
   (1,
   '0.078*"screen" + 0.067*"video" + 0.052*"character" + 0.046*"normal" + '
   '0.045*"mouse" + 0.034*"manager" + 0.034*"disease" + 0.031*"processor" + '
   '0.028*"excuse" + 0.028*"choice"'),
   (2,
   '0.776*"ax" + 0.079*"_" + 0.011*"boy" + 0.008*"ticket" + 0.006*"red" + '
   '0.004*"conservative" + 0.004*"cult" + 0.004*"amazing" + 0.003*"runner" + '
   '0.003*"roughly"'),
   (3,
   '0.086*"season" + 0.078*"fan" + 0.072*"reality" + 0.065*"trade" + '
   '0.045*"concept" + 0.040*"pen" + 0.028*"blow" + 0.025*"improve" + '
   '0.025*"cap" + 0.021*"penguin"'),
   (4,
   '0.027*"group" + 0.023*"issue" + 0.016*"case" + 0.016*"cause" + '
   '0.014*"state" + 0.012*"whole" + 0.012*"support" + 0.011*"government" + '
   '0.010*"year" + 0.010*"rate"'),
   (5,
   '0.133*"evidence" + 0.047*"believe" + 0.044*"religion" + 0.042*"belief" + '
   '0.041*"sense" + 0.041*"discussion" + 0.034*"atheist" + 0.030*"conclusion" +
   '
   '0.029*"explain" + 0.029*"claim"'),
   (6,
   '0.083*"space" + 0.059*"science" + 0.031*"launch" + 0.030*"earth" + '
   '0.026*"route" + 0.024*"orbit" + 0.024*"scientific" + 0.021*"mission" + '
   '0.018*"plane" + 0.017*"satellite"'),
   (7,
   '0.065*"file" + 0.064*"program" + 0.048*"card" + 0.041*"window" + '
   '0.038*"driver" + 0.037*"software" + 0.034*"run" + 0.029*"machine" + '
   '0.029*"entry" + 0.028*"version"'),
   (8,
   '0.078*"publish" + 0.059*"mount" + 0.050*"turkish" + 0.043*"armenian" + '
   '0.027*"western" + 0.026*"russian" + 0.025*"locate" + 0.024*"proceed" + '
   '0.024*"electrical" + 0.022*"terrorism"'),
   (9,
   '0.023*"people" + 0.023*"child" + 0.021*"kill" + 0.020*"man" + 0.019*"death" '
   '+ 0.015*"die" + 0.015*"live" + 0.014*"attack" + 0.013*"age" + '
   '0.011*"church"'),
   (10,
   '0.092*"cpu" + 0.085*"black" + 0.071*"controller" + 0.039*"white" + '
   '0.028*"water" + 0.027*"cold" + 0.025*"solid" + 0.024*"cool" + 0.024*"heat" '
   '+ 0.023*"nuclear"'),
   (11,
   '0.071*"monitor" + 0.044*"box" + 0.042*"option" + 0.041*"generate" + '
   '0.038*"vote" + 0.032*"battery" + 0.029*"wave" + 0.026*"tradition" + '
   '0.026*"fairly" + 0.025*"task"'),
   (12,
   '0.048*"send" + 0.045*"mail" + 0.036*"list" + 0.033*"include" + '
   '0.032*"price" + 0.031*"address" + 0.027*"email" + 0.026*"receive" + '
   '0.024*"book" + 0.024*"sell"'),
   (13,
   '0.515*"drive" + 0.052*"laboratory" + 0.042*"blind" + 0.020*"investment" + '
   '0.011*"creature" + 0.010*"loop" + 0.005*"dialog" + 0.000*"slave" + '
   '0.000*"jumper" + 0.000*"sector"'),
   (14,
   '0.153*"patient" + 0.066*"treatment" + 0.062*"printer" + 0.059*"doctor" + '

   '0.036*"medical" + 0.031*"energy" + 0.029*"study" + 0.029*"probe" + '
   '0.024*"mph" + 0.020*"physician"'),
   (15,
   '0.068*"law" + 0.055*"gun" + 0.039*"government" + 0.036*"right" + '
   '0.029*"state" + 0.026*"drug" + 0.022*"crime" + 0.019*"person" + '
   '0.019*"citizen" + 0.019*"weapon"'),
   (16,
   '0.107*"team" + 0.102*"game" + 0.078*"play" + 0.055*"win" + 0.052*"player" + '
   '0.051*"year" + 0.030*"score" + 0.025*"goal" + 0.023*"wing" + 0.023*"run"'),
   (17,
   '0.031*"say" + 0.026*"think" + 0.022*"people" + 0.020*"make" + 0.017*"see" + '
   '0.016*"know" + 0.013*"come" + 0.013*"even" + 0.013*"thing" + 0.013*"give"'),
   (18,
   '0.039*"system" + 0.034*"use" + 0.023*"key" + 0.016*"bit" + 0.016*"also" + '
   '0.015*"information" + 0.014*"source" + 0.013*"chip" + 0.013*"available" + '
   '0.010*"provide"'),
   (19,
   '0.085*"line" + 0.073*"write" + 0.053*"article" + 0.046*"organization" + '
   '0.034*"host" + 0.023*"be" + 0.023*"know" + 0.017*"thank" + 0.016*"want" + '
   '0.014*"help"')
]
計算模型困惑度
我們上面建立的 LDA 模型 (lda_model) 可用於計算模型的困惑度,即模型的好壞。分數越低,模型越好。這可以使用以下指令碼來完成:
print('\nPerplexity: ', lda_model.log_perplexity(corpus))
輸出
Perplexity: -12.338664984332151
計算一致性得分
我們上面建立的 LDA 模型(lda_model) 可用於計算模型的一致性得分,即主題中詞語的成對詞語相似度得分的平均值/中位數。這可以使用以下指令碼來完成:
coherence_model_lda = CoherenceModel(
   model=lda_model, texts=data_lemmatized, dictionary=id2word, coherence='c_v'
)
coherence_lda = coherence_model_lda.get_coherence()
print('\nCoherence Score: ', coherence_lda)
輸出
Coherence Score: 0.510264381411751
視覺化主題關鍵詞
我們上面建立的 LDA 模型(lda_model) 可用於檢查生成的主題和相關的關鍵詞。可以使用pyLDAvis包對其進行視覺化,如下所示:
pyLDAvis.enable_notebook()
vis = pyLDAvis.gensim.prepare(lda_model, corpus, id2word)
vis
輸出

從上面的輸出中,左側的泡泡代表一個主題,泡泡越大,該主題就越普遍。如果主題模型具有散佈在圖表中的大型、非重疊泡泡,則該主題模型會很好。
Gensim - 建立 LDA Mallet 模型
本章將解釋什麼是潛在狄利克雷分配 (LDA) Mallet 模型以及如何在 Gensim 中建立相同的模型。
在上一節中,我們已經實現了 LDA 模型,並從 20Newsgroup 資料集的文件中獲得了主題。那是 Gensim 自帶的 LDA 演算法版本。Gensim 也存在 Mallet 版本,它提供更高質量的主題。在這裡,我們將對之前已經實現的示例應用 Mallet 的 LDA。
什麼是 LDA Mallet 模型?
Mallet 是一個開源工具包,由 Andrew McCullum 編寫。它基本上是一個基於 Java 的包,用於 NLP、文件分類、聚類、主題建模以及許多其他機器學習文字應用程式。它為我們提供了 Mallet 主題建模工具包,其中包含 LDA 以及分層 LDA 的高效基於取樣的實現。
Mallet 2.0 是 MALLET(Java 主題建模工具包)的當前版本。在開始將其與 Gensim 一起用於 LDA 之前,我們必須將 mallet-2.0.8.zip 包下載到我們的系統上並解壓縮它。安裝並解壓縮後,手動或透過我們將提供的程式碼(在下一步使用 Mallet 實現 LDA 時),將環境變數 %MALLET_HOME% 設定為指向 MALLET 目錄。
Gensim 包裝器
Python 為潛在狄利克雷分配 (LDA) 提供了 Gensim 包裝器。該包裝器的語法為 **gensim.models.wrappers.LdaMallet**。此模組(來自 MALLET 的摺疊吉布斯取樣)允許從訓練語料庫估計 LDA 模型,並對新的、未見過的文件推斷主題分佈。
實現示例
我們將對之前構建的 LDA 模型使用 LDA Mallet,並透過計算一致性分數來檢查效能差異。
提供 Mallet 檔案的路徑
在將 Mallet LDA 模型應用於我們在前面示例中構建的語料庫之前,我們必須更新環境變數並提供 Mallet 檔案的路徑。這可以使用以下程式碼完成:
import os
from gensim.models.wrappers import LdaMallet
os.environ.update({'MALLET_HOME':r'C:/mallet-2.0.8/'})
#You should update this path as per the path of Mallet directory on your system.
mallet_path = r'C:/mallet-2.0.8/bin/mallet'
#You should update this path as per the path of Mallet directory on your system.
一旦我們提供了 Mallet 檔案的路徑,我們現在就可以在語料庫上使用它了。這可以使用 **ldamallet.show_topics()** 函式完成,如下所示:
ldamallet = gensim.models.wrappers.LdaMallet(
   mallet_path, corpus=corpus, num_topics=20, id2word=id2word
)
pprint(ldamallet.show_topics(formatted=False))
輸出
[
   (4,
   [('gun', 0.024546225966016102),
   ('law', 0.02181426826996709),
   ('state', 0.017633545129043606),
   ('people', 0.017612848479831116),
   ('case', 0.011341763768445888),
   ('crime', 0.010596684396796159),
   ('weapon', 0.00985160502514643),
   ('person', 0.008671896020034356),
   ('firearm', 0.00838214293105946),
   ('police', 0.008257963035784506)]),
   (9,
   [('make', 0.02147966482730431),
   ('people', 0.021377478029838543),
   ('work', 0.018557122419783363),
   ('money', 0.016676885346413244),
   ('year', 0.015982015123646026),
   ('job', 0.012221540976905783),
   ('pay', 0.010239117106069897),
   ('time', 0.008910688739014919),
   ('school', 0.0079092581238504),
   ('support', 0.007357449417535254)]),
   (14,
   [('power', 0.018428398507941996),
   ('line', 0.013784244460364121),
   ('high', 0.01183271164249895),
   ('work', 0.011560979224821522),
   ('ground', 0.010770484918850819),
   ('current', 0.010745781971789235),
   ('wire', 0.008399002000938712),
   ('low', 0.008053160742076529),
   ('water', 0.006966231071366814),
   ('run', 0.006892122230182061)]),
   (0,
   [('people', 0.025218349201353372),
   ('kill', 0.01500904870564167),
   ('child', 0.013612400660948935),
   ('armenian', 0.010307655991816822),
   ('woman', 0.010287984892595798),
   ('start', 0.01003226060272248),
   ('day', 0.00967818081674404),
   ('happen', 0.009383114328428673),
   ('leave', 0.009383114328428673),
   ('fire', 0.009009363443229208)]),
   (1,
   [('file', 0.030686386604212003),
   ('program', 0.02227713642901929),
   ('window', 0.01945561169918489),
   ('set', 0.015914874783314277),
   ('line', 0.013831003577619592),
   ('display', 0.013794120901412606),
   ('application', 0.012576992586582082),
   ('entry', 0.009275993066056873),
   ('change', 0.00872275292295209),
   ('color', 0.008612104894331132)]),
   (12,
   [('line', 0.07153810971508515),
   ('buy', 0.02975597944523662),
   ('organization', 0.026877236406682988),
   ('host', 0.025451316957679788),
   ('price', 0.025182275552207485),
   ('sell', 0.02461728860071565),
   ('mail', 0.02192687454599263),
   ('good', 0.018967419085797303),
   ('sale', 0.017998870026097017),
   ('send', 0.013694207538540181)]),
   (11,
   [('thing', 0.04901329901329901),
   ('good', 0.0376018876018876),
   ('make', 0.03393393393393394),
   ('time', 0.03326898326898327),
   ('bad', 0.02664092664092664),
   ('happen', 0.017696267696267698),
   ('hear', 0.015615615615615615),
   ('problem', 0.015465465465465466),
   ('back', 0.015143715143715144),
   ('lot', 0.01495066495066495)]),
   (18,
   [('space', 0.020626317374284855),
   ('launch', 0.00965716006366413),
   ('system', 0.008560244332602057),
   ('project', 0.008173097603991913),
   ('time', 0.008108573149223556),
   ('cost', 0.007764442723792318),
   ('year', 0.0076784101174345075),
   ('earth', 0.007484836753129436),
   ('base', 0.0067535595990880545),
   ('large', 0.006689035144319697)]),
   (5,
   [('government', 0.01918437232469453),
   ('people', 0.01461203206475212),
   ('state', 0.011207097828624796),
   ('country', 0.010214802708381975),
   ('israeli', 0.010039691804809714),
   ('war', 0.009436532025838587),
   ('force', 0.00858043427504086),
   ('attack', 0.008424780138532182),
   ('land', 0.0076659662230523775),
   ('world', 0.0075103120865437)]),
   (2,
   [('car', 0.041091194044470564),
   ('bike', 0.015598981291017729),
   ('ride', 0.011019688510138114),
   ('drive', 0.010627877363110981),
   ('engine', 0.009403467528651191),
   ('speed', 0.008081104907434616),
   ('turn', 0.007738270153785875),
   ('back', 0.007738270153785875),
   ('front', 0.007468899990204721),
   ('big', 0.007370947203447938)])
]
評估效能
現在我們還可以透過計算一致性分數來評估其效能,如下所示:
ldamallet = gensim.models.wrappers.LdaMallet(
   mallet_path, corpus=corpus, num_topics=20, id2word=id2word
)
pprint(ldamallet.show_topics(formatted=False))
輸出
Coherence Score: 0.5842762900901401
Gensim - 文件與 LDA 模型
本章討論了 Gensim 中的文件和 LDA 模型。
查詢 LDA 的最佳主題數量
我們可以透過建立許多具有不同主題值的 LDA 模型來找到 LDA 的最佳主題數量。在這些 LDA 中,我們可以選擇一個具有最高一致性值的那個。
名為 **coherence_values_computation()** 的以下函式將訓練多個 LDA 模型。它還將提供模型及其相應的一致性分數:
def coherence_values_computation(dictionary, corpus, texts, limit, start=2, step=3):
   coherence_values = []
   model_list = []
   for num_topics in range(start, limit, step):
      model = gensim.models.wrappers.LdaMallet(
         mallet_path, corpus=corpus, num_topics=num_topics, id2word=id2word
      )
      model_list.append(model)
   coherencemodel = CoherenceModel(
      model=model, texts=texts, dictionary=dictionary, coherence='c_v'
   )
   coherence_values.append(coherencemodel.get_coherence())
return model_list, coherence_values
現在,藉助以下程式碼,我們可以獲得最佳的主題數量,我們也可以用圖表來顯示:
model_list, coherence_values = coherence_values_computation (
   dictionary=id2word, corpus=corpus, texts=data_lemmatized,
   start=1, limit=50, step=8
)
limit=50; start=1; step=8;
x = range(start, limit, step)
plt.plot(x, coherence_values)
plt.xlabel("Num Topics")
plt.ylabel("Coherence score")
plt.legend(("coherence_values"), loc='best')
plt.show()
輸出

接下來,我們還可以列印各種主題的一致性值,如下所示:
for m, cv in zip(x, coherence_values):
   print("Num Topics =", m, " is having Coherence Value of", round(cv, 4))
輸出
Num Topics = 1 is having Coherence Value of 0.4866
Num Topics = 9 is having Coherence Value of 0.5083
Num Topics = 17 is having Coherence Value of 0.5584
Num Topics = 25 is having Coherence Value of 0.5793
Num Topics = 33 is having Coherence Value of 0.587
Num Topics = 41 is having Coherence Value of 0.5842
Num Topics = 49 is having Coherence Value of 0.5735
現在,問題出現了,我們現在應該選擇哪個模型?一個好的做法是選擇在變平之前給出最高一致性值的模型。因此,我們將選擇具有 25 個主題的模型,在上面的列表中排名第 4。
optimal_model = model_list[3]
model_topics = optimal_model.show_topics(formatted=False)
pprint(optimal_model.print_topics(num_words=10))

[
   (0,
   '0.018*"power" + 0.011*"high" + 0.010*"ground" + 0.009*"current" + '
   '0.008*"low" + 0.008*"wire" + 0.007*"water" + 0.007*"work" + 0.007*"design" '
   '+ 0.007*"light"'),
   (1,
   '0.036*"game" + 0.029*"team" + 0.029*"year" + 0.028*"play" + 0.020*"player" '
   '+ 0.019*"win" + 0.018*"good" + 0.013*"season" + 0.012*"run" + 0.011*"hit"'),
   (2,
   '0.020*"image" + 0.019*"information" + 0.017*"include" + 0.017*"mail" + '
   '0.016*"send" + 0.015*"list" + 0.013*"post" + 0.012*"address" + '
   '0.012*"internet" + 0.012*"system"'),
   (3,
   '0.986*"ax" + 0.002*"_" + 0.001*"tm" + 0.000*"part" + 0.000*"biz" + '
   '0.000*"mb" + 0.000*"mbs" + 0.000*"pne" + 0.000*"end" + 0.000*"di"'),
   (4,
   '0.020*"make" + 0.014*"work" + 0.013*"money" + 0.013*"year" + 0.012*"people" '
   '+ 0.011*"job" + 0.010*"group" + 0.009*"government" + 0.008*"support" + '
   '0.008*"question"'),
   (5,
   '0.011*"study" + 0.011*"drug" + 0.009*"science" + 0.008*"food" + '
   '0.008*"problem" + 0.008*"result" + 0.008*"effect" + 0.007*"doctor" + '
   '0.007*"research" + 0.007*"patient"'),
   (6,
   '0.024*"gun" + 0.024*"law" + 0.019*"state" + 0.015*"case" + 0.013*"people" + '
   '0.010*"crime" + 0.010*"weapon" + 0.010*"person" + 0.008*"firearm" + '
   '0.008*"police"'),
   (7,
   '0.012*"word" + 0.011*"question" + 0.011*"exist" + 0.011*"true" + '
   '0.010*"religion" + 0.010*"claim" + 0.008*"argument" + 0.008*"truth" + '
   '0.008*"life" + 0.008*"faith"'),
   (8,
   '0.077*"time" + 0.029*"day" + 0.029*"call" + 0.025*"back" + 0.021*"work" + '
   '0.019*"long" + 0.015*"end" + 0.015*"give" + 0.014*"year" + 0.014*"week"'),
   (9,
   '0.048*"thing" + 0.041*"make" + 0.038*"good" + 0.037*"people" + '
   '0.028*"write" + 0.019*"bad" + 0.019*"point" + 0.018*"read" + 0.018*"post" + '
   '0.016*"idea"'),
   (10,
   '0.022*"book" + 0.020*"_" + 0.013*"man" + 0.012*"people" + 0.011*"write" + '
   '0.011*"find" + 0.010*"history" + 0.010*"armenian" + 0.009*"turkish" + '
   '0.009*"number"'),
   (11,
   '0.064*"line" + 0.030*"buy" + 0.028*"organization" + 0.025*"price" + '
   '0.025*"sell" + 0.023*"good" + 0.021*"host" + 0.018*"sale" + 0.017*"mail" + '
   '0.016*"cost"'),
   (12,
   '0.041*"car" + 0.015*"bike" + 0.011*"ride" + 0.010*"engine" + 0.009*"drive" '
   '+ 0.008*"side" + 0.008*"article" + 0.007*"turn" + 0.007*"front" + '
   '0.007*"speed"'),
   (13,
   '0.018*"people" + 0.011*"attack" + 0.011*"state" + 0.011*"israeli" + '
   '0.010*"war" + 0.010*"country" + 0.010*"government" + 0.009*"live" + '
   '0.009*"give" + 0.009*"land"'),
   (14,
   '0.037*"file" + 0.026*"line" + 0.021*"read" + 0.019*"follow" + '
   '0.018*"number" + 0.015*"program" + 0.014*"write" + 0.012*"entry" + '
   '0.012*"give" + 0.011*"check"'),
   (15,
   '0.196*"write" + 0.172*"line" + 0.165*"article" + 0.117*"organization" + '
   '0.086*"host" + 0.030*"reply" + 0.010*"university" + 0.008*"hear" + '
   '0.007*"post" + 0.007*"news"'),
   (16,
   '0.021*"people" + 0.014*"happen" + 0.014*"child" + 0.012*"kill" + '
   '0.011*"start" + 0.011*"live" + 0.010*"fire" + 0.010*"leave" + 0.009*"hear" '
   '+ 0.009*"home"'),
   (17,
   '0.038*"key" + 0.018*"system" + 0.015*"space" + 0.015*"technology" + '
   '0.014*"encryption" + 0.010*"chip" + 0.010*"bit" + 0.009*"launch" + '
   '0.009*"public" + 0.009*"government"'),
   (18,
   '0.035*"drive" + 0.031*"system" + 0.027*"problem" + 0.027*"card" + '
   '0.020*"driver" + 0.017*"bit" + 0.017*"work" + 0.016*"disk" + '
   '0.014*"monitor" + 0.014*"machine"'),
   (19,
   '0.031*"window" + 0.020*"run" + 0.018*"color" + 0.018*"program" + '
   '0.017*"application" + 0.016*"display" + 0.015*"set" + 0.015*"version" + '
   '0.012*"screen" + 0.012*"problem"')
]
查詢句子中的主要主題
查詢句子中的主要主題是主題建模最有用的一些實際應用之一。它確定給定文件的主題。在這裡,我們將找到在該特定文件中貢獻百分比最高的主題編號。為了彙總表格中的資訊,我們將建立一個名為 **dominant_topics()** 的函式:
def dominant_topics(ldamodel=lda_model, corpus=corpus, texts=data):
   sent_topics_df = pd.DataFrame()
接下來,我們將獲取每個文件中的主要主題:
for i, row in enumerate(ldamodel[corpus]):
   row = sorted(row, key=lambda x: (x[1]), reverse=True)
接下來,我們將獲取每個文件的主要主題、百分比貢獻和關鍵詞:
for j, (topic_num, prop_topic) in enumerate(row):
   if j == 0: # => dominant topic
      wp = ldamodel.show_topic(topic_num)
      topic_keywords = ", ".join([word for word, prop in wp])
sent_topics_df = sent_topics_df.append(
   pd.Series([int(topic_num), round(prop_topic,4), topic_keywords]), ignore_index=True
)
   else:
      break
sent_topics_df.columns = ['Dominant_Topic', 'Perc_Contribution', 'Topic_Keywords']
藉助以下程式碼,我們將原始文字新增到輸出的結尾:
contents = pd.Series(texts)
   sent_topics_df = pd.concat([sent_topics_df, contents], axis=1)
   return(sent_topics_df)
df_topic_sents_keywords = dominant_topics(
   ldamodel=optimal_model, corpus=corpus, texts=data
)
現在,對句子中的主題進行格式化,如下所示:
df_dominant_topic = df_topic_sents_keywords.reset_index()
df_dominant_topic.columns = [
   'Document_No', 'Dominant_Topic', 'Topic_Perc_Contrib', 'Keywords', 'Text'
]
最後,我們可以顯示主要主題,如下所示:
df_dominant_topic.head(15)

查詢最具代表性的文件
為了更多地瞭解主題,我們還可以找到給定主題貢獻最多的文件。我們可以透過閱讀該特定文件來推斷該主題。
sent_topics_sorteddf_mallet = pd.DataFrame()
sent_topics_outdf_grpd = df_topic_sents_keywords.groupby('Dominant_Topic')
for i, grp in sent_topics_outdf_grpd:
   sent_topics_sorteddf_mallet = pd.concat([sent_topics_sorteddf_mallet,
grp.sort_values(['Perc_Contribution'], ascending=[0]).head(1)], axis=0)
sent_topics_sorteddf_mallet.reset_index(drop=True, inplace=True)
sent_topics_sorteddf_mallet.columns = [
   'Topic_Number', "Contribution_Perc", "Keywords", "Text"
]
sent_topics_sorteddf_mallet.head()
輸出

主題的卷和分佈
有時我們還想判斷主題在文件中的討論範圍。為此,我們需要了解主題在文件中的數量和分佈。
首先計算每個主題的文件數量,如下所示:
topic_counts = df_topic_sents_keywords['Dominant_Topic'].value_counts()
接下來,計算每個主題的文件百分比,如下所示:
topic_contribution = round(topic_counts/topic_counts.sum(), 4)
現在找到主題編號和關鍵詞,如下所示:
topic_num_keywords = df_topic_sents_keywords[['Dominant_Topic', 'Topic_Keywords']]
現在,按列連線它們,如下所示:
df_dominant_topics = pd.concat(
   [topic_num_keywords, topic_counts, topic_contribution], axis=1
)
接下來,我們將更改列名,如下所示:
df_dominant_topics.columns = [
   'Dominant-Topic', 'Topic-Keywords', 'Num_Documents', 'Perc_Documents'
]
df_dominant_topics
輸出

Gensim - 建立 LSI 和 HDP 主題模型
本章介紹了使用 Gensim 建立潛在語義索引 (LSI) 和分層狄利克雷過程 (HDP) 主題模型。
首先在 Gensim 中使用潛在狄利克雷分配 (LDA) 實現的主題建模演算法是 **潛在語義索引 (LSI)**。它也稱為 **潛在語義分析 (LSA)**。它於 1988 年由 Scott Deerwester、Susan Dumais、George Furnas、Richard Harshman、Thomas Landaur、Karen Lochbaum 和 Lynn Streeter 獲得專利。
在本節中,我們將設定我們的 LSI 模型。這可以透過與設定 LDA 模型相同的方式完成。我們需要從 **gensim.models** 匯入 LSI 模型。
LSI 的作用
實際上,LSI 是一種 NLP 技術,尤其是在分散式語義中。它分析一組文件及其包含的術語之間的關係。如果我們談論它的工作原理,那麼它會構建一個矩陣,該矩陣包含來自大量文字的每個文件的詞數。
構建後,為了減少行數,LSI 模型使用稱為奇異值分解 (SVD) 的數學技術。除了減少行數外,它還保留列之間的相似性結構。
在矩陣中,行表示唯一單詞,列表示每個文件。它基於分散式假設工作,即它假設含義相近的詞會出現在相同型別的文字中。
使用 Gensim 實現
在這裡,我們將使用 LSI(潛在語義索引)從資料集中提取自然討論的主題。
載入資料集
我們將使用的資料集是“20 個新聞組”的資料集,其中包含來自新聞報道各個部分的數千篇新聞文章。它可在Sklearn資料集下找到。我們可以輕鬆地使用以下 Python 指令碼來下載:
from sklearn.datasets import fetch_20newsgroups
newsgroups_train = fetch_20newsgroups(subset='train')
讓我們藉助以下指令碼來檢視一些示例新聞:
newsgroups_train.data[:4]
["From: lerxst@wam.umd.edu (where's my thing)\nSubject:
WHAT car is this!?\nNntp-Posting-Host: rac3.wam.umd.edu\nOrganization:
University of Maryland, College Park\nLines: 15\n\n
I was wondering if anyone out there could enlighten me on this car
I saw\nthe other day. It was a 2-door sports car,
looked to be from the late 60s/\nearly 70s. It was called a Bricklin.
The doors were really small. In addition,\nthe front bumper was separate from
the rest of the body. This is \nall I know. If anyone can tellme a model name,
engine specs, years\nof production, where this car is made, history, or
whatever info you\nhave on this funky looking car,
please e-mail.\n\nThanks,\n- IL\n ---- brought to you by your neighborhood
Lerxst ----\n\n\n\n\n",

"From: guykuo@carson.u.washington.edu (Guy Kuo)\nSubject:
SI Clock Poll - Final Call\nSummary: Final call for SI clock reports\nKeywords:
SI,acceleration,clock,upgrade\nArticle-I.D.: shelley.1qvfo9INNc3s\nOrganization:
University of Washington\nLines: 11\nNNTP-Posting-Host: carson.u.washington.edu\n\nA
fair number of brave souls who upgraded their SI clock oscillator have\nshared their
experiences for this poll. Please send a brief message detailing\nyour experiences with
the procedure. Top speed attained, CPU rated speed,\nadd on cards and adapters, heat
sinks, hour of usage per day, floppy disk\nfunctionality with 800 and 1.4 m floppies
are especially requested.\n\nI will be summarizing in the next two days, so please add
to the network\nknowledge base if you have done the clock upgrade and haven't answered
this\npoll. Thanks.\n\nGuy Kuo <guykuo@u.washington.edu>\n",

'From: twillis@ec.ecn.purdue.edu (Thomas E Willis)\nSubject:
PB questions...\nOrganization: Purdue University Engineering Computer
Network\nDistribution: usa\nLines: 36\n\nwell folks, my mac plus finally gave up the
ghost this weekend after\nstarting life as a 512k way back in 1985. sooo, i\'m in the
market for a\nnew machine a bit sooner than i intended to be...\n\ni\'m looking into
picking up a powerbook 160 or maybe 180 and have a bunch\nof questions that (hopefully)
somebody can answer:\n\n* does anybody know any dirt on when the next round of
powerbook\nintroductions are expected? i\'d heard the 185c was supposed to make
an\nappearence "this summer" but haven\'t heard anymore on it - and since i\ndon\'t
have access to macleak, i was wondering if anybody out there had\nmore info...\n\n* has
anybody heard rumors about price drops to the powerbook line like the\nones the duo\'s
just went through recently?\n\n* what\'s the impression of the display on the 180? i
could probably swing\na 180 if i got the 80Mb disk rather than the 120, but i don\'t
really have\na feel for how much "better" the display is (yea, it looks great in
the\nstore, but is that all "wow" or is it really that good?). could i solicit\nsome
opinions of people who use the 160 and 180 day-to-day on if its worth\ntaking the disk
size and money hit to get the active display? (i realize\nthis is a real subjective
question, but i\'ve only played around with the\nmachines in a computer store breifly
and figured the opinions of somebody\nwho actually uses the machine daily might prove
helpful).\n\n* how well does hellcats perform? ;)\n\nthanks a bunch in advance for any
info - if you could email, i\'ll post a\nsummary (news reading time is at a premium
with finals just around the\ncorner... :( )\n--\nTom Willis \\ twillis@ecn.purdue.edu
\\ Purdue Electrical
Engineering\n---------------------------------------------------------------------------\
n"Convictions are more dangerous enemies of truth than lies." - F. W.\nNietzsche\n',

'From: jgreen@amber (Joe Green)\nSubject: Re: Weitek P9000 ?\nOrganization: Harris
Computer Systems Division\nLines: 14\nDistribution: world\nNNTP-Posting-Host:
amber.ssd.csd.harris.com\nX-Newsreader: TIN [version 1.1 PL9]\n\nRobert J.C. Kyanko
(rob@rjck.UUCP) wrote:\n > abraxis@iastate.edu writes in article <
abraxis.734340159@class1.iastate.edu>:\n> > Anyone know about the Weitek P9000
graphics chip?\n > As far as the low-level stuff goes, it looks pretty nice. It\'s
got this\n > quadrilateral fill command that requires just the four
points.\n\nDo you have Weitek\'s address/phone number? I\'d like to get some
information\nabout this chip.\n\n--\nJoe Green\t\t\t\tHarris
Corporation\njgreen@csd.harris.com\t\t\tComputer Systems Division\n"The only thing that
really scares me is a person with no sense of humor."\n\t\t\t\t\t\t-- Jonathan
Winters\n']
先決條件
我們需要來自 NLTK 的停用詞和來自 Scapy 的英語模型。兩者都可以按如下方式下載:
import nltk;
nltk.download('stopwords')
nlp = spacy.load('en_core_web_md', disable=['parser', 'ner'])
匯入必要的包
為了構建 LSI 模型,我們需要匯入以下必要的包:
import re
import numpy as np
import pandas as pd
from pprint import pprint
import gensim
import gensim.corpora as corpora
from gensim.utils import simple_preprocess
from gensim.models import CoherenceModel
import spacy
import matplotlib.pyplot as plt
準備停用詞
現在我們需要匯入停用詞並使用它們:
from nltk.corpus import stopwords
stop_words = stopwords.words('english')
stop_words.extend(['from', 'subject', 're', 'edu', 'use'])
清理文字
現在,藉助 Gensim 的simple_preprocess(),我們需要將每個句子標記化為詞語列表。我們還應該刪除標點符號和不必要的字元。為此,我們將建立一個名為sent_to_words()的函式:
def sent_to_words(sentences):
   for sentence in sentences:
      yield(gensim.utils.simple_preprocess(str(sentence), deacc=True))
data_words = list(sent_to_words(data))
構建二元組和三元組模型
眾所周知,雙詞是文件中經常一起出現的兩個詞,三詞是文件中經常一起出現的三個詞。藉助 Gensim 的 Phrases 模型,我們可以做到這一點:
bigram = gensim.models.Phrases(data_words, min_count=5, threshold=100)
trigram = gensim.models.Phrases(bigram[data_words], threshold=100)
bigram_mod = gensim.models.phrases.Phraser(bigram)
trigram_mod = gensim.models.phrases.Phraser(trigram)
過濾掉停用詞
接下來,我們需要過濾掉停用詞。除此之外,我們還將建立用於建立二元組、三元組和詞形還原的函式:
def remove_stopwords(texts):
   return [[word for word in simple_preprocess(str(doc))
   if word not in stop_words] for doc in texts]
def make_bigrams(texts):
   return [bigram_mod[doc] for doc in texts]
def make_trigrams(texts):
   return [trigram_mod[bigram_mod[doc]] for doc in texts]
def lemmatization(texts, allowed_postags=['NOUN', 'ADJ', 'VERB', 'ADV']):
   texts_out = []
   for sent in texts:
      doc = nlp(" ".join(sent))
      texts_out.append([token.lemma_ for token in doc if token.pos_ in allowed_postags])
   return texts_out
為主題模型構建字典和語料庫
我們現在需要構建字典和語料庫。我們之前也做過:
id2word = corpora.Dictionary(data_lemmatized)
texts = data_lemmatized
corpus = [id2word.doc2bow(text) for text in texts]
構建 LSI 主題模型
我們已經實現了訓練 LSI 模型所需的一切。現在,是時候構建 LSI 主題模型了。對於我們的實現示例,這可以使用以下幾行程式碼完成:
lsi_model = gensim.models.lsimodel.LsiModel(
   corpus=corpus, id2word=id2word, num_topics=20,chunksize=100
)
實現示例
讓我們看看構建 LDA 主題模型的完整實現示例:
import re
import numpy as np
import pandas as pd
from pprint import pprint
import gensim
import gensim.corpora as corpora
from gensim.utils import simple_preprocess
from gensim.models import CoherenceModel
import spacy
import matplotlib.pyplot as plt
from nltk.corpus import stopwords
stop_words = stopwords.words('english')
stop_words.extend(['from', 'subject', 're', 'edu', 'use'])
from sklearn.datasets import fetch_20newsgroups
newsgroups_train = fetch_20newsgroups(subset='train')
data = newsgroups_train.data
data = [re.sub('\S*@\S*\s?', '', sent) for sent in data]
data = [re.sub('\s+', ' ', sent) for sent in data]
data = [re.sub("\'", "", sent) for sent in data]
print(data_words[:4]) #it will print the data after prepared for stopwords
bigram = gensim.models.Phrases(data_words, min_count=5, threshold=100)
trigram = gensim.models.Phrases(bigram[data_words], threshold=100)
bigram_mod = gensim.models.phrases.Phraser(bigram)
trigram_mod = gensim.models.phrases.Phraser(trigram)
def remove_stopwords(texts):
   return [[word for word in simple_preprocess(str(doc))
   if word not in stop_words] for doc in texts]
def make_bigrams(texts):
   return [bigram_mod[doc] for doc in texts]
def make_trigrams(texts):
   return [trigram_mod[bigram_mod[doc]] for doc in texts]
def lemmatization(texts, allowed_postags=['NOUN', 'ADJ', 'VERB', 'ADV']):
   texts_out = []
   for sent in texts:
      doc = nlp(" ".join(sent))
      texts_out.append([token.lemma_ for token in doc if token.pos_ in allowed_postags])
return texts_out
data_words_nostops = remove_stopwords(data_words)
data_words_bigrams = make_bigrams(data_words_nostops)
nlp = spacy.load('en_core_web_md', disable=['parser', 'ner'])
data_lemmatized = lemmatization(
   data_words_bigrams, allowed_postags=['NOUN', 'ADJ', 'VERB', 'ADV']
)
print(data_lemmatized[:4]) #it will print the lemmatized data.
id2word = corpora.Dictionary(data_lemmatized)
texts = data_lemmatized
corpus = [id2word.doc2bow(text) for text in texts]
print(corpus[:4]) #it will print the corpus we created above.
[[(id2word[id], freq) for id, freq in cp] for cp in corpus[:4]]
#it will print the words with their frequencies.
lsi_model = gensim.models.lsimodel.LsiModel(
   corpus=corpus, id2word=id2word, num_topics=20,chunksize=100
)
我們現在可以使用上面建立的 LSI 模型來獲取主題。
檢視 LSI 模型中的主題
我們上面建立的 LSI 模型 **(lsi_model)** 可用於檢視文件中的主題。這可以使用以下指令碼完成:
pprint(lsi_model.print_topics())
doc_lsi = lsi_model[corpus]
輸出
[
   (0,
   '1.000*"ax" + 0.001*"_" + 0.000*"tm" + 0.000*"part" +    0.000*"pne" + '
   '0.000*"biz" + 0.000*"mbs" + 0.000*"end" + 0.000*"fax" + 0.000*"mb"'),
   (1,
   '0.239*"say" + 0.222*"file" + 0.189*"go" + 0.171*"know" + 0.169*"people" + '
   '0.147*"make" + 0.140*"use" + 0.135*"also" + 0.133*"see" + 0.123*"think"')
]
分層狄利克雷過程 (HPD)
LDA 和 LSI 等主題模型有助於總結和組織無法手動分析的大型文字檔案。除了 LDA 和 LSI 之外,Gensim 中另一個強大的主題模型是 HDP(分層狄利克雷過程)。它基本上是用於分組資料的無監督分析的混合成員模型。與 LDA(其有限對應物)不同,HDP 從資料中推斷主題數量。
使用 Gensim 實現
要在 Gensim 中實現 HDP,我們需要訓練語料庫和字典(如在上面實現 LDA 和 LSI 主題模型的示例中所做的那樣)我們可以從 gensim.models.HdpModel 匯入 HDP 主題模型。在這裡,我們還將在 20Newsgroup 資料上實現 HDP 主題模型,步驟也相同。
對於我們的語料庫和字典(在上面為 LSI 和 LDA 模型建立的示例中),我們可以按如下方式匯入 HdpModel:
Hdp_model = gensim.models.hdpmodel.HdpModel(corpus=corpus, id2word=id2word)
檢視 LSI 模型中的主題
HDP 模型 **(Hdp_model)** 可用於檢視文件中的主題。這可以使用以下指令碼完成:
pprint(Hdp_model.print_topics())
輸出
[
   (0,
   '0.009*line + 0.009*write + 0.006*say + 0.006*article + 0.006*know + '
   '0.006*people + 0.005*make + 0.005*go + 0.005*think + 0.005*be'),
   (1,
   '0.016*line + 0.011*write + 0.008*article + 0.008*organization + 0.006*know '
   '+ 0.006*host + 0.006*be + 0.005*get + 0.005*use + 0.005*say'),
   (2,
   '0.810*ax + 0.001*_ + 0.000*tm + 0.000*part + 0.000*mb + 0.000*pne + '
   '0.000*biz + 0.000*end + 0.000*wwiz + 0.000*fax'),
   (3,
   '0.015*line + 0.008*write + 0.007*organization + 0.006*host + 0.006*know + '
   '0.006*article + 0.005*use + 0.005*thank + 0.004*get + 0.004*problem'),
   (4,
   '0.004*line + 0.003*write + 0.002*believe + 0.002*think + 0.002*article + '
   '0.002*belief + 0.002*say + 0.002*see + 0.002*look + 0.002*organization'),
   (5,
   '0.005*line + 0.003*write + 0.003*organization + 0.002*article + 0.002*time '
   '+ 0.002*host + 0.002*get + 0.002*look + 0.002*say + 0.001*number'),
   (6,
   '0.003*line + 0.002*say + 0.002*write + 0.002*go + 0.002*gun + 0.002*get + '
   '0.002*organization + 0.002*bill + 0.002*article + 0.002*state'),
   (7,
   '0.003*line + 0.002*write + 0.002*article + 0.002*organization + 0.001*none '
   '+ 0.001*know + 0.001*say + 0.001*people + 0.001*host + 0.001*new'),
   (8,
   '0.004*line + 0.002*write + 0.002*get + 0.002*team + 0.002*organization + '
   '0.002*go + 0.002*think + 0.002*know + 0.002*article + 0.001*well'),
   (9,
   '0.004*line + 0.002*organization + 0.002*write + 0.001*be + 0.001*host + '
   '0.001*article + 0.001*thank + 0.001*use + 0.001*work + 0.001*run'),
   (10,
   '0.002*line + 0.001*game + 0.001*write + 0.001*get + 0.001*know + '
   '0.001*thing + 0.001*think + 0.001*article + 0.001*help + 0.001*turn'),
   (11,
   '0.002*line + 0.001*write + 0.001*game + 0.001*organization + 0.001*say + '
   '0.001*host + 0.001*give + 0.001*run + 0.001*article + 0.001*get'),
   (12,
   '0.002*line + 0.001*write + 0.001*know + 0.001*time + 0.001*article + '
   '0.001*get + 0.001*think + 0.001*organization + 0.001*scope + 0.001*make'),
   (13,
   '0.002*line + 0.002*write + 0.001*article + 0.001*organization + 0.001*make '
   '+ 0.001*know + 0.001*see + 0.001*get + 0.001*host + 0.001*really'),
   (14,
   '0.002*write + 0.002*line + 0.002*know + 0.001*think + 0.001*say + '
   '0.001*article + 0.001*argument + 0.001*even + 0.001*card + 0.001*be'),
   (15,
   '0.001*article + 0.001*line + 0.001*make + 0.001*write + 0.001*know + '
   '0.001*say + 0.001*exist + 0.001*get + 0.001*purpose + 0.001*organization'),
   (16,
   '0.002*line + 0.001*write + 0.001*article + 0.001*insurance + 0.001*go + '
   '0.001*be + 0.001*host + 0.001*say + 0.001*organization + 0.001*part'),
   (17,
   '0.001*line + 0.001*get + 0.001*hit + 0.001*go + 0.001*write + 0.001*say + '
   '0.001*know + 0.001*drug + 0.001*see + 0.001*need'),
   (18,
   '0.002*option + 0.001*line + 0.001*flight + 0.001*power + 0.001*software + '
   '0.001*write + 0.001*add + 0.001*people + 0.001*organization + 0.001*module'),
   (19,
   '0.001*shuttle + 0.001*line + 0.001*roll + 0.001*attitude + 0.001*maneuver + '
   '0.001*mission + 0.001*also + 0.001*orbit + 0.001*produce + 0.001*frequency')
]
Gensim - 開發詞嵌入
本章將幫助我們理解在 Gensim 中開發詞嵌入。
詞嵌入,表示詞和文件的方法,是文字的密集向量表示,其中具有相同含義的詞具有相似的表示。以下是詞嵌入的一些特徵:
它是一類技術,它將單個詞表示為預定義向量空間中的實值向量。
這種技術通常被歸入深度學習 (DL) 領域,因為每個詞都對映到一個向量,並且向量的值以與神經網路 (NN) 相同的方式學習。
詞嵌入技術的關鍵方法是每個詞的密集分散式表示。
不同的詞嵌入方法/演算法
如上所述,詞嵌入方法/演算法從文字語料庫中學習實值向量表示。這種學習過程可以使用 NN 模型進行文件分類等任務,或者是一個無監督過程,例如文件統計。在這裡,我們將討論兩種可以用來從文字中學習詞嵌入的方法/演算法:
Google 的 Word2Vec
Word2Vec 由 Tomas Mikolov 等人在 Google 於 2013 年開發,是一種從文字語料庫有效學習詞嵌入的統計方法。它實際上是作為對使基於 NN 的詞嵌入訓練更高效的回應而開發的。它已成為詞嵌入的事實標準。
Word2Vec 詞向量嵌入涉及對學習到的向量的分析以及對單詞表示的向量數學的探索。以下是可以用作 Word2Vec 方法一部分的兩種不同的學習方法:
- CBoW(連續詞袋)模型
- 連續 Skip-Gram 模型
斯坦福大學的 GloVe
GloVe(用於單詞表示的全域性向量)是 Word2Vec 方法的擴充套件。它由斯坦福大學的 Pennington 等人開發。GloVe 演算法結合了以下兩種方法:
- 矩陣分解技術的全域性統計,例如 LSA(潛在語義分析)
- Word2Vec 中基於區域性上下文的學習。
如果我們談論它的工作原理,那麼 GloVe 不是使用視窗來定義區域性上下文,而是使用整個文字語料庫的統計資料來構建顯式的詞共現矩陣。
開發 Word2Vec 嵌入
在這裡,我們將使用 Gensim 開發 Word2Vec 嵌入。為了使用 Word2Vec 模型,Gensim 為我們提供了Word2Vec 類,可以從models.word2vec匯入。為了實現它,word2vec 需要大量的文字,例如整個亞馬遜評論語料庫。但是在這裡,我們將這個原理應用於小型記憶體文字。
實現示例
首先,我們需要從 gensim.models 匯入 Word2Vec 類,如下所示:
from gensim.models import Word2Vec
接下來,我們需要定義訓練資料。我們不是使用大型文字檔案,而是使用一些句子來實現這個原理。
sentences = [
   ['this', 'is', 'gensim', 'tutorial', 'for', 'free'],
   ['this', 'is', 'the', 'tutorials' 'point', 'website'],
   ['you', 'can', 'read', 'technical','tutorials', 'for','free'],
   ['we', 'are', 'implementing','word2vec'],
   ['learn', 'full', 'gensim', 'tutorial']
]
一旦提供訓練資料,我們就需要訓練模型。可以按如下方式進行:
model = Word2Vec(sentences, min_count=1)
我們可以對模型進行如下總結:
print(model)
我們可以對詞彙表進行如下總結:
words = list(model.wv.vocab)
print(words)
接下來,讓我們訪問一個單詞的向量。我們正在對單詞“tutorial”進行操作。
print(model['tutorial'])
接下來,我們需要儲存模型:
model.save('model.bin')
接下來,我們需要載入模型:
new_model = Word2Vec.load('model.bin')
最後,列印儲存的模型,如下所示:
print(new_model)
完整的實現示例
from gensim.models import Word2Vec
sentences = [
   ['this', 'is', 'gensim', 'tutorial', 'for', 'free'],
   ['this', 'is', 'the', 'tutorials' 'point', 'website'],
   ['you', 'can', 'read', 'technical','tutorials', 'for','free'],
   ['we', 'are', 'implementing','word2vec'],
   ['learn', 'full', 'gensim', 'tutorial']
]
model = Word2Vec(sentences, min_count=1)
print(model)
words = list(model.wv.vocab)
print(words)
print(model['tutorial'])
model.save('model.bin')
new_model = Word2Vec.load('model.bin')
print(new_model)
輸出
Word2Vec(vocab=20, size=100, alpha=0.025)
[
   'this', 'is', 'gensim', 'tutorial', 'for', 'free', 'the', 'tutorialspoint',
   'website', 'you', 'can', 'read', 'technical', 'tutorials', 'we', 'are',
   'implementing', 'word2vec', 'learn', 'full'
]
[
   -2.5256255e-03 -4.5352755e-03 3.9024993e-03 -4.9509313e-03
   -1.4255195e-03 -4.0217536e-03 4.9407515e-03 -3.5925603e-03
   -1.1933431e-03 -4.6682903e-03 1.5440651e-03 -1.4101702e-03
   3.5070938e-03 1.0914479e-03 2.3334436e-03 2.4452661e-03
   -2.5336299e-04 -3.9676363e-03 -8.5054158e-04 1.6443320e-03
   -4.9968651e-03 1.0974540e-03 -1.1123562e-03 1.5393364e-03
   9.8941079e-04 -1.2656028e-03 -4.4471184e-03 1.8309267e-03
   4.9302122e-03 -1.0032534e-03 4.6892050e-03 2.9563988e-03
   1.8730218e-03 1.5343715e-03 -1.2685956e-03 8.3664013e-04
   4.1721235e-03 1.9445885e-03 2.4097660e-03 3.7517555e-03
   4.9687522e-03 -1.3598346e-03 7.1032363e-04 -3.6595813e-03
   6.0000515e-04 3.0872561e-03 -3.2115565e-03 3.2270295e-03
   -2.6354722e-03 -3.4988276e-04 1.8574356e-04 -3.5757164e-03
   7.5391348e-04 -3.5205986e-03 -1.9795434e-03 -2.8321696e-03
   4.7155009e-03 -4.3349937e-04 -1.5320212e-03 2.7013756e-03
   -3.7055744e-03 -4.1658725e-03 4.8034848e-03 4.8594419e-03
   3.7129463e-03 4.2385766e-03 2.4612297e-03 5.4920948e-04
   -3.8912550e-03 -4.8226118e-03 -2.2763973e-04 4.5571579e-03
   -3.4609400e-03 2.7903817e-03 -3.2709218e-03 -1.1036445e-03
   2.1492650e-03 -3.0384419e-04 1.7709908e-03 1.8429896e-03
   -3.4038599e-03 -2.4872608e-03 2.7693063e-03 -1.6352943e-03
   1.9182395e-03 3.7772327e-03 2.2769428e-03 -4.4629495e-03
   3.3151123e-03 4.6509290e-03 -4.8521687e-03 6.7615538e-04
   3.1034781e-03 2.6369948e-05 4.1454583e-03 -3.6932561e-03
   -1.8769916e-03 -2.1958587e-04 6.3395966e-04 -2.4969708e-03
]
Word2Vec(vocab=20, size=100, alpha=0.025)
視覺化詞向量嵌入
我們還可以透過視覺化來探索詞向量嵌入。這可以透過使用經典的投影方法(如 PCA)將高維詞向量降維到二維圖來完成。降維後,我們就可以將它們繪製在圖表上。
使用 PCA 繪製詞向量
首先,我們需要從訓練好的模型中檢索所有向量,如下所示:
Z = model[model.wv.vocab]
接下來,我們需要使用 PCA 類建立一個詞向量的二維 PCA 模型,如下所示:
pca = PCA(n_components=2)
result = pca.fit_transform(Z)
現在,我們可以使用 matplotlib 繪製生成的投影,如下所示:
Pyplot.scatter(result[:,0],result[:,1])
我們還可以用單詞本身來註釋圖表上的點。使用 matplotlib 繪製生成的投影,如下所示:
words = list(model.wv.vocab)
for i, word in enumerate(words):
   pyplot.annotate(word, xy=(result[i, 0], result[i, 1]))
完整的實現示例
from gensim.models import Word2Vec
from sklearn.decomposition import PCA
from matplotlib import pyplot
sentences = [
   ['this', 'is', 'gensim', 'tutorial', 'for', 'free'],
	['this', 'is', 'the', 'tutorials' 'point', 'website'],
	['you', 'can', 'read', 'technical','tutorials', 'for','free'],
	['we', 'are', 'implementing','word2vec'],
	['learn', 'full', 'gensim', 'tutorial']
]
model = Word2Vec(sentences, min_count=1)
X = model[model.wv.vocab]
pca = PCA(n_components=2)
result = pca.fit_transform(X)
pyplot.scatter(result[:, 0], result[:, 1])
words = list(model.wv.vocab)
for i, word in enumerate(words):
   pyplot.annotate(word, xy=(result[i, 0], result[i, 1]))
pyplot.show()
輸出

Gensim - Doc2Vec 模型
與 Word2Vec 模型相反,Doc2Vec 模型用於建立對作為單個單元整體獲取的一組單詞的向量化表示。它不僅僅是對句子中單詞的簡單平均。
使用 Doc2Vec 建立文件向量
在這裡,為了使用 Doc2Vec 建立文件向量,我們將使用 text8 資料集,可以從gensim.downloader下載。
下載資料集
我們可以使用以下命令下載 text8 資料集:
import gensim
import gensim.downloader as api
dataset = api.load("text8")
data = [d for d in dataset]
下載 text8 資料集需要一些時間。
訓練 Doc2Vec
為了訓練模型,我們需要標記的文件,可以使用models.doc2vec.TaggedDocument()建立,如下所示:
def tagged_document(list_of_list_of_words):
   for i, list_of_words in enumerate(list_of_list_of_words):
      yield gensim.models.doc2vec.TaggedDocument(list_of_words, [i])
data_for_training = list(tagged_document(data))
我們可以列印訓練好的資料集,如下所示:
print(data_for_training [:1])
輸出
[TaggedDocument(words=['anarchism', 'originated', 'as', 'a', 'term', 'of',
'abuse', 'first', 'used', 'against', 'early', 'working', 'class', 'radicals',
'including', 'the', 'diggers', 'of', 'the', 'english', 'revolution',
'and', 'the', 'sans', 'culottes', 'of', 'the', 'french', 'revolution',
'whilst', 'the', 'term', 'is', 'still', 'used', 'in', 'a', 'pejorative',
'way', 'to', 'describe', 'any', 'act', 'that', 'used', 'violent',
'means', 'to', 'destroy',
'the', 'organization', 'of', 'society', 'it', 'has', 'also', 'been'
, 'taken', 'up', 'as', 'a', 'positive', 'label', 'by', 'self', 'defined',
'anarchists', 'the', 'word', 'anarchism', 'is', 'derived', 'from', 'the',
'greek', 'without', 'archons', 'ruler', 'chief', 'king', 'anarchism',
'as', 'a', 'political', 'philosophy', 'is', 'the', 'belief', 'that',
'rulers', 'are', 'unnecessary', 'and', 'should', 'be', 'abolished',
'although', 'there', 'are', 'differing', 'interpretations', 'of',
'what', 'this', 'means', 'anarchism', 'also', 'refers', 'to',
'related', 'social', 'movements', 'that', 'advocate', 'the',
'elimination', 'of', 'authoritarian', 'institutions', 'particularly',
'the', 'state', 'the', 'word', 'anarchy', 'as', 'most', 'anarchists',
'use', 'it', 'does', 'not', 'imply', 'chaos', 'nihilism', 'or', 'anomie',
'but', 'rather', 'a', 'harmonious', 'anti', 'authoritarian', 'society',
'in', 'place', 'of', 'what', 'are', 'regarded', 'as', 'authoritarian',
'political', 'structures', 'and', 'coercive', 'economic', 'institutions',
'anarchists', 'advocate', 'social', 'relations', 'based', 'upon', 'voluntary',
'association', 'of', 'autonomous', 'individuals', 'mutual', 'aid', 'and',
'self', 'governance', 'while', 'anarchism', 'is', 'most', 'easily', 'defined',
'by', 'what', 'it', 'is', 'against', 'anarchists', 'also', 'offer',
'positive', 'visions', 'of', 'what', 'they', 'believe', 'to', 'be', 'a',
'truly', 'free', 'society', 'however', 'ideas', 'about', 'how', 'an', 'anarchist',
'society', 'might', 'work', 'vary', 'considerably', 'especially', 'with',
'respect', 'to', 'economics', 'there', 'is', 'also', 'disagreement', 'about',
'how', 'a', 'free', 'society', 'might', 'be', 'brought', 'about', 'origins',
'and', 'predecessors', 'kropotkin', 'and', 'others', 'argue', 'that', 'before',
'recorded', 'history', 'human', 'society', 'was', 'organized', 'on', 'anarchist',
'principles', 'most', 'anthropologists', 'follow', 'kropotkin', 'and', 'engels',
'in', 'believing', 'that', 'hunter', 'gatherer', 'bands', 'were', 'egalitarian',
'and', 'lacked', 'division', 'of', 'labour', 'accumulated', 'wealth', 'or', 'decreed',
'law', 'and', 'had', 'equal', 'access', 'to', 'resources', 'william', 'godwin',
'anarchists', 'including', 'the', 'the', 'anarchy', 'organisation', 'and', 'rothbard',
'find', 'anarchist', 'attitudes', 'in', 'taoism', 'from', 'ancient', 'china',
'kropotkin', 'found', 'similar', 'ideas', 'in', 'stoic', 'zeno', 'of', 'citium',
'according', 'to', 'kropotkin', 'zeno', 'repudiated', 'the', 'omnipotence', 'of',
'the', 'state', 'its', 'intervention', 'and', 'regimentation', 'and', 'proclaimed',
'the', 'sovereignty', 'of', 'the', 'moral', 'law', 'of', 'the', 'individual', 'the',
'anabaptists', 'of', 'one', 'six', 'th', 'century', 'europe', 'are', 'sometimes',
'considered', 'to', 'be', 'religious', 'forerunners', 'of', 'modern', 'anarchism',
'bertrand', 'russell', 'in', 'his', 'history', 'of', 'western', 'philosophy',
'writes', 'that', 'the', 'anabaptists', 'repudiated', 'all', 'law', 'since',
'they', 'held', 'that', 'the', 'good', 'man', 'will', 'be', 'guided', 'at',
'every', 'moment', 'by', 'the', 'holy', 'spirit', 'from', 'this', 'premise',
'they', 'arrive', 'at', 'communism', 'the', 'diggers', 'or', 'true', 'levellers',
'were', 'an', 'early', 'communistic', 'movement',
(truncated…)
初始化模型
訓練完成後,現在我們需要初始化模型。可以按如下方式進行:
model = gensim.models.doc2vec.Doc2Vec(vector_size=40, min_count=2, epochs=30)
現在,構建詞彙表,如下所示:
model.build_vocab(data_for_training)
現在,讓我們訓練 Doc2Vec 模型,如下所示:
model.train(data_for_training, total_examples=model.corpus_count, epochs=model.epochs)
分析輸出
最後,我們可以使用 model.infer_vector() 分析輸出,如下所示:
print(model.infer_vector(['violent', 'means', 'to', 'destroy', 'the','organization']))
完整的實現示例
import gensim
import gensim.downloader as api
dataset = api.load("text8")
data = [d for d in dataset]
def tagged_document(list_of_list_of_words):
   for i, list_of_words in enumerate(list_of_list_of_words):
      yield gensim.models.doc2vec.TaggedDocument(list_of_words, [i])
data_for_training = list(tagged_document(data))
print(data_for_training[:1])
model = gensim.models.doc2vec.Doc2Vec(vector_size=40, min_count=2, epochs=30)
model.build_vocab(data_training)
model.train(data_training, total_examples=model.corpus_count, epochs=model.epochs)
print(model.infer_vector(['violent', 'means', 'to', 'destroy', 'the','organization']))
輸出
[
   -0.2556166 0.4829361 0.17081228 0.10879577 0.12525807 0.10077011
   -0.21383236 0.19294572 0.11864349 -0.03227958 -0.02207291 -0.7108424
   0.07165232 0.24221905 -0.2924459 -0.03543589 0.21840079 -0.1274817
   0.05455418 -0.28968817 -0.29146606 0.32885507 0.14689675 -0.06913587
   -0.35173815 0.09340707 -0.3803535 -0.04030455 -0.10004586 0.22192696
   0.2384828 -0.29779273 0.19236489 -0.25727913 0.09140676 0.01265439
   0.08077634 -0.06902497 -0.07175519 -0.22583418 -0.21653089 0.00347822
   -0.34096122 -0.06176808 0.22885063 -0.37295452 -0.08222228 -0.03148199
   -0.06487323 0.11387568
]