- Apache Pig 教程
- Apache Pig - 首頁
- Apache Pig 簡介
- Apache Pig - 概述
- Apache Pig - 架構
- Apache Pig 環境
- Apache Pig - 安裝
- Apache Pig - 執行
- Apache Pig - Grunt Shell
- Pig Latin
- Pig Latin - 基礎
- 載入 & 儲存運算子
- Apache Pig - 讀取資料
- Apache Pig - 儲存資料
- 診斷運算子
- Apache Pig - 診斷運算子
- Apache Pig - Describe 運算子
- Apache Pig - Explain 運算子
- Apache Pig - Illustrate 運算子
- 分組 & 連線
- Apache Pig - Group 運算子
- Apache Pig - Cogroup 運算子
- Apache Pig - Join 運算子
- Apache Pig - Cross 運算子
- Pig Latin 內建函式
- Apache Pig - Eval 函式
- 載入 & 儲存函式
- Apache Pig - Bag & Tuple 函式
- Apache Pig - 字串函式
- Apache Pig - 日期時間函式
- Apache Pig - 數學函式
- Apache Pig 有用資源
- Apache Pig 快速指南
- Apache Pig - 有用資源
- Apache Pig - 討論
Apache Pig 快速指南
Apache Pig - 概述
什麼是 Apache Pig?
Apache Pig 是 MapReduce 之上的抽象層。它是一個用於分析大型資料集並將其表示為資料流的工具/平臺。Pig 通常與 **Hadoop** 一起使用;我們可以使用 Apache Pig 在 Hadoop 中執行所有資料操作。
為了編寫資料分析程式,Pig 提供了一種名為 **Pig Latin** 的高階語言。這種語言提供了各種運算子,程式設計師可以使用這些運算子開發自己的函式來讀取、寫入和處理資料。
為了使用 **Apache Pig** 分析資料,程式設計師需要使用 Pig Latin 語言編寫指令碼。所有這些指令碼在內部都轉換為 Map 和 Reduce 任務。Apache Pig 有一個稱為 **Pig Engine** 的元件,它接受 Pig Latin 指令碼作為輸入並將這些指令碼轉換為 MapReduce 作業。
為什麼我們需要 Apache Pig?
不太擅長 Java 的程式設計師通常在使用 Hadoop 時會遇到困難,尤其是在執行任何 MapReduce 任務時。Apache Pig 對所有這些程式設計師來說都是一種福音。
使用 **Pig Latin**,程式設計師可以輕鬆地執行 MapReduce 任務,而無需在 Java 中鍵入複雜的程式碼。
Apache Pig 使用 **多查詢方法**,從而減少了程式碼長度。例如,在 Java 中需要鍵入 200 行程式碼 (LoC) 的操作,在 Apache Pig 中只需鍵入 10 行程式碼即可輕鬆完成。最終,Apache Pig 將開發時間縮短了近 16 倍。
Pig Latin 是一種 **類似 SQL 的語言**,如果您熟悉 SQL,那麼學習 Apache Pig 就很容易。
Apache Pig 提供了許多內建運算子來支援資料操作,如連線、過濾、排序等。此外,它還提供了 MapReduce 中缺少的巢狀資料型別,如元組、包和對映。
Pig 的特性
Apache Pig 具有以下特性:
**豐富的運算子集** - 它提供了許多運算子來執行連線、排序、過濾等操作。
**易於程式設計** - Pig Latin 類似於 SQL,如果您擅長 SQL,那麼編寫 Pig 指令碼就很容易。
**最佳化機會** - Apache Pig 中的任務會自動最佳化其執行,因此程式設計師只需要關注語言的語義。
**可擴充套件性** - 使用者可以使用現有的運算子開發自己的函式來讀取、處理和寫入資料。
**UDF** - Pig 提供了在其他程式語言(如 Java)中建立 **使用者定義函式** 並在 Pig 指令碼中呼叫或嵌入它們的工具。
**處理所有型別的資料** - Apache Pig 分析所有型別的資料,包括結構化資料和非結構化資料。它將結果儲存在 HDFS 中。
Apache Pig 與 MapReduce 的比較
以下是 Apache Pig 和 MapReduce 的主要區別。
| Apache Pig | MapReduce |
|---|---|
| Apache Pig 是一種資料流語言。 | MapReduce 是一種資料處理正規化。 |
| 它是一種高階語言。 | MapReduce 是低階且僵化的。 |
| 在 Apache Pig 中執行連線操作非常簡單。 | 在 MapReduce 中,在資料集之間執行連線操作非常困難。 |
| 任何具有 SQL 基礎知識的新手程式設計師都可以方便地使用 Apache Pig。 | 必須具備 Java 經驗才能使用 MapReduce。 |
| Apache Pig 使用多查詢方法,從而在很大程度上減少了程式碼長度。 | MapReduce 執行相同任務所需的程式碼行數幾乎是其 20 倍。 |
| 無需編譯。在執行時,每個 Apache Pig 運算子都會在內部轉換為一個 MapReduce 作業。 | MapReduce 作業的編譯過程很長。 |
Apache Pig 與 SQL 的比較
以下是 Apache Pig 和 SQL 的主要區別。
| Pig | SQL |
|---|---|
| Pig Latin 是一種 **過程式** 語言。 | SQL 是一種 **宣告式** 語言。 |
| 在 Apache Pig 中,**模式** 是可選的。我們可以儲存資料而不設計模式(值儲存為 $01、$02 等)。 | SQL 中模式是必須的。 |
| Apache Pig 中的資料模型是 **巢狀關係型** 的。 | SQL 中使用的資料模型是 **扁平關係型** 的。 |
| Apache Pig 提供了有限的 **查詢最佳化** 機會。 | SQL 中有更多查詢最佳化的機會。 |
除了上述差異外,Apache Pig Latin:
- 允許在管道中進行拆分。
- 允許開發人員將資料儲存在管道中的任何位置。
- 宣告執行計劃。
- 提供運算子來執行 ETL(提取、轉換和載入)函式。
Apache Pig 與 Hive 的比較
Apache Pig 和 Hive 都用於建立 MapReduce 作業。在某些情況下,Hive 以類似於 Apache Pig 的方式在 HDFS 上執行。在下表中,我們列出了一些將 Apache Pig 與 Hive 區分開來的重要要點。
| Apache Pig | Hive |
|---|---|
| Apache Pig 使用一種名為 **Pig Latin** 的語言。它最初是在 **雅虎** 開發的。 | Hive 使用一種名為 **HiveQL** 的語言。它最初是在 **Facebook** 開發的。 |
| Pig Latin 是一種資料流語言。 | HiveQL 是一種查詢處理語言。 |
| Pig Latin 是一種過程式語言,它適合管道範式。 | HiveQL 是一種宣告式語言。 |
| Apache Pig 可以處理結構化、非結構化和半結構化資料。 | Hive 主要用於結構化資料。 |
Apache Pig 的應用
Apache Pig 通常由資料科學家用於執行涉及臨時處理和快速原型設計的任務。Apache Pig 用於:
- 處理大型資料來源,如 Web 日誌。
- 執行搜尋平臺的資料處理。
- 處理時間敏感的資料載入。
Apache Pig - 歷史
在 **2006** 年,Apache Pig 作為雅虎的一個研究專案開發,特別是為了在每個資料集上建立和執行 MapReduce 作業。在 **2007** 年,Apache Pig 透過 Apache incubator 開源。在 **2008** 年,Apache Pig 釋出了第一個版本。在 **2010** 年,Apache Pig 畢業成為 Apache 一級專案。
Apache Pig - 架構
在 Hadoop 中使用 Pig 分析資料時使用的語言稱為 **Pig Latin**。它是一種高階資料處理語言,提供豐富的 資料型別和運算子來對資料執行各種操作。
為了執行特定任務,使用 Pig 的程式設計師需要使用 Pig Latin 語言編寫 Pig 指令碼,並使用任何執行機制(Grunt Shell、UDF、嵌入式)執行它們。執行後,這些指令碼將經過 Pig 框架應用的一系列轉換,以產生所需的輸出。
在內部,Apache Pig 將這些指令碼轉換為一系列 MapReduce 作業,從而簡化了程式設計師的工作。Apache Pig 的架構如下所示。

Apache Pig 元件
如圖所示,Apache Pig 框架中有多個元件。讓我們看一下主要元件。
解析器
最初,Pig 指令碼由解析器處理。它檢查指令碼的語法,執行型別檢查以及其他雜項檢查。解析器的輸出將是一個 DAG(有向無環圖),它表示 Pig Latin 語句和邏輯運算子。
在 DAG 中,指令碼的邏輯運算子表示為節點,資料流表示為邊。
最佳化器
邏輯計劃(DAG)傳遞給邏輯最佳化器,後者執行邏輯最佳化,如投影和下推。
編譯器
編譯器將最佳化的邏輯計劃編譯成一系列 MapReduce 作業。
執行引擎
最後,MapReduce 作業按排序順序提交到 Hadoop。最後,這些 MapReduce 作業在 Hadoop 上執行,生成所需的結果。
Pig Latin 資料模型
Pig Latin 的資料模型是完全巢狀的,它允許複雜非原子資料型別,如 **map** 和 **tuple**。以下是 Pig Latin 資料模型的圖形表示。

原子
Pig Latin 中的任何單個值,無論其資料型別如何,都稱為 **原子**。它儲存為字串,可用作字串和數字。int、long、float、double、chararray 和 bytearray 是 Pig 的原子值。資料片段或簡單的原子值稱為 **欄位**。
**示例** - ‘raja’ 或 ‘30’
元組
由一組有序欄位形成的記錄稱為元組,欄位可以是任何型別。元組類似於 RDBMS 表中的一行。
**示例** - (Raja, 30)
包
包是一個無序的元組集合。換句話說,元組的集合(非唯一)稱為包。每個元組可以包含任意數量的欄位(靈活的模式)。包由‘{}’表示。它類似於關係資料庫管理系統(RDBMS)中的表,但與RDBMS中的表不同,它不需要每個元組都包含相同數量的欄位,也不需要相同位置(列)的欄位具有相同的型別。
示例 − {(Raja, 30), (Mohammad, 45)}
包可以作為關係中的一個欄位;在這種情況下,它被稱為內部包。
示例 − {Raja, 30, {9848022338, raja@gmail.com,}}
對映
對映(或資料對映)是一組鍵值對。鍵需要是chararray型別,並且應該是唯一的。值可以是任何型別。它由‘[]’表示。
示例 − [name#Raja, age#30]
關係
關係是元組的包。Pig Latin中的關係是無序的(不能保證元組以任何特定順序處理)。
Apache Pig - 安裝
本章介紹如何在您的系統中下載、安裝和設定Apache Pig。
先決條件
在使用Apache Pig之前,您必須在系統上安裝Hadoop和Java。因此,在安裝Apache Pig之前,請按照以下連結中給出的步驟安裝Hadoop和Java:
https://tutorialspoint.tw/hadoop/hadoop_enviornment_setup.htm
下載Apache Pig
首先,從以下網站下載最新版本的Apache Pig:
步驟 1
開啟Apache Pig網站的主頁。在新聞部分下,點選釋出頁面連結,如下面的快照所示。

步驟 2
點選指定的連結後,您將被重定向到Apache Pig 釋出頁面。在此頁面上,在下載部分下,您將有兩個連結,即Pig 0.8 及更高版本和Pig 0.7 及更早版本。點選Pig 0.8 及更高版本連結,然後您將被重定向到包含一組映象的頁面。

步驟 3
選擇並點選以下所示的任意一個映象。

步驟 4
這些映象將帶您到Pig 釋出頁面。此頁面包含 Apache Pig 的各種版本。點選其中最新的版本。

步驟 5
在這些資料夾中,您將擁有 Apache Pig 在各種發行版中的原始碼和二進位制檔案。下載 Apache Pig 0.15 的原始碼和二進位制檔案的 tar 檔案,pig0.15.0-src.tar.gz 和 pig-0.15.0.tar.gz。

安裝Apache Pig
下載 Apache Pig 軟體後,請按照以下步驟在 Linux 環境中安裝它。
步驟 1
在安裝Hadoop、Java和其他軟體的安裝目錄所在的同一目錄中建立一個名為 Pig 的目錄。(在本教程中,我們在名為 Hadoop 的使用者中建立了 Pig 目錄)。
$ mkdir Pig
步驟 2
解壓下載的 tar 檔案,如下所示。
$ cd Downloads/
$ tar zxvf pig-0.15.0-src.tar.gz
$ tar zxvf pig-0.15.0.tar.gz
步驟 3
將pig-0.15.0-src.tar.gz檔案的內容移動到之前建立的Pig目錄中,如下所示。
$ mv pig-0.15.0-src.tar.gz/* /home/Hadoop/Pig/
配置Apache Pig
安裝 Apache Pig 後,我們需要對其進行配置。要進行配置,我們需要編輯兩個檔案:bashrc 和 pig.properties。
.bashrc 檔案
在.bashrc檔案中,設定以下變數:
PIG_HOME 資料夾到 Apache Pig 的安裝資料夾,
PATH 環境變數到 bin 資料夾,以及
PIG_CLASSPATH 環境變數到 Hadoop 安裝的 etc(配置)資料夾(包含 core-site.xml、hdfs-site.xml 和 mapred-site.xml 檔案的目錄)。
export PIG_HOME = /home/Hadoop/Pig
export PATH  = $PATH:/home/Hadoop/pig/bin
export PIG_CLASSPATH = $HADOOP_HOME/conf
pig.properties 檔案
在 Pig 的conf資料夾中,我們有一個名為pig.properties的檔案。在 pig.properties 檔案中,您可以設定如下所示的各種引數。
pig -h properties
支援以下屬性:
Logging: verbose = true|false; default is false. This property is the same as -v
       switch brief=true|false; default is false. This property is the same
       as -b switch debug=OFF|ERROR|WARN|INFO|DEBUG; default is INFO.
       This property is the same as -d switch aggregate.warning = true|false; default is true.
       If true, prints count of warnings of each type rather than logging each warning.

Performance tuning: pig.cachedbag.memusage=<mem fraction>; default is 0.2 (20% of all memory).
       Note that this memory is shared across all large bags used by the application.
       pig.skewedjoin.reduce.memusagea=<mem fraction>; default is 0.3 (30% of all memory).
       Specifies the fraction of heap available for the reducer to perform the join.
       pig.exec.nocombiner = true|false; default is false.
           Only disable combiner as a temporary workaround for problems.
       opt.multiquery = true|false; multiquery is on by default.
           Only disable multiquery as a temporary workaround for problems.
       opt.fetch=true|false; fetch is on by default.
           Scripts containing Filter, Foreach, Limit, Stream, and Union can be dumped without MR jobs.
       pig.tmpfilecompression = true|false; compression is off by default.
           Determines whether output of intermediate jobs is compressed.
       pig.tmpfilecompression.codec = lzo|gzip; default is gzip.
           Used in conjunction with pig.tmpfilecompression. Defines compression type.
       pig.noSplitCombination = true|false. Split combination is on by default.
           Determines if multiple small files are combined into a single map.

       pig.exec.mapPartAgg = true|false. Default is false.
           Determines if partial aggregation is done within map phase, before records are sent to combiner.
       pig.exec.mapPartAgg.minReduction=<min aggregation factor>. Default is 10.
           If the in-map partial aggregation does not reduce the output num records by this factor, it gets disabled.

Miscellaneous: exectype = mapreduce|tez|local; default is mapreduce. This property is the same as -x switch
       pig.additional.jars.uris=<comma seperated list of jars>. Used in place of register command.
       udf.import.list=<comma seperated list of imports>. Used to avoid package names in UDF.
       stop.on.failure = true|false; default is false. Set to true to terminate on the first error.
       pig.datetime.default.tz=<UTC time offset>. e.g. +08:00. Default is the default timezone of the host.
           Determines the timezone used to handle datetime datatype and UDFs.
Additionally, any Hadoop property can be specified.
驗證安裝
透過鍵入 version 命令來驗證 Apache Pig 的安裝。如果安裝成功,您將獲得如下所示的 Apache Pig 版本。
$ pig –version

Apache Pig version 0.15.0 (r1682971)
compiled Jun 01 2015, 11:44:35
Apache Pig - 執行
在上一章中,我們介紹瞭如何安裝 Apache Pig。在本章中,我們將討論如何執行 Apache Pig。
Apache Pig 執行模式
您可以以兩種模式執行 Apache Pig,即本地模式和HDFS 模式。
本地模式
在此模式下,所有檔案都安裝並在本地主機和本地檔案系統中執行。不需要 Hadoop 或 HDFS。此模式通常用於測試目的。
MapReduce 模式
MapReduce 模式是指我們使用 Apache Pig 載入或處理 Hadoop 檔案系統 (HDFS) 中存在的資料。在此模式下,每當我們執行 Pig Latin 語句來處理資料時,都會在後端呼叫 MapReduce 作業以對 HDFS 中存在的資料執行特定操作。
Apache Pig 執行機制
Apache Pig 指令碼可以透過三種方式執行,即互動模式、批處理模式和嵌入模式。
互動模式(Grunt shell)− 您可以使用 Grunt shell 以互動模式執行 Apache Pig。在此 shell 中,您可以輸入 Pig Latin 語句並獲取輸出(使用 Dump 運算子)。
批處理模式(指令碼)− 您可以透過將 Pig Latin 指令碼寫入副檔名為.pig的單個檔案中來以批處理模式執行 Apache Pig。
嵌入模式(UDF)− Apache Pig 提供了在 Java 等程式語言中定義我們自己的函式(User Defined Functions)並在我們的指令碼中使用它們的機制。
呼叫 Grunt Shell
您可以使用-x選項以所需的模式(本地/MapReduce)呼叫 Grunt shell,如下所示。
| 本地模式 | MapReduce 模式 |
|---|---|
命令 − $ ./pig –x local |
命令 − $ ./pig -x mapreduce |
輸出 − 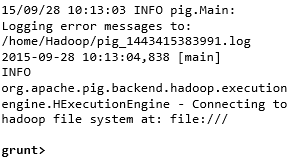 |
輸出 −  |
這兩個命令中的任何一個都會為您提供如下所示的 Grunt shell 提示符。
grunt>
您可以使用‘ctrl + d’退出 Grunt shell。
呼叫 Grunt shell 後,您可以透過直接在其中輸入 Pig Latin 語句來執行 Pig 指令碼。
grunt> customers = LOAD 'customers.txt' USING PigStorage(',');
以批處理模式執行 Apache Pig
您可以將整個 Pig Latin 指令碼寫入一個檔案中,並使用–x 命令執行它。假設我們在一個名為sample_script.pig的檔案中有一個 Pig 指令碼,如下所示。
Sample_script.pig
student = LOAD 'hdfs://:9000/pig_data/student.txt' USING
   PigStorage(',') as (id:int,name:chararray,city:chararray);

Dump student;
現在,您可以如下所示執行上述檔案中的指令碼。
| 本地模式 | MapReduce 模式 |
|---|---|
| $ pig -x local Sample_script.pig | $ pig -x mapreduce Sample_script.pig |
注意 − 我們將在後續章節中詳細討論如何在批處理模式和嵌入模式下執行 Pig 指令碼。
Apache Pig - Grunt Shell
呼叫 Grunt shell 後,您可以在 shell 中執行 Pig 指令碼。除此之外,Grunt shell 還提供了一些有用的 shell 和實用程式命令。本章介紹 Grunt shell 提供的 shell 和實用程式命令。
注意 − 在本章的某些部分,使用了Load和Store等命令。請參閱相應的章節以獲取有關它們的詳細資訊。
Shell 命令
Apache Pig 的 Grunt shell 主要用於編寫 Pig Latin 指令碼。在此之前,我們可以使用sh和fs呼叫任何 shell 命令。
sh 命令
使用sh命令,我們可以從 Grunt shell 呼叫任何 shell 命令。從 Grunt shell 使用sh命令,我們無法執行作為 shell 環境一部分的命令(例如- cd)。
語法
以下是sh命令的語法。
grunt> sh shell command parameters
示例
我們可以使用sh選項從 Grunt shell 呼叫 Linux shell 的ls命令,如下所示。在此示例中,它列出了/pig/bin/目錄中的檔案。
grunt> sh ls

pig
pig_1444799121955.log
pig.cmd
pig.py
fs 命令
使用fs命令,我們可以從 Grunt shell 呼叫任何 FsShell 命令。
語法
以下是fs命令的語法。
grunt> sh File System command parameters
示例
我們可以使用 fs 命令從 Grunt shell 呼叫 HDFS 的 ls 命令。在以下示例中,它列出了 HDFS 根目錄中的檔案。
grunt> fs –ls

Found 3 items
drwxrwxrwx   - Hadoop supergroup          0 2015-09-08 14:13 Hbase
drwxr-xr-x   - Hadoop supergroup          0 2015-09-09 14:52 seqgen_data
drwxr-xr-x   - Hadoop supergroup          0 2015-09-08 11:30 twitter_data
同樣,我們可以使用fs命令從 Grunt shell 呼叫所有其他檔案系統 shell 命令。
實用程式命令
Grunt shell 提供了一組實用程式命令。這些包括clear、help、history、quit和set等實用程式命令;以及exec、kill和run等命令,用於從 Grunt shell 控制 Pig。以下是 Grunt shell 提供的實用程式命令的描述。
clear 命令
clear命令用於清除 Grunt shell 的螢幕。
語法
您可以使用clear命令清除 grunt shell 的螢幕,如下所示。
grunt> clear
help 命令
help命令為您提供 Pig 命令或 Pig 屬性的列表。
用法
您可以使用help命令獲取 Pig 命令的列表,如下所示。
grunt> help

Commands: <pig latin statement>; - See the PigLatin manual for details:
http://hadoop.apache.org/pig

File system commands:fs <fs arguments> - Equivalent to Hadoop dfs  command:
http://hadoop.apache.org/common/docs/current/hdfs_shell.html

Diagnostic Commands:describe <alias>[::<alias] - Show the schema for the alias.
Inner aliases can be described as A::B.
    explain [-script <pigscript>] [-out <path>] [-brief] [-dot|-xml]
       [-param <param_name>=<pCram_value>]
       [-param_file <file_name>] [<alias>] -
       Show the execution plan to compute the alias or for entire script.
       -script - Explain the entire script.
       -out - Store the output into directory rather than print to stdout.
       -brief - Don't expand nested plans (presenting a smaller graph for overview).
       -dot - Generate the output in .dot format. Default is text format.
       -xml - Generate the output in .xml format. Default is text format.
       -param <param_name - See parameter substitution for details.
       -param_file <file_name> - See parameter substitution for details.
       alias - Alias to explain.
       dump <alias> - Compute the alias and writes the results to stdout.

Utility Commands: exec [-param <param_name>=param_value] [-param_file <file_name>] <script> -
       Execute the script with access to grunt environment including aliases.
       -param <param_name - See parameter substitution for details.
       -param_file <file_name> - See parameter substitution for details.
       script - Script to be executed.
    run [-param <param_name>=param_value] [-param_file <file_name>] <script> -
       Execute the script with access to grunt environment.
		 -param <param_name - See parameter substitution for details.
       -param_file <file_name> - See parameter substitution for details.
       script - Script to be executed.
    sh  <shell command> - Invoke a shell command.
    kill <job_id> - Kill the hadoop job specified by the hadoop job id.
    set <key> <value> - Provide execution parameters to Pig. Keys and values are case sensitive.
       The following keys are supported:
       default_parallel - Script-level reduce parallelism. Basic input size heuristics used
       by default.
       debug - Set debug on or off. Default is off.
       job.name - Single-quoted name for jobs. Default is PigLatin:<script name>
       job.priority - Priority for jobs. Values: very_low, low, normal, high, very_high.
       Default is normal stream.skippath - String that contains the path.
       This is used by streaming any hadoop property.
    help - Display this message.
    history [-n] - Display the list statements in cache.
       -n Hide line numbers.
    quit - Quit the grunt shell.
history 命令
此命令顯示自呼叫 Grunt shell 以來已執行/使用的語句列表。
用法
假設自開啟 Grunt shell 以來我們已執行了三個語句。
grunt> customers = LOAD 'hdfs://:9000/pig_data/customers.txt' USING PigStorage(',');

grunt> orders = LOAD 'hdfs://:9000/pig_data/orders.txt' USING PigStorage(',');

grunt> student = LOAD 'hdfs://:9000/pig_data/student.txt' USING PigStorage(',');
然後,使用history命令將產生以下輸出。
grunt> history

customers = LOAD 'hdfs://:9000/pig_data/customers.txt' USING PigStorage(',');

orders = LOAD 'hdfs://:9000/pig_data/orders.txt' USING PigStorage(',');

student = LOAD 'hdfs://:9000/pig_data/student.txt' USING PigStorage(',');
set 命令
set命令用於顯示/分配 Pig 中使用的鍵的值。
用法
使用此命令,您可以為以下鍵設定值。
| 鍵 | 描述和值 |
|---|---|
| default_parallel | 您可以透過將任何整數作為值傳遞給此鍵來設定 map 作業的 reducer 數量。 |
| debug | 您可以透過將 on/off 傳遞給此鍵來關閉或開啟 Pig 中的除錯功能。 |
| job.name | 您可以透過將字串值傳遞給此鍵來將作業名稱設定為所需的作業。 |
| job.priority | 您可以透過將以下值之一傳遞給此鍵來設定作業的優先順序:
|
| stream.skippath | 對於流式傳輸,您可以設定資料不應從中傳輸的路徑,方法是將所需的路徑以字串的形式傳遞給此鍵。 |
quit 命令
您可以使用此命令退出 Grunt shell。
用法
如下所示退出 Grunt shell。
grunt> quit
現在讓我們看看可以使用哪些命令從 Grunt shell 控制 Apache Pig。
exec 命令
使用exec命令,我們可以從 Grunt shell 執行 Pig 指令碼。
語法
以下是實用程式命令exec的語法。
grunt> exec [–param param_name = param_value] [–param_file file_name] [script]
示例
假設在 HDFS 的/pig_data/目錄中有一個名為student.txt的檔案,其內容如下。
Student.txt
001,Rajiv,Hyderabad
002,siddarth,Kolkata
003,Rajesh,Delhi
並且,假設我們在 HDFS 的/pig_data/目錄中有一個名為sample_script.pig的指令碼檔案,其內容如下。
Sample_script.pig
student = LOAD 'hdfs://:9000/pig_data/student.txt' USING PigStorage(',')
   as (id:int,name:chararray,city:chararray);

Dump student;
現在,讓我們使用exec命令從 Grunt shell 執行上述指令碼,如下所示。
grunt> exec /sample_script.pig
輸出
exec 命令執行sample_script.pig中的指令碼。按照指令碼中的指示,它將student.txt檔案載入到 Pig 中,並顯示以下內容的 Dump 運算子結果。
(1,Rajiv,Hyderabad)
(2,siddarth,Kolkata)
(3,Rajesh,Delhi)
kill 命令
您可以使用此命令從 Grunt shell 中終止作業。
語法
以下是kill命令的語法。
grunt> kill JobId
示例
假設有一個正在執行的 Pig 作業,其 ID 為Id_0055,您可以使用以下所示的kill命令從 Grunt shell 中終止它。
grunt> kill Id_0055
run 命令
您可以使用run命令從 Grunt shell 中執行 Pig 指令碼。
語法
以下是run命令的語法。
grunt> run [–param param_name = param_value] [–param_file file_name] script
示例
假設在 HDFS 的/pig_data/目錄中有一個名為student.txt的檔案,其內容如下。
Student.txt
001,Rajiv,Hyderabad
002,siddarth,Kolkata
003,Rajesh,Delhi
並且,假設我們在本地檔案系統中有一個名為sample_script.pig的指令碼檔案,其內容如下。
Sample_script.pig
student = LOAD 'hdfs://:9000/pig_data/student.txt' USING
   PigStorage(',') as (id:int,name:chararray,city:chararray);
現在,讓我們使用以下所示的 run 命令從 Grunt shell 中執行上述指令碼。
grunt> run /sample_script.pig
您可以使用以下所示的Dump 運算子檢視指令碼的輸出。
grunt> Dump;

(1,Rajiv,Hyderabad)
(2,siddarth,Kolkata)
(3,Rajesh,Delhi)
注意 - exec和run命令的區別在於,如果我們使用run,則指令碼中的語句將在命令歷史記錄中可用。
Pig Latin – 基礎知識
Pig Latin 是用於使用 Apache Pig 分析 Hadoop 中資料的語言。在本章中,我們將討論 Pig Latin 的基礎知識,例如 Pig Latin 語句、資料型別、通用和關係運算符以及 Pig Latin UDF。
Pig Latin – 資料模型
如前幾章所述,Pig 的資料模型是完全巢狀的。關係是 Pig Latin 資料模型的最外層結構。它是一個包,其中 -
- 包是元組的集合。
- 元組是一組有序的欄位。
- 欄位是一段資料。
Pig Latin – 語句
在使用 Pig Latin 處理資料時,語句是基本結構。
這些語句與關係一起使用。它們包括表示式和模式。
每個語句以分號 (;) 結尾。
我們將透過語句使用 Pig Latin 提供的運算子執行各種操作。
除了 LOAD 和 STORE 之外,在執行所有其他操作時,Pig Latin 語句將關係作為輸入,並生成另一個關係作為輸出。
在 Grunt shell 中輸入Load語句後,將立即對其進行語義檢查。要檢視模式的內容,您需要使用Dump運算子。只有在執行dump操作後,才會執行將資料載入到檔案系統中的 MapReduce 作業。
示例
以下是一個 Pig Latin 語句,它將資料載入到 Apache Pig 中。
grunt> Student_data = LOAD 'student_data.txt' USING PigStorage(',')as
   ( id:int, firstname:chararray, lastname:chararray, phone:chararray, city:chararray );
Pig Latin – 資料型別
下表描述了 Pig Latin 資料型別。
| 序號 | 資料型別 | 描述和示例 |
|---|---|---|
| 1 | int | 表示有符號的 32 位整數。 示例 : 8 |
| 2 | long | 表示有符號的 64 位整數。 示例:5L |
| 3 | float | 表示有符號的 32 位浮點數。 示例:5.5F |
| 4 | double | 表示 64 位浮點數。 示例 : 10.5 |
| 5 | chararray | 以 Unicode UTF-8 格式表示字元陣列(字串)。 示例:'tutorials point' |
| 6 | Bytearray | 表示位元組陣列(blob)。 |
| 7 | Boolean | 表示布林值。 示例:true/false。 |
| 8 | Datetime | 表示日期時間。 示例:1970-01-01T00:00:00.000+00:00 |
| 9 | Biginteger | 表示 Java BigInteger。 示例 : 60708090709 |
| 10 | Bigdecimal | 表示 Java BigDecimal 示例 : 185.98376256272893883 |
| 複雜型別 | ||
| 11 | 元組 | 元組是一組有序的欄位。 示例:(raja, 30) |
| 12 | 包 | 包是元組的集合。 示例:{(raju,30),(Mohhammad,45)} |
| 13 | 對映 | Map 是一組鍵值對。 示例:[‘name’#’Raju’, ‘age’#30] |
空值
以上所有資料型別的值都可以為 NULL。Apache Pig 對空值採用與 SQL 相同的方式處理。
空值可以是未知值或不存在的值。它用作可選值的佔位符。這些空值可以自然出現,也可以是操作的結果。
Pig Latin – 算術運算子
下表描述了 Pig Latin 的算術運算子。假設 a = 10 且 b = 20。
| 運算子 | 描述 | 示例 |
|---|---|---|
| + | 加法 - 將運算子兩側的值相加 |
a + b 將得到 30 |
| - | 減法 - 從左運算元中減去右運算元 |
a − b 將得到 -10 |
| * | 乘法 - 將運算子兩側的值相乘 |
a * b 將得到 200 |
| / | 除法 - 將左運算元除以右運算元 |
b / a 將得到 2 |
| % | 模數 - 將左運算元除以右運算元並返回餘數 |
b % a 將得到 0 |
| ? : | Bincond - 評估布林運算子。它有三個運算元,如下所示。 變數x = (表示式) ? value1 如果為真 : value2 如果為假。 |
b = (a == 1)? 20: 30; 如果 a=1,則 b 的值為 20。 如果 a!=1,則 b 的值為 30。 |
CASE WHEN THEN ELSE END |
Case - case 運算子等效於巢狀的 bincond 運算子。 |
CASE f2 % 2 WHEN 0 THEN 'even' WHEN 1 THEN 'odd' END |
Pig Latin – 比較運算子
下表描述了 Pig Latin 的比較運算子。
| 運算子 | 描述 | 示例 |
|---|---|---|
| == | 等於 - 檢查兩個運算元的值是否相等;如果是,則條件變為真。 |
(a = b) 為假 |
| != | 不等於 - 檢查兩個運算元的值是否相等。如果值不相等,則條件變為真。 |
(a != b) 為真。 |
| > | 大於 - 檢查左運算元的值是否大於右運算元的值。如果是,則條件變為真。 |
(a > b) 為假。 |
| < | 小於 - 檢查左運算元的值是否小於右運算元的值。如果是,則條件變為真。 |
(a < b) 為真。 |
| >= | 大於或等於 - 檢查左運算元的值是否大於或等於右運算元的值。如果是,則條件變為真。 |
(a >= b) 為假。 |
| <= | 小於或等於 - 檢查左運算元的值是否小於或等於右運算元的值。如果是,則條件變為真。 |
(a <= b) 為真。 |
| matches | 模式匹配 - 檢查左側的字串是否與右側的常量匹配。 |
f1 matches '.*tutorial.*' |
Pig Latin – 型別構造運算子
下表描述了 Pig Latin 的型別構造運算子。
| 運算子 | 描述 | 示例 |
|---|---|---|
| () | 元組構造運算子 - 此運算子用於構造元組。 |
(Raju, 30) |
| {} | 包構造運算子 - 此運算子用於構造包。 |
{(Raju, 30), (Mohammad, 45)} |
| [] | Map 構造運算子 - 此運算子用於構造元組。 |
[name#Raja, age#30] |
Pig Latin – 關係運算
下表描述了 Pig Latin 的關係運算符。
| 運算子 | 描述 |
|---|---|
| 載入和儲存 | |
| LOAD | 將資料從檔案系統(本地/HDFS)載入到關係中。 |
| STORE | 將關係儲存到檔案系統(本地/HDFS)。 |
| 過濾 | |
| FILTER | 從關係中刪除不需要的行。 |
| DISTINCT | 從關係中刪除重複的行。 |
| FOREACH, GENERATE | 根據資料列生成資料轉換。 |
| STREAM | 使用外部程式轉換關係。 |
| 分組和連線 | |
| JOIN | 連線兩個或多個關係。 |
| COGROUP | 對兩個或多個關係中的資料進行分組。 |
| GROUP | 對單個關係中的資料進行分組。 |
| CROSS | 建立兩個或多個關係的笛卡爾積。 |
| 排序 | |
| ORDER | 根據一個或多個欄位(升序或降序)對關係進行排序。 |
| LIMIT | 從關係中獲取有限數量的元組。 |
| 組合和拆分 | |
| UNION | 將兩個或多個關係組合成一個關係。 |
| SPLIT | 將一個關係拆分為兩個或多個關係。 |
| 診斷運算子 | |
| DUMP | 在控制檯上列印關係的內容。 |
| DESCRIBE | 描述關係的模式。 |
| EXPLAIN | 檢視計算關係的邏輯、物理或 MapReduce 執行計劃。 |
| ILLUSTRATE | 檢視一系列語句的分步執行。 |
Apache Pig - 讀取資料
通常,Apache Pig 執行在 Hadoop 之上。它是一個分析工具,用於分析存在於Hadoop File System 中的大型資料集。要使用 Apache Pig 分析資料,我們必須首先將資料載入到 Apache Pig 中。本章說明如何從 HDFS 將資料載入到 Apache Pig 中。
準備 HDFS
在 MapReduce 模式下,Pig 從 HDFS 讀取(載入)資料並將結果儲存回 HDFS。因此,讓我們啟動 HDFS 並在 HDFS 中建立以下示例資料。
| 學生 ID | 名字 | 姓氏 | 電話 | 城市 |
|---|---|---|---|---|
| 001 | Rajiv | Reddy | 9848022337 | 海德拉巴 |
| 002 | siddarth | Battacharya | 9848022338 | 加爾各答 |
| 003 | Rajesh | Khanna | 9848022339 | 德里 |
| 004 | Preethi | Agarwal | 9848022330 | 浦那 |
| 005 | Trupthi | Mohanthy | 9848022336 | 布巴內斯瓦爾 |
| 006 | Archana | Mishra | 9848022335 | 欽奈 |
以上資料集包含六名學生的個人詳細資訊,如 ID、名字、姓氏、電話號碼和城市。
步驟 1:驗證 Hadoop
首先,使用以下所示的 Hadoop 版本命令驗證安裝。
$ hadoop version
如果您的系統包含 Hadoop,並且您已設定 PATH 變數,則您將獲得以下輸出 -
Hadoop 2.6.0
Subversion https://git-wip-us.apache.org/repos/asf/hadoop.git -r
e3496499ecb8d220fba99dc5ed4c99c8f9e33bb1
Compiled by jenkins on 2014-11-13T21:10Z
Compiled with protoc 2.5.0
From source with checksum 18e43357c8f927c0695f1e9522859d6a
This command was run using /home/Hadoop/hadoop/share/hadoop/common/hadoop
common-2.6.0.jar
步驟 2:啟動 HDFS
瀏覽 Hadoop 的sbin目錄並啟動yarn和 Hadoop dfs(分散式檔案系統),如下所示。
cd /$Hadoop_Home/sbin/
$ start-dfs.sh
localhost: starting namenode, logging to /home/Hadoop/hadoop/logs/hadoopHadoop-namenode-localhost.localdomain.out
localhost: starting datanode, logging to /home/Hadoop/hadoop/logs/hadoopHadoop-datanode-localhost.localdomain.out
Starting secondary namenodes [0.0.0.0]
starting secondarynamenode, logging to /home/Hadoop/hadoop/logs/hadoop-Hadoopsecondarynamenode-localhost.localdomain.out

$ start-yarn.sh
starting yarn daemons
starting resourcemanager, logging to /home/Hadoop/hadoop/logs/yarn-Hadoopresourcemanager-localhost.localdomain.out
localhost: starting nodemanager, logging to /home/Hadoop/hadoop/logs/yarnHadoop-nodemanager-localhost.localdomain.out
步驟 3:在 HDFS 中建立目錄
在 Hadoop DFS 中,您可以使用mkdir命令建立目錄。在所需路徑中使用以下所示的命令在 HDFS 中建立一個名為Pig_Data的新目錄。
$cd /$Hadoop_Home/bin/
$ hdfs dfs -mkdir hdfs://:9000/Pig_Data
步驟 4:將資料放入 HDFS
Pig 的輸入檔案將每個元組/記錄儲存在單獨的行中。記錄中的實體由分隔符分隔(在我們的示例中,我們使用了“,”)。
在本地檔案系統中,建立一個名為student_data.txt的輸入檔案,內容如下所示。
001,Rajiv,Reddy,9848022337,Hyderabad
002,siddarth,Battacharya,9848022338,Kolkata
003,Rajesh,Khanna,9848022339,Delhi
004,Preethi,Agarwal,9848022330,Pune
005,Trupthi,Mohanthy,9848022336,Bhuwaneshwar
006,Archana,Mishra,9848022335,Chennai.
現在,使用put命令將檔案從本地檔案系統移動到 HDFS,如下所示。(您也可以使用copyFromLocal命令)。
$ cd $HADOOP_HOME/bin
$ hdfs dfs -put /home/Hadoop/Pig/Pig_Data/student_data.txt dfs://:9000/pig_data/
驗證檔案
您可以使用cat命令驗證檔案是否已移動到 HDFS,如下所示。
$ cd $HADOOP_HOME/bin
$ hdfs dfs -cat hdfs://:9000/pig_data/student_data.txt
輸出
您可以看到檔案的內容,如下所示。
15/10/01 12:16:55 WARN util.NativeCodeLoader: Unable to load native-hadoop
library for your platform... using builtin-java classes where applicable

001,Rajiv,Reddy,9848022337,Hyderabad
002,siddarth,Battacharya,9848022338,Kolkata
003,Rajesh,Khanna,9848022339,Delhi
004,Preethi,Agarwal,9848022330,Pune
005,Trupthi,Mohanthy,9848022336,Bhuwaneshwar
006,Archana,Mishra,9848022335,Chennai
Load 運算子
您可以使用Pig Latin的LOAD運算子從檔案系統(HDFS/本地)載入資料到 Apache Pig 中。
語法
load 語句由“=”運算子分隔的兩部分組成。在左側,我們需要提及要儲存資料的關係名稱,在右側,我們需要定義如何儲存資料。以下是Load運算子的語法。
Relation_name = LOAD 'Input file path' USING function as schema;
其中,
relation_name - 我們必須提及要儲存資料的關係。
輸入檔案路徑 - 我們必須提及儲存檔案的 HDFS 目錄。(在 MapReduce 模式下)
function - 我們必須從 Apache Pig 提供的載入函式集中選擇一個函式(BinStorage, JsonLoader, PigStorage, TextLoader)。
Schema - 我們必須定義資料的模式。我們可以按如下方式定義所需的模式:
(column1 : data type, column2 : data type, column3 : data type);
注意 - 我們在不指定模式的情況下載入資料。在這種情況下,列將被定址為 $01, $02 等…(檢查)。
示例
例如,讓我們使用LOAD命令將student_data.txt中的資料載入到 Pig 中,並將其命名為Student模式。
啟動 Pig Grunt Shell
首先,開啟 Linux 終端。在 MapReduce 模式下啟動 Pig Grunt shell,如下所示。
$ Pig –x mapreduce
它將啟動 Pig Grunt shell,如下所示。
15/10/01 12:33:37 INFO pig.ExecTypeProvider: Trying ExecType : LOCAL
15/10/01 12:33:37 INFO pig.ExecTypeProvider: Trying ExecType : MAPREDUCE
15/10/01 12:33:37 INFO pig.ExecTypeProvider: Picked MAPREDUCE as the ExecType

2015-10-01 12:33:38,080 [main] INFO  org.apache.pig.Main - Apache Pig version 0.15.0 (r1682971) compiled Jun 01 2015, 11:44:35
2015-10-01 12:33:38,080 [main] INFO  org.apache.pig.Main - Logging error messages to: /home/Hadoop/pig_1443683018078.log
2015-10-01 12:33:38,242 [main] INFO  org.apache.pig.impl.util.Utils - Default bootup file /home/Hadoop/.pigbootup not found

2015-10-01 12:33:39,630 [main]
INFO org.apache.pig.backend.hadoop.executionengine.HExecutionEngine - Connecting to hadoop file system at: hdfs://:9000

grunt>
執行 Load 語句
現在,透過在 Grunt shell 中執行以下 Pig Latin 語句,將student_data.txt檔案中的資料載入到 Pig 中。
grunt> student = LOAD 'hdfs://:9000/pig_data/student_data.txt'
   USING PigStorage(',')
   as ( id:int, firstname:chararray, lastname:chararray, phone:chararray,
   city:chararray );
以下是上述語句的描述。
| 關係名稱 | 我們將資料儲存在student模式中。 | ||||||||||||
| 輸入檔案路徑 | 我們正在讀取student_data.txt檔案中的資料,該檔案位於 HDFS 的 /pig_data/ 目錄中。 | ||||||||||||
| 儲存函式 | 我們使用了PigStorage()函式。它將資料載入並存儲為結構化文字檔案。它將元組的每個實體分隔使用的分隔符作為引數。預設情況下,它將‘\t’作為引數。 | ||||||||||||
| 模式 | 我們使用以下模式儲存資料。
|
注意 - load語句只會將資料載入到 Pig 中指定的關係中。要驗證Load語句的執行,您必須使用診斷運算子,這些運算子將在後面的章節中討論。
Apache Pig - 儲存資料
在上一章中,我們學習瞭如何將資料載入到 Apache Pig 中。您可以使用store運算子將載入的資料儲存到檔案系統中。本章解釋如何使用Store運算子在 Apache Pig 中儲存資料。
語法
以下是 Store 語句的語法。
STORE Relation_name INTO ' required_directory_path ' [USING function];
示例
假設我們在 HDFS 中有一個名為student_data.txt的檔案,內容如下。
001,Rajiv,Reddy,9848022337,Hyderabad
002,siddarth,Battacharya,9848022338,Kolkata
003,Rajesh,Khanna,9848022339,Delhi
004,Preethi,Agarwal,9848022330,Pune
005,Trupthi,Mohanthy,9848022336,Bhuwaneshwar
006,Archana,Mishra,9848022335,Chennai.
並且我們使用 LOAD 運算子將其讀取到student關係中,如下所示。
grunt> student = LOAD 'hdfs://:9000/pig_data/student_data.txt'
   USING PigStorage(',')
   as ( id:int, firstname:chararray, lastname:chararray, phone:chararray,
   city:chararray );
現在,讓我們將關係儲存到 HDFS 目錄“/pig_Output/”中,如下所示。
grunt> STORE student INTO ' hdfs://:9000/pig_Output/ ' USING PigStorage (',');
輸出
執行store語句後,您將獲得以下輸出。將建立一個具有指定名稱的目錄,並將資料儲存在其中。
2015-10-05 13:05:05,429 [main] INFO  org.apache.pig.backend.hadoop.executionengine.mapReduceLayer.
MapReduceLau ncher - 100% complete
2015-10-05 13:05:05,429 [main] INFO  org.apache.pig.tools.pigstats.mapreduce.SimplePigStats -
Script Statistics:

HadoopVersion    PigVersion    UserId    StartedAt             FinishedAt             Features
2.6.0            0.15.0        Hadoop    2015-10-0 13:03:03    2015-10-05 13:05:05    UNKNOWN
Success!
Job Stats (time in seconds):
JobId          Maps    Reduces    MaxMapTime    MinMapTime    AvgMapTime    MedianMapTime
job_14459_06    1        0           n/a           n/a           n/a           n/a
MaxReduceTime    MinReduceTime    AvgReduceTime    MedianReducetime    Alias    Feature
     0                 0                0                0             student  MAP_ONLY
OutPut folder
hdfs://:9000/pig_Output/

Input(s): Successfully read 0 records from: "hdfs://:9000/pig_data/student_data.txt"
Output(s): Successfully stored 0 records in: "hdfs://:9000/pig_Output"
Counters:
Total records written : 0
Total bytes written : 0
Spillable Memory Manager spill count : 0
Total bags proactively spilled: 0
Total records proactively spilled: 0

Job DAG: job_1443519499159_0006

2015-10-05 13:06:06,192 [main] INFO  org.apache.pig.backend.hadoop.executionengine
.mapReduceLayer.MapReduceLau ncher - Success!
驗證
您可以驗證儲存的資料,如下所示。
步驟 1
首先,使用ls命令列出名為pig_output目錄中的檔案,如下所示。
hdfs dfs -ls 'hdfs://:9000/pig_Output/'
Found 2 items
rw-r--r-   1 Hadoop supergroup          0 2015-10-05 13:03 hdfs://:9000/pig_Output/_SUCCESS
rw-r--r-   1 Hadoop supergroup        224 2015-10-05 13:03 hdfs://:9000/pig_Output/part-m-00000
您可以觀察到,執行store語句後建立了兩個檔案。
步驟 2
使用cat命令列出名為part-m-00000檔案的內容,如下所示。
$ hdfs dfs -cat 'hdfs://:9000/pig_Output/part-m-00000'
1,Rajiv,Reddy,9848022337,Hyderabad
2,siddarth,Battacharya,9848022338,Kolkata
3,Rajesh,Khanna,9848022339,Delhi
4,Preethi,Agarwal,9848022330,Pune
5,Trupthi,Mohanthy,9848022336,Bhuwaneshwar
6,Archana,Mishra,9848022335,Chennai
Apache Pig - 診斷運算子
load語句只會將資料載入到 Apache Pig 中指定的關係中。要驗證Load語句的執行,您必須使用診斷運算子。Pig Latin 提供了四種不同型別的診斷運算子:
- Dump 運算子
- Describe 運算子
- Explain 運算子
- Illustrate 運算子
在本章中,我們將討論 Pig Latin 的 Dump 運算子。
Dump 運算子
Dump運算子用於執行 Pig Latin 語句並在螢幕上顯示結果。它通常用於除錯目的。
語法
以下是Dump運算子的語法。
grunt> Dump Relation_Name
示例
假設我們在 HDFS 中有一個名為student_data.txt的檔案,內容如下。
001,Rajiv,Reddy,9848022337,Hyderabad
002,siddarth,Battacharya,9848022338,Kolkata
003,Rajesh,Khanna,9848022339,Delhi
004,Preethi,Agarwal,9848022330,Pune
005,Trupthi,Mohanthy,9848022336,Bhuwaneshwar
006,Archana,Mishra,9848022335,Chennai.
並且我們使用 LOAD 運算子將其讀取到student關係中,如下所示。
grunt> student = LOAD 'hdfs://:9000/pig_data/student_data.txt'
   USING PigStorage(',')
   as ( id:int, firstname:chararray, lastname:chararray, phone:chararray,
   city:chararray );
現在,讓我們使用Dump 運算子列印關係的內容,如下所示。
grunt> Dump student
執行上述Pig Latin語句後,它將啟動一個 MapReduce 作業以從 HDFS 讀取資料。它將產生以下輸出。
2015-10-01 15:05:27,642 [main]
INFO  org.apache.pig.backend.hadoop.executionengine.mapReduceLayer.MapReduceLauncher -
100% complete
2015-10-01 15:05:27,652 [main]
INFO  org.apache.pig.tools.pigstats.mapreduce.SimplePigStats - Script Statistics:
HadoopVersion  PigVersion  UserId    StartedAt             FinishedAt       Features
2.6.0          0.15.0      Hadoop  2015-10-01 15:03:11  2015-10-01 05:27     UNKNOWN

Success!
Job Stats (time in seconds):

JobId           job_14459_0004
Maps                 1
Reduces              0
MaxMapTime          n/a
MinMapTime          n/a
AvgMapTime          n/a
MedianMapTime       n/a
MaxReduceTime        0
MinReduceTime        0
AvgReduceTime        0
MedianReducetime     0
Alias             student
Feature           MAP_ONLY
Outputs           hdfs://:9000/tmp/temp580182027/tmp757878456,

Input(s): Successfully read 0 records from: "hdfs://:9000/pig_data/
student_data.txt"

Output(s): Successfully stored 0 records in: "hdfs://:9000/tmp/temp580182027/
tmp757878456"

Counters: Total records written : 0 Total bytes written : 0 Spillable Memory Manager
spill count : 0Total bags proactively spilled: 0 Total records proactively spilled: 0

Job DAG: job_1443519499159_0004

2015-10-01 15:06:28,403 [main]
INFO  org.apache.pig.backend.hadoop.executionengine.mapReduceLayer.MapReduceLau ncher - Success!
2015-10-01 15:06:28,441 [main] INFO  org.apache.pig.data.SchemaTupleBackend -
Key [pig.schematuple] was not set... will not generate code.
2015-10-01 15:06:28,485 [main]
INFO  org.apache.hadoop.mapreduce.lib.input.FileInputFormat - Total input paths
to process : 1
2015-10-01 15:06:28,485 [main]
INFO  org.apache.pig.backend.hadoop.executionengine.util.MapRedUtil - Total input paths
to process : 1

(1,Rajiv,Reddy,9848022337,Hyderabad)
(2,siddarth,Battacharya,9848022338,Kolkata)
(3,Rajesh,Khanna,9848022339,Delhi)
(4,Preethi,Agarwal,9848022330,Pune)
(5,Trupthi,Mohanthy,9848022336,Bhuwaneshwar)
(6,Archana,Mishra,9848022335,Chennai)
Apache Pig - Describe 運算子
describe運算子用於檢視關係的模式。
語法
describe運算子的語法如下:
grunt> Describe Relation_name
示例
假設我們在 HDFS 中有一個名為student_data.txt的檔案,內容如下。
001,Rajiv,Reddy,9848022337,Hyderabad
002,siddarth,Battacharya,9848022338,Kolkata
003,Rajesh,Khanna,9848022339,Delhi
004,Preethi,Agarwal,9848022330,Pune
005,Trupthi,Mohanthy,9848022336,Bhuwaneshwar
006,Archana,Mishra,9848022335,Chennai.
並且我們使用 LOAD 運算子將其讀取到student關係中,如下所示。
grunt> student = LOAD 'hdfs://:9000/pig_data/student_data.txt' USING PigStorage(',')
   as ( id:int, firstname:chararray, lastname:chararray, phone:chararray, city:chararray );
現在,讓我們描述名為student的關係並驗證模式,如下所示。
grunt> describe student;
輸出
執行上述Pig Latin語句後,它將產生以下輸出。
grunt> student: { id: int,firstname: chararray,lastname: chararray,phone: chararray,city: chararray }
Apache Pig - Explain 運算子
explain運算子用於顯示關係的邏輯、物理和 MapReduce 執行計劃。
語法
以下是explain運算子的語法。
grunt> explain Relation_name;
示例
假設我們在 HDFS 中有一個名為student_data.txt的檔案,內容如下。
001,Rajiv,Reddy,9848022337,Hyderabad
002,siddarth,Battacharya,9848022338,Kolkata
003,Rajesh,Khanna,9848022339,Delhi
004,Preethi,Agarwal,9848022330,Pune
005,Trupthi,Mohanthy,9848022336,Bhuwaneshwar
006,Archana,Mishra,9848022335,Chennai.
並且我們使用 LOAD 運算子將其讀取到student關係中,如下所示。
grunt> student = LOAD 'hdfs://:9000/pig_data/student_data.txt' USING PigStorage(',')
   as ( id:int, firstname:chararray, lastname:chararray, phone:chararray, city:chararray );
現在,讓我們使用explain運算子解釋名為 student 的關係,如下所示。
grunt> explain student;
輸出
它將產生以下輸出。
$ explain student;

2015-10-05 11:32:43,660 [main]
2015-10-05 11:32:43,660 [main] INFO  org.apache.pig.newplan.logical.optimizer
.LogicalPlanOptimizer -
{RULES_ENABLED=[AddForEach, ColumnMapKeyPrune, ConstantCalculator,
GroupByConstParallelSetter, LimitOptimizer, LoadTypeCastInserter, MergeFilter,
MergeForEach, PartitionFilterOptimizer, PredicatePushdownOptimizer,
PushDownForEachFlatten, PushUpFilter, SplitFilter, StreamTypeCastInserter]}
#-----------------------------------------------
# New Logical Plan:
#-----------------------------------------------
student: (Name: LOStore Schema:
id#31:int,firstname#32:chararray,lastname#33:chararray,phone#34:chararray,city#
35:chararray)
|
|---student: (Name: LOForEach Schema:
id#31:int,firstname#32:chararray,lastname#33:chararray,phone#34:chararray,city#
35:chararray)
    |   |
    |   (Name: LOGenerate[false,false,false,false,false] Schema:
id#31:int,firstname#32:chararray,lastname#33:chararray,phone#34:chararray,city#
35:chararray)ColumnPrune:InputUids=[34, 35, 32, 33,
31]ColumnPrune:OutputUids=[34, 35, 32, 33, 31]
    |   |   |
    |   |   (Name: Cast Type: int Uid: 31)
    |   |   |     |   |   |---id:(Name: Project Type: bytearray Uid: 31 Input: 0 Column: (*))
    |   |   |
    |   |   (Name: Cast Type: chararray Uid: 32)
    |   |   |
    |   |   |---firstname:(Name: Project Type: bytearray Uid: 32 Input: 1
Column: (*))
    |   |   |
    |   |   (Name: Cast Type: chararray Uid: 33)
    |   |   |
    |   |   |---lastname:(Name: Project Type: bytearray Uid: 33 Input: 2
	 Column: (*))
    |   |   |
    |   |   (Name: Cast Type: chararray Uid: 34)
    |   |   |
    |   |   |---phone:(Name: Project Type: bytearray Uid: 34 Input: 3 Column:
(*))
    |   |   |
    |   |   (Name: Cast Type: chararray Uid: 35)
    |   |   |
    |   |   |---city:(Name: Project Type: bytearray Uid: 35 Input: 4 Column:
(*))
    |   |
    |   |---(Name: LOInnerLoad[0] Schema: id#31:bytearray)
    |   |
    |   |---(Name: LOInnerLoad[1] Schema: firstname#32:bytearray)
    |   |
    |   |---(Name: LOInnerLoad[2] Schema: lastname#33:bytearray)
    |   |
    |   |---(Name: LOInnerLoad[3] Schema: phone#34:bytearray)
    |   |
    |   |---(Name: LOInnerLoad[4] Schema: city#35:bytearray)
    |
    |---student: (Name: LOLoad Schema:
id#31:bytearray,firstname#32:bytearray,lastname#33:bytearray,phone#34:bytearray
,city#35:bytearray)RequiredFields:null
#-----------------------------------------------
# Physical Plan: #-----------------------------------------------
student: Store(fakefile:org.apache.pig.builtin.PigStorage) - scope-36
|
|---student: New For Each(false,false,false,false,false)[bag] - scope-35
    |   |
    |   Cast[int] - scope-21
    |   |
    |   |---Project[bytearray][0] - scope-20
    |   |
    |   Cast[chararray] - scope-24
    |   |
    |   |---Project[bytearray][1] - scope-23
    |   |
    |   Cast[chararray] - scope-27
    |   |
    |   |---Project[bytearray][2] - scope-26
    |   |
    |   Cast[chararray] - scope-30
    |   |
    |   |---Project[bytearray][3] - scope-29
    |   |
    |   Cast[chararray] - scope-33
    |   |
    |   |---Project[bytearray][4] - scope-32
    |
    |---student: Load(hdfs://:9000/pig_data/student_data.txt:PigStorage(',')) - scope19
2015-10-05 11:32:43,682 [main]
INFO  org.apache.pig.backend.hadoop.executionengine.mapReduceLayer.MRCompiler -
File concatenation threshold: 100 optimistic? false
2015-10-05 11:32:43,684 [main]
INFO  org.apache.pig.backend.hadoop.executionengine.mapReduceLayer.MultiQueryOp timizer -
MR plan size before optimization: 1 2015-10-05 11:32:43,685 [main]
INFO  org.apache.pig.backend.hadoop.executionengine.mapReduceLayer.
MultiQueryOp timizer - MR plan size after optimization: 1
#--------------------------------------------------
# Map Reduce Plan
#--------------------------------------------------
MapReduce node scope-37
Map Plan
student: Store(fakefile:org.apache.pig.builtin.PigStorage) - scope-36
|
|---student: New For Each(false,false,false,false,false)[bag] - scope-35
    |   |
    |   Cast[int] - scope-21
    |   |
    |   |---Project[bytearray][0] - scope-20
    |   |
    |   Cast[chararray] - scope-24
    |   |
    |   |---Project[bytearray][1] - scope-23
    |   |
    |   Cast[chararray] - scope-27
    |   |
    |   |---Project[bytearray][2] - scope-26
    |   |
    |   Cast[chararray] - scope-30
    |   |
    |   |---Project[bytearray][3] - scope-29
    |   |
    |   Cast[chararray] - scope-33
    |   |
    |   |---Project[bytearray][4] - scope-32
    |
    |---student:
Load(hdfs://:9000/pig_data/student_data.txt:PigStorage(',')) - scope
19-------- Global sort: false
 ----------------
Apache Pig - Illustrate 運算子
illustrate運算子提供了一系列語句的逐步執行過程。
語法
以下是illustrate運算子的語法。
grunt> illustrate Relation_name;
示例
假設我們在 HDFS 中有一個名為student_data.txt的檔案,內容如下。
001,Rajiv,Reddy,9848022337,Hyderabad
002,siddarth,Battacharya,9848022338,Kolkata
003,Rajesh,Khanna,9848022339,Delhi
004,Preethi,Agarwal,9848022330,Pune
005,Trupthi,Mohanthy,9848022336,Bhuwaneshwar
006,Archana,Mishra,9848022335,Chennai.
並且我們使用 LOAD 運算子將其讀取到student關係中,如下所示。
grunt> student = LOAD 'hdfs://:9000/pig_data/student_data.txt' USING PigStorage(',')
   as ( id:int, firstname:chararray, lastname:chararray, phone:chararray, city:chararray );
現在,讓我們說明名為 student 的關係,如下所示。
grunt> illustrate student;
輸出
執行上述語句後,您將獲得以下輸出。
grunt> illustrate student;

INFO  org.apache.pig.backend.hadoop.executionengine.mapReduceLayer.PigMapOnly$M ap - Aliases
being processed per job phase (AliasName[line,offset]): M: student[1,10] C:  R:
---------------------------------------------------------------------------------------------
|student | id:int | firstname:chararray | lastname:chararray | phone:chararray | city:chararray |
---------------------------------------------------------------------------------------------
|        | 002    | siddarth            | Battacharya        | 9848022338      | Kolkata        |
---------------------------------------------------------------------------------------------
Apache Pig - Group 運算子
GROUP運算子用於對一個或多個關係中的資料進行分組。它收集具有相同鍵的資料。
語法
以下是group運算子的語法。
grunt> Group_data = GROUP Relation_name BY age;
示例
假設我們在 HDFS 目錄/pig_data/中有一個名為student_details.txt的檔案,內容如下。
student_details.txt
001,Rajiv,Reddy,21,9848022337,Hyderabad
002,siddarth,Battacharya,22,9848022338,Kolkata
003,Rajesh,Khanna,22,9848022339,Delhi
004,Preethi,Agarwal,21,9848022330,Pune
005,Trupthi,Mohanthy,23,9848022336,Bhuwaneshwar
006,Archana,Mishra,23,9848022335,Chennai
007,Komal,Nayak,24,9848022334,trivendram
008,Bharathi,Nambiayar,24,9848022333,Chennai
並且我們已將此檔案載入到 Apache Pig 中,關係名為student_details,如下所示。
grunt> student_details = LOAD 'hdfs://:9000/pig_data/student_details.txt' USING PigStorage(',')
   as (id:int, firstname:chararray, lastname:chararray, age:int, phone:chararray, city:chararray);
現在,讓我們按年齡對關係中的記錄/元組進行分組,如下所示。
grunt> group_data = GROUP student_details by age;
驗證
使用DUMP運算子驗證group_data關係,如下所示。
grunt> Dump group_data;
輸出
然後您將獲得顯示名為group_data的關係內容的輸出,如下所示。在這裡您可以觀察到結果模式有兩列:
一個是age,我們根據它對關係進行了分組。
另一個是bag,它包含元組組,即具有相應年齡的學生記錄。
(21,{(4,Preethi,Agarwal,21,9848022330,Pune),(1,Rajiv,Reddy,21,9848022337,Hydera bad)})
(22,{(3,Rajesh,Khanna,22,9848022339,Delhi),(2,siddarth,Battacharya,22,984802233 8,Kolkata)})
(23,{(6,Archana,Mishra,23,9848022335,Chennai),(5,Trupthi,Mohanthy,23,9848022336 ,Bhuwaneshwar)})
(24,{(8,Bharathi,Nambiayar,24,9848022333,Chennai),(7,Komal,Nayak,24,9848022334, trivendram)})
您可以使用describe命令檢視分組資料後的表模式,如下所示。
grunt> Describe group_data;

group_data: {group: int,student_details: {(id: int,firstname: chararray,
               lastname: chararray,age: int,phone: chararray,city: chararray)}}
同樣,您可以使用illustrate命令獲取模式的示例說明,如下所示。
$ Illustrate group_data;
它將產生以下輸出:
-------------------------------------------------------------------------------------------------
|group_data|  group:int | student_details:bag{:tuple(id:int,firstname:chararray,lastname:chararray,age:int,phone:chararray,city:chararray)}|
-------------------------------------------------------------------------------------------------
|          |     21     | { 4, Preethi, Agarwal, 21, 9848022330, Pune), (1, Rajiv, Reddy, 21, 9848022337, Hyderabad)}|
|          |     2      | {(2,siddarth,Battacharya,22,9848022338,Kolkata),(003,Rajesh,Khanna,22,9848022339,Delhi)}|
-------------------------------------------------------------------------------------------------
按多列分組
讓我們按年齡和城市對關係進行分組,如下所示。
grunt> group_multiple = GROUP student_details by (age, city);
您可以使用 Dump 運算子驗證名為group_multiple的關係內容,如下所示。
grunt> Dump group_multiple;

((21,Pune),{(4,Preethi,Agarwal,21,9848022330,Pune)})
((21,Hyderabad),{(1,Rajiv,Reddy,21,9848022337,Hyderabad)})
((22,Delhi),{(3,Rajesh,Khanna,22,9848022339,Delhi)})
((22,Kolkata),{(2,siddarth,Battacharya,22,9848022338,Kolkata)})
((23,Chennai),{(6,Archana,Mishra,23,9848022335,Chennai)})
((23,Bhuwaneshwar),{(5,Trupthi,Mohanthy,23,9848022336,Bhuwaneshwar)})
((24,Chennai),{(8,Bharathi,Nambiayar,24,9848022333,Chennai)})
(24,trivendram),{(7,Komal,Nayak,24,9848022334,trivendram)})
全部分組
您可以按所有列對關係進行分組,如下所示。
grunt> group_all = GROUP student_details All;
現在,驗證group_all關係的內容,如下所示。
grunt> Dump group_all;

(all,{(8,Bharathi,Nambiayar,24,9848022333,Chennai),(7,Komal,Nayak,24,9848022334 ,trivendram),
(6,Archana,Mishra,23,9848022335,Chennai),(5,Trupthi,Mohanthy,23,9848022336,Bhuw aneshwar),
(4,Preethi,Agarwal,21,9848022330,Pune),(3,Rajesh,Khanna,22,9848022339,Delhi),
(2,siddarth,Battacharya,22,9848022338,Kolkata),(1,Rajiv,Reddy,21,9848022337,Hyd erabad)})
Apache Pig - Cogroup 運算子
COGROUP運算子的工作方式與GROUP運算子大致相同。這兩個運算子之間的唯一區別在於,group運算子通常用於一個關係,而cogroup運算子用於涉及兩個或多個關係的語句。
使用 Cogroup 對兩個關係進行分組
假設我們在 HDFS 目錄/pig_data/中分別有兩個檔案,名為student_details.txt和employee_details.txt,內容如下。
student_details.txt
001,Rajiv,Reddy,21,9848022337,Hyderabad
002,siddarth,Battacharya,22,9848022338,Kolkata
003,Rajesh,Khanna,22,9848022339,Delhi
004,Preethi,Agarwal,21,9848022330,Pune
005,Trupthi,Mohanthy,23,9848022336,Bhuwaneshwar
006,Archana,Mishra,23,9848022335,Chennai
007,Komal,Nayak,24,9848022334,trivendram
008,Bharathi,Nambiayar,24,9848022333,Chennai
employee_details.txt
001,Robin,22,newyork
002,BOB,23,Kolkata
003,Maya,23,Tokyo
004,Sara,25,London
005,David,23,Bhuwaneshwar
006,Maggy,22,Chennai
並且我們已將這些檔案載入到 Pig 中,關係名稱分別為student_details和employee_details,如下所示。
grunt> student_details = LOAD 'hdfs://:9000/pig_data/student_details.txt' USING PigStorage(',')
   as (id:int, firstname:chararray, lastname:chararray, age:int, phone:chararray, city:chararray);

grunt> employee_details = LOAD 'hdfs://:9000/pig_data/employee_details.txt' USING PigStorage(',')
   as (id:int, name:chararray, age:int, city:chararray);
現在,讓我們按鍵 age 對student_details和employee_details關係的記錄/元組進行分組,如下所示。
grunt> cogroup_data = COGROUP student_details by age, employee_details by age;
驗證
使用DUMP運算子驗證cogroup_data關係,如下所示。
grunt> Dump cogroup_data;
輸出
它將產生以下輸出,顯示名為cogroup_data的關係內容,如下所示。
(21,{(4,Preethi,Agarwal,21,9848022330,Pune), (1,Rajiv,Reddy,21,9848022337,Hyderabad)},
   {    })
(22,{ (3,Rajesh,Khanna,22,9848022339,Delhi), (2,siddarth,Battacharya,22,9848022338,Kolkata) },
   { (6,Maggy,22,Chennai),(1,Robin,22,newyork) })
(23,{(6,Archana,Mishra,23,9848022335,Chennai),(5,Trupthi,Mohanthy,23,9848022336 ,Bhuwaneshwar)},
   {(5,David,23,Bhuwaneshwar),(3,Maya,23,Tokyo),(2,BOB,23,Kolkata)})
(24,{(8,Bharathi,Nambiayar,24,9848022333,Chennai),(7,Komal,Nayak,24,9848022334, trivendram)},
   { })
(25,{   },
   {(4,Sara,25,London)})
cogroup運算子根據年齡對每個關係中的元組進行分組,其中每個組表示一個特定的年齡值。
例如,如果我們考慮結果的第一個元組,它按年齡 21 分組。並且它包含兩個包:
第一個包包含第一個關係(在本例中為student_details)中所有年齡為 21 的元組,以及
第二個包包含第二個關係(在本例中為employee_details)中所有年齡為 21 的元組。
如果某個關係沒有年齡值為 21 的元組,則它將返回一個空包。
Apache Pig - Join 運算子
JOIN運算子用於組合兩個或多個關係中的記錄。在執行聯接操作時,我們宣告每個關係中的一個(或一組)元組作為鍵。當這些鍵匹配時,這兩個特定元組將匹配,否則記錄將被丟棄。聯接可以是以下型別:
- 自聯接
- 內聯接
- 外聯接 - 左聯接、右聯接和全聯接
本章將透過示例解釋如何在 Pig Latin 中使用聯接運算子。假設我們在 HDFS 的/pig_data/目錄中分別有兩個檔案,名為customers.txt和orders.txt,內容如下。
customers.txt
1,Ramesh,32,Ahmedabad,2000.00
2,Khilan,25,Delhi,1500.00
3,kaushik,23,Kota,2000.00
4,Chaitali,25,Mumbai,6500.00
5,Hardik,27,Bhopal,8500.00
6,Komal,22,MP,4500.00
7,Muffy,24,Indore,10000.00
orders.txt
102,2009-10-08 00:00:00,3,3000
100,2009-10-08 00:00:00,3,1500
101,2009-11-20 00:00:00,2,1560
103,2008-05-20 00:00:00,4,2060
並且我們已將這兩個檔案載入到 Pig 中,關係分別為customers和orders,如下所示。
grunt> customers = LOAD 'hdfs://:9000/pig_data/customers.txt' USING PigStorage(',')
   as (id:int, name:chararray, age:int, address:chararray, salary:int);

grunt> orders = LOAD 'hdfs://:9000/pig_data/orders.txt' USING PigStorage(',')
   as (oid:int, date:chararray, customer_id:int, amount:int);
現在,讓我們對這兩個關係執行各種聯接操作。
自聯接
自聯接用於將表與自身聯接,就好像該表是兩個關係一樣,暫時重新命名至少一個關係。
通常,在 Apache Pig 中,要執行自聯接,我們將多次載入相同的資料,並使用不同的別名(名稱)。因此,讓我們將customers.txt檔案的內容載入為兩個表,如下所示。
grunt> customers1 = LOAD 'hdfs://:9000/pig_data/customers.txt' USING PigStorage(',')
   as (id:int, name:chararray, age:int, address:chararray, salary:int);

grunt> customers2 = LOAD 'hdfs://:9000/pig_data/customers.txt' USING PigStorage(',')
   as (id:int, name:chararray, age:int, address:chararray, salary:int);
語法
以下是使用JOIN運算子執行自聯接操作的語法。
grunt> Relation3_name = JOIN Relation1_name BY key, Relation2_name BY key ;
示例
讓我們透過聯接customers1和customers2這兩個關係,對customers關係執行自聯接操作,如下所示。
grunt> customers3 = JOIN customers1 BY id, customers2 BY id;
驗證
使用DUMP運算子驗證customers3關係,如下所示。
grunt> Dump customers3;
輸出
它將產生以下輸出,顯示customers關係的內容。
(1,Ramesh,32,Ahmedabad,2000,1,Ramesh,32,Ahmedabad,2000)
(2,Khilan,25,Delhi,1500,2,Khilan,25,Delhi,1500)
(3,kaushik,23,Kota,2000,3,kaushik,23,Kota,2000)
(4,Chaitali,25,Mumbai,6500,4,Chaitali,25,Mumbai,6500)
(5,Hardik,27,Bhopal,8500,5,Hardik,27,Bhopal,8500)
(6,Komal,22,MP,4500,6,Komal,22,MP,4500)
(7,Muffy,24,Indore,10000,7,Muffy,24,Indore,10000)
內聯接
內聯接使用頻率很高;它也稱為等值聯接。當兩個表中都有匹配項時,內聯接將返回行。
它透過根據聯接謂詞組合兩個關係(例如 A 和 B)的列值來建立一個新關係。查詢將 A 的每一行與 B 的每一行進行比較,以查詢滿足聯接謂詞的所有行對。當滿足聯接謂詞時,A 和 B 的每一對匹配行的列值將組合到結果行中。
語法
以下是使用JOIN運算子執行內聯接操作的語法。
grunt> result = JOIN relation1 BY columnname, relation2 BY columnname;
示例
讓我們對customers和orders這兩個關係執行內聯接操作,如下所示。
grunt> coustomer_orders = JOIN customers BY id, orders BY customer_id;
驗證
使用DUMP運算子驗證coustomer_orders關係,如下所示。
grunt> Dump coustomer_orders;
輸出
您將獲得以下輸出,其中包含名為coustomer_orders的關係的內容。
(2,Khilan,25,Delhi,1500,101,2009-11-20 00:00:00,2,1560)
(3,kaushik,23,Kota,2000,100,2009-10-08 00:00:00,3,1500)
(3,kaushik,23,Kota,2000,102,2009-10-08 00:00:00,3,3000)
(4,Chaitali,25,Mumbai,6500,103,2008-05-20 00:00:00,4,2060)
注意 −
外部連線:與內部連線不同,外部連線返回至少一個關係中的所有行。外部連線操作以三種方式執行 -
- 左外部連線
- 右外部連線
- 全外部連線
左外部連線
左外部連線操作返回左表中的所有行,即使右關係中沒有匹配項。
語法
下面是使用JOIN運算子執行左外部連線操作的語法。
grunt> Relation3_name = JOIN Relation1_name BY id LEFT OUTER, Relation2_name BY customer_id;
示例
讓我們在兩個關係customers和orders上執行左外部連線操作,如下所示。
grunt> outer_left = JOIN customers BY id LEFT OUTER, orders BY customer_id;
驗證
使用DUMP運算子驗證關係outer_left,如下所示。
grunt> Dump outer_left;
輸出
它將生成以下輸出,顯示關係outer_left的內容。
(1,Ramesh,32,Ahmedabad,2000,,,,)
(2,Khilan,25,Delhi,1500,101,2009-11-20 00:00:00,2,1560)
(3,kaushik,23,Kota,2000,100,2009-10-08 00:00:00,3,1500)
(3,kaushik,23,Kota,2000,102,2009-10-08 00:00:00,3,3000)
(4,Chaitali,25,Mumbai,6500,103,2008-05-20 00:00:00,4,2060)
(5,Hardik,27,Bhopal,8500,,,,)
(6,Komal,22,MP,4500,,,,)
(7,Muffy,24,Indore,10000,,,,)
右外部連線
右外部連線操作返回右表中的所有行,即使左表中沒有匹配項。
語法
下面是使用JOIN運算子執行右外部連線操作的語法。
grunt> outer_right = JOIN customers BY id RIGHT, orders BY customer_id;
示例
讓我們在兩個關係customers和orders上執行右外部連線操作,如下所示。
grunt> outer_right = JOIN customers BY id RIGHT, orders BY customer_id;
驗證
使用DUMP運算子驗證關係outer_right,如下所示。
grunt> Dump outer_right
輸出
它將生成以下輸出,顯示關係outer_right的內容。
(2,Khilan,25,Delhi,1500,101,2009-11-20 00:00:00,2,1560)
(3,kaushik,23,Kota,2000,100,2009-10-08 00:00:00,3,1500)
(3,kaushik,23,Kota,2000,102,2009-10-08 00:00:00,3,3000)
(4,Chaitali,25,Mumbai,6500,103,2008-05-20 00:00:00,4,2060)
全外部連線
全外部連線操作在其中一個關係中存在匹配時返回行。
語法
下面是使用JOIN運算子執行全外部連線的語法。
grunt> outer_full = JOIN customers BY id FULL OUTER, orders BY customer_id;
示例
讓我們在兩個關係customers和orders上執行全外部連線操作,如下所示。
grunt> outer_full = JOIN customers BY id FULL OUTER, orders BY customer_id;
驗證
使用DUMP運算子驗證關係outer_full,如下所示。
grun> Dump outer_full;
輸出
它將生成以下輸出,顯示關係outer_full的內容。
(1,Ramesh,32,Ahmedabad,2000,,,,)
(2,Khilan,25,Delhi,1500,101,2009-11-20 00:00:00,2,1560)
(3,kaushik,23,Kota,2000,100,2009-10-08 00:00:00,3,1500)
(3,kaushik,23,Kota,2000,102,2009-10-08 00:00:00,3,3000)
(4,Chaitali,25,Mumbai,6500,103,2008-05-20 00:00:00,4,2060)
(5,Hardik,27,Bhopal,8500,,,,)
(6,Komal,22,MP,4500,,,,)
(7,Muffy,24,Indore,10000,,,,)
使用多個鍵
我們可以使用多個鍵執行JOIN操作。
語法
以下是如何使用多個鍵在兩個表上執行JOIN操作。
grunt> Relation3_name = JOIN Relation2_name BY (key1, key2), Relation3_name BY (key1, key2);
假設我們在HDFS的/pig_data/目錄中具有兩個檔案,名為employee.txt和employee_contact.txt,如下所示。
employee.txt
001,Rajiv,Reddy,21,programmer,003
002,siddarth,Battacharya,22,programmer,003
003,Rajesh,Khanna,22,programmer,003
004,Preethi,Agarwal,21,programmer,003
005,Trupthi,Mohanthy,23,programmer,003
006,Archana,Mishra,23,programmer,003
007,Komal,Nayak,24,teamlead,002
008,Bharathi,Nambiayar,24,manager,001
employee_contact.txt
001,9848022337,Rajiv@gmail.com,Hyderabad,003
002,9848022338,siddarth@gmail.com,Kolkata,003
003,9848022339,Rajesh@gmail.com,Delhi,003
004,9848022330,Preethi@gmail.com,Pune,003
005,9848022336,Trupthi@gmail.com,Bhuwaneshwar,003
006,9848022335,Archana@gmail.com,Chennai,003
007,9848022334,Komal@gmail.com,trivendram,002
008,9848022333,Bharathi@gmail.com,Chennai,001
並且我們已將這兩個檔案載入到Pig中,關係為employee和employee_contact,如下所示。
grunt> employee = LOAD 'hdfs://:9000/pig_data/employee.txt' USING PigStorage(',')
   as (id:int, firstname:chararray, lastname:chararray, age:int, designation:chararray, jobid:int);

grunt> employee_contact = LOAD 'hdfs://:9000/pig_data/employee_contact.txt' USING PigStorage(',')
   as (id:int, phone:chararray, email:chararray, city:chararray, jobid:int);
現在,讓我們使用JOIN運算子連線這兩個關係的內容,如下所示。
grunt> emp = JOIN employee BY (id,jobid), employee_contact BY (id,jobid);
驗證
使用DUMP運算子驗證關係emp,如下所示。
grunt> Dump emp;
輸出
它將生成以下輸出,顯示名為emp的關係的內容,如下所示。
(1,Rajiv,Reddy,21,programmer,113,1,9848022337,Rajiv@gmail.com,Hyderabad,113)
(2,siddarth,Battacharya,22,programmer,113,2,9848022338,siddarth@gmail.com,Kolka ta,113)
(3,Rajesh,Khanna,22,programmer,113,3,9848022339,Rajesh@gmail.com,Delhi,113)
(4,Preethi,Agarwal,21,programmer,113,4,9848022330,Preethi@gmail.com,Pune,113)
(5,Trupthi,Mohanthy,23,programmer,113,5,9848022336,Trupthi@gmail.com,Bhuwaneshw ar,113)
(6,Archana,Mishra,23,programmer,113,6,9848022335,Archana@gmail.com,Chennai,113)
(7,Komal,Nayak,24,teamlead,112,7,9848022334,Komal@gmail.com,trivendram,112)
(8,Bharathi,Nambiayar,24,manager,111,8,9848022333,Bharathi@gmail.com,Chennai,111)
Apache Pig - Cross 運算子
CROSS運算子計算兩個或多個關係的笛卡爾積。本章將透過示例說明如何在Pig Latin中使用cross運算子。
語法
下面是CROSS運算子的語法。
grunt> Relation3_name = CROSS Relation1_name, Relation2_name;
示例
假設我們在HDFS的/pig_data/目錄中具有兩個檔案,名為customers.txt和orders.txt,如下所示。
customers.txt
1,Ramesh,32,Ahmedabad,2000.00
2,Khilan,25,Delhi,1500.00
3,kaushik,23,Kota,2000.00
4,Chaitali,25,Mumbai,6500.00
5,Hardik,27,Bhopal,8500.00
6,Komal,22,MP,4500.00
7,Muffy,24,Indore,10000.00
orders.txt
102,2009-10-08 00:00:00,3,3000
100,2009-10-08 00:00:00,3,1500
101,2009-11-20 00:00:00,2,1560
103,2008-05-20 00:00:00,4,2060
並且我們已將這兩個檔案載入到 Pig 中,關係分別為customers和orders,如下所示。
grunt> customers = LOAD 'hdfs://:9000/pig_data/customers.txt' USING PigStorage(',')
   as (id:int, name:chararray, age:int, address:chararray, salary:int);

grunt> orders = LOAD 'hdfs://:9000/pig_data/orders.txt' USING PigStorage(',')
   as (oid:int, date:chararray, customer_id:int, amount:int);
現在,讓我們使用這兩個關係上的cross運算子獲取這兩個關係的笛卡爾積,如下所示。
grunt> cross_data = CROSS customers, orders;
驗證
使用DUMP運算子驗證關係cross_data,如下所示。
grunt> Dump cross_data;
輸出
它將生成以下輸出,顯示關係cross_data的內容。
(7,Muffy,24,Indore,10000,103,2008-05-20 00:00:00,4,2060)
(7,Muffy,24,Indore,10000,101,2009-11-20 00:00:00,2,1560)
(7,Muffy,24,Indore,10000,100,2009-10-08 00:00:00,3,1500)
(7,Muffy,24,Indore,10000,102,2009-10-08 00:00:00,3,3000)
(6,Komal,22,MP,4500,103,2008-05-20 00:00:00,4,2060)
(6,Komal,22,MP,4500,101,2009-11-20 00:00:00,2,1560)
(6,Komal,22,MP,4500,100,2009-10-08 00:00:00,3,1500)
(6,Komal,22,MP,4500,102,2009-10-08 00:00:00,3,3000)
(5,Hardik,27,Bhopal,8500,103,2008-05-20 00:00:00,4,2060)
(5,Hardik,27,Bhopal,8500,101,2009-11-20 00:00:00,2,1560)
(5,Hardik,27,Bhopal,8500,100,2009-10-08 00:00:00,3,1500)
(5,Hardik,27,Bhopal,8500,102,2009-10-08 00:00:00,3,3000)
(4,Chaitali,25,Mumbai,6500,103,2008-05-20 00:00:00,4,2060)
(4,Chaitali,25,Mumbai,6500,101,2009-20 00:00:00,4,2060)
(2,Khilan,25,Delhi,1500,101,2009-11-20 00:00:00,2,1560)
(2,Khilan,25,Delhi,1500,100,2009-10-08 00:00:00,3,1500)
(2,Khilan,25,Delhi,1500,102,2009-10-08 00:00:00,3,3000)
(1,Ramesh,32,Ahmedabad,2000,103,2008-05-20 00:00:00,4,2060)
(1,Ramesh,32,Ahmedabad,2000,101,2009-11-20 00:00:00,2,1560)
(1,Ramesh,32,Ahmedabad,2000,100,2009-10-08 00:00:00,3,1500)
(1,Ramesh,32,Ahmedabad,2000,102,2009-10-08 00:00:00,3,3000)-11-20 00:00:00,2,1560)
(4,Chaitali,25,Mumbai,6500,100,2009-10-08 00:00:00,3,1500)
(4,Chaitali,25,Mumbai,6500,102,2009-10-08 00:00:00,3,3000)
(3,kaushik,23,Kota,2000,103,2008-05-20 00:00:00,4,2060)
(3,kaushik,23,Kota,2000,101,2009-11-20 00:00:00,2,1560)
(3,kaushik,23,Kota,2000,100,2009-10-08 00:00:00,3,1500)
(3,kaushik,23,Kota,2000,102,2009-10-08 00:00:00,3,3000)
(2,Khilan,25,Delhi,1500,103,2008-05-20 00:00:00,4,2060)
(2,Khilan,25,Delhi,1500,101,2009-11-20 00:00:00,2,1560)
(2,Khilan,25,Delhi,1500,100,2009-10-08 00:00:00,3,1500)
(2,Khilan,25,Delhi,1500,102,2009-10-08 00:00:00,3,3000)
(1,Ramesh,32,Ahmedabad,2000,103,2008-05-20 00:00:00,4,2060)
(1,Ramesh,32,Ahmedabad,2000,101,2009-11-20 00:00:00,2,1560)
(1,Ramesh,32,Ahmedabad,2000,100,2009-10-08 00:00:00,3,1500)
(1,Ramesh,32,Ahmedabad,2000,102,2009-10-08 00:00:00,3,3000)
Apache Pig - Union 運算子
Pig Latin的UNION運算子用於合併兩個關係的內容。要在兩個關係上執行UNION操作,它們的列和域必須相同。
語法
下面是UNION運算子的語法。
grunt> Relation_name3 = UNION Relation_name1, Relation_name2;
示例
假設我們在HDFS的/pig_data/目錄中具有兩個檔案,名為student_data1.txt和student_data2.txt,如下所示。
Student_data1.txt
001,Rajiv,Reddy,9848022337,Hyderabad
002,siddarth,Battacharya,9848022338,Kolkata
003,Rajesh,Khanna,9848022339,Delhi
004,Preethi,Agarwal,9848022330,Pune
005,Trupthi,Mohanthy,9848022336,Bhuwaneshwar
006,Archana,Mishra,9848022335,Chennai.
Student_data2.txt
7,Komal,Nayak,9848022334,trivendram.
8,Bharathi,Nambiayar,9848022333,Chennai.
並且我們已將這兩個檔案載入到Pig中,關係為student1和student2,如下所示。
grunt> student1 = LOAD 'hdfs://:9000/pig_data/student_data1.txt' USING PigStorage(',')
   as (id:int, firstname:chararray, lastname:chararray, phone:chararray, city:chararray);

grunt> student2 = LOAD 'hdfs://:9000/pig_data/student_data2.txt' USING PigStorage(',')
   as (id:int, firstname:chararray, lastname:chararray, phone:chararray, city:chararray);
現在,讓我們使用UNION運算符合並這兩個關係的內容,如下所示。
grunt> student = UNION student1, student2;
驗證
使用DUMP運算子驗證關係student,如下所示。
grunt> Dump student;
輸出
它將顯示以下輸出,顯示關係student的內容。
(1,Rajiv,Reddy,9848022337,Hyderabad) (2,siddarth,Battacharya,9848022338,Kolkata)
(3,Rajesh,Khanna,9848022339,Delhi)
(4,Preethi,Agarwal,9848022330,Pune)
(5,Trupthi,Mohanthy,9848022336,Bhuwaneshwar)
(6,Archana,Mishra,9848022335,Chennai)
(7,Komal,Nayak,9848022334,trivendram)
(8,Bharathi,Nambiayar,9848022333,Chennai)
Apache Pig - Split 運算子
SPLIT運算子用於將關係拆分為兩個或多個關係。
語法
下面是SPLIT運算子的語法。
grunt> SPLIT Relation1_name INTO Relation2_name IF (condition1), Relation2_name (condition2),
示例
假設我們在 HDFS 目錄/pig_data/中有一個名為student_details.txt的檔案,內容如下。
student_details.txt
001,Rajiv,Reddy,21,9848022337,Hyderabad
002,siddarth,Battacharya,22,9848022338,Kolkata
003,Rajesh,Khanna,22,9848022339,Delhi
004,Preethi,Agarwal,21,9848022330,Pune
005,Trupthi,Mohanthy,23,9848022336,Bhuwaneshwar
006,Archana,Mishra,23,9848022335,Chennai
007,Komal,Nayak,24,9848022334,trivendram
008,Bharathi,Nambiayar,24,9848022333,Chennai
並且我們已將此檔案載入到Pig中,關係名為student_details,如下所示。
student_details = LOAD 'hdfs://:9000/pig_data/student_details.txt' USING PigStorage(',')
   as (id:int, firstname:chararray, lastname:chararray, age:int, phone:chararray, city:chararray);
現在,讓我們將關係拆分為兩個,一個列出年齡小於23的員工,另一個列出年齡在22到25之間的員工。
SPLIT student_details into student_details1 if age<23, student_details2 if (22<age and age>25);
驗證
使用DUMP運算子驗證關係student_details1和student_details2,如下所示。
grunt> Dump student_details1;

grunt> Dump student_details2;
輸出
它將生成以下輸出,分別顯示關係student_details1和student_details2的內容。
grunt> Dump student_details1;
(1,Rajiv,Reddy,21,9848022337,Hyderabad)
(2,siddarth,Battacharya,22,9848022338,Kolkata)
(3,Rajesh,Khanna,22,9848022339,Delhi)
(4,Preethi,Agarwal,21,9848022330,Pune)

grunt> Dump student_details2;
(5,Trupthi,Mohanthy,23,9848022336,Bhuwaneshwar)
(6,Archana,Mishra,23,9848022335,Chennai)
(7,Komal,Nayak,24,9848022334,trivendram)
(8,Bharathi,Nambiayar,24,9848022333,Chennai)
Apache Pig - Filter 運算子
FILTER運算子用於根據條件從關係中選擇所需的元組。
語法
下面是FILTER運算子的語法。
grunt> Relation2_name = FILTER Relation1_name BY (condition);
示例
假設我們在 HDFS 目錄/pig_data/中有一個名為student_details.txt的檔案,內容如下。
student_details.txt
001,Rajiv,Reddy,21,9848022337,Hyderabad
002,siddarth,Battacharya,22,9848022338,Kolkata
003,Rajesh,Khanna,22,9848022339,Delhi
004,Preethi,Agarwal,21,9848022330,Pune
005,Trupthi,Mohanthy,23,9848022336,Bhuwaneshwar
006,Archana,Mishra,23,9848022335,Chennai
007,Komal,Nayak,24,9848022334,trivendram
008,Bharathi,Nambiayar,24,9848022333,Chennai
並且我們已將此檔案載入到Pig中,關係名為student_details,如下所示。
grunt> student_details = LOAD 'hdfs://:9000/pig_data/student_details.txt' USING PigStorage(',')
   as (id:int, firstname:chararray, lastname:chararray, age:int, phone:chararray, city:chararray);
現在,讓我們使用Filter運算子獲取屬於Chennai市的學生的詳細資訊。
filter_data = FILTER student_details BY city == 'Chennai';
驗證
使用DUMP運算子驗證關係filter_data,如下所示。
grunt> Dump filter_data;
輸出
它將生成以下輸出,顯示關係filter_data的內容,如下所示。
(6,Archana,Mishra,23,9848022335,Chennai)
(8,Bharathi,Nambiayar,24,9848022333,Chennai)
Apache Pig - Distinct 運算子
DISTINCT運算子用於從關係中刪除冗餘(重複)元組。
語法
下面是DISTINCT運算子的語法。
grunt> Relation_name2 = DISTINCT Relatin_name1;
示例
假設我們在 HDFS 目錄/pig_data/中有一個名為student_details.txt的檔案,內容如下。
student_details.txt
001,Rajiv,Reddy,9848022337,Hyderabad
002,siddarth,Battacharya,9848022338,Kolkata
002,siddarth,Battacharya,9848022338,Kolkata
003,Rajesh,Khanna,9848022339,Delhi
003,Rajesh,Khanna,9848022339,Delhi
004,Preethi,Agarwal,9848022330,Pune
005,Trupthi,Mohanthy,9848022336,Bhuwaneshwar
006,Archana,Mishra,9848022335,Chennai
006,Archana,Mishra,9848022335,Chennai
並且我們已將此檔案載入到Pig中,關係名為student_details,如下所示。
grunt> student_details = LOAD 'hdfs://:9000/pig_data/student_details.txt' USING PigStorage(',')
   as (id:int, firstname:chararray, lastname:chararray, phone:chararray, city:chararray);
現在,讓我們使用DISTINCT運算子從名為student_details的關係中刪除冗餘(重複)元組,並將其儲存為另一個名為distinct_data的關係,如下所示。
grunt> distinct_data = DISTINCT student_details;
驗證
使用DUMP運算子驗證關係distinct_data,如下所示。
grunt> Dump distinct_data;
輸出
它將生成以下輸出,顯示關係distinct_data的內容,如下所示。
(1,Rajiv,Reddy,9848022337,Hyderabad)
(2,siddarth,Battacharya,9848022338,Kolkata)
(3,Rajesh,Khanna,9848022339,Delhi)
(4,Preethi,Agarwal,9848022330,Pune)
(5,Trupthi,Mohanthy,9848022336,Bhuwaneshwar)
(6,Archana,Mishra,9848022335,Chennai)
Apache Pig - Foreach 運算子
FOREACH運算子用於根據列資料生成指定的 데이터 변환。
語法
下面是FOREACH運算子的語法。
grunt> Relation_name2 = FOREACH Relatin_name1 GENERATE (required data);
示例
假設我們在 HDFS 目錄/pig_data/中有一個名為student_details.txt的檔案,內容如下。
student_details.txt
001,Rajiv,Reddy,21,9848022337,Hyderabad
002,siddarth,Battacharya,22,9848022338,Kolkata
003,Rajesh,Khanna,22,9848022339,Delhi
004,Preethi,Agarwal,21,9848022330,Pune
005,Trupthi,Mohanthy,23,9848022336,Bhuwaneshwar
006,Archana,Mishra,23,9848022335,Chennai
007,Komal,Nayak,24,9848022334,trivendram
008,Bharathi,Nambiayar,24,9848022333,Chennai
並且我們已將此檔案載入到Pig中,關係名為student_details,如下所示。
grunt> student_details = LOAD 'hdfs://:9000/pig_data/student_details.txt' USING PigStorage(',')
   as (id:int, firstname:chararray, lastname:chararray,age:int, phone:chararray, city:chararray);
現在,讓我們從關係student_details中獲取每個學生的id、age和city值,並使用foreach運算子將其儲存到另一個名為foreach_data的關係中,如下所示。
grunt> foreach_data = FOREACH student_details GENERATE id,age,city;
驗證
使用DUMP運算子驗證關係foreach_data,如下所示。
grunt> Dump foreach_data;
輸出
它將生成以下輸出,顯示關係foreach_data的內容。
(1,21,Hyderabad)
(2,22,Kolkata)
(3,22,Delhi)
(4,21,Pune)
(5,23,Bhuwaneshwar)
(6,23,Chennai)
(7,24,trivendram)
(8,24,Chennai)
Apache Pig - Order By
ORDER BY運算子用於根據一個或多個欄位以排序的順序顯示關係的內容。
語法
下面是ORDER BY運算子的語法。
grunt> Relation_name2 = ORDER Relatin_name1 BY (ASC|DESC);
示例
假設我們在 HDFS 目錄/pig_data/中有一個名為student_details.txt的檔案,內容如下。
student_details.txt
001,Rajiv,Reddy,21,9848022337,Hyderabad
002,siddarth,Battacharya,22,9848022338,Kolkata
003,Rajesh,Khanna,22,9848022339,Delhi
004,Preethi,Agarwal,21,9848022330,Pune
005,Trupthi,Mohanthy,23,9848022336,Bhuwaneshwar
006,Archana,Mishra,23,9848022335,Chennai
007,Komal,Nayak,24,9848022334,trivendram
008,Bharathi,Nambiayar,24,9848022333,Chennai
並且我們已將此檔案載入到Pig中,關係名為student_details,如下所示。
grunt> student_details = LOAD 'hdfs://:9000/pig_data/student_details.txt' USING PigStorage(',')
   as (id:int, firstname:chararray, lastname:chararray,age:int, phone:chararray, city:chararray);
現在,讓我們根據學生的年齡以降序對關係進行排序,並使用ORDER BY運算子將其儲存到另一個名為order_by_data的關係中,如下所示。
grunt> order_by_data = ORDER student_details BY age DESC;
驗證
使用DUMP運算子驗證關係order_by_data,如下所示。
grunt> Dump order_by_data;
輸出
它將生成以下輸出,顯示關係order_by_data的內容。
(8,Bharathi,Nambiayar,24,9848022333,Chennai)
(7,Komal,Nayak,24,9848022334,trivendram)
(6,Archana,Mishra,23,9848022335,Chennai)
(5,Trupthi,Mohanthy,23,9848022336,Bhuwaneshwar)
(3,Rajesh,Khanna,22,9848022339,Delhi)
(2,siddarth,Battacharya,22,9848022338,Kolkata)
(4,Preethi,Agarwal,21,9848022330,Pune)
(1,Rajiv,Reddy,21,9848022337,Hyderabad)
Apache Pig - Limit 運算子
LIMIT運算子用於從關係中獲取有限數量的元組。
語法
下面是LIMIT運算子的語法。
grunt> Result = LIMIT Relation_name required number of tuples;
示例
假設我們在 HDFS 目錄/pig_data/中有一個名為student_details.txt的檔案,內容如下。
student_details.txt
001,Rajiv,Reddy,21,9848022337,Hyderabad
002,siddarth,Battacharya,22,9848022338,Kolkata
003,Rajesh,Khanna,22,9848022339,Delhi
004,Preethi,Agarwal,21,9848022330,Pune
005,Trupthi,Mohanthy,23,9848022336,Bhuwaneshwar
006,Archana,Mishra,23,9848022335,Chennai
007,Komal,Nayak,24,9848022334,trivendram
008,Bharathi,Nambiayar,24,9848022333,Chennai
並且我們已將此檔案載入到Pig中,關係名為student_details,如下所示。
grunt> student_details = LOAD 'hdfs://:9000/pig_data/student_details.txt' USING PigStorage(',')
   as (id:int, firstname:chararray, lastname:chararray,age:int, phone:chararray, city:chararray);
現在,讓我們根據學生的年齡以降序對關係進行排序,並使用ORDER BY運算子將其儲存到另一個名為limit_data的關係中,如下所示。
grunt> limit_data = LIMIT student_details 4;
驗證
使用DUMP運算子驗證關係limit_data,如下所示。
grunt> Dump limit_data;
輸出
它將生成以下輸出,顯示關係limit_data的內容,如下所示。
(1,Rajiv,Reddy,21,9848022337,Hyderabad)
(2,siddarth,Battacharya,22,9848022338,Kolkata)
(3,Rajesh,Khanna,22,9848022339,Delhi)
(4,Preethi,Agarwal,21,9848022330,Pune)
Apache Pig - Eval 函式
Apache Pig提供了各種內建函式,即eval、load、store、math、string、bag和tuple函式。
Eval函式
下面是Apache Pig提供的eval函式列表。
| 序號 | 函式和描述 |
|---|---|
| 1 | AVG()
計算包中數值的平均值。 |
| 2 | BagToString()
將包的元素連線成一個字串。連線時,可以在這些值之間放置分隔符(可選)。 |
| 3 | CONCAT()
連線兩個或多個相同型別的表示式。 |
| 4 | COUNT()
獲取包中元素的數量,同時計算包中元組的數量。 |
| 5 | COUNT_STAR()
它類似於COUNT()函式。它用於獲取包中元素的數量。 |
| 6 | DIFF()
比較元組中的兩個包(欄位)。 |
| 7 | IsEmpty()
檢查包或對映是否為空。 |
| 8 | MAX()
計算單列包中列(數值或chararrays)的最高值。 |
| 9 | MIN()
獲取單列包中特定列的最小(最低)值(數值或chararray)。 |
| 10 | PluckTuple()
使用Pig Latin PluckTuple()函式,我們可以定義一個字串字首並過濾關係中以給定字首開頭的列。 |
| 11 | SIZE()
根據任何Pig資料型別計算元素的數量。 |
| 12 | SUBTRACT()
減去兩個包。它以兩個包作為輸入,並返回一個包,其中包含第一個包中不在第二個包中的元組。 |
| 13 | SUM()
獲取單列包中列的數值總和。 |
| 14 | TOKENIZE()
將字串(包含一組單詞)拆分為單個元組,並返回一個包含拆分操作輸出的包。 |
Apache Pig - 載入和儲存函式
Apache Pig中的Load和Store函式用於確定資料如何進入和退出Pig。這些函式與load和store運算子一起使用。下面是Pig中可用的load和store函式列表。
| 序號 | 函式和描述 |
|---|---|
| 1 | PigStorage()
載入和儲存結構化檔案。 |
| 2 | TextLoader()
將非結構化資料載入到Pig中。 |
| 3 | BinStorage()
使用機器可讀格式將資料載入和儲存到Pig中。 |
| 4 | 處理壓縮
在Pig Latin中,我們可以載入和儲存壓縮資料。 |
Apache Pig - Bag & Tuple 函式
下面是Bag和Tuple函式的列表。
| 序號 | 函式和描述 |
|---|---|
| 1 | TOBAG()
將兩個或多個表示式轉換為包。 |
| 2 | TOP()
獲取關係的前N個元組。 |
| 3 | TOTUPLE()
將一個或多個表示式轉換為元組。 |
| 4 | TOMAP()
將鍵值對轉換為對映。 |
Apache Pig - 字串函式
在Apache Pig中,我們有以下字串函式。
| 序號 | 函式和描述 |
|---|---|
| 1 | ENDSWITH(string, testAgainst)
驗證給定字串是否以特定子字串結尾。 |
| 2 | STARTSWITH(string, substring)
接受兩個字串引數,並驗證第一個字串是否以第二個字串開頭。 |
| 3 | SUBSTRING(string, startIndex, stopIndex)
從給定字串返回子字串。 |
| 4 | EqualsIgnoreCase(string1, string2)
比較兩個字串,忽略大小寫。 |
| 5 | INDEXOF(string, ‘character’, startIndex)
返回字串中字元的第一次出現,從起始索引向前搜尋。 |
| 6 | LAST_INDEX_OF(expression)
從起始索引向後搜尋,返回字元在字串中最後一次出現的索引。 |
| 7 | LCFIRST(expression)
將字串中的第一個字元轉換為小寫。 |
| 8 | UCFIRST(expression)
返回一個字串,其中第一個字元轉換為大寫。 |
| 9 | UPPER(expression)
UPPER(expression) 返回轉換為大寫的字串。 |
| 10 | LOWER(expression)
將字串中的所有字元轉換為小寫。 |
| 11 | REPLACE(string, ‘oldChar’, ‘newChar’);
用新字元替換字串中現有的字元。 |
| 12 | STRSPLIT(string, regex, limit)
根據給定的正則表示式拆分字串。 |
| 13 | STRSPLITTOBAG(string, regex, limit)
類似於STRSPLIT()函式,它根據給定的分隔符拆分字串,並將結果返回到一個包中。 |
| 14 | TRIM(expression)
返回字串的副本,其中刪除了前導和尾隨空格。 |
| 15 | LTRIM(expression)
返回字串的副本,其中刪除了前導空格。 |
| 16 | RTRIM(expression)
返回字串的副本,其中刪除了尾隨空格。 |
Apache Pig - 日期時間函式
Apache Pig 提供以下日期和時間函式:
Apache Pig - 數學函式
Apache Pig 中有以下數學函式:
| 序號 | 函式和描述 |
|---|---|
| 1 | ABS(expression)
獲取表示式的絕對值。 |
| 2 | ACOS(expression)
獲取表示式的反餘弦。 |
| 3 | ASIN(expression)
獲取表示式的反正弦。 |
| 4 | ATAN(expression)
此函式用於獲取表示式的反正切。 |
| 5 | CBRT(expression)
此函式用於獲取表示式的立方根。 |
| 6 | CEIL(expression)
此函式用於獲取表示式四捨五入到最接近的整數的值。 |
| 7 | COS(expression)
此函式用於獲取表示式的三角餘弦。 |
| 8 | COSH(expression)
此函式用於獲取表示式的雙曲餘弦。 |
| 9 | EXP(expression)
此函式用於獲取尤拉數 e 的 x 次冪。 |
| 10 | FLOOR(expression)
獲取表示式四捨五入到最接近的整數的值。 |
| 11 | LOG(expression)
獲取表示式的自然對數(以 e 為底)。 |
| 12 | LOG10(expression)
獲取表示式的以 10 為底的對數。 |
| 13 | RANDOM( )
獲取大於或等於 0.0 且小於 1.0 的偽隨機數(型別為 double)。 |
| 14 | ROUND(expression)
獲取表示式四捨五入到整數(如果結果型別為 float)或四捨五入到長整數(如果結果型別為 double)的值。 |
| 15 | SIN(expression)
獲取表示式的正弦。 |
| 16 | SINH(expression)
獲取表示式的雙曲正弦。 |
| 17 | SQRT(expression)
獲取表示式的正平方根。 |
| 18 | TAN(expression)
獲取角度的三角正切。 |
| 19 | TANH(expression)
獲取表示式的雙曲正切。 |
Apache Pig - 使用者自定義函式
除了內建函式外,Apache Pig 還廣泛支援使用者自定義函式 (UDF)。使用這些 UDF,我們可以定義自己的函式並使用它們。UDF 支援以六種程式語言提供,即 Java、Jython、Python、JavaScript、Ruby 和 Groovy。
在編寫 UDF 時,Java 提供了完整的支援,而在所有其他語言中則提供了有限的支援。使用 Java,您可以編寫涉及所有處理部分的 UDF,例如資料載入/儲存、列轉換和聚合。由於 Apache Pig 是用 Java 編寫的,因此與其他語言相比,使用 Java 語言編寫的 UDF 工作效率更高。
在 Apache Pig 中,我們還有一個名為Piggybank的 Java UDF 儲存庫。使用 Piggybank,我們可以訪問其他使用者編寫的 Java UDF,並貢獻我們自己的 UDF。
Java 中的 UDF 型別
在使用 Java 編寫 UDF 時,我們可以建立和使用以下三種類型的函式:
過濾器函式 - 過濾器函式用作過濾器語句中的條件。這些函式接受 Pig 值作為輸入並返回布林值。
Eval 函式 - Eval 函式用於 FOREACH-GENERATE 語句中。這些函式接受 Pig 值作為輸入並返回 Pig 結果。
代數函式 - 代數函式作用於 FOREACHGENERATE 語句中的內部包。這些函式用於對內部包執行完整的 MapReduce 操作。
使用 Java 編寫 UDF
要使用 Java 編寫 UDF,我們必須整合 jar 檔案Pig-0.15.0.jar。在本節中,我們將討論如何使用 Eclipse 編寫一個示例 UDF。在繼續之前,請確保您已在系統中安裝了 Eclipse 和 Maven。
按照以下步驟編寫 UDF 函式:
開啟 Eclipse 並建立一個新專案(例如myproject)。
將新建立的專案轉換為 Maven 專案。
將以下內容複製到 pom.xml 中。此檔案包含 Apache Pig 和 Hadoop-core jar 檔案的 Maven 依賴項。
<project xmlns = "http://maven.apache.org/POM/4.0.0"
   xmlns:xsi = "http://www.w3.org/2001/XMLSchema-instance"
   xsi:schemaLocation = "http://maven.apache.org/POM/4.0.0http://maven.apache .org/xsd/maven-4.0.0.xsd">

   <modelVersion>4.0.0</modelVersion>
   <groupId>Pig_Udf</groupId>
   <artifactId>Pig_Udf</artifactId>
   <version>0.0.1-SNAPSHOT</version>

   <build>
      <sourceDirectory>src</sourceDirectory>
      <plugins>
         <plugin>
            <artifactId>maven-compiler-plugin</artifactId>
            <version>3.3</version>
            <configuration>
               <source>1.7</source>
               <target>1.7</target>
            </configuration>
         </plugin>
      </plugins>
   </build>

   <dependencies>

      <dependency>
         <groupId>org.apache.pig</groupId>
         <artifactId>pig</artifactId>
         <version>0.15.0</version>
      </dependency>

      <dependency>
         <groupId>org.apache.hadoop</groupId>
         <artifactId>hadoop-core</artifactId>
         <version>0.20.2</version>
      </dependency>

   </dependencies>

</project>
儲存檔案並重新整理它。在Maven 依賴項部分,您可以找到下載的 jar 檔案。
建立一個名為Sample_Eval的新類檔案,並將以下內容複製到其中。
import java.io.IOException;
import org.apache.pig.EvalFunc;
import org.apache.pig.data.Tuple;

import java.io.IOException;
import org.apache.pig.EvalFunc;
import org.apache.pig.data.Tuple;

public class Sample_Eval extends EvalFunc<String>{

   public String exec(Tuple input) throws IOException {
      if (input == null || input.size() == 0)
      return null;
      String str = (String)input.get(0);
      return str.toUpperCase();
   }
}
在編寫 UDF 時,必須繼承 EvalFunc 類併為exec()函式提供實現。在此函式中,編寫了 UDF 所需的程式碼。在上面的示例中,我們返回了將給定列的內容轉換為大寫的程式碼。
在編譯類沒有錯誤後,右鍵單擊 Sample_Eval.java 檔案。它會為您提供一個選單。選擇匯出,如下面的螢幕截圖所示。

單擊匯出後,您將看到以下視窗。單擊JAR 檔案。

透過單擊下一步>按鈕繼續。您將看到另一個視窗,您需要在本地檔案系統中輸入路徑,您需要將 jar 檔案儲存在該路徑中。

最後單擊完成按鈕。在指定的資料夾中,將建立一個 Jar 檔案sample_udf.jar。此 jar 檔案包含用 Java 編寫的 UDF。
使用 UDF
編寫 UDF 並生成 Jar 檔案後,請按照以下步驟操作:
步驟 1:註冊 Jar 檔案
在編寫 UDF(在 Java 中)後,我們必須使用 Register 運算子註冊包含 UDF 的 Jar 檔案。透過註冊 Jar 檔案,使用者可以將 UDF 的位置通知 Apache Pig。
語法
以下是 Register 運算子的語法。
REGISTER path;
示例
例如,讓我們註冊本章前面建立的 sample_udf.jar。
在本地模式下啟動 Apache Pig 並註冊 jar 檔案 sample_udf.jar,如下所示。
$cd PIG_HOME/bin
$./pig –x local

REGISTER '/$PIG_HOME/sample_udf.jar'
注意 - 假設 Jar 檔案位於路徑 - /$PIG_HOME/sample_udf.jar 中
步驟 2:定義別名
註冊 UDF 後,我們可以使用Define運算子為其定義別名。
語法
以下是 Define 運算子的語法。
DEFINE alias {function | [`command` [input] [output] [ship] [cache] [stderr] ] };
示例
為 sample_eval 定義別名,如下所示。
DEFINE sample_eval sample_eval();
步驟 3:使用 UDF
定義別名後,您可以像使用內建函式一樣使用 UDF。假設 HDFS /Pig_Data/目錄中有一個名為 emp_data 的檔案,其內容如下。
001,Robin,22,newyork
002,BOB,23,Kolkata
003,Maya,23,Tokyo
004,Sara,25,London
005,David,23,Bhuwaneshwar
006,Maggy,22,Chennai
007,Robert,22,newyork
008,Syam,23,Kolkata
009,Mary,25,Tokyo
010,Saran,25,London
011,Stacy,25,Bhuwaneshwar
012,Kelly,22,Chennai
並假設我們已將此檔案載入到 Pig 中,如下所示。
grunt> emp_data = LOAD 'hdfs://:9000/pig_data/emp1.txt' USING PigStorage(',')
   as (id:int, name:chararray, age:int, city:chararray);
現在讓我們使用 UDF sample_eval將員工姓名轉換為大寫。
grunt> Upper_case = FOREACH emp_data GENERATE sample_eval(name);
驗證關係Upper_case的內容,如下所示。
grunt> Dump Upper_case;

(ROBIN)
(BOB)
(MAYA)
(SARA)
(DAVID)
(MAGGY)
(ROBERT)
(SYAM)
(MARY)
(SARAN)
(STACY)
(KELLY)
Apache Pig - 執行指令碼
在本節中,我們將瞭解如何在批處理模式下執行 Apache Pig 指令碼。
Pig 指令碼中的註釋
在檔案中編寫指令碼時,我們可以像下面這樣在其中包含註釋。
多行註釋
我們將以 '/*' 開頭多行註釋,以 '*/' 結束它們。
/* These are the multi-line comments
  In the pig script */
單行註釋
我們將以 '--' 開頭單行註釋。
--we can write single line comments like this.
在批處理模式下執行 Pig 指令碼
在批處理模式下執行 Apache Pig 語句時,請按照以下步驟操作。
步驟 1
將所有必需的 Pig Latin 語句寫入單個檔案。我們可以在單個檔案中編寫所有 Pig Latin 語句和命令,並將其儲存為.pig檔案。
步驟 2
執行 Apache Pig 指令碼。您可以從 shell(Linux)執行 Pig 指令碼,如下所示。
| 本地模式 | MapReduce 模式 |
|---|---|
| $ pig -x local Sample_script.pig | $ pig -x mapreduce Sample_script.pig |
您也可以使用 exec 命令從 Grunt shell 執行它,如下所示。
grunt> exec /sample_script.pig
從 HDFS 執行 Pig 指令碼
我們還可以執行駐留在 HDFS 中的 Pig 指令碼。假設 HDFS 目錄/pig_data/中有一個名為Sample_script.pig的 Pig 指令碼。我們可以像下面這樣執行它。
$ pig -x mapreduce hdfs://:9000/pig_data/Sample_script.pig
示例
假設我們在 HDFS 中有一個名為student_details.txt的檔案,其內容如下。
student_details.txt
001,Rajiv,Reddy,21,9848022337,Hyderabad
002,siddarth,Battacharya,22,9848022338,Kolkata
003,Rajesh,Khanna,22,9848022339,Delhi
004,Preethi,Agarwal,21,9848022330,Pune
005,Trupthi,Mohanthy,23,9848022336,Bhuwaneshwar
006,Archana,Mishra,23,9848022335,Chennai
007,Komal,Nayak,24,9848022334,trivendram
008,Bharathi,Nambiayar,24,9848022333,Chennai
我們還在同一個 HDFS 目錄中有一個名為sample_script.pig的示例指令碼。此檔案包含對student關係執行操作和轉換的語句,如下所示。
student = LOAD 'hdfs://:9000/pig_data/student_details.txt' USING PigStorage(',')
   as (id:int, firstname:chararray, lastname:chararray, phone:chararray, city:chararray);

student_order = ORDER student BY age DESC;

student_limit = LIMIT student_order 4;

Dump student_limit;
指令碼的第一條語句將名為student_details.txt的檔案中的資料載入為名為student的關係。
指令碼的第二條語句將根據年齡按降序排列關係的元組,並將其儲存為student_order。
指令碼的第三條語句將student_order的前 4 個元組儲存為student_limit。
最後,第四條語句將轉儲關係student_limit的內容。
現在讓我們執行sample_script.pig,如下所示。
$./pig -x mapreduce hdfs://:9000/pig_data/sample_script.pig
Apache Pig 將執行併為您提供以下內容的輸出。
(7,Komal,Nayak,24,9848022334,trivendram)
(8,Bharathi,Nambiayar,24,9848022333,Chennai)
(5,Trupthi,Mohanthy,23,9848022336,Bhuwaneshwar)
(6,Archana,Mishra,23,9848022335,Chennai)
2015-10-19 10:31:27,446 [main] INFO  org.apache.pig.Main - Pig script completed in 12
minutes, 32 seconds and 751 milliseconds (752751 ms)