- Angular 2 教程
- Angular 2 - 首頁
- Angular 2 - 概述
- Angular 2 - 環境
- Angular 2 - Hello World
- Angular 2 - 模組
- Angular 2 - 架構
- Angular 2 - 元件
- Angular 2 - 模板
- Angular 2 - 指令
- Angular 2 - 元資料
- Angular 2 - 資料繫結
- 使用 HTTP 進行 CRUD 操作
- Angular 2 - 錯誤處理
- Angular 2 - 路由
- Angular 2 - 導航
- Angular 2 - 表單
- Angular 2 - CLI
- Angular 2 - 依賴注入
- Angular 2 - 高階配置
- Angular 2 - 第三方控制元件
- Angular 2 - 資料顯示
- Angular 2 - 處理事件
- Angular 2 - 資料轉換
- Angular 2 - 自定義管道
- Angular 2 - 使用者輸入
- Angular 2 - 生命週期鉤子
- Angular 2 - 巢狀容器
- Angular 2 - 服務
- Angular 2 有用資源
- Angular 2 - 常見問題解答
- Angular 2 - 快速指南
- Angular 2 - 有用資源
- Angular 2 - 討論
Angular 2 - 路由
路由有助於根據使用者在主頁面上選擇的選項將使用者引導到不同的頁面。因此,根據他們選擇的選項,將向用戶呈現所需的 Angular 元件。
讓我們看看在 Angular 2 應用程式中如何實現路由的必要步驟。
步驟 1 - 在 index.html 檔案中新增基本引用標籤。
<!DOCTYPE html>
<html>
   <head>
      <base href = "/">
      <title>Angular QuickStart</title>
      <meta charset = "UTF-8">
      <meta name = "viewport" content = "width = device-width, initial-scale = 1">

      <base href = "/">
      <link rel = "stylesheet" href = "styles.css">

      <!-- Polyfill(s) for older browsers -->
      <script src = "node_modules/core-js/client/shim.min.js"></script>
      <script src = "node_modules/zone.js/dist/zone.js"></script>
      <script src = "node_modules/systemjs/dist/system.src.js"></script>
      <script src = "systemjs.config.js"></script>

      <script>
         System.import('main.js').catch(function(err){ console.error(err); });
      </script>
   </head>

   <body>
      <my-app></my-app>
   </body>
</html>
步驟 2 - 為應用程式建立兩個路由。為此,建立 2 個名為 Inventory.component.ts 和 product.component.ts 的檔案
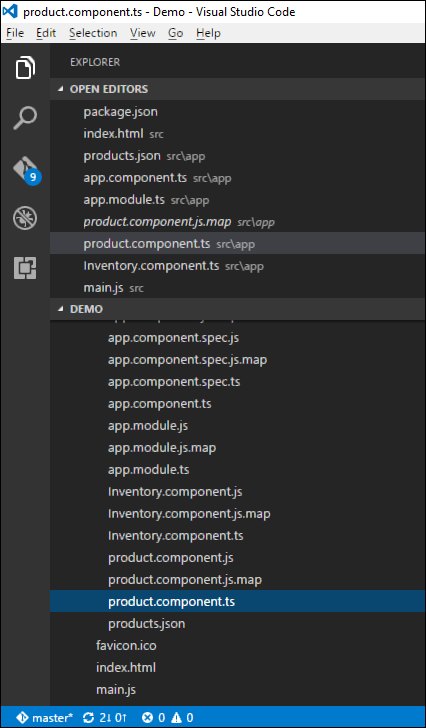
步驟 3 - 將以下程式碼放在 product.component.ts 檔案中。
import { Component } from '@angular/core';

@Component ({
   selector: 'my-app',
   template: 'Products',
})
export   class   Appproduct  {
}
步驟 4 - 將以下程式碼放在 Inventory.component.ts 檔案中。
import { Component } from '@angular/core';

@Component ({
   selector: 'my-app',
   template: 'Inventory',
})
export class AppInventory  {
}
這兩個元件都沒有做任何花哨的事情,它們只是根據元件呈現關鍵字。因此,對於 Inventory 元件,它將向用戶顯示 Inventory 關鍵字。對於 products 元件,它將向用戶顯示 product 關鍵字。
步驟 5 - 在 app.module.ts 檔案中,新增以下程式碼 -
import { NgModule } from '@angular/core';
import { BrowserModule } from '@angular/platform-browser';
import { AppComponent }  from './app.component';
import { Appproduct } from './product.component';
import { AppInventory } from './Inventory.component';
import { RouterModule, Routes } from '@angular/router';

const appRoutes: Routes = [
   { path: 'Product', component: Appproduct },
   { path: 'Inventory', component: AppInventory },
];

@NgModule ({
   imports: [ BrowserModule,
   RouterModule.forRoot(appRoutes)],
   declarations: [ AppComponent,Appproduct,AppInventory],
   bootstrap: [ AppComponent ]
})
export class AppModule { }
關於以上程式需要注意以下幾點 -
appRoutes 包含 2 個路由,一個是 Appproduct 元件,另一個是 AppInventory 元件。
確保宣告這兩個元件。
RouterModule.forRoot 確保將路由新增到應用程式中。
步驟 6 - 在 app.component.ts 檔案中,新增以下程式碼。
import { Component } from '@angular/core';

@Component ({
   selector: 'my-app',
   template: `
   <ul>
      <li><a [routerLink] = "['/Product']">Product</a></li>
      <li><a [routerLink] = "['/Inventory']">Inventory</a></li>
   </ul>
   <router-outlet></router-outlet>`
})
export class AppComponent  { }
關於以上程式需要注意以下幾點 -
<router-outlet></router-outlet> 是根據使用者選擇的選項呈現元件的佔位符。
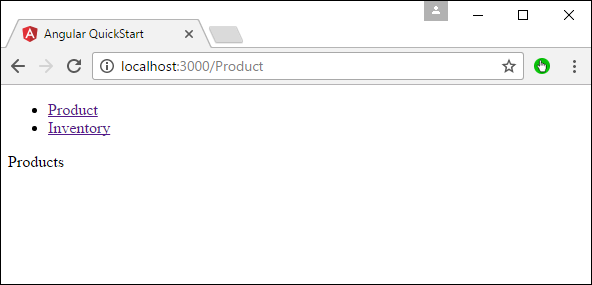
現在,儲存所有程式碼並使用 npm 執行應用程式。轉到瀏覽器,您將看到以下輸出。
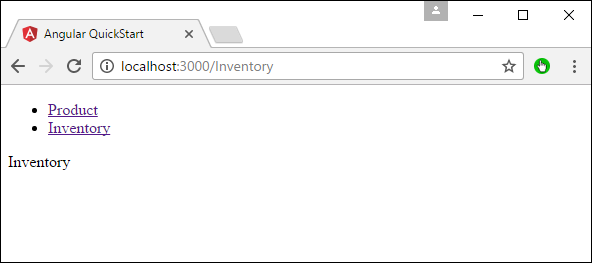
現在,如果您點選 Inventory 連結,您將獲得以下輸出。
新增錯誤路由
在路由中,還可以新增錯誤路由。如果使用者訪問應用程式中不存在的頁面,則可能會發生這種情況。
讓我們看看如何實現這一點。
步驟 1 - 新增一個 PageNotFound 元件作為 NotFound.component.ts,如下所示 -
步驟 2 - 將以下程式碼新增到新檔案。
import { Component } from '@angular/core';

@Component ({
   selector: 'my-app',
   template: 'Not Found',
})
export class PageNotFoundComponent {
}
步驟 3 - 將以下程式碼新增到 app.module.ts 檔案。
import { NgModule } from '@angular/core';
import { BrowserModule } from '@angular/platform-browser';
import { AppComponent } from './app.component';
import { Appproduct } from './product.component'
import { AppInventory } from  './Inventory.component'
import { PageNotFoundComponent } from  './NotFound.component'
import { RouterModule, Routes } from '@angular/router';

const appRoutes: Routes = [
   { path: 'Product', component: Appproduct },
   { path: 'Inventory', component: AppInventory },
   { path: '**', component: PageNotFoundComponent }
];

@NgModule ({
   imports: [ BrowserModule,
   RouterModule.forRoot(appRoutes)],
   declarations: [ AppComponent,Appproduct,AppInventory,PageNotFoundComponent],
   bootstrap: [ AppComponent ]
})

export class AppModule {
}
關於以上程式需要注意以下幾點 -
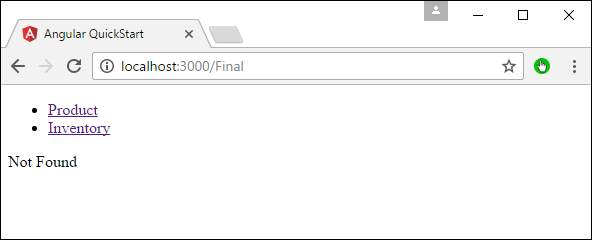
現在我們有一個額外的路由,稱為 path: '**',component: PageNotFoundComponent。因此,** 用於任何不適合預設路由的路由。它們將被重定向到 PageNotFoundComponent 元件。
現在,儲存所有程式碼並使用 npm 執行應用程式。轉到您的瀏覽器,您將看到以下輸出。現在,當您轉到任何錯誤連結時,您將獲得以下輸出。