- PySimpleGUI 教程
- PySimpleGUI - 首頁
- PySimpleGUI - 簡介
- PySimpleGUI - 環境設定
- PySimpleGUI - Hello World
- PySimpleGUI - 彈出視窗
- PySimpleGUI - 視窗類
- PySimpleGUI - 元素類
- PySimpleGUI - 事件
- PySimpleGUI - 選單欄
- PySimpleGUI - Matplotlib 整合
- PySimpleGUI - 使用 PIL
- PySimpleGUI - 偵錯程式
- PySimpleGUI - 設定
- PySimpleGUI 有用資源
- PySimpleGUI - 快速指南
- PySimpleGUI - 有用資源
- PySimpleGUI - 討論
PySimpleGUI - Hello World
使用 PySimpleGUI 建立第一個視窗
要檢查 PySimpleGUI 及其依賴項是否已正確安裝,請輸入以下程式碼並將其儲存為“hello.py”,使用任何 Python 編輯器。
import PySimpleGUI as psg
layout = [[psg.Text(text='Hello World',
   font=('Arial Bold', 20),
   size=20,
   expand_x=True,
   justification='center')],
]
window = psg.Window('HelloWorld', layout, size=(715,250))
while True:
   event, values = window.read()
   print(event, values)
   if event in (None, 'Exit'):
      break
window.close()
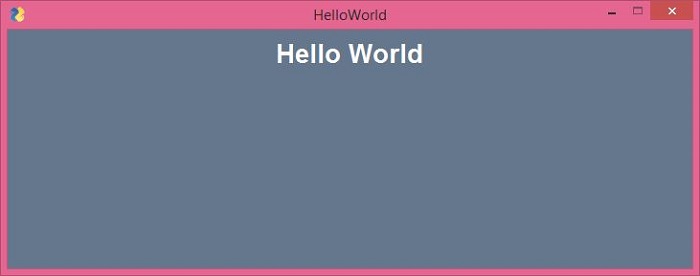
以上程式碼構建了一個帶有文字元素(相當於 Tkinter 中的標籤)的視窗,並在視窗的整個寬度居中顯示“Hello World”訊息。
從命令終端執行此程式,如下所示:
Python hello.py
程式生成的**輸出**應該類似於下面顯示的:
等效的 Tkinter 程式碼
要使用純 Tkinter 程式碼獲得類似的輸出,我們需要以下 Python 指令碼:
from tkinter import *
window=Tk()
lbl=Label(window, text="Hello World",
   fg='white', bg='#64778D',
   font=("Arial Bold", 20))
lbl.place(x=300, y=15)
window.title('HelloWorld Tk')
window['bg']='#64778D'
window.geometry("715x250+10+10")
window.mainloop()
所有其他功能保持不變,除了我們使用**waitress** 模組的**serve()** 函式啟動 WSGI 伺服器。在執行程式後訪問瀏覽器中的“/”路由,將像以前一樣顯示 Hello World 訊息。
除了函式之外,可呼叫類也可以用作檢視。可呼叫類是覆蓋了**__call__()** 方法的類。
from pyramid.response import Response
class MyView(object):
   def __init__(self, request):
      self.request = request
   def __call__(self):
      return Response('hello world')
PySimpleGUIQt
PySimpleGUI API 的物件模型已與 PySide2 包(它是 Qt 圖形工具包的 Python 埠)中定義的小部件相容。PySimpleGui 的 Qt 版本稱為 PySimpleGUIQt。它可以透過以下 PIP 命令類似地安裝:
pip3 install PySimpleGUIQt
由於此包依賴於 PySide2,因此也會安裝 PySide2。
>>> import PySide2
>>> PySide2.__version__
'5.15.2.1'
>>> import PySimpleGUIQt
>>> PySimpleGUIQt.version
'0.35.0 Released 6-Jun-2020'
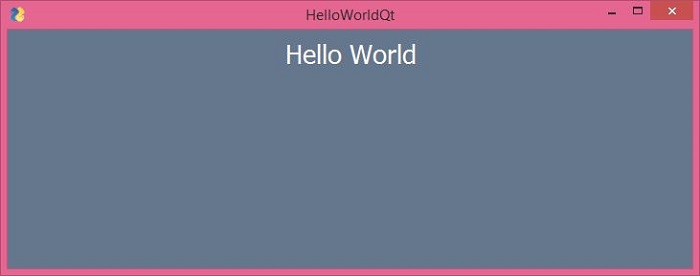
如前所述,PySimpleGui 專案最重要的功能是為一個包編寫的程式碼與另一個包完全相容。因此,前面使用的 hello.py 程式可以原樣用於 Qt 版本。唯一需要更改的是匯入 PySimpleGUIQt 而不是 PySimpleGui。
import PySimpleGUIQt as psg
layout = [[psg.Text(text='Hello World',
   font=('Arial Bold', 20),
   justification='center')],
]
window = psg.Window('HelloWorldQt', layout, size=(715,250))
while True:
   event, values = window.read()
   print(event, values)
   if event in (None, 'Exit'):
      break
window.close()
**輸出**非常相似。
等效的 PySide2 程式碼
實現相同結果的純 PySide2 程式碼如下所示:
import sys
from PySide2.QtCore import *
from PySide2.QtGui import *
from PySide2.QtWidgets import *
def window():
   app = QApplication(sys.argv)
   w = QWidget()
   w.setStyleSheet("background-color: #64778D;")

   b = QLabel(w)
   b.setText("Hello World!")
   b.setFont(QFont('Arial Bold', 20))
   b.setAlignment(Qt.AlignCenter)
   b.setStyleSheet("color: white;")
   b.setGeometry(100, 100, 715, 250)
   b.move(50, 20)

   w.setWindowTitle("HelloWorldQt")
   w.show()
   sys.exit(app.exec_())
   if __name__ == '__main__':
      window()
它將生成相同的輸出視窗。
PySimpleGUIWx
此模組封裝了 WxPython 工具包中定義的 GUI 小部件的功能。WxPython 是廣泛使用的 WxWidgets 庫(最初用 C++ 編寫)的 Python 埠。顯然,PySimpleGUIWx 依賴於 WxPython 包,因此後者將透過以下 PIP 命令自動安裝:
pip3 install PySimpleGUIWx
要確認 PySimpleGUIWx 和 WxPython 是否已正確安裝,請在 Python 終端中輸入以下語句。
>>> import PySimpleGUIWx
>>> PySimpleGUIWx.version
'0.17.1 Released 7-Jun-2020'
>>> import wx
>>> wx.__version__
'4.0.7'
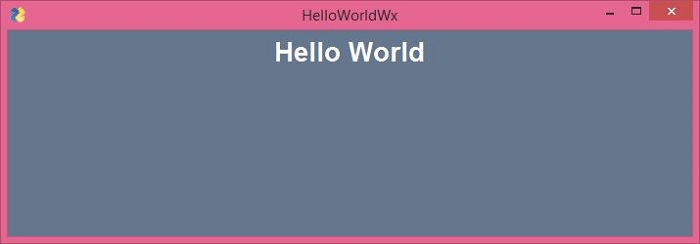
“hello.py”指令碼不需要做太多更改。我們只需要在“import”語句中將 PySimpleGUI 替換為 PySimpleGUIWx 模組即可。
import PySimpleGUIWx as psg
layout = [[psg.Text(text='Hello World',
   font=('Arial Bold', 20),
   size=(500, 5),
   justification='center')],
]
window = psg.Window('HelloWorldWx', layout, size=(715, 250))
while True:
   event, values = window.read()
   print(event, values)
   if event in (None, 'Exit'):
      break
window.close()
它將產生以下**輸出**
請注意,您需要更復雜的程式碼才能獲得類似的**純 WxPython 程式碼**輸出,如下所示:
import wx
app = wx.App()
window = wx.Frame(None, title="WxPython", size=(715, 250))
panel = wx.Panel(window)
panel.SetBackgroundColour((100, 119, 141))
label = wx.StaticText(panel, -1, style=wx.ALIGN_CENTER)
label.SetLabel("Hello World")
label.SetForegroundColour((255, 255, 255))
font = wx.Font()
font.SetFaceName("Arial Bold")
font.SetPointSize(30)
label.SetFont(font)
window.Show(True)
app.MainLoop()
它將顯示一個頂層視窗,其中包含一個文字標籤,標籤的標題為 Hello World。
PySimpleGUIWeb
Remi (REMote Interface) 是一個用於在 Web 瀏覽器中呈現的 Python 應用程式的 GUI 庫。PySimpleGUIWeb 包將原始 PySimpleGui 庫移植到 Remi,以便其應用程式可以在瀏覽器中執行。以下 PIP 命令在當前 Python 環境中安裝 PySimpleGUIWeb 和 Remi:
pip3 install PySimpleGUIWeb
在編寫應用程式之前,請檢查它們是否已正確安裝。
>>> import PySimpleGUIWeb
>>> PySimpleGUIWeb.version
'0.39.0 Released 6-Jun-2020'
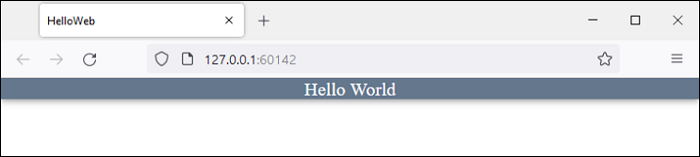
以下指令碼是原始 Hello World 程式的 PySimpleGUIWeb 版本。
import PySimpleGUIWeb as psg
layout = [[psg.Text(text='Hello World',
   font=('Arial Bold', 20),
   justification='center')]]
window = psg.Window('HelloWorldWeb', layout)
while True:
   event, values = window.read()
   print(event, values)
   if event in (None, 'Exit'):
      break
window.close()
要使用純 Remi 庫的功能獲得類似的輸出比較複雜,如下面的程式碼所示
import remi.gui as gui
from remi import start, App
class HelloWeb(App):
   def __init__(self, *args):
      super(HelloWeb, self).__init__(*args)
   def main(self):
      wid = gui.VBox(style={"background-color": "#64778D"})
      self.lbl = gui.Label('Hello World', width='100%', height='100%',
      style={ "color":"white",
         "text-align": "center",
         "font-family": "Arial Bold",
         "font-size": "20px"}
      )
      wid.append(self.lbl)
      return wid
      if __name__ == "__main__":
         start(HelloWeb, debug=True, address='0.0.0.0', port=0)
當我們執行這些程式時,Remi 伺服器啟動,瀏覽器視窗自動開啟並顯示 Hello World 訊息。
在這裡,我們看到了用 PySimpleGUI、PySimpleGUIQt、PySimpleGUIWx 和 PySimpleGUIWeb 庫編寫的 Hello World 程式。我們可以看到小部件庫保持不變。此外,當分別用純 Tkinter、PySide、WxPython 和 Remi 編寫相同的 Hello World 程式時,它比 PySimpleGUI 版本複雜得多且繁瑣得多。