- 微服務架構教程
- 微服務架構 - 首頁
- 介紹
- 微服務架構 - 擴充套件
- 微服務架構 - 藍圖
- 不同元素
- 組合模式
- 實踐SOA
- 實踐MSA
微服務架構 - 實踐SOA
在本節中,我們將開發一個基於CRUD的應用程式,使用SOA架構。在後續章節中,我們將把此服務分解成微服務,並學習SOA和微服務架構之間的基本區別。
系統配置和設定
在本節中,我們將構建一個示例CRUD應用程式,每當我們呼叫我們的服務時,它將返回一個JSON物件作為響應。我們將使用Jersey框架來開發它。以下是設定本地系統環境的步驟。
開發CRUD應用程式
步驟1 − 我們將使用NetBeans作為開發IDE。請下載並安裝NetBeans官方網站上提供的最新版本 https://netbeans.org/downloads/。
步驟2 − 開啟你的NetBeans IDE。轉到“檔案 -> 新建專案”。以下螢幕截圖將彈出。選擇“Maven”作為類別,選擇“從ArchType建立專案”作為專案,然後點選下一步。
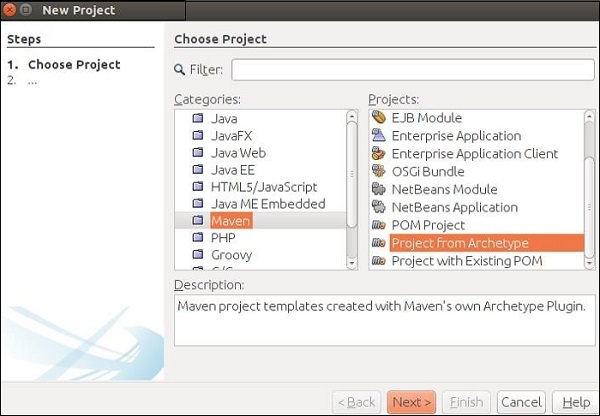
這將下載建立你的第一個Maven專案和RESTful Web服務所需的所有jar檔案。
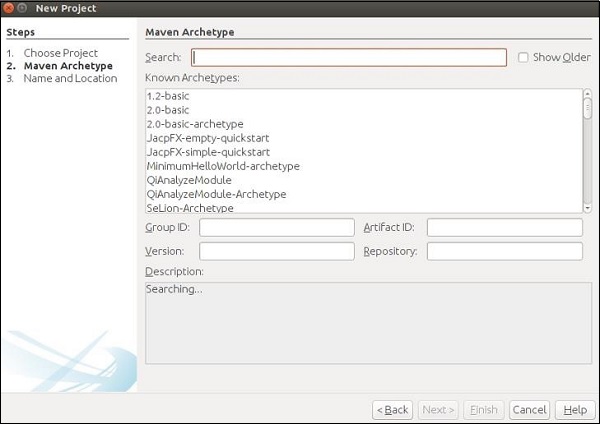
步驟3 − 在上一步中點選下一步按鈕後,將出現以下螢幕截圖。在這裡,您需要指定Maven原型。
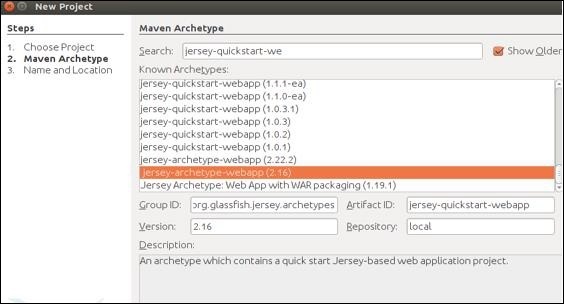
在搜尋框中,搜尋“Jersey-archType-Webapp(2.16)”並勾選“顯示舊版本”複選框。
步驟4 − 選擇後,您將被重定向到以下螢幕。從列表中選擇首選jar,然後點選下一步繼續。
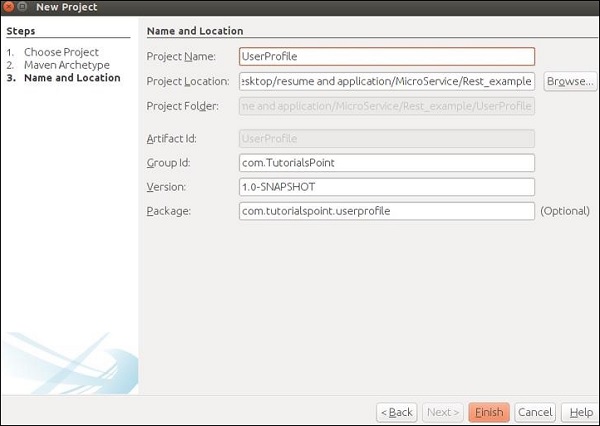
步驟5 − 在此步驟中,您需要提供專案名稱及其GroupId以及包詳細資訊。提供所有這些資訊後,點選完成繼續。
步驟6 − 工作區設定完成。專案目錄將如下所示。

檢視你的“依賴項”資料夾,您會發現Maven已自動下載此專案所需的所有jar檔案。

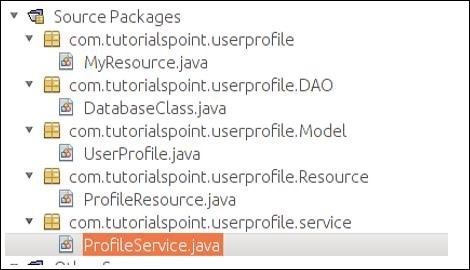
步驟7 − 您的工作區已設定好,您可以開始編碼了。繼續建立四個類和包,如以下螢幕截圖所示。您可以發現MyResource.java已由Maven建立,因為Maven足夠智慧,可以檢測到您將要構建自己的Web服務。
步驟8 − 完成上述步驟後,我們將構造我們的POJO類UserProfile.java,如下所示。
package com.tutorialspoint.userprofile.Model;

import javax.xml.bind.annotation.XmlRootElement;

@XmlRootElement
public class UserProfile {
   private long ProId;
   private String FName;
   private String LName;
   private String Add;
   public UserProfile(){}

   public UserProfile(long Proid, String Fname, String Lname,String Add) {
      this.ProId = Proid;
      this.FName = Fname;
      this.LName = Lname;
      this.Add = Add;
   }
   public long getProId() {
      return ProId;
   }
   public void setProId(long ProId) {
      this.ProId = ProId;
   }
   public String getFName() {
      return FName;
   }
   public void setFName(String FName) {
      this.FName = FName;
   }
   public String getLName() {
      return LName;
   }
   public void setLName(String LName) {
      this.LName = LName;
   }
   public String getAdd() {
      return Add;
   }
   public void setAdd(String Add) {
      this.Add = Add;
   }
}
步驟9 − 現在我們將建立我們的資料庫類。由於這是學習資料的一部分,我們不會使用任何資料庫作為我們的資料庫。我們將使用內建的Java記憶體作為我們的臨時記憶體。如您在以下程式碼集中看到的,我們將使用MAP作為我們的資料庫。我們執行的所有Web服務操作都將在此類中定義的MAP上進行。
package com.tutorialspoint.userprofile.DAO;

import com.tutorialspoint.userprofile.Model.UserProfile;

import java.util.HashMap;
import java.util.Map;

public class DatabaseClass {
   private static Map<Long,UserProfile> messages = new HashMap<Long,UserProfile>();
   public static Map<Long,UserProfile> getUsers() {
      return messages;
      // Each time this method will return entire map as an instance of database
   }
}
步驟10 − 現在讓我們構建我們的服務類。繼續並在“ProfileService.java”類中複製貼上以下程式碼集。這是我們將宣告所有要公開給外部世界的Web服務方法的類。我們需要建立我們資料庫類的一個引用,以便可以在此類中訪問我們的臨時資料庫。
package com.tutorialspoint.userprofile.service;

import com.tutorialspoint.userprofile.DAO.DatabaseClass;
import com.tutorialspoint.userprofile.Model.UserProfile;

import java.util.ArrayList;
import java.util.List;
import java.util.Map;

public class ProfileService {
   private Map<Long,UserProfile> Userprofiles = DatabaseClass.getUsers();

   // Creating some predefine profile and populating the same in the map
   public ProfileService() {
      UserProfile m1 = new UserProfile(1L,"Tutorials1","Point1","TutorialsPoint.com");
      UserProfile m2 = new UserProfile(2L,"Tutorials2","Point2","TutorialsPoint.com2");
      UserProfile m3 = new UserProfile(3L,"Tutorials3","Point3","TutorialsPoint.com3");
      UserProfile m4 = new UserProfile(4L,"Tutorials4","Point4","TutorialsPoint.com4");

      Userprofiles.put(1L, m1);
      Userprofiles.put(2L, m2);
      Userprofiles.put(1L, m3);
      Userprofiles.put(2L, m4);
   }

   //Method to fetch all profile
   public List<UserProfile> getAllProfile() {
      List<UserProfile> list = new ArrayList<UserProfile>(Userprofiles.values());
      return list;
   }  // Method to fetch only one profile depending on the ID provided

   public UserProfile getProfile(long id) {
      return Userprofiles.get(id);
   }  //Method to add profile

   public UserProfile addProfile(UserProfile UserProfile) {
      UserProfile.setProId(Userprofiles.size()+1);
      Userprofiles.put(UserProfile.getProId(), UserProfile);
      return UserProfile;
   }  //method to update Profile

   public UserProfile UpdateProfile(UserProfile UserProfile) {
      if(UserProfile.getProId()<=0) {
         return null;
      } else {
         Userprofiles.put(UserProfile.getProId(), UserProfile);
         return UserProfile;
      }
   } //method to delete profile

   public void RemoveProfile(long Id) {
      Userprofiles.remove(Id);
   }
}
步驟11 − 在此步驟中,我們將建立我們的資源類,該類將與URL連結,並呼叫相應的服務。
package com.tutorialspoint.userprofile.Resource;

import com.tutorialspoint.userprofile.Model.UserProfile;
import com.tutorialspoint.userprofile.service.ProfileService;

import java.util.List;
import javax.ws.rs.Consumes;
import javax.ws.rs.DELETE;
import javax.ws.rs.GET;
import javax.ws.rs.POST;
import javax.ws.rs.PUT;
import javax.ws.rs.Path;
import javax.ws.rs.PathParam;
import javax.ws.rs.Produces;
import javax.ws.rs.core.MediaType;

@Path("/Profile")
@Consumes(MediaType.APPLICATION_XML)
@Produces(MediaType.APPLICATION_XML)

public class ProfileResource {
   ProfileService messageService = new ProfileService();

   @GET
   public List<UserProfile> getProfile() {
      return messageService.getAllProfile();
   }

   @GET
   @Path("/{ProID}")
   public UserProfile getProfile(@PathParam("ProID")long Id) {
      return messageService.getProfile(Id);
   }

   @POST
   public UserProfile addProfile(UserProfile profile) {
      return messageService.addProfile(profile);
   }

   @PUT
   @Path("/{proID}")
   public UserProfile UpdateProfile(@PathParam("proID")long Id,UserProfile UserProfile) {
      UserProfile.setProId(Id);
      return messageService.UpdateProfile(UserProfile);
   }

   @DELETE
   @Path("/{ProID}")
   public void deleteProfile(@PathParam("ProID")long Id) {
      messageService.RemoveProfile(Id);
   }
}
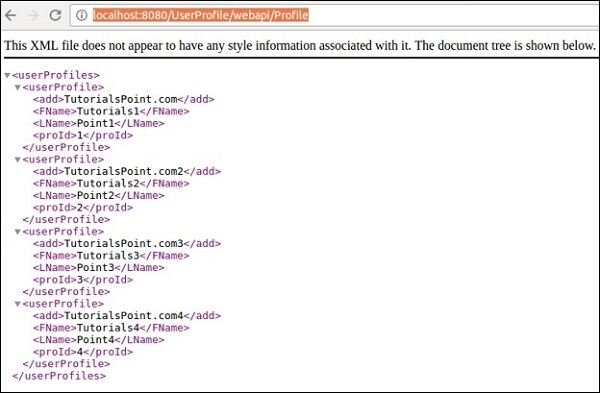
步驟12 − 清理構建專案並執行它。如果一切順利,則在訪問https://:8080/UserProfile/webapi/Profile”URL時,您應該在瀏覽器中獲得以下輸出。
您可以看到使用XML表示法填充了不同的條目。
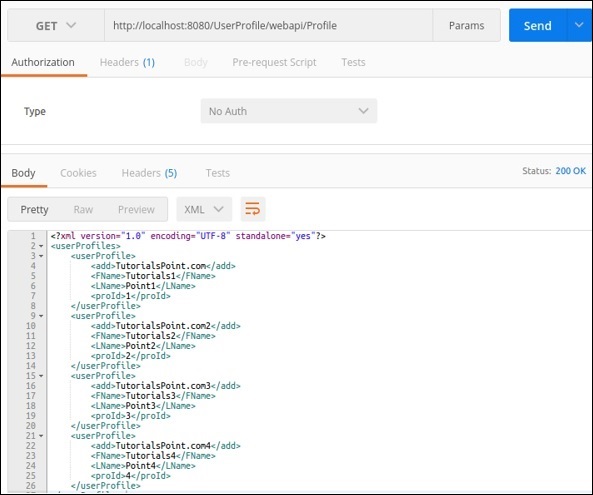
可以透過使用適當的方法URL應用Postman來測試不同的方法。
@GET方法 − 以下螢幕截圖演示瞭如何獲得get請求的所需結果,該請求返回所有使用者詳細資訊。
@POST − 以下請求可用於測試我們的Post方法。請注意proId是如何自動生成的。
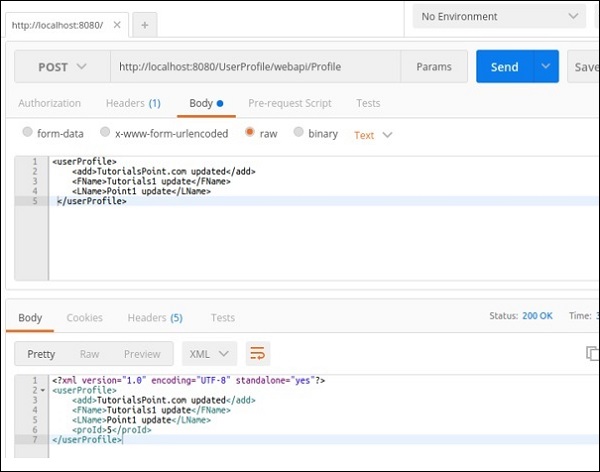
@PUT − 此方法將更新條目。以下螢幕截圖演示了Jersey如何從請求URL中獲取proId並更新相同使用者配置檔案回覆。

同樣,您可以檢查Web服務中可用的其他方法。
在上一節中,我們開發了一個服務,它將公開CRUD功能。現在,每當我們嘗試在應用程式中實現此服務時,都需要建立此應用程式的客戶端並將其附加到我們的應用程式。在本節中,我們將學習如何使用微服務概念構建此功能。以下是使用上述步驟構建的應用程式的示意圖。
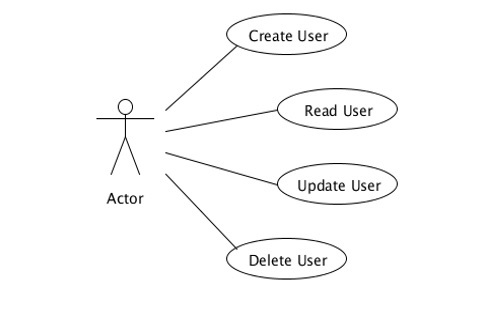
參與者應該是我們服務的入口點。在這種情況下,“ProfileResource.java”承擔參與者的職責。此類將呼叫不同的方法來執行不同的操作,例如新增、更新和刪除。
CRUD應用程式的分解
根據微服務的主要原則,每個模組都應該只有一個業務任務,因此一個參與者不應該負責所有四個CRUD功能。請考慮以下示例,我們在此示例中引入了一些新角色,以便您可以清楚地瞭解微服務是SOA的架構表示。

“主要使用者”是與“應用程式控制器”通訊以滿足其需求的使用者。“應用程式控制器”只是根據終端使用者的請求呼叫不同的“資源管理器”。“資源管理器”完成需要完成的工作。讓我們快速瞭解應用程式不同單元的不同角色。
終端使用者/主要使用者 − 嚮應用程式控制器請求某些資源。
應用程式 − 接收請求並將其轉發到特定的資源管理器。
資源管理器 − 執行更新、刪除和新增使用者的實際工作。
請參閱一個類的總責任是如何分佈在其他不同類中的。