
 資料結構
資料結構 網路
網路 關係資料庫管理系統 (RDBMS)
 作業系統
作業系統 Java
Java iOS
iOS HTML
HTML CSS
CSS Android
 Python
 C語言程式設計
 C++
C++ C#
C# MongoDB
 MySQL
MySQL Javascript
 PHP
PHP如何使用Tkinter從列表輸入生成列表框?
Tkinter是一個強大的庫,用於在Python中建立圖形使用者介面(GUI)。其重要組成部分之一是Listbox小部件,它允許使用者顯示專案列表。雖然使用靜態資料填充Listbox很簡單,但從列表輸入動態生成它提供了更靈活和可擴充套件的解決方案。在本教程中,我們將探討如何允許Tkinter從列表輸入生成Listbox。
理解Tkinter Listbox
在深入研究動態Listbox生成之前,瞭解Tkinter Listbox的基本結構至關重要。Listbox是一個小部件,它在一個可滾動的框中顯示專案列表。列表中的每個專案都分配一個索引,從0開始。您可以與Listbox互動,根據其索引選擇和操作這些專案。
靜態Listbox填充
讓我們從建立一個帶有靜態Listbox的簡單Tkinter應用程式開始。
示例
import tkinter as tk

# Create the main Tkinter window
root = tk.Tk()
root.title("Static Listbox Example")
root.geometry("720x250")

# Sample list data
items = ["Python", "Java", "Javascript", "Artificial Intelligence", "Tutorialspoint.com"]

# Creating a Listbox and populating it with static data
listbox = tk.Listbox(root)
for item in items:
   listbox.insert(tk.END, item)

# Pack the Listbox to make it visible
listbox.pack()

# Run the Tkinter main loop
root.mainloop()
輸出
這段程式碼建立了一個基本Tkinter視窗,其中包含一個包含靜態專案的Listbox。

現在,讓我們繼續從列表輸入動態生成Listbox。
動態Listbox生成
要從列表輸入動態生成Listbox,我們需要建立一個可重用的函式,該函式接受一個列表並相應地建立Listbox。我們還將包括其他功能,例如捲軸,以實現更好的導航。
示例
import tkinter as tk
# Defining the generate_listbox() function
def generate_listbox(root, items):
listbox = tk.Listbox(root)
for item in items:
listbox.insert(tk.END, item)
return listbox
# Defining the main function
def main():
root = tk.Tk()
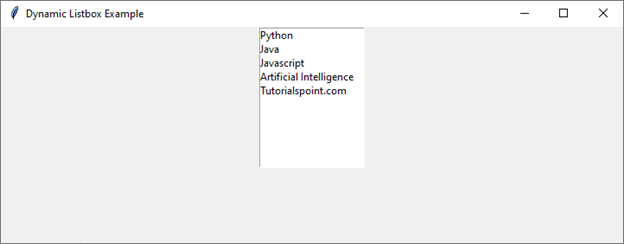
root.title("Dynamic Listbox Example")
root.geometry("720x250")
# Sample list data
dynamic_items = ["Python", "Java", "Javascript", "Artificial Intelligence", "Tutorialspoint.com"]
# Generating a dynamic Listbox
dynamic_listbox = generate_listbox(root, dynamic_items)
dynamic_listbox.pack()
# Run the Tkinter main loop
root.mainloop()
if __name__ == "__main__":
main()
在這個例子中,`generate_listbox`函式接受Tkinter根視窗和專案列表作為引數。它建立一個Listbox,用給定的專案填充它,並返回Listbox小部件。然後,主函式使用此函式生成動態Listbox並在Tkinter視窗中顯示它。
輸出
執行程式碼後,您將獲得以下輸出視窗:
增強功能:新增捲軸
為了改善使用者體驗,尤其是在處理長列表時,向Listbox新增捲軸至關重要。讓我們修改`generate_listbox`函式以包含垂直和水平捲軸。
示例
import tkinter as tk
# Defining the generate_listbox() function
def generate_listbox(root, items):
frame = tk.Frame(root)
scrollbar_y = tk.Scrollbar(frame, orient=tk.VERTICAL)
scrollbar_x = tk.Scrollbar(frame, orient=tk.HORIZONTAL)
listbox = tk.Listbox(frame, yscrollcommand=scrollbar_y.set, xscrollcommand=scrollbar_x.set)
for item in items:
listbox.insert(tk.END, item)
scrollbar_y.config(command=listbox.yview)
scrollbar_x.config(command=listbox.xview)
scrollbar_y.pack(side=tk.RIGHT, fill=tk.Y)
scrollbar_x.pack(side=tk.BOTTOM, fill=tk.X)
listbox.pack(side=tk.LEFT, fill=tk.BOTH, expand=True)
return frame
# Defining the main function
def main():
root = tk.Tk()
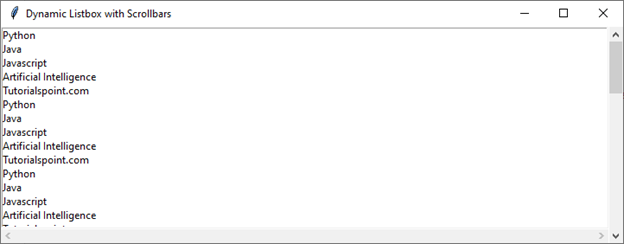
root.title("Dynamic Listbox with Scrollbars")
root.geometry("720x250")
# Sample list data
dynamic_items = ["Python", "Java", "Javascript", "Artificial Intelligence", "Tutorialspoint.com"] * 10
# Generating a dynamic Listbox with scrollbars
dynamic_listbox = generate_listbox(root, dynamic_items)
dynamic_listbox.pack(fill=tk.BOTH, expand=True)
# Run the Tkinter main loop
root.mainloop()
if __name__ == "__main__":
main()
在這個增強版本中,我們將Listbox和捲軸封裝在一個框架中。`yscrollcommand`和`xscrollcommand`引數用於將捲軸連結到Listbox,`config`方法用於建立此連線。然後,捲軸將位於Listbox的右側(對於垂直捲軸)和底部(對於水平捲軸)。
輸出
執行程式碼後,您將獲得以下輸出視窗:
結論
透過引入可重用的函式,我們能夠建立動態Listbox,無縫地適應變化的資料需求。加入捲軸進一步完善了使用者體驗,尤其是在處理大量列表時。

瀏覽量:329
