
 資料結構
資料結構 網路
網路 RDBMS
RDBMS 作業系統
作業系統 Java
Java iOS
iOS HTML
HTML CSS
CSS Android
 Python
 C 程式設計
 C++
C++ C#
C# MongoDB
 MySQL
MySQL Javascript
 PHP
PHP使用 Firebase 獲取 URL
Firebase 是一種後端即服務 (BAAS),提供多種服務。其服務包括身份驗證、雲端儲存、託管等。基本上,它使開發人員能夠輕鬆地在移動或 Web 應用程式中整合身份驗證、資料庫等。
在本教程中,我們將探討 Firebase 的雲端儲存。我們將學習如何將影像上傳到 Firebase 雲端儲存並獲取影像的 URL,以便在任何地方使用。
使用者應按照以下步驟設定 Firebase 帳戶並將其與單頁 Web 應用程式整合。
步驟 1 − 首先,訪問 Firebase 網站並建立帳戶。
步驟 2 − 現在,訪問 https://console.firebase.google.com/u/0/ 開啟 Firebase 控制檯。
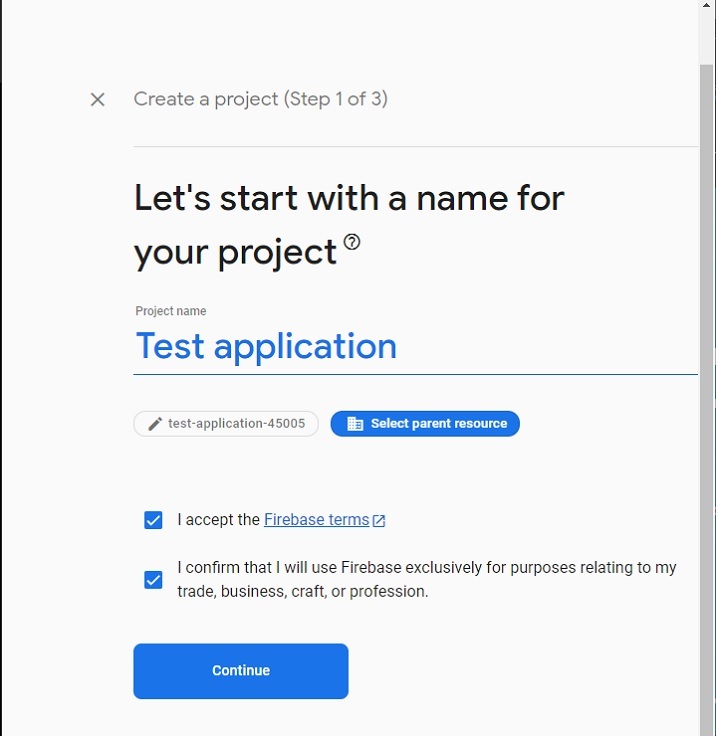
步驟 3 − 現在,單擊“建立專案”按鈕開始建立新專案。

步驟 4 − 在這裡,新增專案名稱,接受條款和條件,然後單擊“繼續”按鈕。
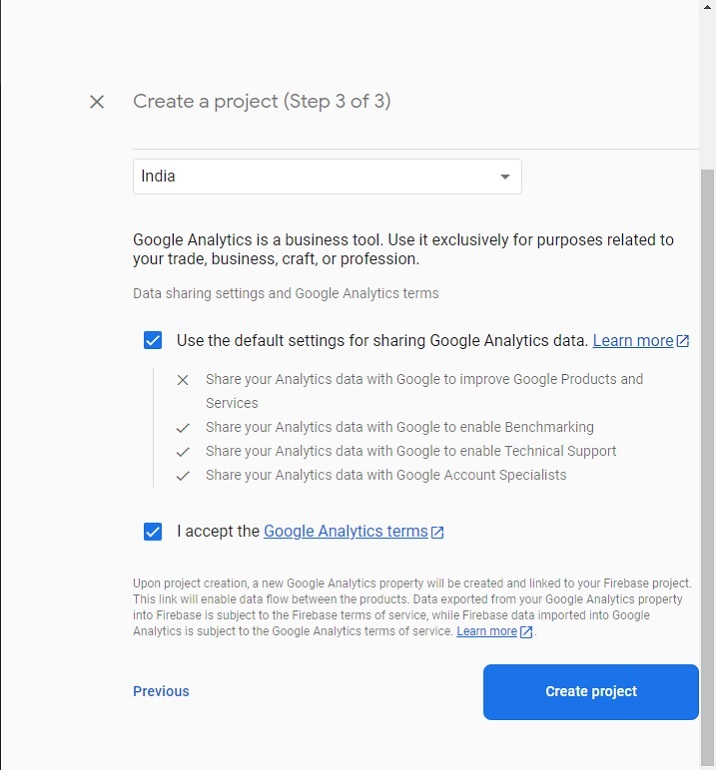
步驟 5 − 選擇首選位置,接受條款和條件,然後單擊“建立專案”按鈕。
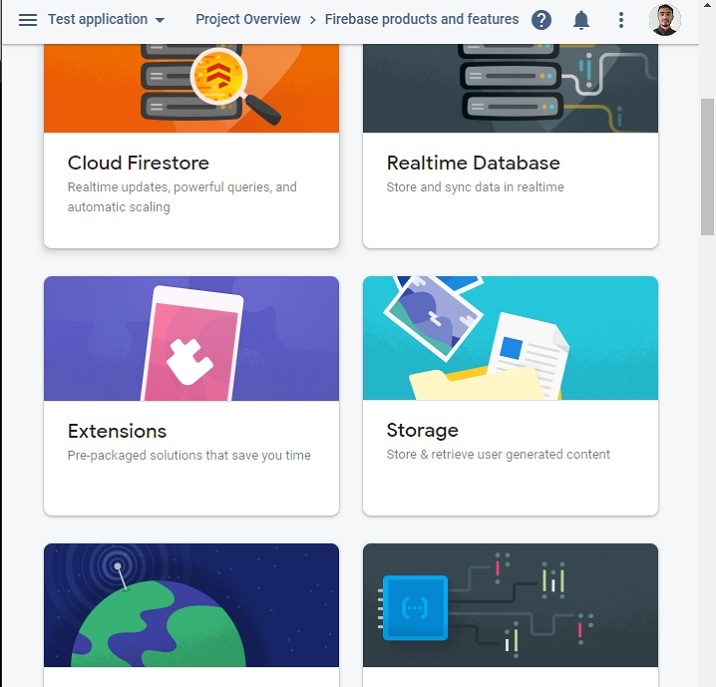
步驟 6 − 它將重定向到以下頁面。在這裡,單擊“儲存”卡片元素。之後,單擊“開始使用”按鈕。
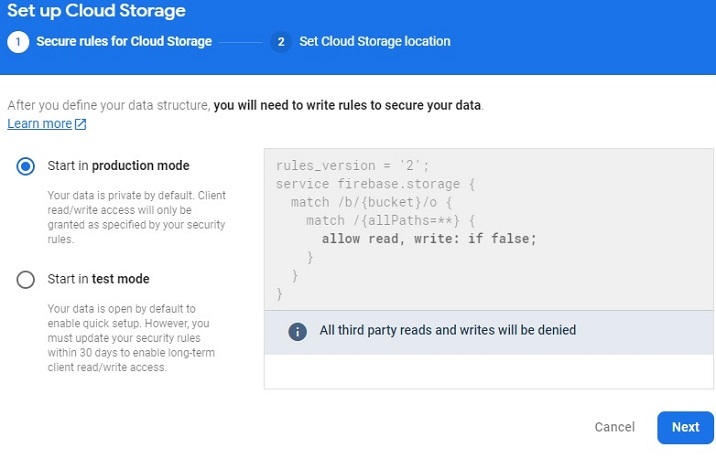
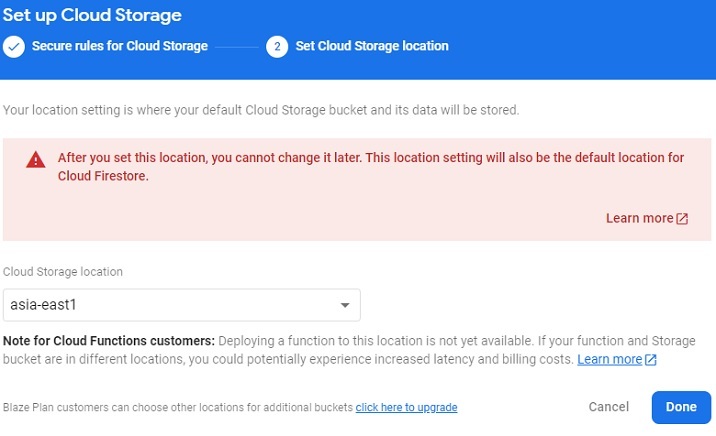
步驟 7 − 在這裡,選擇以“測試”或“生產”模式啟動。在這裡,我們將選擇“測試”模式進行測試,然後單擊“下一步”按鈕。
步驟 8 − 現在,選擇最靠近您的儲存首選位置,然後單擊“完成”按鈕。它將開始為儲存建立預設儲存桶。
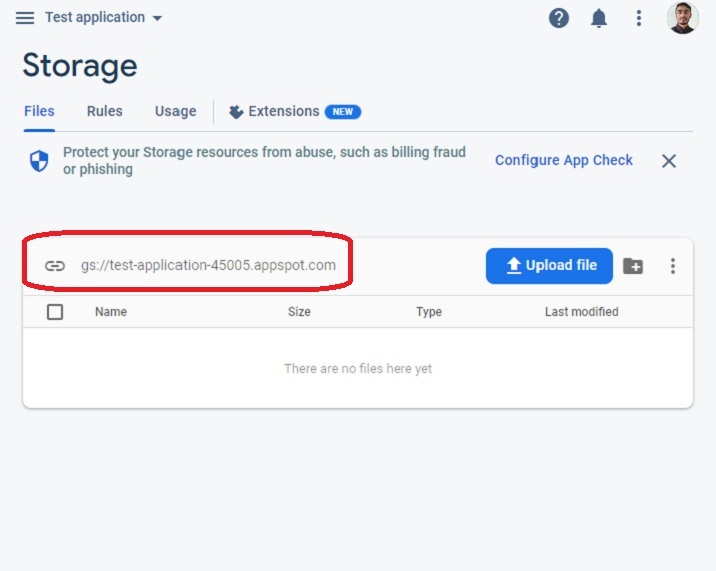
步驟 9 − 建立儲存桶將重定向到以下頁面。從此處複製儲存桶 ID,我們將在示例中使用它。
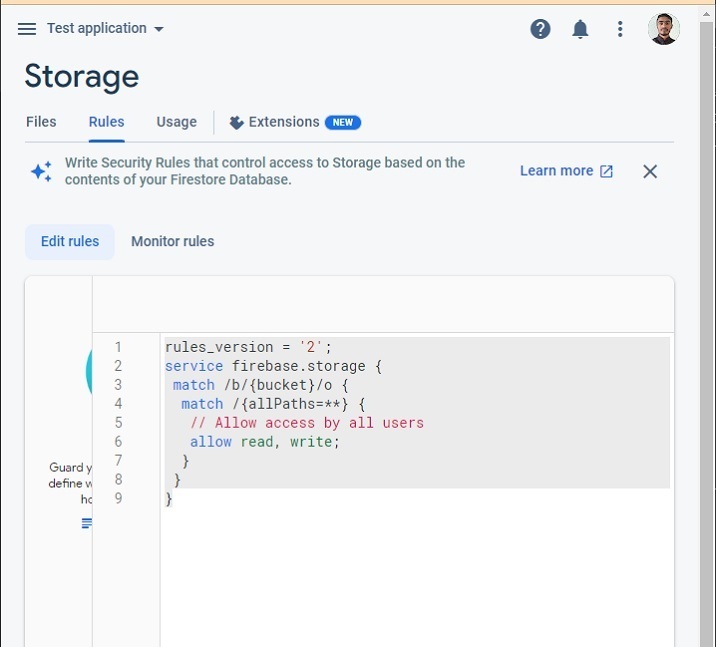
步驟 10 − 現在,轉到“規則”選項卡並編輯規則。之後,新增以下程式碼以允許所有使用者在未經身份驗證的情況下上傳影像檔案。
rules_version = '2';
service firebase.storage {
   match /b/{bucket}/o {
      match /{allPaths=**} {
         // Allow access by all users
         allow read, write;
      }
   }
}
我們現在已完成 Firebase 專案設定,以便將影像上傳到儲存桶。
示例
以下示例在使用者上傳任何影像檔案時呼叫 uploadFile() 函式。在 uploadFile() 函式中,我們將影像檔案上傳到 Firebase 儲存,獲取影像 URL,並使用 URL 更改影像的“src”屬性的值。
使用者應按照以下步驟操作給定示例。
步驟 1 − 在 <head> 標記中新增 Firebase CDN,以便在單頁網站中使用 Firebase。
步驟 2 − 在 HTML 中,新增一個進度條,我們將根據影像上傳百分比從 JavaScript 更新其進度。此外,新增用於上傳檔案的輸入,該輸入應在使用者上傳檔案時呼叫 uplaodFile() 函式。此外,新增具有空“src”值的“img”元素,並在獲取下載 URL 後初始化“src”值。
步驟 3 − 在 JavaScript 中,當用戶上傳檔案時訪問它,並使用 Date() 物件將唯一的檔名儲存到“fileName”變數中。
步驟 4 − 現在,初始化 Firebase 儲存。
步驟 5 − 現在開始將影像檔案上傳到儲存桶中的首選位置,並根據上傳的百分比上傳進度值。
步驟 6 − 上傳完成後,使用 getDownalodURL() 方法獲取影像 URL 並將其設定為影像的“src”屬性的值,以便在網頁上顯示。
在輸出中,使用者可以觀察到它顯示了上傳的影像。
<html>
<head>
   <!-- Include Firebase SDK -->
   <script src="https://www.gstatic.com/firebasejs/8.6.8/firebase-app.js"></script>
   <script src="https://www.gstatic.com/firebasejs/8.6.8/firebase-storage.js"></script>
   <style>
      img {
         width: 500px;
         height: auto;
      }
   </style>
</head>
<body>
   <h2>Uploading image to <i>Firebase and getting URL.</i></h2>
   <h3>Upload image file below.</h3>
   <form>
      <!-- Showing image uploading progress bar -->
      <progress value = "0" id = "progressBar" max = "100"> 0% </progress> <br> <br>
      <!-- file input -->
      <input id = "file" type = "file" onchange = "uploadFile()"> <br> <br>
      <!-- Showing uploaded image -->
      <img src = "" alt = "" id = "uploadedImage">
   </form>
   <script>
      // Firebase configurations
      var config = {
         apiKey: "AIzaSyBsYILuhF4wOGOe0rFhPudhVWO3cGh2z18",
         authDomain: "localhost",
         projectId: "test-application-45005",
         storageBucket: "gs://test-application-45005.appspot.com",
      };

      // Initialize the Firebase app
      firebase.initializeApp(config);
      var currentFile;
      function uploadFile() {
         var fileInput = document.getElementById("file");

         // select the uploaded file
         currentFile = fileInput.files[0];

         // give a unique name to the file
         var fileName = "image-" + Date.now();

         // Give reference to the bucket path where we require to store the uploaded image
         var storageRef = firebase.storage().ref('/images/' + fileName);

         // upload file to selected storage reference
         var uploadingElement = storageRef.put(currentFile);

         // When uploading of the image starts, change the value of the progress bar
         uploadingElement.on('state_changed', (uploadingImage) => {
            var progress =
            (uploadingImage.bytesTransferred / uploadingImage.totalBytes) * 100;
            var progressBar = document.getElementById('progressBar');
            progressBar.value = progress;
         }, function (error) {
            console.log(error);
         }, function () {

            // Get the image URL
            uploadingElement.snapshot.ref.getDownloadURL().then(
            function (imageURL) {
               // set image URL as a value of the 'src' attribute of the image element
               let img = document.getElementById('uploadedImage');
               img.src = imageURL;
            });
         });
      }
   </script>
</body>
</html>
使用者學習瞭如何使用 JavaScript 將影像上傳到 Firebase 雲端儲存並獲取影像 URL。在即時應用程式中,使用 Firebase 時,獲取上傳影像(例如使用者個人資料照片和其他影像)的 URL 非常有用。
此外,Firebase 允許開發人員非常快速地設定上傳影像並獲取其 URL。

2K+ 閱讀量
