- Docker 教程
- Docker - 首頁
- Docker - 概述
- Docker - Linux 安裝
- Docker - 安裝
- Docker - Hub
- Docker - 映象
- Docker - 容器
- Docker - 登錄檔
- Docker - Compose
- Docker - 容器操作
- Docker - 架構
- Docker - 層
- Docker - 容器與主機
- Docker - 配置
- Docker - 容器與 Shell
- Docker - Dockerfile
- Docker - 構建檔案
- Docker - 公共倉庫
- Docker - 埠管理
- Docker - Web 伺服器
- Docker - 命令
- Docker - 容器連結
- Docker - 資料儲存
- Docker - 卷
- Docker - 網路
- Docker - 安全
- Docker - 工具箱
- Docker - 雲
- Docker - 構建雲
- Docker - 日誌
- Docker - 持續整合
- Docker - Kubernetes 架構
- Docker - Kubernetes 工作原理
- Docker - 生成式AI
- Docker - 託管
- Docker - 最佳實踐
- Docker 服務設定
- Docker - Node.js 設定
- Docker - MongoDB 設定
- Docker - NGINX 設定
- Docker - ASP.Net 設定
- Docker - MySQL 設定
- Docker - Go 設定
- Docker - Rust 設定
- Docker - Apache 設定
- Docker - MariaDB 設定
- Docker - Jupyter 設定
- Docker - Portainer 設定
- Docker - Rstudio 設定
- Docker - Plex 設定
- Docker 設定 - Flame
- Docker 設定 - PostgreSQL
- Docker 設定 - Mosquitto
- Docker 設定 - Grafana
- Docker 設定 - Nextcloud
- Docker 設定 - Pawns
- Docker 設定 - Ubuntu
- Docker 設定 - RabbitMQ
- Docker - Python 設定
- Docker - Java 設定
- Docker - Redis 設定
- Docker - Alpine 設定
- Docker - BusyBox 設定
- Docker 設定 - Traefik
- Docker 設定 - WordPress
- Docker 有用資源
- Docker - 快速指南
- Docker - 有用資源
- Docker - 討論
Docker - MongoDB 設定
Docker憑藉其出色的容器化特性,提供了穩定一致的打包環境,改變了我們開發、部署和管理應用程式的方式。
將應用程式的MongoDB資料庫容器化將有助於簡化開發、測試和部署流程。本章將引導您在Docker容器內設定MongoDB例項,並建立一個基本的Node.js應用程式與之互動並執行基本的CRUD操作。
先決條件
在開始之前,請確保您擁有以下內容:
- Docker 安裝 − 請訪問 https://www.docker.com/get-started,下載並安裝Docker。
- 已安裝 Node.js 和 npm(或 yarn) − 您需要從 https://nodejs.com.tw/ 下載並安裝 Node.js。Node Package Manager (npm) 已包含在 Node.js 中。
- Docker 基礎知識 − 瞭解最常見的Docker概念(如映象和容器)以及相關的命令非常有用。
- MongoDB 知識 − 掌握MongoDB資料庫、集合和文件的基礎知識就足夠入門了。
本章將演示一個使用Node.js和MongoDB Node.js驅動程式的簡單應用程式。使用它,我們可以直接與在Docker容器中執行的MongoDB資料庫對話,並執行許多型別的CRUD操作。
設定 MongoDB Docker 映象
讓我們拉取官方的MongoDB Docker映象。此映象將預裝MongoDB資料庫及其依賴項。您可以開啟終端並執行以下命令:
$ docker pull mongo
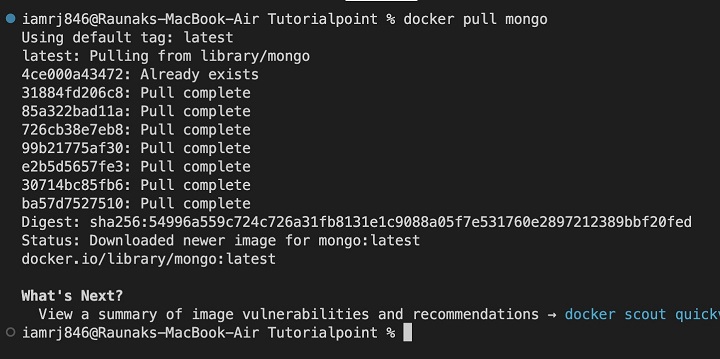
執行此命令後,您將從Docker Hub下載最新的MongoDB映象。
執行 MongoDB 容器
下載MongoDB映象後,我們可以建立並執行MongoDB容器。讓我們使用預設配置執行容器:
$ docker run --name my-mongo -d -p 27017:27017 mongo
- --name my-mongo − 這將為容器分配一個名稱,以便於引用。
- -d − 這將以分離模式執行容器,允許它在後臺執行。
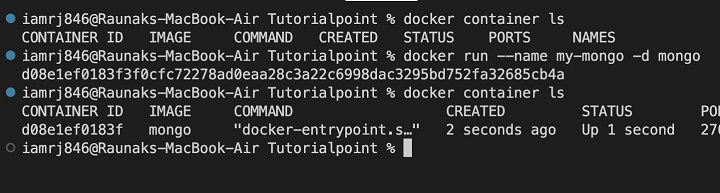
現在,您可以看到上述命令已在名為my-mongo的Docker容器中啟動了一個MongoDB例項。
下一步,讓我們建立一個基本的Node.js應用程式來與這個MongoDB容器互動。
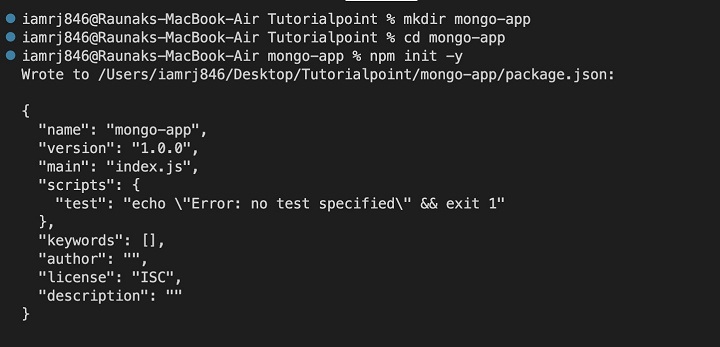
建立基本的 Node.js 應用程式
讓我們建立一個新的Node.js專案目錄:
mkdir mongo-app
cd mongo-app
初始化一個新的Node.js專案:
npm init -y
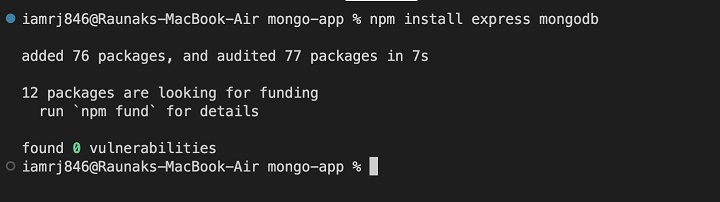
安裝所需的依賴項:
npm install express mongodb
- Express − 用於建立基本的Web伺服器。
- Mongodb − 用於與MongoDB資料庫互動。
這是您可以使用的專案目錄結構:
mongo-app/

├── public/

│   └── index.html

│   └── script.js

├── index.js

├── package.json

├── Dockerfile
您可以在package.json檔案中使用以下程式碼:
{

   "name": "mongo-app",

   "version": "1.0.0",

   "description": "",

   "main": "index.js",

   "scripts": {

      "start": "node index.js"

   },

   "dependencies": {

      "express": "^4.18.2",

      "mongodb": "^5.1.0"

   }

}
對於index.html檔案,您可以使用以下程式碼:
<!DOCTYPE html>
<html lang="en">
<head>
   <meta charset="UTF-8">
   <meta name="viewport" content="width=device-width, initial-scale=1.0">
   <title>MongoDB App</title>
   <link rel="stylesheet"
      href="https://cdn.jsdelivr.net/npm/bootstrap@5.3.2/dist/css/bootstrap.min.css"
      crossorigin="anonymous">
</head>
<body>
   <div class="container">
      <h1>MongoDB Data</h1>
      <table class="table">
         <thead>
            <tr>
               <th>Name</th>
               <th>Age</th>
               <th>Actions</th>
            </tr>
         </thead>
         <tbody id="data-table">
         </tbody>
      </table>

      <form id="create-form">
         <div class="mb-3">
            <label for="name" class="form-label">Name</label>
            <input type="text" class="form-control" id="name" name="name">
         </div>
         <div class="mb-3">
            <label for="age" class="form-label">Age</label>
            <input type="number" class="form-control" id="age" name="age">
         </div>
         <button type="submit" class="btn btn-primary">Create</button>
      </form>
   </div>

   <script src="https://cdn.jsdelivr.net/npm/bootstrap@5.3.2/dist/js/bootstrap.bundle.min.js"
      crossorigin="anonymous"></script>
   <script src="script.js"></script>
</body>
</html>
說明
- 我們包含了Bootstrap CSS和JavaScript檔案用於樣式設定。
- HTML結構包括一個用於顯示資料的表格和一個用於建立新記錄的表單。
- 我們添加了一個script標籤來連結到一個script.js檔案,我們將在其中處理JavaScript邏輯。
讓我們更新index.js檔案,以便它可以服務index.html檔案並處理資料獲取、插入、更新和刪除請求。
const express = require('express');
const MongoClient = require('mongodb').MongoClient;
const path = require('path');
const bodyParser = require('body-parser');
const ObjectId = require('mongodb').ObjectId;

const app = express();
const port = 3000;

app.use(bodyParser.json());
app.use(express.static(path.join(__dirname, 'public')));

const uri = "mongodb://my-mongo:27017"; // Replace with your MongoDB connection string
const client = new MongoClient(uri);

async function run() {
   try {
      await client.connect();
      const database = client.db('mydatabase');
      const collection = database.collection('mycollection');

      app.get('/data', async (req, res) => {
         const result = await collection.find().toArray();
         res.json(result);
      });

      app.post('/create', async (req, res) => {
         const { name, age } = req.body;
         const result = await collection.insertOne({ name, age });
         res.json(result);
      });

      app.put('/update/:id', async (req, res) => {
         const { id } = req.params;
         const { name, age } = req.body;
         const result = await collection.updateOne({ _id: new ObjectId(id) }, { $set: { name, age } });
         res.json(result);
      });

      app.delete('/delete/:id', async (req, res) => {
         const { id } = req.params;
         const result = await collection.deleteOne({ _id: new ObjectId(id) });
         res.json(result);
      });

      app.listen(port, () => {
         console.log(`Server listening on port ${port}`);
      });
   } catch (err) {
      console.error(err);
   }
}

run().catch(console.dir);
請注意,我們必須在public目錄中建立一個script.js檔案來處理資料獲取和表單提交。
const dataTableBody = document.getElementById('data-table');
const createForm = document.getElementById('create-form');

// Fetch data from the server
fetch('/data')
   .then(response => response.json())
   .then(data => {
      data.forEach(item => {
         const row = document.createElement('tr');
         const nameCell = document.createElement('td');
         const ageCell = document.createElement('td');
         nameCell.textContent = item.name;
         ageCell.textContent = item.age;
         row.appendChild(nameCell);
         row.appendChild(ageCell);
         dataTableBody.appendChild(row);
      });
   })
   .catch(error => console.error(error));

// Handle form submission
createForm.addEventListener('submit', (event) => {
   event.preventDefault();
   const name = document.getElementById('name').value;
   const age = document.getElementById('age').value;

   fetch('/create', {
      method: 'POST',
      headers: {
         'Content-Type': 'application/json'
      },
      body: JSON.stringify({ name, age })
   })
   .then(response => response.json())
   .then(data => {
      console.log('Data created:', data);
      // Optionally, update the UI with the newly created data
   })
   .catch(error => console.error(error));
});

// Handle update button click
dataTableBody.addEventListener('click', (event) => {
   if (event.target.classList.contains('update-btn')) {
      const id = event.target.dataset.id;
      const nameInput = prompt('Enter new name');
      const ageInput = prompt('Enter new age');
      if (nameInput !== null && ageInput !== null) {
         fetch(`/update/${id}`, {
            method: 'PUT',
            headers: {
               'Content-Type': 'application/json'
            },
            body: JSON.stringify({ name: nameInput, age: ageInput })
         })
         .then(response => response.json())
         .then(data => {
            console.log('Data updated:', data);
            // Update the UI with the updated data
         })
         .catch(error => console.error(error));
      }
   }
});

// Handle delete button click
dataTableBody.addEventListener('click', (event) => {
   if (event.target.classList.contains('delete-btn')) {
      const id = event.target.dataset.id;
      if (confirm('Are you sure you want to delete this record?')) {
         fetch(`/delete/${id}`, {
            method: 'DELETE'
         })
         .then(response => response.json())
         .then(data => {
            console.log('Data deleted:', data);
            // Remove the row from the UI
         })
         .catch(error => console.error(error));
      }
   }
});
接下來,讓我們為這個NodeJS應用程式建立一個Dockerfile。
建立 Dockerfile
在建立Dockerfile之前,讓我們回顧一下應用程式的元件:
- Node.js 應用程式
- MongoDB 資料庫(在單獨的容器中執行)
- 依賴項:express、mongodb、body-parser
Dockerfile 內容
這是您的應用程式的基本Dockerfile:
# Use a Node.js base image

FROM node:18-alpine

# Set the working directory

WORKDIR /app

# Copy package.json and package-lock.json (if present)

COPY package*.json ./

# Install dependencies

RUN npm install

# Copy the rest of the application code

COPY . .

# Expose the port your app will listen on

EXPOSE 3000

# Start the app

CMD [ "node", "index.js" ]
Dockerfile 說明
- FROM node:18-alpine: 這將使用基於Node.js 18 Alpine Linux的映象作為基礎映象。請注意,Alpine Linux是一個輕量級發行版。
- WORKDIR /app − 將容器內的工作目錄設定為/app。
- COPY package*.json ./ − 它將package.json和package-lock.json檔案複製到工作目錄。
- RUN npm install − 安裝package.json中列出的依賴項。
- COPY . . − 將整個專案目錄複製到容器。
- EXPOSE 3000 − 為Node.js應用程式公開埠3000。
- CMD [ "node", "index.js" ] − 指定容器啟動時要執行的命令。
構建和執行 Docker 映象
要構建Docker映象:
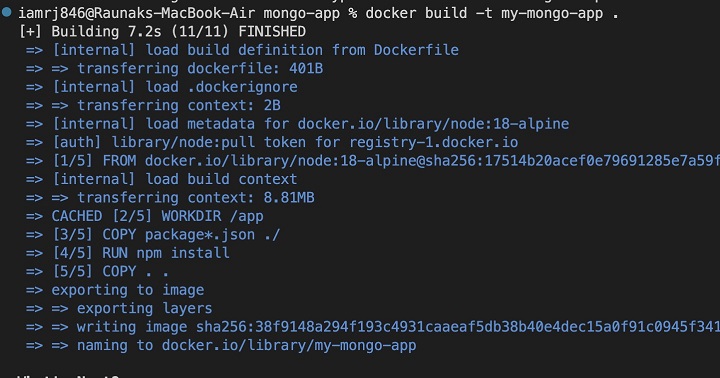
$ docker build -t my-mongo-app .
您可以將my-mongo-app替換為您想要的映象名稱。
要執行容器:
$ docker run -dp 3000:3000 --name my-mongo-app-container my-mongo-app

上述命令會將主機的埠3000對映到容器中的埠3000。
現在,您可以在瀏覽器中開啟localhost:3000,並透過表單執行CRUD操作。
結論
總而言之,在本章中,我們瞭解瞭如何執行MongoDB容器以及一個簡單的NodeJs和Express應用程式來在資料庫中執行CRUD操作。
雖然此設定非常適合本地測試和開發目的,但是對於生產和複雜的應用程式,建議使用更可靠的方式來執行MongoDB和NodeJS或任何其他後端應用程式。您可以使用Kubernetes或Docker Swarm之類的容器編排工具,它們將提供更多靈活性來擴充套件和處理大量容器和網路。
Docker 中 MongoDB 設定的常見問題
1. 如何將 Node.js 應用程式連線到 Docker 化的 MongoDB?
使用 MongoDB Node.js 驅動程式將您的 Node.js 應用程式連線到 Docker 化的 MongoDB。使用正確的 hostname(通常為 `mongodb`)和正確的埠配置連線字串。請記住,您的 Node.js 應用程式和 MongoDB 容器需要在同一個網路上。
2. 如何管理 Docker 容器中 MongoDB 的資料永續性?
使用卷可以在 Docker 容器內設定 MongoDB 資料儲存的永續性。卷允許將主機機器中的一個目錄對映到容器中。寫入 MongoDB 資料庫的所有資料都將安全地儲存在主機卷中,因此當您的容器停止時,您不會丟失資料。
3. 設定 Docker 中的 MongoDB 和 Node.js 時,常見的挑戰是什麼?
常見問題包括容器之間的網路連線、資料卷配置和環境變數的管理。確保正確對映埠、掛載卷和傳遞環境變數。更好的方法是透過使用 Docker Compose 來維護多容器設定。