
 資料結構
資料結構 網路
網路 關係資料庫管理系統 (RDBMS)
 作業系統
作業系統 Java
Java iOS
iOS HTML
HTML CSS
CSS Android
 Python
 C 程式設計
 C++
C++ C#
C# MongoDB
 MySQL
MySQL Javascript
 PHP
PHPElectronJS 中的 HTTP REST API 呼叫
我們可以選擇各種庫,例如 request、axios 或 fetch,來向我們的 HTTP REST API 端點發出請求。這樣做允許我們與 API 中的資料進行互動,並在 ElectronJS 應用程式中顯示它。
ElectronJS 是一個開源專案,由 OpenJS 基金會和一個貢獻者社群積極維護。使用 ElectronJS,我們可以使用 Web 技術(例如 HTML、JavaScript 和 CSS)構建跨平臺桌面應用程式。
在本教程中,我們將學習如何在 ElectronJS 應用程式中使用 HTTP REST API 呼叫。
在 ElectronJS 中使用 HTTP REST API 呼叫的步驟
以下是我們在 ElectronJS 中使用 HTTP REST API 呼叫需要遵循的基本步驟:
步驟 1 − 首先,我們必須為我們的專案安裝庫。例如,我們可以使用以下命令安裝 axios:
npm install axios
步驟 2 − 之後,為了從 ElectronJS 應用程式的渲染器程序發出 HTTP 請求並在主程序中處理響應,我們需要使用 ipcMain 和 ipcRenderer 模組在兩個程序之間建立通訊。
在 main.js 檔案中,我們可以為渲染器程序觸發的事件設定監聽器。例如:
const { ipcMain } = require('electron');
ipcMain.on('get-data', (event, url) => {

   // Handle the request here
});
在渲染器程序中,我們可以使用 ipcRenderer 模組向主程序傳送請求。例如:
const { ipcRenderer } = require('electron');
ipcRenderer.send('get-data', 'https://example.com/api/data');
步驟 3 − 現在,我們可以使用該庫向我們的 REST API 發出 HTTP 請求。
使用內建的“net”模組發出 HTTP 請求
我們可以在 Electron.js 中使用內建的 net 模組發出 HTTP 請求。net 模組提供了一個低階網路介面,可用於建立和與 TCP 伺服器和客戶端互動。雖然可以使用此模組發出 HTTP 請求,但這需要更多工作以及對 HTTP 協議的低階知識。
在發出 HTTP 請求方面,Node.js 中的 net 模組比原生模組提供了許多優勢。以下是使用 net 模組的一些好處:
net 模組支援 wpad 協議和代理 pac 配置檔案。
它可以自動為 HTTPS 請求建立隧道。
此模組支援用於對代理進行身份驗證的基本、摘要、NTLM、Kerberos 或協商身份驗證方案。
net 模組還支援用於訪問控制和監控的類似 Fiddler 的代理。
以下是使用 net 模組發出 HTTP 請求的示例:
const net = require('net');

// Define the request
const request = `GET / HTTP/1.1\r
Host: example.com\r
\r
`;

// Create a TCP socket and connect to the server
const socket = net.createConnection({ host: 'example.com', port: 80 }, () => {

   // Send the request to the server
   socket.write(request);
});

// Receive the response from the server
socket.on('data', (data) => {
   console.log(data.toString());
});

// Handle errors
socket.on('error', (err) => {
   console.error(err);
});
示例
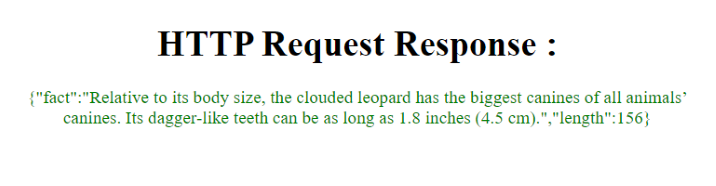
在此示例中,我們使用 axios 庫向 REST API 發出 HTTP 請求。程式碼分為三個部分:main.js、index.js 和 index.html。
在主程序中,應用程式偵聽來自渲染器程序的 fetch-data 事件。當它接收到該事件時,它將使用 axios 庫向“https://catfact.ninja/fact”URL 發出 HTTP 請求。收到響應資料後,主程序將傳送帶有響應資料的 fetch-data-response 事件回渲染器程序。
在渲染器程序中,index.js 檔案偵聽 fetch-data-response 事件並使用響應資料更新 HTML 文件中的響應元素。然後,它向主程序傳送 fetch-data 事件以觸發 HTTP 請求。
最後,index.html 檔案包含應用程式 UI 的 HTML 程式碼,它包含標題、響應 div 和載入 index.js 檔案的指令碼標籤。
main.js
const { app, BrowserWindow, ipcMain } = require('electron');
const axios = require('axios');

function createWindow () {
   const win = new BrowserWindow({
      width: 800,
      height: 600,
      webPreferences: {
         nodeIntegration: true,
         contextIsolation: false
      }
   })

   win.loadFile('index.html')
   ipcMain.on('fetch-data', async (event, args) => {
      try {
         const response = await axios.get('https://catfact.ninja/fact');
         event.reply('fetch-data-response', response.data);
      } catch (error) {
         console.error(error);
      }
   });
}
app.whenReady().then(createWindow);
index.js
const { ipcRenderer } = require('electron');
const responseElement = document.getElementById('response');

ipcRenderer.on('fetch-data-response', (event, data) => {
   responseElement.innerHTML = JSON.stringify(data);
});

ipcRenderer.send('fetch-data');
index.html
<html>
<head>
   <meta charset="UTF-8">
   <title>My Electron App</title>
   <style>
      body{
         text-align: center;
         padding: 1rem;
      }
      p{
         color: green;
      }
   </style>
</head>
<body>
   <h1> HTTP Request Response: </h1>
   <p id = "response" > </p>
   <script src = "./index.js" > </script>
</body>
</html>
輸出
示例
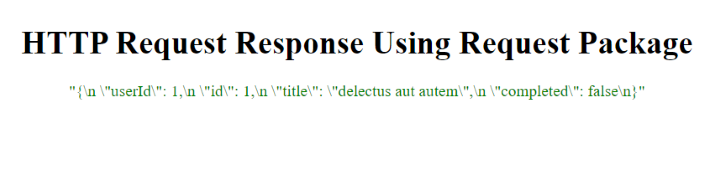
此示例是一個 Electron.js 應用程式,它使用 request 包向外部 API 發出 HTTP 請求。
應用程式由三個部分組成:
在 main.js 檔案中,request 包用於向外部 API 發出 HTTP 請求,並使用 IPC 將響應傳送到渲染器程序。
index.js 檔案負責接收來自主程序的響應並更新 HTML 以顯示響應。
index.html 檔案是載入到 Electron.js 視窗中的 HTML 檔案。它顯示從外部 API 收到的 HTTP 響應。
main.js
const { app, BrowserWindow, ipcMain } = require('electron');
const request = require('request');

function createWindow () {
   const win = new BrowserWindow({
      width: 800,
      height: 600,
      webPreferences: {
         nodeIntegration: true,
         contextIsolation: false
      }
   })

   win.loadFile('index.html')

   ipcMain.on('fetch-data', (event, args) => {
      request('https://jsonplaceholder.typicode.com/todos/1', (error, response, body) => {
         if (error) {
            console.error(error);
            return;
         }
         event.reply('fetch-data-response', body);
      });
   });
}

app.whenReady().then(createWindow);
index.js
const { ipcRenderer } = require('electron');

const responseElement = document.getElementById('response');

ipcRenderer.on('fetch-data-response', (event, data) => {
   responseElement.innerHTML = JSON.stringify(data);
});

ipcRenderer.send('fetch-data');
index.html
<!DOCTYPE html>
<html>
<head>
   <meta charset = "UTF-8">
   <title> My Electron App </title>
   <style>
      body{
         text-align: center;
         padding: 1rem;
      }
      p{
         color: green;
      }
   </style>
</head>
<body>
   <h1> HTTP Request Response Using Request Package </h1>
   <p id = "response"> </p>
   <script src= "./index.js" ></script>
</body>
</html>
輸出
本教程教我們如何在 ElectronJS 應用程式中使用 HTTP REST API 呼叫。我們討論了安裝和使用 Axios、Request 或 Fetch 等庫。
然後,我們透過兩個示例演示瞭如何使用不同的庫向 REST API 發出 HTTP 請求並在 ElectronJS 應用程式中顯示響應資料。
總的來說,透過在 ElectronJS 應用程式中使用 HTTP REST API 呼叫,我們可以與遠端伺服器上的資料進行互動並在應用程式中顯示它,從而使我們能夠構建功能強大且靈活的桌面應用程式,這些應用程式可在不同的平臺上訪問。

5K+ 次檢視
