
 資料結構
資料結構 網路
網路 RDBMS
RDBMS 作業系統
作業系統 Java
Java iOS
iOS HTML
HTML CSS
CSS Android
 Python
 C 程式設計
 C++
C++ C#
C# MongoDB
 MySQL
MySQL Javascript
 PHP
PHPspring boot 如何連線本地 MySQL
為此,使用 application.properties −
spring.datasource.username=yourMySQLUserName
spring.datasource.password=yourMySQLPassword
spring.datasource.url=jdbc:mysql://:3306/yoruDatabaseName
spring.datasource.driver-class-name=com.mysql.cj.jdbc.Driver
為了理解上述語法,我們建立一個表格 −
mysql> create table demo71
−> (
−> id int,
−> name varchar(20)
−> );
Query OK, 0 rows affected (3.81 sec)
在表格中插入一些記錄,藉助插入命令 −
mysql> insert into demo71 values(100,'John');
Query OK, 1 row affected (0.13 sec)

mysql> insert into demo71 values(101,'David');
Query OK, 1 row affected (0.49 sec)

mysql> insert into demo71 values(102,'Bob');
Query OK, 1 row affected (0.15 sec)
在表格中使用選擇語句顯示記錄 −
mysql> select *from demo71;
這將會產生以下輸出 −
+------+-------+
| id   | name  |
+------+-------+
| 100  | John  |
| 101  | David |
| 102  | Bob  |
+------+-------+
3 rows in set (0.00 sec)
為了驗證上述 application.properties 是否與本地 MySQL 協同工作,你可以編寫 spring boot 應用程式進行測試。
以下是 application.properties 檔案。

以下是控制器類程式碼。程式碼如下 −
package com.demo.controller;
import java.util.Iterator;
import java.util.List;
import javax.persistence.EntityManager;
import javax.persistence.Query;
import org.springframework.beans.factory.annotation.Autowired;
import org.springframework.web.bind.annotation.GetMapping;
import org.springframework.web.bind.annotation.RequestMapping;
import org.springframework.web.bind.annotation.ResponseBody;
import org.springframework.web.bind.annotation.RestController;
@RestController
@RequestMapping("/table")
public class TableController {
   @Autowired
   EntityManager entityManager;
   @ResponseBody
   @GetMapping("/demo71")
   public String getData() {
      Query sqlQuery= entityManager.createNativeQuery("select name from demo71");
      List<String> result= sqlQuery.getResultList();
      StringBuilder sb=new StringBuilder();
      Iterator itr= result.iterator();
      while(itr.hasNext()) {
         sb.append(itr.next()+" ");
      }
      return sb.toString();
   }
}
以下是主類。Java 程式碼如下 −
package com.demo;
import org.springframework.boot.SpringApplication;
import org.springframework.boot.autoconfigure.SpringBootApplication;
@SpringBootApplication
public class JavaMysqlDemoApplication {
   public static void main(String[] args) {
      SpringApplication.run(JavaMysqlDemoApplication.class, args);
   }
}要執行以上內容,進入主類,右鍵點選並選擇“Run as Java Application”。在成功執行後,你需要點選以下網址。
網址如下 −
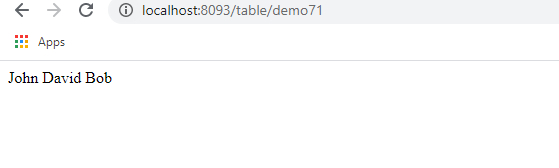
https://:8093/table/demo71
這將會產生以下輸出 −

更新於: 20-11-2020
2K+ 瀏覽量

廣告