
 資料結構
資料結構 網路
網路 關係型資料庫管理系統
 作業系統
作業系統 Java
Java iOS
iOS HTML
HTML CSS
CSS Android
 Python
 C 程式設計
 C++
C++ C#
C# MongoDB
 MySQL
MySQL Javascript
 PHP
PHP如何在 Android 中使用 Firebase Firestore 建立動態底部彈窗對話方塊?
Android 中的動態底部彈窗指的是一種使用者介面元件,它從螢幕底部向上滑動以顯示其他資訊、選項或操作。與具有固定內容的靜態底部彈窗不同,動態底部彈窗從 Firebase Firestore 等來源檢索資料,允許開發人員使用相關資料動態填充彈窗。這使得能夠進行即時更新和定製,而無需修改應用程式的程式碼。動態底部彈窗透過以有用且視覺上吸引人的方式提供相關且最新的內容(例如使用者配置檔案、產品詳細資訊或選單選項)來增強使用者互動,從而提高整體使用者體驗和應用程式功能。
使用的方法
手動實現
手動實現
在使用 Firebase Firestore 建立 Android 動態底部彈窗對話方塊的上下文中,手動實現是指使用程式設計技術手動編碼和定義彈窗對話方塊的功能和行為的方法。與依賴預構建庫或框架不同,開發人員可以完全控制從頭開始設計和實現動態底部彈窗。手動實現包括從 Firebase Firestore 檢索資料、動態填充彈窗內容、處理使用者互動以及管理對話方塊的流程和轉換等任務。這種方法提供了靈活性和定製選項,允許開發人員建立獨特且定製的底部彈窗對話方塊,以適應其應用程式的設計和需求。
演算法
啟動應用程式。
初始化 Firebase Firestore 並配置必要的依賴項。
為動態底部彈窗對話方塊建立佈局檔案。
為底部彈窗對話方塊片段定義一個類。
實現底部彈窗對話方塊片段的基本方法和監聽器。
設定佈局並顯示底部彈窗對話方塊。
使用合適的查詢從 Firebase Firestore 檢索資料。
將檢索到的資料對映到相應的物件。
根據檢索到的資料使用動態內容填充底部彈窗。
處理底部彈窗對話方塊內的使用者互動,例如按鈕點選或專案選擇。
根據使用者輸入更新 UI 或執行必要的操作。
測試應用程式以確保動態底部彈窗對話方塊按預期工作。
最佳化程式碼以提高效能和記憶體使用率。
優雅地處理任何潛在錯誤或特殊情況。
完成應用程式,進行全面測試,並根據使用者反饋或錯誤報告進行必要的修改。
示例
XML 程式
<?xml version="1.0" encoding="utf-8"?>
<RelativeLayout xmlns:android="http://schemas.android.com/apk/res/android"
   android:id="@+id/idRLBottomSheet"
   android:layout_width="match_parent"
   android:layout_height="wrap_content"
   android:background="@color/white"
   android:padding="20dp">

   <!-- ImageView for displaying our image -->
   <ImageView
      android:id="@+id/idIVimage"
      android:layout_width="120dp"
      android:layout_height="120dp"
      android:layout_margin="10dp"
      android:padding="5dp"
      android:src="@drawable/your_image" />

   <!-- Text view for displaying a heading text -->
   <TextView
      android:id="@+id/idTVtext"
      android:layout_width="match_parent"
      android:layout_height="wrap_content"
      android:layout_margin="10dp"
      android:layout_toRightOf="@id/idIVimage"
      android:padding="5dp"
      android:text="Updated Message One"
      android:textColor="@color/black"
      android:textSize="20sp"
      android:textStyle="bold" />

   <!-- Text View for displaying description text -->
   <TextView
      android:id="@+id/idTVtextTwo"
      android:layout_width="match_parent"
      android:layout_height="wrap_content"
      android:layout_below="@id/idTVtext"
      android:layout_margin="10dp"
      android:layout_marginTop="10dp"
      android:layout_toEndOf="@id/idIVimage"
      android:padding="5dp"
      android:text="Updated Message Two"
      android:textColor="@color/black"
      android:textSize="16sp" />

   <!-- Add a border to the RelativeLayout -->
   <RelativeLayout
      android:layout_width="match_parent"
      android:layout_height="wrap_content"
      android:layout_below="@id/idTVtextTwo"
      android:background="@drawable/border"
      android:padding="10dp">

      <!-- Add more text views with different colors -->
      <TextView
         android:id="@+id/idTVtextThree"
         android:layout_width="wrap_content"
         android:layout_height="wrap_content"
         android:layout_alignParentStart="true"
         android:text="Updated Message Three"
         android:textColor="@color/blue"
         android:textSize="14sp" />

      <TextView
         android:id="@+id/idTVtextFour"
         android:layout_width="wrap_content"
         android:layout_height="wrap_content"
         android:layout_below="@id/idTVtextThree"
         android:layout_marginTop="10dp"
         android:layout_toEndOf="@id/idTVtextThree"
         android:text="Updated Message Four"
         android:textColor="@color/red"
         android:textSize="14sp" />

      <!-- Add a button with a background color -->
      <Button
         android:layout_width="wrap_content"
         android:layout_height="wrap_content"
         android:layout_below="@id/idTVtextFour"
         android:background="@drawable/button_background"
         android:text="Button"
         android:textColor="@color/white" />

   </RelativeLayout>

</RelativeLayout>
主題的 XML 程式
<style name="BottomSheetDialogTheme" parent="Theme.Design.Light.BottomSheetDialog">
   <item name="bottomSheetStyle">@style/BottomSheetStyle</item>
</style>

<style name="BottomSheetStyle" parent="Widget.Design.BottomSheet.Modal">
	<item name="android:background">@android:color/transparent</item>
</style>
Java 程式
import android.os.Bundle;
import android.view.LayoutInflater;
import android.view.View;
import android.widget.ImageView;
import android.widget.RelativeLayout;
import android.widget.TextView;
import android.widget.Toast;

import androidx.annotation.Nullable;
import androidx.appcompat.app.AppCompatActivity;

import com.google.android.material.bottomsheet.BottomSheetDialog;
import com.google.firebase.firestore.DocumentReference;
import com.google.firebase.firestore.DocumentSnapshot;
import com.google.firebase.firestore.EventListener;
import com.google.firebase.firestore.FirebaseFirestore;
import com.google.firebase.firestore.FirebaseFirestoreException;
import com.squareup.picasso.Picasso;

public class MainActivity extends AppCompatActivity {

   // Variables for Firebase Firestore and bottom sheet RelativeLayout
   private FirebaseFirestore db;
   private RelativeLayout bottomSheetRL;

   @Override
   protected void onCreate(Bundle savedInstanceState) {
      super.onCreate(savedInstanceState);
      setContentView(R.layout.activity_main);

      // Initializing Firebase Firestore and bottom sheet RelativeLayout
      db = FirebaseFirestore.getInstance();
      bottomSheetRL = findViewById(R.id.idRLBottomSheet);

      // Calling method to display the bottom sheet
        displayBottomSheet();
   }

   private void displayBottomSheet() {

      // Creating a BottomSheetDialog
      final BottomSheetDialog bottomSheetDialog = new BottomSheetDialog(MainActivity.this, R.style.BottomSheetDialogTheme);

      // Inflating the layout file for the bottom sheet dialog
      View layout = LayoutInflater.from(MainActivity.this).inflate(R.layout.bottom_sheet_layout, bottomSheetRL);

      // Setting the inflated layout file to the bottom sheet dialog
      bottomSheetDialog.setContentView(layout);

      // Making the bottom sheet dialog cancelable and set to be canceled on touch outside
      bottomSheetDialog.setCancelable(true);
      bottomSheetDialog.setCanceledOnTouchOutside(true);

      // Displaying the bottom sheet dialog
      bottomSheetDialog.show();

      // Initializing the image view and text views from the inflated layout
      ImageView imageIV = layout.findViewById(R.id.idIVimage);
      TextView textOneTV = layout.findViewById(R.id.idTVtext);
      TextView textTwoTV = layout.findViewById(R.id.idTVtextTwo);

      // Creating a document reference for our Firestore collection and document
      DocumentReference documentReference = db.collection("BottomSheetDialog").document("Data");

      // Adding a snapshot listener to the document reference
      documentReference.addSnapshotListener(new EventListener<DocumentSnapshot>() {
         @Override
         public void onEvent(@Nullable DocumentSnapshot value, @Nullable FirebaseFirestoreException error) {
            // Inside the onEvent method
            if (error != null) {
               // Handling the error if it's not null
               Toast.makeText(MainActivity.this, "Error: " + error.getMessage(), Toast.LENGTH_SHORT).show();
               return;
            }

            if (value != null && value.exists()) {
               // Retrieving data from the Firestore document and setting it to the views
               textOneTV.setText(value.getString("textOne"));
               Picasso.get().load(value.getString("Image")).into(imageIV);
               textTwoTV.setText(value.getString("textTwo"));
            }
         }
      });
   }
}
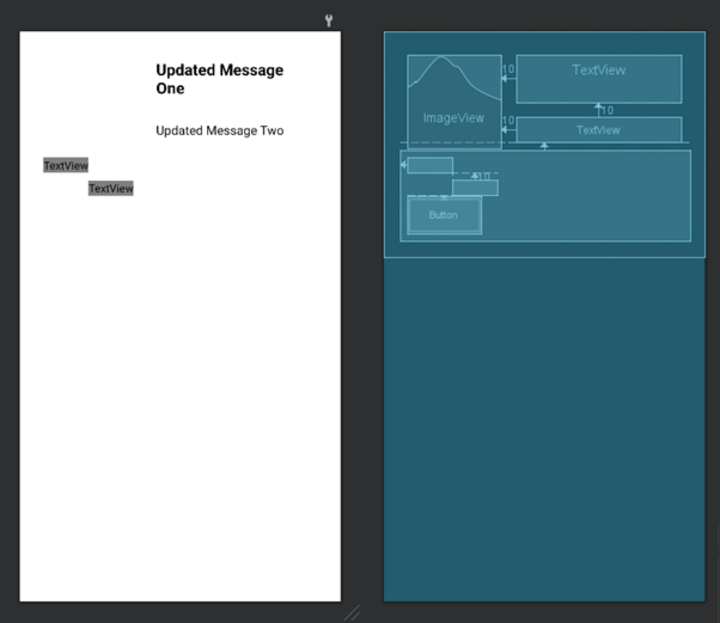
輸出
結論
本文提供了關於使用 Firebase Firestore 在 Android 中建立動態底部彈窗的全面指南。動態底部彈窗是一種使用者介面元件,它從螢幕底部向上滑動,顯示從 Firebase Firestore 獲取的相關即時資料。透過採用手動實現方法,開發人員可以完全控制設計和實現彈窗對話方塊的功能。本文概述了關鍵步驟,包括初始化 Firebase Firestore、定義佈局、實現基本方法和監聽器、從 Firestore 檢索資料、使用動態內容填充底部彈窗、處理使用者互動、測試功能以及最佳化程式碼。總的來說,本文提供了關於在 Android 中建立動態底部彈窗對話方塊的實用且詳細的解釋。

575 次瀏覽
