
 資料結構
資料結構 網路
網路 關係型資料庫管理系統
 作業系統
作業系統 Java
Java iOS
iOS HTML
HTML CSS
CSS Android
 Python
 C 程式設計
 C++
C++ C#
C# MongoDB
 MySQL
MySQL Javascript
 PHP
PHP如何在 Android 中建立具有自定義佈局的對話方塊?
Android 中的自定義格式指的是能夠為對話方塊建立和使用獨特的使用者介面 (UI) 設計。預設情況下,Android 為常見的用例提供了預定義的對話方塊格式。但是,使用自定義格式,開發人員可以透過指定佈局元件、樣式和互動來設計和自定義自己的對話方塊 UI。自定義格式允許完全控制對話方塊的外觀和功能。開發人員可以建立視覺上吸引人和互動式的對話方塊,這些對話方塊可以定製以滿足特定需求和設計偏好。這種靈活性允許包含複雜的 UI 元件,例如文字區域、按鈕、影像等等,從而增強使用者體驗並提供更個性化和一致的應用程式介面。
使用的方法
手動實現
手動實現
在 Android 中使用自定義佈局建立對話方塊的上下文中,手動實現指的是使用程式設計方法手動自定義和建立對話方塊的佈局和行為。開發人員可以完全控制對話方塊的使用者介面設計,而不是依賴 Android 系統提供的預定義對話方塊佈局,方法是指定佈局元件、樣式和功能。手動實現包括編寫程式碼來建立和擴充套件自定義佈局,處理使用者互動並管理對話方塊的生命週期。這種方法提供了靈活性和自定義選項,允許開發人員建立獨特且量身定製的對話方塊體驗,以適應其應用程式的設計和需求。
演算法
啟動應用程式。
初始化對話方塊的基本變數和資料結構。
建立一個自定義格式的 XML 檔案,該檔案定義對話方塊的外觀和結構。
建立一個新的 Dialog 類例項。
使用 setContentView() 方法設定對話方塊的自定義佈局,傳入佈局資源 ID。
配置對話方塊的外觀和行為,例如設定標題、按鈕或其他屬性。
實現功能以處理對話方塊中的使用者互動,例如按鈕點選或輸入驗證。
註冊監聽器或回撥以捕獲使用者操作並相應地做出反應。
使用 show() 方法顯示對話方塊。
測試應用程式以確保自定義對話方塊按預期正確顯示和工作。
最佳化程式碼以提高執行效率和記憶體使用率,考慮諸如有效佈局渲染或資產管理之類的因素。
平滑地處理任何潛在錯誤或特殊情況,以提供流暢的使用者體驗。
完成應用程式,進行徹底測試,並根據使用者反饋或錯誤報告進行必要的修改。
示例
XML 程式
<?xml version="1.0" encoding="utf-8"?>
<androidx.constraintlayout.widget.ConstraintLayout
xmlns:android="http://schemas.android.com/apk/res/android"
xmlns:app="http://schemas.android.com/apk/res-auto"
xmlns:tools="http://schemas.android.com/tools"
android:layout_width="match_parent"
android:layout_height="match_parent"
android:background="#F5F5F5"
tools:context=".MainActivity">
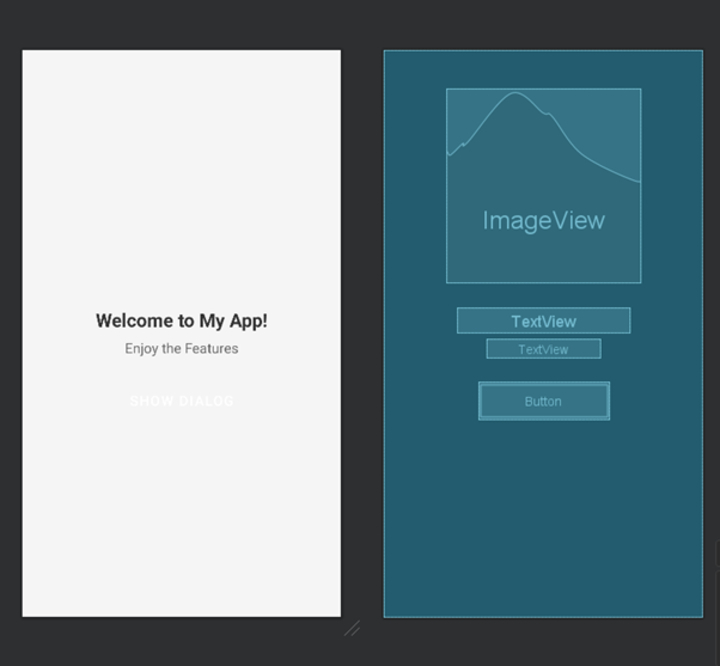
<ImageView
android:id="@+id/imageView2"
android:layout_width="250dp"
android:layout_height="250dp"
android:src="@drawable/rati_img"
android:layout_marginTop="50dp"
app:layout_constraintTop_toTopOf="parent"
app:layout_constraintStart_toStartOf="parent"
app:layout_constraintEnd_toEndOf="parent" />
<TextView
android:id="@+id/titleTextView"
android:layout_width="wrap_content"
android:layout_height="wrap_content"
android:text="Welcome to My App!"
android:textColor="#333333"
android:textSize="24sp"
android:textStyle="bold"
app:layout_constraintTop_toBottomOf="@+id/imageView2"
app:layout_constraintStart_toStartOf="parent"
app:layout_constraintEnd_toEndOf="parent"
app:layout_constraintHorizontal_bias="0.5"
android:layout_marginTop="32dp" />
<TextView
android:id="@+id/subtitleTextView"
android:layout_width="wrap_content"
android:layout_height="wrap_content"
android:text="Enjoy the Features"
android:textColor="#666666"
android:textSize="18sp"
app:layout_constraintTop_toBottomOf="@+id/titleTextView"
app:layout_constraintStart_toStartOf="parent"
app:layout_constraintEnd_toEndOf="parent"
app:layout_constraintHorizontal_bias="0.5"
android:layout_marginTop="8dp" />
<Button
android:id="@+id/dialogBtn"
android:layout_width="wrap_content"
android:layout_height="wrap_content"
android:text="Show Dialog"
android:textColor="#FFFFFF"
android:textSize="18sp"
android:background="@drawable/button_background"
app:layout_constraintTop_toBottomOf="@+id/subtitleTextView"
app:layout_constraintStart_toStartOf="parent"
app:layout_constraintEnd_toEndOf="parent"
android:layout_marginTop="32dp" />
</androidx.constraintlayout.widget.ConstraintLayout>
XML 程式
<?xml version="1.0" encoding="utf-8"?>
<RelativeLayout
xmlns:android="http://schemas.android.com/apk/res/android"
xmlns:tools="http://schemas.android.com/tools"
android:layout_width="match_parent"
android:layout_height="wrap_content"
android:padding="10dp">
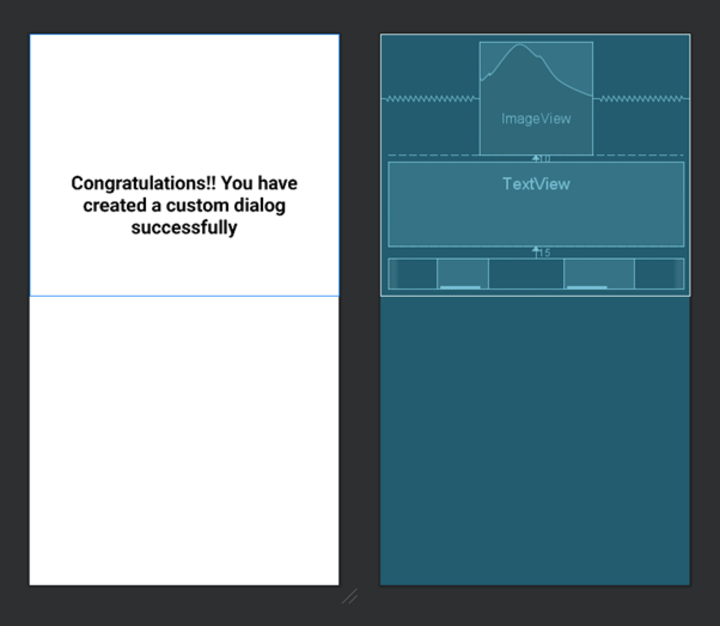
<ImageView
android:id="@+id/imageView"
android:layout_width="150dp"
android:layout_height="150dp"
android:layout_centerHorizontal="true"
android:src="@drawable/success" />
<TextView
android:id="@+id/textview"
android:layout_width="match_parent"
android:layout_height="112dp"
android:layout_marginTop="10dp"
android:padding="10dp"
android:layout_below="@id/imageView"
android:text="Congratulations!! You have created a custom dialog successfully"
android:textAlignment="center"
android:textSize="25sp"
android:textStyle="bold"
android:background="@drawable/dialog_background"
android:textColor="#000000"/>
<LinearLayout
android:layout_width="match_parent"
android:layout_height="wrap_content"
android:layout_below="@id/textview"
android:layout_marginTop="15dp"
android:gravity="center">
<TextView
android:id="@+id/okay_text"
android:layout_width="wrap_content"
android:layout_height="wrap_content"
android:text="Okay"
android:textStyle="bold"
android:textColor="#FFFFFF"
android:textSize="30sp"
android:layout_marginEnd="50dp"
android:background="@drawable/button_background"/>
<TextView
android:id="@+id/cancel_text"
android:layout_width="wrap_content"
android:layout_height="wrap_content"
android:text="Cancel"
android:textStyle="bold"
android:textColor="#FFFFFF"
android:textSize="30sp"
android:layout_marginStart="50dp"
android:background="@drawable/button_background"/>
</LinearLayout>
</RelativeLayout>
Java 程式
import androidx.appcompat.app.AppCompatActivity;
import android.app.Dialog;
import android.os.Bundle;
import android.view.View;
import android.view.ViewGroup;
import android.widget.Button;
import android.widget.TextView;
import android.widget.Toast;

public class MainActivity extends AppCompatActivity {

   Button showDialogButton;
   TextView okayText, cancelText;

   @Override
   protected void onCreate(Bundle savedInstanceState) {
      super.onCreate(savedInstanceState);
      setContentView(R.layout.activity_main);

      // Find the button in the XML layout
      showDialogButton = findViewById(R.id.dialogBtn);

      // Create a new Dialog
      final Dialog dialog = new Dialog(MainActivity.this);

      // Set a click listener for the showDialogButton
      showDialogButton.setOnClickListener(new View.OnClickListener() {
         @Override
         public void onClick(View v) {
            // Set the content view of the dialog to the dialog_layout XML
            dialog.setContentView(R.layout.dialog_layout);

            // Set the layout parameters for the dialog window
            dialog.getWindow().setLayout(ViewGroup.LayoutParams.MATCH_PARENT, ViewGroup.LayoutParams.WRAP_CONTENT);

            // Make the dialog non-cancelable
            dialog.setCancelable(false);

            // Set window animation for the dialog
            dialog.getWindow().getAttributes().windowAnimations = R.style.animation;

            // Find the TextViews in the dialog layout
            okayText = dialog.findViewById(R.id.okay_text);
            cancelText = dialog.findViewById(R.id.cancel_text);

            // Set a click listener for the "Okay" TextView
            okayText.setOnClickListener(new View.OnClickListener() {
               @Override
               public void onClick(View v) {
                  // Dismiss the dialog
                  dialog.dismiss();
                  // Display a toast message for "Okay" click
                  Toast.makeText(MainActivity.this, "Okay clicked", Toast.LENGTH_SHORT).show();
               }
            });

            // Set a click listener for the "Cancel" TextView
            cancelText.setOnClickListener(new View.OnClickListener() {
               @Override
               public void onClick(View v) {
                  // Dismiss the dialog
                   dialog.dismiss();
                  // Display a toast message for "Cancel" click
                  Toast.makeText(MainActivity.this, "Cancel clicked", Toast.LENGTH_SHORT).show();
               }
            });

            // Show the dialog
            dialog.show();
         }
      });
   }
}
輸出
結論
本文介紹瞭如何在 Android 中建立具有自定義佈局的對話方塊。它解釋了開發人員如何透過指定佈局元件、樣式和互動來設計和實現自己的使用者介面 (UI) 以供對話方塊使用。本文探討了自定義佈局和手動實現的概念,並提供了逐步演算法來建立具有自定義佈局的對話方塊。它還包含示例 XML 和 Java 程式碼片段以說明該方法。透過遵循本指南,開發人員可以建立視覺上吸引人和互動式的對話方塊,這些對話方塊可以定製以滿足其應用程式的設計和需求,從而增強使用者體驗和整體應用程式介面。

507 次檢視
