
 資料結構
資料結構 網路
網路 關係型資料庫管理系統
 作業系統
作業系統 Java
Java iOS
iOS HTML
HTML CSS
CSS Android
 Python
 C語言程式設計
 C++
C++ C#
C# MongoDB
 MySQL
MySQL Javascript
 PHP
PHP如何在Android中建立動畫漸變背景。
在進入示例之前,我們應該瞭解什麼是漸變色。根據維基百科,在計算機圖形學中,顏色漸變(有時稱為顏色漸變或顏色漸變)指定了一系列依賴於位置的顏色,通常用於填充區域。例如,許多視窗管理器允許將螢幕背景指定為漸變。
此示例演示瞭如何在Android中建立動畫漸變背景。
步驟 1 - 在Android Studio中建立一個新專案,轉到檔案 ⇒ 新建專案,並填寫所有必要的資訊以建立一個新專案。
步驟 2 - 將以下程式碼新增到res/layout/activity_main.xml中。
<?xml version = "1.0" encoding = "utf-8"?>
<android.support.constraint.ConstraintLayout xmlns:android = "http://schemas.android.com/apk/res/android"
   xmlns:app = "http://schemas.android.com/apk/res-auto"
   xmlns:tools = "http://schemas.android.com/tools"
   android:id = "@+id/constraintLayout"
   android:layout_width = "match_parent"
   android:layout_height = "match_parent"
   android:background = "@drawable/gradient_animation "
   tools:context = ".MainActivity">
   <!-- Your layout here -->
   <TextView
      android:layout_width = "368dp"
      android:layout_height = "520dp"
      android:layout_marginBottom = "8dp"
      android:layout_marginLeft = "8dp"
      android:layout_marginRight = "8dp"
      android:layout_marginTop = "8dp"
      android:gravity = "center"
      android:text = "@string/app_name"
      android:textAlignment = "center"
      android:textColor = "@android:color/background_light"
      android:textSize = "30sp"
      android:textStyle = "bold"
      app:layout_constraintBottom_toBottomOf = "parent"
      app:layout_constraintLeft_toLeftOf = "parent"
      app:layout_constraintRight_toRightOf = "parent"
      app:layout_constraintTop_toTopOf = "parent"
      tools:text = "@string/app_name"/>
</android.support.constraint.ConstraintLayout>
在上面的程式碼中,我們將背景設定為drawable中的gradient_animation。現在在drawable資料夾中建立gradient_animation.xml檔案並新增以下程式碼 -
<?xml version = "1.0" encoding = "utf-8"?>
<animation-list xmlns:android = "http://schemas.android.com/apk/res/android">
   <item
      android:drawable = "@drawable/drawable_purple_gradient"
      android:duration = "3000" />
   <item
      android:drawable = "@drawable/drawable_amber_gradient"
      android:duration = "3000" />
   <item
      android:drawable = "@drawable/drawable_green_gradient"
      android:duration = "3000" />
   <item
      android:drawable = "@drawable/drawable_red_gradient"
      android:duration = "3000" />
</animation-list>
在上面的animation-list中,我們添加了4個子drawable併為每個動畫檢視添加了持續時間,超時後,它將更改背景。在drawable_purple_gradient中,包含紫色背景,因此在drawable資料夾中建立一個名為drawable_purple_gradient.xml的檔案並新增以下程式碼 -
<?xml version = "1.0" encoding = "utf-8"?>
<shape xmlns:android = "http://schemas.android.com/apk/res/android">
   <gradient
      android:angle = "90"
      android:endColor = "#D500F9"
      android:startColor = "#4A148C" />
</shape>
按照上述步驟,在Drawable資料夾中建立drawable_amber_gradient.xml、drawable_green_gradient.xml和drawable_red_gradient.xml,並新增以下程式碼,如下所示 -
drawable_amber_gradient.xml-
<?xml version = "1.0" encoding = "utf-8"?>
<shape xmlns:android = "http://schemas.android.com/apk/res/android">
   <gradient
      android:angle = "135"
      android:endColor = "#FFC400"
      android:startColor = "#FF6F00" />
</shape>
drawable_green_gradient.xml -
<?xml version = "1.0" encoding = "utf-8"?>
<shape xmlns:android = "http://schemas.android.com/apk/res/android">
   <gradient
      android:angle = "0"
      android:endColor = "#00E676"
      android:startColor = "#1B5E20"/>
</shape>
drawable_red_gradient.xml -
<?xml version = "1.0" encoding = "utf-8"?>
<shape xmlns:android = "http://schemas.android.com/apk/res/android">
   <gradient
      android:angle = "45"
      android:endColor = "#FF1744"
      android:startColor = "#B71C1C" />
</shape>
步驟 3 - 將以下程式碼新增到src/MainActivity.java中 -
package com.example.andy.myapplication;

import android.graphics.drawable.AnimationDrawable;
import android.support.constraint.ConstraintLayout;
import android.support.v7.app.AppCompatActivity;
import android.os.Bundle;

public class MainActivity extends AppCompatActivity {
   private ConstraintLayout constraintLayout;
   private AnimationDrawable animationDrawable;
   @Override
   protected void onCreate(Bundle savedInstanceState) {
      super.onCreate(savedInstanceState);
      setContentView(R.layout.activity_main);
      constraintLayout = (ConstraintLayout) findViewById(R.id.constraintLayout);
      animationDrawable = (AnimationDrawable) constraintLayout.getBackground();
      animationDrawable.setEnterFadeDuration(3000);
      animationDrawable.setExitFadeDuration(2000);
   }
   @Override
   protected void onResume() {
      super.onResume();
      if (animationDrawable ! = null && !animationDrawable.isRunning()) {
         animationDrawable.start();
      }
   }
   @Override
   protected void onPause() {
      super.onPause();
      if (animationDrawable ! = null && animationDrawable.isRunning()) {
         animationDrawable.stop();
      }
   }
}
讓我們嘗試執行您的應用程式。我假設您已將您的實際Android移動裝置連線到您的計算機。要從Android Studio執行應用程式,請開啟您專案中的一個活動檔案,然後單擊工具欄中的執行![]() 圖示。選擇您的移動裝置作為選項,然後檢查您的移動裝置,它將顯示您的預設螢幕 -
圖示。選擇您的移動裝置作為選項,然後檢查您的移動裝置,它將顯示您的預設螢幕 -

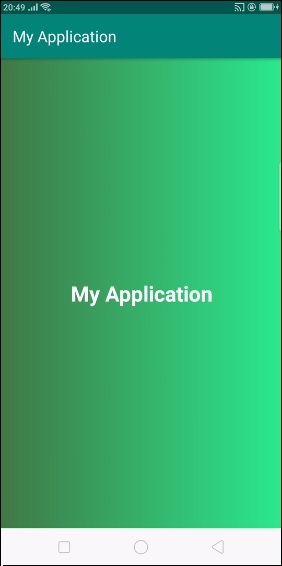
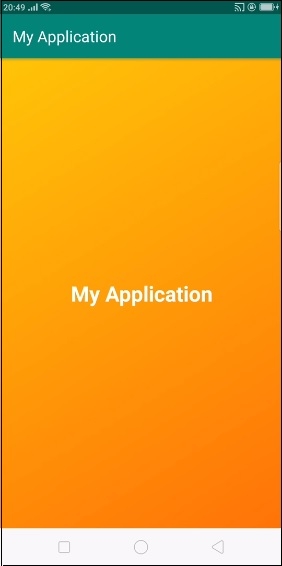
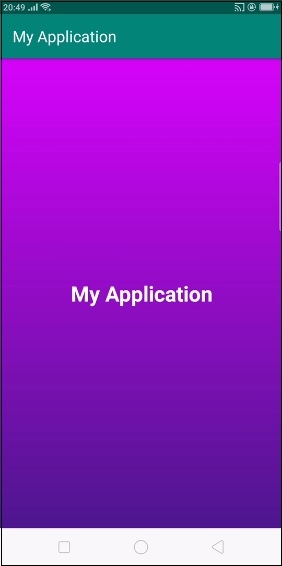
如上所示的結果,每3秒鐘。它將更改背景顏色。
點選此處下載專案程式碼

770 次檢視
