
 資料結構
資料結構 網路
網路 關係資料庫管理系統
 作業系統
作業系統 Java
Java iOS
iOS HTML
HTML CSS
CSS Android
 Python
 C 程式設計
 C++
C++ C#
C# MongoDB
 MySQL
MySQL Javascript
 PHP
PHP如何在 Vue.js 中使用路由?
在 Vue.js 應用中將 URL 分配給元件的過程稱為路由。安裝 Vue-router 庫並將其匯入 Vue 例項是實現路由的先決條件。然後,使用者必須在不同的 router.js 檔案中指定每個路由顯示的元件,並在定義一組路由後進行操作。
使用者可以使用“router-view”元件在主 Vue 模板中指定每個路由的元件應顯示的位置,並且使用者還可以使用“router-link”元件在路由之間切換。由 routerlink 元件建立的被點選的連結會更改 URL 並修改在 router-view 元件中可見的元件。
使用者可以透過使用路由在單頁面應用中建立多頁面體驗,從而在不重新整理整個頁面的情況下在頁面或元件之間導航。
在 Vue.js 中使用路由的步驟
Vue.js 路由涉及以下步驟:
在專案中安裝 vue-router 庫−
在專案的目錄中執行以下命令以安裝 vue-router 庫。
npm install vue-router
匯入 vue-router 庫 - 使用者必須在安裝 vue-router 庫後將其匯入 Vue 例項。然後,他們現在可以在 Vue 專案中使用 Vue-router 功能。
定義路由 - 需要在不同的 router.js 檔案中建立一組路由,將 URL 連結到每個路由應該顯示的元素。路由包括應該為其顯示的元件、路由的名稱和 URL 路徑。
指定路由器 - 要在 Vue 應用中使用路由器,使用者必須匯入 router.js 檔案並在專案中指定路由器引數。
使用元件 - 該元件允許使用者選擇在使用者的 Vue 主模板中每個路由的元件應顯示的位置。此元件充當與當前路由相關的元件的佔位符。使用者可以使用該元件在模板中進行路由切換。該元件生成一個可點選的連結,該連結更新可見元件和元件的 URL。
這些步驟將幫助使用者將其路由新增到 Vue.js 應用程式中,從而允許他們在不重新載入整個頁面的情況下在頁面或元件之間進行切換。
示例
在此示例中,我們將使用 Vue Js 中的路由在兩個元件之間導航,並在每個路由元件的網頁上顯示一條訊息。我們使用了兩個路由連結,例如“主頁”和“關於”。“主頁”連結顯示“HomeComponent”,而“關於”連結顯示“AboutComponent”。以下是需要建立和使用的檔案:
router/index.js - 我們建立了一個名為 router 的資料夾並在其中建立了 index.js 檔案。此檔案儲存與路由相關的所有資訊。
import Vue from 'vue'
import Router from 'vue-router'
import HomeComponent from '@/components/HomeComponent'
import AboutComponent from '@/components/AboutComponent'
Vue.use(Router)
export default new Router({
   routes: [
      {
         path: '/',
         name: 'HomeComponent',
         component: HomeComponent
      },
      {
         path: '/about',
         name: 'AboutComponent',
         component: AboutComponent
      }
   ]
})
“/”路由是應用程式的預設路由,將顯示 HomeComponent。“/about”表示每當 URL 更改為“/about”時,AboutComponent 將顯示。
HomeComponent.vue - 這是 src 的 components 資料夾中的主頁元件。
<template>
   <div>
      <h2>This is HomeComponent</h2>
   </div>
</template>
<script>
   export default {
      name: 'HomeComponent'
   }
</script>
AboutComponent.vue - 這是 src 中 components 資料夾中的關於元件。
<template>
   <div>
      <h2>This is AboutComponent</h2>
   </div>
</template>
<script>
   export default {
      name: 'AboutComponent'
   }
</script>
main.js - 此檔案位於 src 資料夾中,在這裡我們需要匯入 router 資料夾的 index.js 檔案。
// The Vue build version to load with the `import` command

// (runtime-only or standalone) has been set in webpack.base.conf with an
alias.
import Vue from 'vue'
import App from './App'
import router from './router'
Vue.config.productionTip = false
/* eslint-disable no-new */
new Vue({
   el: '#app',
   router,
   components: { App },
   template: '<App/>'
})
App.vue - 此檔案包含 router-view 和 router-link,它是我們專案的根檔案。
<template>
   <div>
      <div>
         <router-link to="/" class="link">Home Component</router-link>
         <router-link to="/about" class="link">About Component</router-link>
      </div>
      <router-view />
   </div>
</template>
<script>
   export default {
      name: 'App'
   }
</script>
<style>
   .link{
      padding: 5px;
      color: blue;
   }
</style>
router-link 用於在不重新載入頁面的情況下路由 URL。“to”屬性用於導航到特定 URL。
輸出
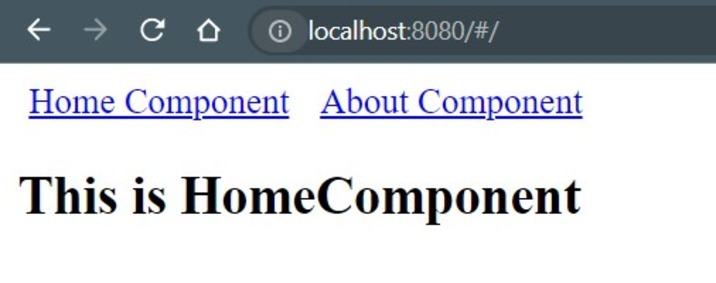

Vue 的路由是一個非常有用且強大的工具;我們可以導航到任何 URL 並顯示特定的元件。路由的簡單格式使使用者能夠輕鬆地根據自己的需求使用它。

475 次瀏覽
