
 資料結構
資料結構 網路
網路 關係資料庫管理系統
 作業系統
作業系統 Java
Java iOS
iOS HTML
HTML CSS
CSS Android
 Python
 C 語言程式設計
 C++
C++ C#
C# MongoDB
 MySQL
MySQL Javascript
 PHP
PHP如何在 React JS 中開發使用者登錄檔單?
在 ReactJS 中開發使用者登錄檔單說起來容易做起來難。這是因為這個過程需要檢測未註冊使用者、獲取已註冊使用者的授權以及註冊新使用者。幸運的是,React 提供了一種方便的方法,只需幾個步驟即可執行使用者註冊流程。
先決條件
在開始開發使用者登錄檔單之前,您應該具備以下幾點。
- 瞭解如何使用React 中的 Hook來簡化狀態管理和副作用。您應該熟悉的一些常用 Hook 包括‘useState’ 和 ‘useEffect’(用於其他效果)Hook。
- 高階 HTML 和 CSS 知識將幫助您設計更具吸引力和有效性的使用者登錄檔單。
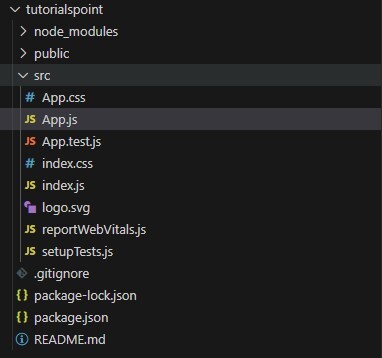
專案結構
無需建立任何檔案或目錄,我們將使用預設的專案結構。
方法
以下部分將嘗試解決專案結構任務,從初始步驟開始,隨著您完成專案的進展而逐步進行。
步驟 1:建立新的 React 應用建立新的 React 應用就像貼上下面的程式碼一樣簡單,並將“user-registration-form”部分替換為您喜歡的專案名稱。
npx create-react-app user-registration-form步驟 2:啟動開發伺服器
在這裡,您需要透過在終端中貼上以下程式碼來初始化開發伺服器。
cd user-registration-form

npm start
伺服器應該在您的預設瀏覽器上的 https://:3000 上執行。
步驟 3:建立登錄檔單元件這是一個兩步過程,需要您在使用 useState Hook 開發表單狀態管理之前定義 RegistrationForm 元件。
步驟 4:設計表單佈局此階段涉及使用 ReactJS 建立輸入和標籤元素的過程。例如,如果您的專案具有類似的欄位範圍,則可以使用以下欄位。
- 全名
- 電子郵件地址
- 密碼
- 確認密碼
以上欄位涵蓋了標準的新使用者註冊欄位,在我們的示例中足夠了。
步驟 5:處理表單狀態在本節中,您可以使用 useState 元件初始化欄位的狀態變數。然後,您可以繼續使用 onChange 處理程式將輸入欄位置於狀態變數中。
步驟 6:驗證表單驗證表單的本質是確保您的使用者在相應的輸入欄位中輸入正確的詳細資訊。在我們的例子中,讓我們實現一些基本的驗證檢查,以確保所有欄位都已填寫、電子郵件格式正確以及密碼匹配。當輸入無效時,錯誤訊息顯示在螢幕上是標準做法。
步驟 7:提交表單資料您可以在 React 程式碼中建立一個 handleSubmit 函式來處理表單資料。其他步驟包括防止預設表單提交行為以及顯示成功訊息或處理表單資料(例如:將其傳送到伺服器)。
步驟 8:可選增強功能您可以使用“內聯”樣式或像 'styled-components' 這樣的庫根據您的喜好自定義 CSS 樣式。建議您新增響應性和視覺吸引力元素來增強使用者體驗。
如果您想確保資料庫的完整性,像 reCAPTCHA 這樣的可選驗證功能非常有用。您可以利用 Formik 或 Yup 等庫來執行此任務,並新增載入微調器等額外功能來增強視覺吸引力。
示例
App.js 以下是可以貼上到 App.js 資料夾中的完整可執行的 ReactJS 程式碼。
import React, { useState } from 'react';
// Import the CSS file
import './index.css';

function App() {
  const [formData, setFormData] = useState({
    username: '',
    email: '',
    password: '',
    confirmPassword: '',
  });

  const [errorMessage, setErrorMessage] = useState('');
  const [successMessage, setSuccessMessage] = useState('');

  const handleChange = (e) => {
    const { name, value } = e.target;
    setFormData({
      ...formData,
      [name]: value,
    });
  };

  const handleSubmit = (e) => {
    e.preventDefault();
    if (formData.password !== formData.confirmPassword) {
      setErrorMessage('Passwords do not match!');
      setSuccessMessage('');
    } else {
      setErrorMessage('');
      setSuccessMessage('Registration Successful!');
    }
  };

  return (
    <div className="form-container">
      <h2>User Registration</h2>
      <form className="registration-form" onSubmit={handleSubmit}>
        <div className="form-group">
          <label htmlFor="username">Username:</label>
          <input
            type="text"
            id="username"
            name="username"
            value={formData.username}
            onChange={handleChange}
            required
          />
        </div>

        <div className="form-group">
          <label htmlFor="email">Email:</label>
          <input
            type="email"
            id="email"
            name="email"
            value={formData.email}
            onChange={handleChange}
            required
          />
        </div>

        <div className="form-group">
          <label htmlFor="password">Password:</label>
          <input
            type="password"
            id="password"
            name="password"
            value={formData.password}
            onChange={handleChange}
            required
          />
        </div>

        <div className="form-group">
          <label htmlFor="confirmPassword">Confirm Password:</label>
          <input
            type="password"
            id="confirmPassword"
            name="confirmPassword"
            value={formData.confirmPassword}
            onChange={handleChange}
            required
          />
        </div>

        {errorMessage && <p className="error-message">{errorMessage}</p>}
        {successMessage && <p className="success-message">{successMessage}</p>}

        <button type="submit" className="submit-button">Register</button>
      </form>
    </div>
  );
}

export default App;
Index.css 以下是您可以放置在相關 styles.css 資料夾中的配套 CSS 樣式。
/* Container for the form */
.form-container {
  max-width: 400px;
  margin: 50px auto;
  padding: 20px;
  background-color: #f9f9f9;
  border-radius: 8px;
  box-shadow: 0 4px 10px rgba(0, 0, 0, 0.1);
  text-align: center;
}

/* Heading */
h2 {
  font-size: 24px;
  margin-bottom: 20px;
  color: #333;
}

/* Form group container */
.form-group {
  margin-bottom: 20px;
  text-align: left;
}

/* Label styles */
label {
  display: block;
  margin-bottom: 8px;
  font-weight: bold;
  color: #555;
}

/* Input styles */
input {
  width: 100%;
  padding: 10px;
  font-size: 16px;
  border: 1px solid #ccc;
  border-radius: 4px;
  box-sizing: border-box;
  transition: border-color 0.3s ease;
}

/* Input focus styles */
input:focus {
  border-color: #007bff;
  outline: none;
}

/* Button styles */
.submit-button {
  width: 100%;
  padding: 10px;
  background-color: #007bff;
  color: white;
  font-size: 16px;
  border: none;
  border-radius: 4px;
  cursor: pointer;
  transition: background-color 0.3s ease;
}

/* Button hover effect */
.submit-button:hover {
  background-color: #0056b3;
}

/* Error message */
.error-message {
  color: red;
  font-size: 14px;
  margin-top: -10px;
  margin-bottom: 15px;
}

/* Success message */
.success-message {
  color: green;
  font-size: 14px;
  margin-top: -10px;
  margin-bottom: 15px;
}
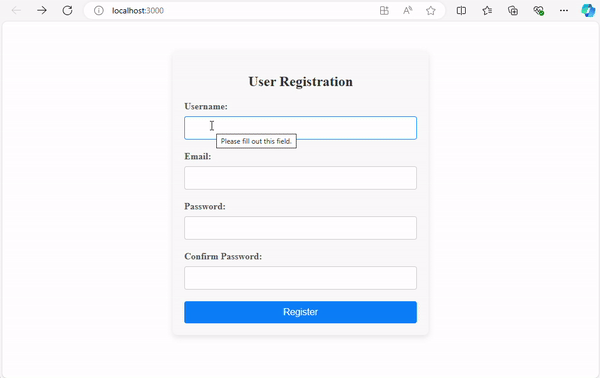
輸出
以下是執行新使用者登錄檔單程式碼後可以預期的輸出顯示。
結論
在本文中,我們建立了一個登錄檔單並添加了一些額外功能,如驗證碼和表單驗證。ReactJS 是一個使用幾行程式碼建立理想的新使用者登錄檔單的有效工具。

363 次檢視
