如何使用 React.js 建立多頁網站?
構建網站需要你依賴於手工定製的模板。重複使用模板和調整元素是比較好的選擇,因為它可以節省時間,這些時間在其他地方可能會更有用。
React 為開發人員提供了一種現代化的解決方案,可以在最短的時間內讓他們的網路應用程式執行起來。讓我們正視現實,只有單頁面的網路應用程式是極為少見的。大多數網路應用程式需要兩個或更多個頁面才能為使用者提供預期目的。
單頁與多頁網站
以下是對單頁應用程式 (SPA) 和多頁應用程式 (MPA) 之間的典型區分。
- SPA 通常透過載入單個 HTML 頁面並在不需要重新整理它的情況下動態更新其內容來工作。
- MPA 從技術上講透過為每個路由載入新頁面來工作。
鑑於它們的差異,SPA 更適合希望建立快速導航 Web 應用程式的任何人,而 MPA 則更適合希望獲得更好的 SEO 美觀性和管理大型網站的人員。
先決條件
你需要基本 React 環境來承擔手頭任務。這意味著你需要系統中的 Node.js 和你首選的程式碼編輯器(我將使用 Visual Studio Code)。
- 瞭解導航路徑。
專案結構
讓我們在主目錄內建立一個單獨的目錄,為每個多頁頁面保留一個頁面,這樣可以保持整潔,並避免因建立新檔案而產生的混亂。

方法
此部分提供了建立 MPA Web 應用程式的標準指南。本例中,我們將建立一個包含有 主頁、產品、服務 和 關於 頁面在內的四頁網站。
步驟 1:建立 React 應用
透過在終端中使用 create-react-app 命令建立 React 應用來開始著手吧。貼上以下 React 命令將在你的程式碼編輯器中初始化一個新的 React 專案。
npx create-react-app my-website

cd my-website
步驟 2:安裝 React Router
由於路由功能依賴於 react-router-dom 軟體包,因此你必須安裝此軟體包。這個過程非常簡單,只需將以下 React Router 安裝命令貼上到你的終端即可。
npm install react-router-dom
步驟 3:建立頁面
本部分的目標是為主頁、產品、服務和關於頁面建立各個元件。作為標準 housekeeping 措施,在 src/ 目錄內建立一個名為 components/ 的新資料夾。在該新資料夾內,建立四個檔案 Home.js、Products.js、Services.js 和 About.js。
Homes.js:將以下程式碼貼上到 Home.js 檔案中。
// Home.js
import React from 'react';

const Home = () => {
  return (
    <div className="page">
      <h1>Home</h1>
      <p>Welcome to our new Tutorialspoint web page.</p>
    </div>
  );
};

export default Home;
Products.js:將以下程式碼貼上到 Products.js 檔案中。
// Products.js
import React from 'react';

const Products = () => {
  return (
    <div className="page">
      <h1>Products</h1>
      <p>Here is the new Tutorialspoint products catalog.</p>
    </div>
  );
};

export default Products;
Servoices.js:將以下程式碼貼上到 Servoices.js 檔案中。
// Services.js
import React from 'react';

const Services = () => {
  return (
    <div className="page">
      <h1>Services</h1>
      <p>Explore the various services offered by Tutorialspoint.</p>
    </div>
  );
};

export default Services;
About.js:將以下程式碼貼上到 About.js 檔案中。
// About.js
import React from 'react';

const About = () => {
  return (
    <div className="page">
      <h1>About</h1>
      <p>Connect with Tutorialspoint on this web page.</p>
    </div>
  );
};

export default About;
步驟 4:使用 React Router 設定路由
此步驟的任務包括編輯 App.js 資料夾,方法是匯入 react-router-dom 和我們建立的四頁。
App.js:找到 App.js 資料夾,並在其中貼上以下程式碼。
// Enable the react-router-dom functinality
import React from 'react';
import { BrowserRouter as Router, Route, Link, Routes } from 'react-router-dom';
import Home from './components/Home';
import Products from './components/Products';
import Services from './components/Services';
import About from './components/About';

// Imort the styling from App.css
import './App.css';

function App() {
  return (
    <Router>
      <div>
        <nav className="navbar">
          <ul>
            <li><Link to="/">Home</Link></li>
            <li><Link to="/products">Products</Link></li>
            <li><Link to="/services">Services</Link></li>
            <li><Link to="/about">About</Link></li>
          </ul>
        </nav>

        <Routes>
          <Route path="/" element={<Home />} />
          <Route path="/products" element={<Products />} />
          <Route path="/services" element={<Services />} />
          <Route path="/about" element={<About />} />
        </Routes>
      </div>
    </Router>
  );
}

export default App;
步驟 7:新增基本樣式
新增基本 CSS 樣式以提升使用者對你專案的體驗。找到 App.css 資料夾,並在其中包含以下樣式。
App.css:找到 App.css 資料夾,並在其中貼上以下程式碼。
body {
  font-family: Arial, sans-serif;
  margin: 0;
  padding: 0;
  box-sizing: border-box;
}

.navbar {
  background-color: #333;
  padding: 1em;
}

.navbar ul {
  list-style: none;
  padding: 0;
  display: flex;
  justify-content: space-around;
}

.navbar ul li {
  display: inline;
}

.navbar ul li a {
  color: white;
  text-decoration: none;
  padding: 8px 16px;
  transition: background-color 0.3s;
}

.navbar ul li a:hover {
  background-color: #575757;
  border-radius: 4px;
}

.page {
  padding: 20px;
  text-align: center;
}

.page h1 {
  color: #333;
}

.page p {
  font-size: 1.2em;
  color: #666;
}
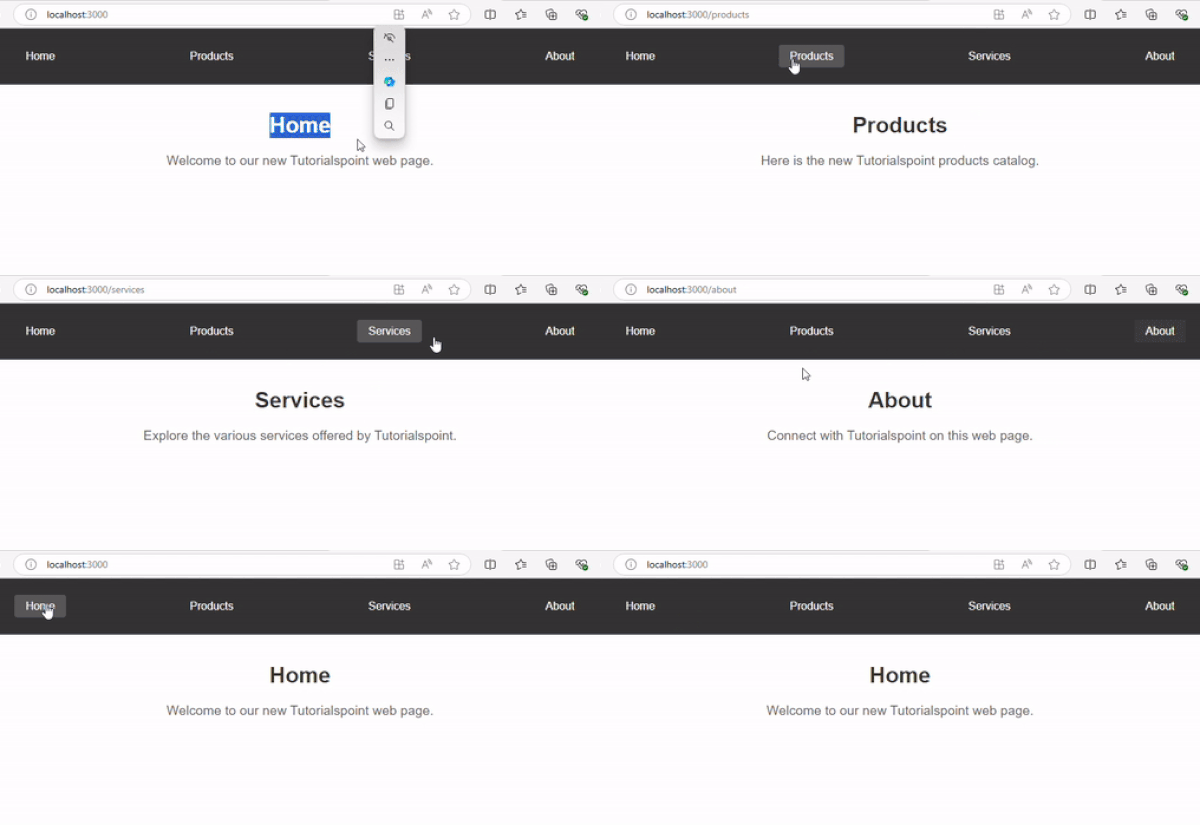
輸出
在終端上啟動 React 開發伺服器 npm start。


 資料結構
資料結構 網路
網路 RDBMS
RDBMS 作業系統
作業系統 Java
Java iOS
iOS HTML
HTML CSS
CSS Android
 Python
 C 程式設計
 C++
C++ C#
C# MongoDB
 MySQL
MySQL Javascript
 PHP
PHP